A Strange New Normal (with Scones)
It’s been a while since I posted. January and February passed by in a blur, it was the busiest term at school. The term when we have to get all the Year 11 pupils to finish the coursework they’ve been working on for a year. The coursework that is worth 50% of their GSCE grade. It was lots of late nights and feeling stressed.
Then March arrived, we all started becoming more and more worried about this new virus that was starting to spread. Before we knew its, pupils and staff were self-isolating and then in a blur school was closed down and we were working from home.
It’s been a very strange spring term. By now I’ve already taught remotely for a week and started my Easter holidays. I also haven’t left my flat for 2 weeks.
My days are now filled with creating tutorials for stressed teachers trying to teach online (for many a new scary place), crafting (I’ll do a post about my quarantine quilt), keeping my autistic, depressed teenager calm and fed (more stressful than you think it’s going to be) and baking basics.
So far in my basic food baking adventure, I have made:
- Bread (white, with a soft crust – very specific instructions from said teenager)
- Pitta Bread (which I will try and post about at some point)
- Scones
Today I thought I would share my very basic completely dairy-free scone recipe.
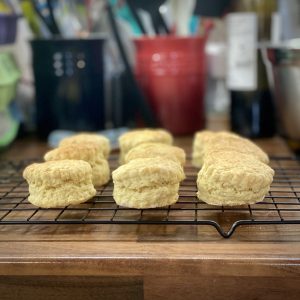
Now the trick to a good scone is to touch it as little as possible and to eat them as soon as possible!
It has 3 basic stages:
- Rub together the flour and fat, using the tips of your fingers until it resembles bread crumbs. If you have naturally hot hands (which I do not!) then you might want to wash them in cold water first, just make sure you dry them really well.
- Mix in cold milk, using a table knife – so you don’t touch it with your warm hands!
- Very briefly knead it before gently squishing it and then cutting out rounds with a cutter.
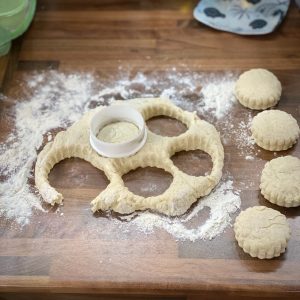
By minimising touching and keeping things cool, you should end up with crumbly soft scones.
Back when I taught Food Technology (a very, very long time ago), I used to teach 13 yr olds how to make scones. They would invariably end up squishing the dough around before finally cutting it out and then say the scones didn’t taste nice, as they were dense and chewy. So when I say handle as little as possible, I mean it!
Scones (Dairy-Free)
Ingredients
- 225 g Self Raising Flour
- 1 pinch Salt
- 55 g Stork Margarine
- 25 g Caster Sugar
- 150 ml Oat Milk
Instructions
- Preheat the oven to 220°c (200°c fan)
- Rub the flour, salt and margarine together using the tips of your fingers, until it resembles breadcrumbs.
- Stir in the sugar with a table knife.
- Mix in the oat milk, a little at a time, with the table knife until the dough has come together. It should be a soft dough, not sticky. You'll probably have some leftover milk.
- Turn out the dough onto a lightly floured surface. Gently knead it.
- Gently squish the dough until it forms a slab about 2cm thick. Cut out rounds of dough with a 5cm cutter.
- Gently squish the leftover dough together and repeat, until you have no dough left.
- Places the rounds on a baking tray and brush some leftover milk on the top of each scone.
- Bake in the oven for 10-15mins. Until the scones have risen and are golden brown.
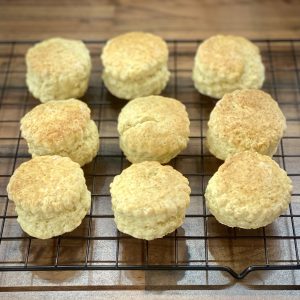
- Take them out of the oven and leave them on a wire rack to cool.
I like to split my scones in half and slather them in raspberry jam when I eat them. I know that a scone purist would be cross with me, but what can I say – I like what I like!
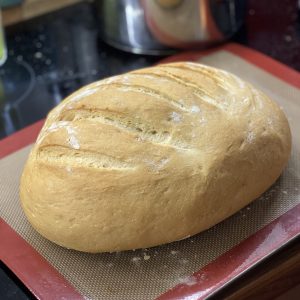
I love bread (to be fair, who doesn’t!), so this morning I thought I would bake a fresh loaf. I have a dough hook for my Kitchen Aid mixer, so I wouldn’t even need to knead it!
I’ve included the recipe below. Top tip for making bread in a Kitchen Aid is not to go above speed 2 on the side, otherwise, your bread starts climbing up and over the bread hook.
The actual making the bread doesn’t take too long, but you need to factor in the proving time.
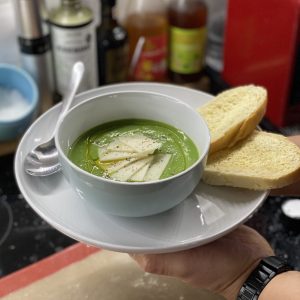
The bread was ready for lunch, just in time to have with some homemade broccoli soup (courtesy of my boyfriend).
Basic Bread (Dairy-Free)
Equipment
- Kitchen Aid Mixer (optional)
Ingredients
- 500 g Strong Bread Flour
- 2 packs Easy Bake Yeast approx 14g)
- 30 g Pure Margarine
- 1 pinch Salt
- 500 ml Tepid Water
Instructions
Making the Dough
- Attach the dough hook to the KitchenAid.
- Put the flour in the Kitchenaid mixing bowl. Put the yeast on one side of the bowl and the salt on the other side of the bowl (otherwise the salt can kill the yeast). Add the margarine.
- Lower the dough hook and set the mixer on speed 2. The ingredients will start mixing together. Don't worry if the margarine doesn't look to be mixing in, it will eventually.
- Add the tepid water a little at a time until the mixture forms a ball of dough. You probably won't need all the water.
- Once you have a ball of dough, let the KitchenAid knead the dough for approximately 4 mins.
- Stop the Kitchen Aid and check the dough. It should be soft and elastic (you can check this by pulling on a piece of dough). If it isn't then let it knead for a bit longer.
Proving the Dough
- Once the dough is soft and elastic, remove the dough hook and cover the bowl with a clean tea towel. Leave the dough for 2 hours to prove.
- After 2 hours the dough should have doubled in size.
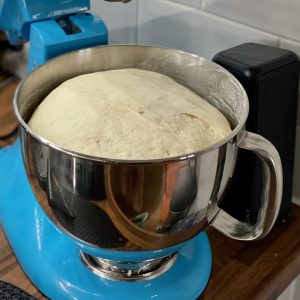
- Knockback the dough and take it out of the bowl (you may need to gently scrape the sides). Gently knead the dough and shape it into the loaf shape you want.
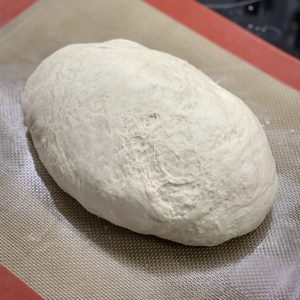
- Place the dough on a baking tray lined with baking parchment, you might want to use a Silpat.
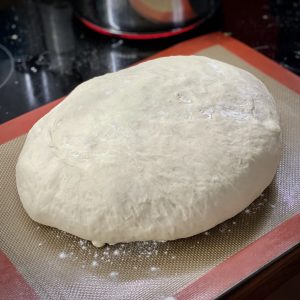
- Dust the top lightly with flour and cover with clingfilm. Leave the dough to prove a second time until it has doubled in size again.
Baking the Bread
- Preheat the oven to 200°c and boil a kettle of water
- Add a few slashes to the top of the bread. You need to do this very quickly with a very sharp knife.
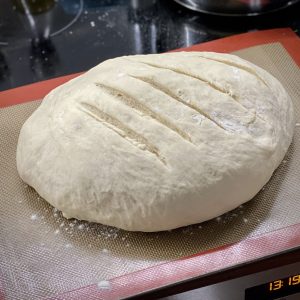
- Place the bread in the oven and pour the boiling water into the grill tray at the bottom of the oven (if you don't have a grill tray then put a heatproof bowl of boiling water in the base of the oven.
- Wait 20 mins, then check the bread. It should be golden brown. Turn the loaf over and tap the bottom, if it sounds hollow then it's done. If not then bake for 5 more minutes and then check again.
- Leave to cool and then slice with a sharp serrated knife
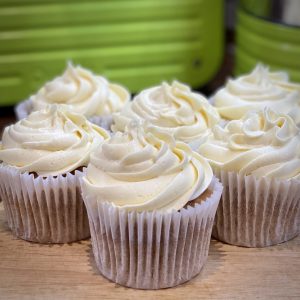
The final batch of cupcakes for my birthday were Apple & Maple Syrup cupcakes. These turned out to be quite popular (I called them Caramel Apple Cupcakes). They are very easy to make and, once again, I managed to make them dairy-free.
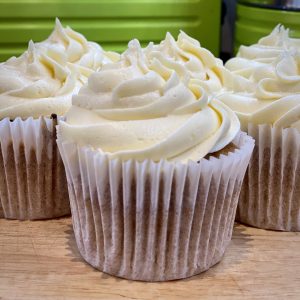
Apple & Maple Syrup Cupcakes
Ingredients
Cake
- 125 g Pure Margarine
- 225 g Soft Brown Sugar
- 300 g Self Raising Flour
- 2 tsp Ground Cinnamon
- 120 ml Maple Syrup
- 4 medium Eggs
- 180 g Grated Apple about 2 Bramley Apples
Frosting
- 175 g Pure Margarine
- 500 g Icing Sugar
- 2 tbsp Maple Syrup
- 2 tbsp Oat Milk
Instructions
Cake
- Preheat the oven to 175°c
- Beat the butter and sugar together until light and fluffy.
- Add an egg, followed by ¼ of the flour and cinnamon and mix well.
- Repeat until all the egg, flour and cinnamon is mixed in.
- Mix in the maple syrup
- Mix in the grated apple.
- Spoon the mixture into cake cases, I found that it filled 18 cupcake cases, each about ⅔ full.
- Bake for 20 mins, or until a cocktail stick comes out clean.
- Leave to cool, while you make the frosting.
Frosting
- Mix the margarine, icing sugar, maple syrup and milk until well combined. It should be quite stiff!
- Spoon into a piping bag and pipe a swirl of frosting onto the cold cupcake.
- If you don't have a piping bag then you can spoon the frosting on.
The finished cupcakes were moist and delicious.
It’s my birthday party next Saturday. I have decided to make the coffee cupcakes again, but also to make plain vanilla ones (with coloured icing) and hopefully Cherry Bakewell cupcakes. So watch this space, I’ll let you know how they go!
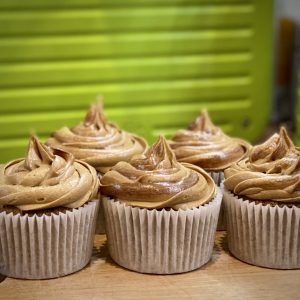
To continue the birthday theme, I also made coffee cupcakes with coffee buttercream icing. I also wanted to make this dairy-free, but this proved to be more challenging because Pure Margerine is quite watery and so I had to adapt the recipe to make a good consistency buttercream. The boyfriend offered to pipe the icing on and added an extra swirl of coffee.
I think they look quite good!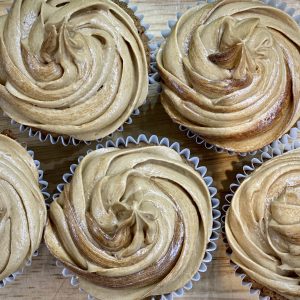
Dairy-Free Coffee Cupcakes
Equipment
- cupcake tin
- cupcake cases
- (optional) piping bag and nozzle
Ingredients
Coffee Cupcakes
- 165 g Pure Margarine
- 165 g Soft Brown Sugar
- 150 g Self Raising Flour
- 3 medium Eggs
- 1 ½ tsp Oat Milk or another dairy-free milk
- 1 pinch Salt
- 2 tbsp Instant Coffee Granules
Coffee Buttercream
- 400 g Icing Sugar
- 100 g Pure Margarine
- 3 tbsp Instant Coffee Granules
- 1 ½ tbsp Boiling Water
Instructions
Coffee Cupcakes
- Preheat the oven to 160°c (140°c fan oven)
- Use a pestle and mortar (or rolling pin) to grind the coffee granules to a reasonably fine powder. Put to one side.
- Cream the margarine and sugar together until pale and fluffy.
- Add ⅓ of the egg and a spoon of flour and mix in. Continue adding the egg and flour until it is all mixed in.
- Add the remaining cupcake ingredients (coffee powder, salt and milk) and mix in.
- Place cupcake cases into a cupcake tin. Then spoon the mixture into the cases, the cases should be ⅔ full.
- Bake in the oven for 20 mins. Check the cakes are cooked through with a cake tester (or cocktail stick).
- Place the cakes on a rack to cool down. Do not ice the cakes when warm! The icing will melt.
Coffee Buttercream
- Mix the coffee granules and boiling water together to make a very thick coffee paste, it will be quite sticky! Leave to cool.
- Beat the icing sugar and margarine together until well mixed and fluffy.
- Add the cooled coffee paste and mix in well.
- You should have quite a firm buttercream, if not then mix in some more icing sugar.
- Pipe the buttercream onto the cupcakes (make sure they are cool). If you want a coffee swirl then add a stripe of the coffee paste into the piping bag before you add the buttercream.
These cupcakes have a lovely strong coffee taste!
Tomorrow is my birthday. I don’t normally take cakes into work to celebrate, but as it’s my 40th birthday I thought I would this year. I really like polenta cake, but I find the lemon ones a bit too zingy, so I decided to make an orange one instead. I also need it to be dairy-free, so I substitute the butter for Pure Dairy-Free Baking Spread. It does make very good cakes!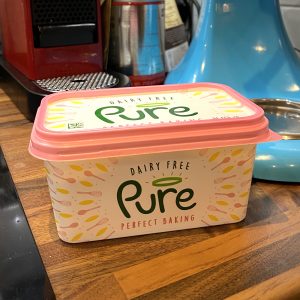
Orange Polenta Cake (Dairy-Free)
Equipment
- 23cm Springform Cake Tin
Ingredients
- 200 g Margarine Dairy-Free
- 200 g Caster Sugar
- 200 g Ground Almonds
- 100 g Fine Polenta or Cornmeal
- 1 1/2 tsp Baking Powder
- 3 Medium Eggs
- 3 Oranges Zest and Juice
- 130 g Icing Sugar
Instructions
- Line the base of the cake tin and grease the sides.
- Preheat the oven to 180°c (Gas Mark 4, 350°f)
- Beat the margarine and sugar together, either in a free-standing mixer or by hand, until light and fluffy.
- Mix the ground almonds, polenta and baking powder in a separate bowl.
- Add some of the almond mixture and beat into the margarine/sugar mixture, followed by beating in 1 egg. Continue alternating until the eggs and almond mixture are all mixed in.
- Finally, beat in the orange zest.
- Put the mixture into the greased cake tin and level and best as possible.
- Bake in the middle of the oven for 40 minutes. The cake may still seem a little wobbly, but a cocktail stick should come out clean.
- Leave the cake in the tin, while you make the syrup.
- Mix the orange juice and icing sugar in a small pan. Bring to a boil (the sugar should be completely dissolved.
- Use a cocktail stick to make several small holes all over the cake. Spoon over the orange syrup Spread the syrup around, so it sinks into the cake.
- Leave the cake to completely cool in the tin. Then take out and serve.
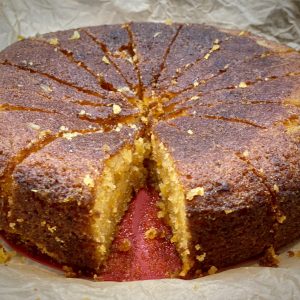
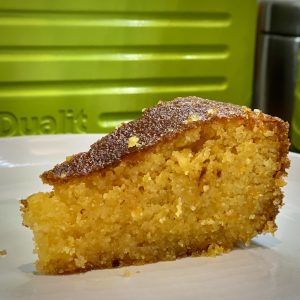
The finished cake is moist and delicious, and not as harsh as lemon cake can be.
-
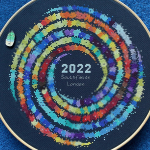
A 2022 Embroidery Challenge
4 February 2023
I’ve been watching people making temperature quilts on social media for a few years and really liked the idea of making one. But I knew I would struggle to carry such a large project through to the end, plus the idea of knitting a blanket in the heat of summer wasn’t that appealing. Then I […]
-
Little Life Update
3 February 2023
I finally caught COVID, and while I am curled up on my sofa feeling sorry for myself, I thought I would check through things. I realised that I haven’t written anything on this blog for ages (gulp April 2021) and so much has happened! The problem is that Instagram is so much quicker and easier […]
-

Alison Glass Lumen Quilt
19 April 2021
In which I attempt to make a giant quilt, for the first time!
-
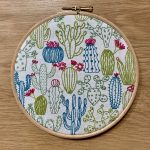
Cactus Embroidery – Slow Sewing
6 February 2021
It’s taken just over a year, but this embroidery is finally finished!
-
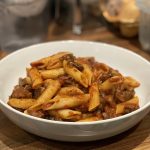
Mushroom Ragu – Vegan and Delicious!
1 January 2021
It's new year's day and I'm making Mushroom Ragu.
-

A 2022 Embroidery Challenge
4 February 2023
I’ve been watching people making temperature quilts on social media for a few years and really liked the idea of making one. But I knew I would struggle to carry such a large project through to the end, plus the idea of knitting a blanket in the heat of summer wasn’t that appealing. Then I […]
-

Little Life Update
3 February 2023
I finally caught COVID, and while I am curled up on my sofa feeling sorry for myself, I thought I would check through things. I realised that I haven’t written anything on this blog for ages (gulp April 2021) and so much has happened! The problem is that Instagram is so much quicker and easier […]
-

Alison Glass Lumen Quilt
19 April 2021
In which I attempt to make a giant quilt, for the first time!
-

Cactus Embroidery – Slow Sewing
6 February 2021
It’s taken just over a year, but this embroidery is finally finished!
-

Mushroom Ragu – Vegan and Delicious!
1 January 2021
It's new year's day and I'm making Mushroom Ragu.
-

A 2022 Embroidery Challenge
4 February 2023
I’ve been watching people making temperature quilts on social media for a few years and really liked the idea of making one. But I knew I would struggle to carry such a large project through to the end, plus the idea of knitting a blanket in the heat of summer wasn’t that appealing. Then I […]
-

Little Life Update
3 February 2023
I finally caught COVID, and while I am curled up on my sofa feeling sorry for myself, I thought I would check through things. I realised that I haven’t written anything on this blog for ages (gulp April 2021) and so much has happened! The problem is that Instagram is so much quicker and easier […]
-

Alison Glass Lumen Quilt
19 April 2021
In which I attempt to make a giant quilt, for the first time!
-

Cactus Embroidery – Slow Sewing
6 February 2021
It’s taken just over a year, but this embroidery is finally finished!
-

Mushroom Ragu – Vegan and Delicious!
1 January 2021
It's new year's day and I'm making Mushroom Ragu.
-

A 2022 Embroidery Challenge
4 February 2023
I’ve been watching people making temperature quilts on social media for a few years and really liked the idea of making one. But I knew I would struggle to carry such a large project through to the end, plus the idea of knitting a blanket in the heat of summer wasn’t that appealing. Then I […]
-

Little Life Update
3 February 2023
I finally caught COVID, and while I am curled up on my sofa feeling sorry for myself, I thought I would check through things. I realised that I haven’t written anything on this blog for ages (gulp April 2021) and so much has happened! The problem is that Instagram is so much quicker and easier […]
-

Alison Glass Lumen Quilt
19 April 2021
In which I attempt to make a giant quilt, for the first time!
-

Cactus Embroidery – Slow Sewing
6 February 2021
It’s taken just over a year, but this embroidery is finally finished!
-

Mushroom Ragu – Vegan and Delicious!
1 January 2021
It's new year's day and I'm making Mushroom Ragu.
-

A 2022 Embroidery Challenge
4 February 2023
I’ve been watching people making temperature quilts on social media for a few years and really liked the idea of making one. But I knew I would struggle to carry such a large project through to the end, plus the idea of knitting a blanket in the heat of summer wasn’t that appealing. Then I […]
-

Little Life Update
3 February 2023
I finally caught COVID, and while I am curled up on my sofa feeling sorry for myself, I thought I would check through things. I realised that I haven’t written anything on this blog for ages (gulp April 2021) and so much has happened! The problem is that Instagram is so much quicker and easier […]
-

Alison Glass Lumen Quilt
19 April 2021
In which I attempt to make a giant quilt, for the first time!
-

Cactus Embroidery – Slow Sewing
6 February 2021
It’s taken just over a year, but this embroidery is finally finished!
-

Mushroom Ragu – Vegan and Delicious!
1 January 2021
It's new year's day and I'm making Mushroom Ragu.