Cherry Bakewell Cupcakes
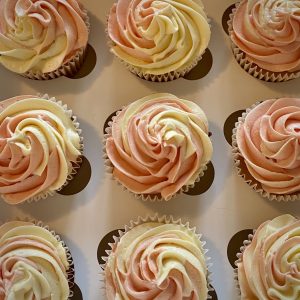
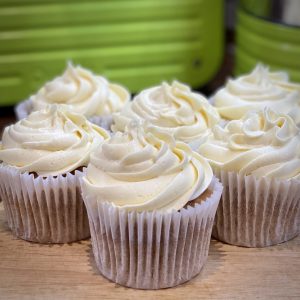
Yesterday I had my birthday party. I rarely go all out for birthdays, but because this was a special one, I hired a pub function room and invited all my friends to come and celebrate with me. Of course, this also meant baking cupcakes! I made the coffee cupcakes again from the previous week, as they were really popular. I also made basic vanilla cupcakes, with 2 colour buttercream icing. This recipe was from the Hummingbird Bakery, and it works really well. I just subbed the butter for Pure Margarine and the milk for Oat Milk.
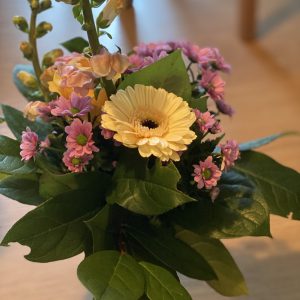
I chose the icing to match the flowers I decorated the room with. I asked my local florist (which I adore, and not just because their name is Doris Florist) to make small bunches to go into some jam jars that I decorated with hessian. They did a brilliant job!
I wanted a third kind of cupcake, one that didn’t have buttercream icing. After thinking (and browsing Pinterest) for a while I decided on a Cherry Bakewell cupcake.
A Cherry Bakewell Tart has four very distinct parts:
- An almond frangipane layer
- A raspberry jam layer
- A thick layer of fondant icing
- Half a cherry on top
It is usually encased in a sweet pastry case, but I didn’t want to include that part.
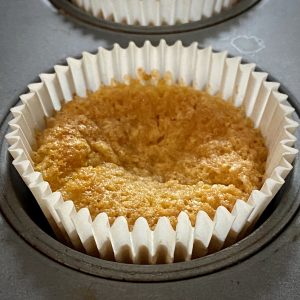
I started by making an almond cupcake with half flour and half ground almonds. However, when I took it out of the oven it had an odd granulated texture. The cake itself was quite dense and sank in the middle. So I went back to the drawing board!
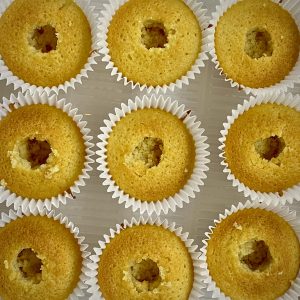
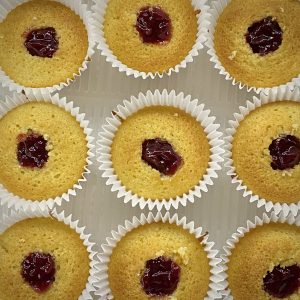
The next batch I made were basic cupcakes with almond extract for the flavouring. This worked perfectly. They were light and fluffy with a satisfying almond taste and smell. Once they were cool, I used a cupcake corer to remove the middle from each cake.
I then filled the holes with raspberry jam, I didn’t want the jam to be too sweet (the cake with icing was going to be overwhelmingly sweet!), so I bought some Bonne Mamon Raspberry Intense, which said it had more fruit and less sugar. I can confirm that it does! It is delicious, not too sweet and packed with raspberries.
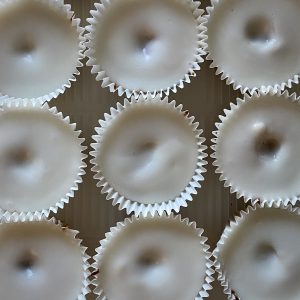
I then mixed up icing sugar with lemon juice, to get that thick fondant icing that has a satisfying tart aftertaste. With hindsight, I realised that I should have saved the cupcake cores, so I could cover the jam centres before icing. Once the icing set there was a definite sinkhole where the jam was.
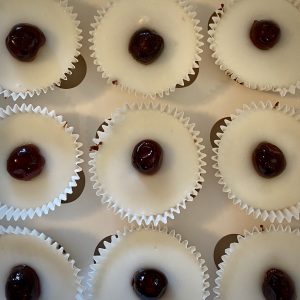
Fortunately, I still had to add the cherries, so I made sure to cover each sinkhole with half a glace cherry. Again, I wanted to try and avoid that overly saccharine taste with the cherry, so I chose the Waitrose Cook’s Ingredients ones, as they were slightly less sweet than the bright red version.
I asked my guests to let me know what they thought and the feedback was very good. Everyone agreed that it tasted very similar to a Bakewell Tart. I’ve already been asked to make them again.
Cherry Bakewell Cupcakes (Dairy-Free)
Equipment
- cupcake tin
- Cupcake Corer (or a teaspoon)
Ingredients
Almond Cupcakes
- 120 g Plain Flour
- 140 g Caster Sugar
- 1 ½ tsp Baking Powder
- 40 g Pure Margarine
- 120 ml Oat Milk
- 1 Egg
- 1 tsp Almond Extract
- Raspberry Jame
Icing
- 500 g Icing Sugar
- Lemon Juice
- 6-12 Glace Cherries
Instructions
Cupcakes
- Preheat the oven to 170°c
- Put the flour, sugar, baking powder and margarine in a bowl and mix until you have a breadcrumb-like consistency (this is much easier if you do it with a freestanding mixer).
- Add the egg, milk and almond extract and mix until the mixture is smooth. It will be very liquid, don't worry!
- Divide the mixture into 12 cupcake cakes. This is easier if you decant it into a jug and pour it into the cases.
- Bake in the centre of the oven for 20mins. A cocktail stick should come out clean, if not then give them a few more minutes.
- Leave the cakes on a wire rack to cool.
- When they are cool, use the corer to remove the centre of the cupcakes (or use a teaspoon). Spoon raspberry jam into the hole.
Icing and Decoration
- Put the icing sugar in a large bowl. Add lemon juice 1 tsp at a time mixing well. You are aiming for a thick icing.
- Spoon or pipe the icing over the top of the cakes. Make sure the icing covers the whole of the cake top.
- Leave the icing to fully set, otherwise, your cherry will sink.
- Cut the glace cherries (I cut ⅔ of a cherry because I wanted a more generous cherry on top of the cake).
- Place the cherry on top of the icing.

The final batch of cupcakes for my birthday were Apple & Maple Syrup cupcakes. These turned out to be quite popular (I called them Caramel Apple Cupcakes). They are very easy to make and, once again, I managed to make them dairy-free.
Apple & Maple Syrup Cupcakes
Ingredients
Cake
- 125 g Pure Margarine
- 225 g Soft Brown Sugar
- 300 g Self Raising Flour
- 2 tsp Ground Cinnamon
- 120 ml Maple Syrup
- 4 medium Eggs
- 180 g Grated Apple about 2 Bramley Apples
Frosting
- 175 g Pure Margarine
- 500 g Icing Sugar
- 2 tbsp Maple Syrup
- 2 tbsp Oat Milk
Instructions
Cake
- Preheat the oven to 175°c
- Beat the butter and sugar together until light and fluffy.
- Add an egg, followed by ¼ of the flour and cinnamon and mix well.
- Repeat until all the egg, flour and cinnamon is mixed in.
- Mix in the maple syrup
- Mix in the grated apple.
- Spoon the mixture into cake cases, I found that it filled 18 cupcake cases, each about ⅔ full.
- Bake for 20 mins, or until a cocktail stick comes out clean.
- Leave to cool, while you make the frosting.
Frosting
- Mix the margarine, icing sugar, maple syrup and milk until well combined. It should be quite stiff!
- Spoon into a piping bag and pipe a swirl of frosting onto the cold cupcake.
- If you don't have a piping bag then you can spoon the frosting on.
The finished cupcakes were moist and delicious.
It’s my birthday party next Saturday. I have decided to make the coffee cupcakes again, but also to make plain vanilla ones (with coloured icing) and hopefully Cherry Bakewell cupcakes. So watch this space, I’ll let you know how they go!
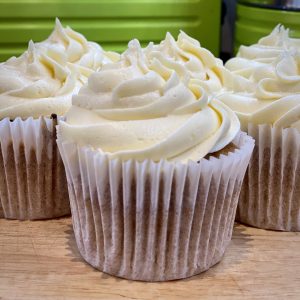
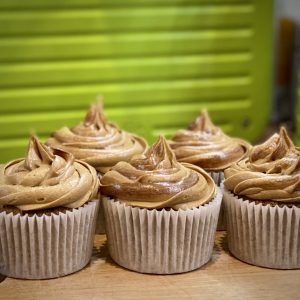
To continue the birthday theme, I also made coffee cupcakes with coffee buttercream icing. I also wanted to make this dairy-free, but this proved to be more challenging because Pure Margerine is quite watery and so I had to adapt the recipe to make a good consistency buttercream. The boyfriend offered to pipe the icing on and added an extra swirl of coffee.
I think they look quite good!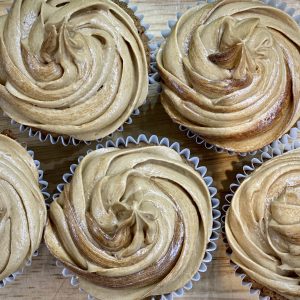
Dairy-Free Coffee Cupcakes
Equipment
- cupcake tin
- cupcake cases
- (optional) piping bag and nozzle
Ingredients
Coffee Cupcakes
- 165 g Pure Margarine
- 165 g Soft Brown Sugar
- 150 g Self Raising Flour
- 3 medium Eggs
- 1 ½ tsp Oat Milk or another dairy-free milk
- 1 pinch Salt
- 2 tbsp Instant Coffee Granules
Coffee Buttercream
- 400 g Icing Sugar
- 100 g Pure Margarine
- 3 tbsp Instant Coffee Granules
- 1 ½ tbsp Boiling Water
Instructions
Coffee Cupcakes
- Preheat the oven to 160°c (140°c fan oven)
- Use a pestle and mortar (or rolling pin) to grind the coffee granules to a reasonably fine powder. Put to one side.
- Cream the margarine and sugar together until pale and fluffy.
- Add ⅓ of the egg and a spoon of flour and mix in. Continue adding the egg and flour until it is all mixed in.
- Add the remaining cupcake ingredients (coffee powder, salt and milk) and mix in.
- Place cupcake cases into a cupcake tin. Then spoon the mixture into the cases, the cases should be ⅔ full.
- Bake in the oven for 20 mins. Check the cakes are cooked through with a cake tester (or cocktail stick).
- Place the cakes on a rack to cool down. Do not ice the cakes when warm! The icing will melt.
Coffee Buttercream
- Mix the coffee granules and boiling water together to make a very thick coffee paste, it will be quite sticky! Leave to cool.
- Beat the icing sugar and margarine together until well mixed and fluffy.
- Add the cooled coffee paste and mix in well.
- You should have quite a firm buttercream, if not then mix in some more icing sugar.
- Pipe the buttercream onto the cupcakes (make sure they are cool). If you want a coffee swirl then add a stripe of the coffee paste into the piping bag before you add the buttercream.
These cupcakes have a lovely strong coffee taste!
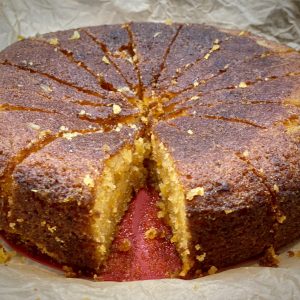
Tomorrow is my birthday. I don’t normally take cakes into work to celebrate, but as it’s my 40th birthday I thought I would this year. I really like polenta cake, but I find the lemon ones a bit too zingy, so I decided to make an orange one instead. I also need it to be dairy-free, so I substitute the butter for Pure Dairy-Free Baking Spread. It does make very good cakes!
Orange Polenta Cake (Dairy-Free)
Equipment
- 23cm Springform Cake Tin
Ingredients
- 200 g Margarine Dairy-Free
- 200 g Caster Sugar
- 200 g Ground Almonds
- 100 g Fine Polenta or Cornmeal
- 1 1/2 tsp Baking Powder
- 3 Medium Eggs
- 3 Oranges Zest and Juice
- 130 g Icing Sugar
Instructions
- Line the base of the cake tin and grease the sides.
- Preheat the oven to 180°c (Gas Mark 4, 350°f)
- Beat the margarine and sugar together, either in a free-standing mixer or by hand, until light and fluffy.
- Mix the ground almonds, polenta and baking powder in a separate bowl.
- Add some of the almond mixture and beat into the margarine/sugar mixture, followed by beating in 1 egg. Continue alternating until the eggs and almond mixture are all mixed in.
- Finally, beat in the orange zest.
- Put the mixture into the greased cake tin and level and best as possible.
- Bake in the middle of the oven for 40 minutes. The cake may still seem a little wobbly, but a cocktail stick should come out clean.
- Leave the cake in the tin, while you make the syrup.
- Mix the orange juice and icing sugar in a small pan. Bring to a boil (the sugar should be completely dissolved.
- Use a cocktail stick to make several small holes all over the cake. Spoon over the orange syrup Spread the syrup around, so it sinks into the cake.
- Leave the cake to completely cool in the tin. Then take out and serve.
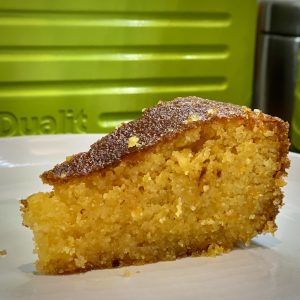
The finished cake is moist and delicious, and not as harsh as lemon cake can be.
Today is my boyfriend’s birthday. He loves Italian food (well, to be perfectly honest he just loves food). So for his birthday, I wanted to make him tiramisu for dessert. However, he has a serious dairy allergy, so I had to get creative!
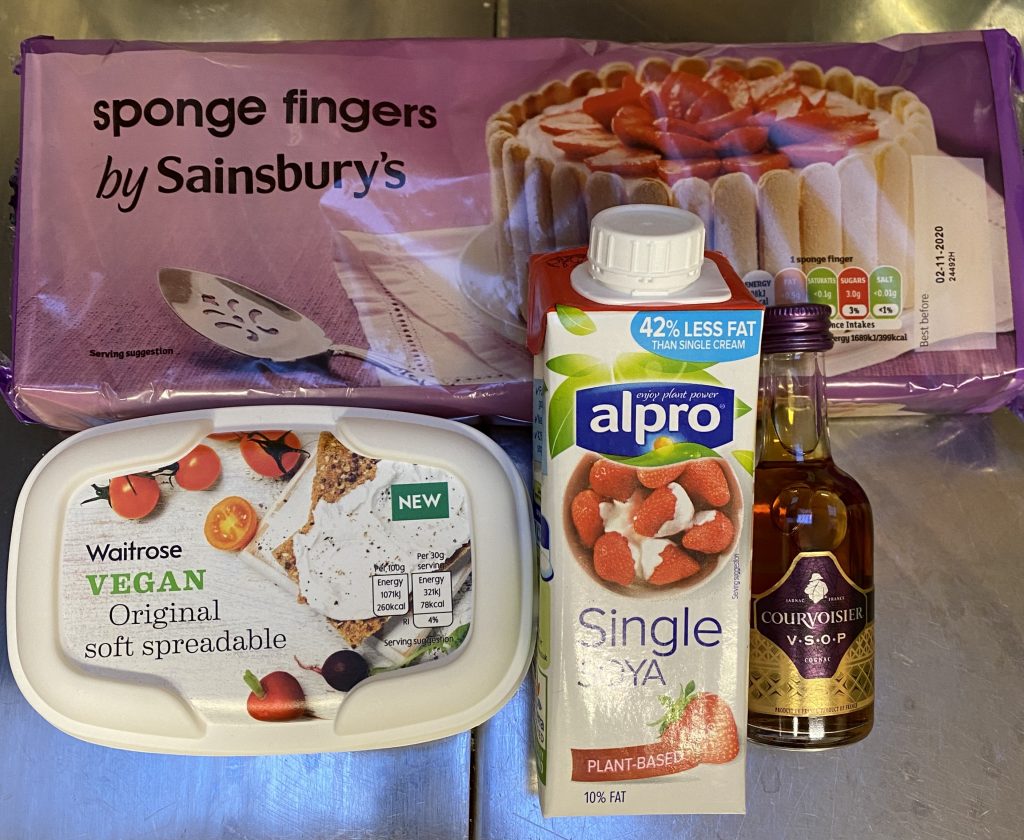
Sainsbury’s sponge fingers are dairy-free (unlike those in most other supermarkets) and I found coconut milk cream cheese and soya cream in Waitrose. He can’t have things that “may contain milk”, so I need to be extra careful.
Dairy-Free Tiramisu
Equipment
- Rectangular Dish
- Whisk
- Shallow Bowl
Ingredients
- 170 g Vegan Cream Cheese
- 60 g Caster Sugar
- 100 ml Soya Cream
- 1 Pack Sponge Fingers
- 1 Cup Strong Coffee cooled
- Mini Bottle Cognac
- 1 Pack Dairy-Free Dark Chocolate or Cocoa Powder
Instructions
- Whip the cream cheese, sugar and soya cream together.
- Add a splash of cognac and mix well.
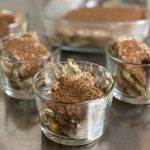
- In a shallow bowl, pour some strong coffee and add a splash of cognac. Dip a sponge finger in this mixture then put the slightly soggy sponge finger into a Pyrex dish.
- Repeat this until the base of the dish is covered in a layer of sponge fingers (you may need to top up your coffee/cognac mix).
- Spread half of the cream cheese mixture over the sponge finger layer.
- Make another layer of soaked sponge fingers and top with the other half of the cream mixture.
- Grate over a generous layer of chocolate.
- Cover and refrigerate for 2-4 hours.
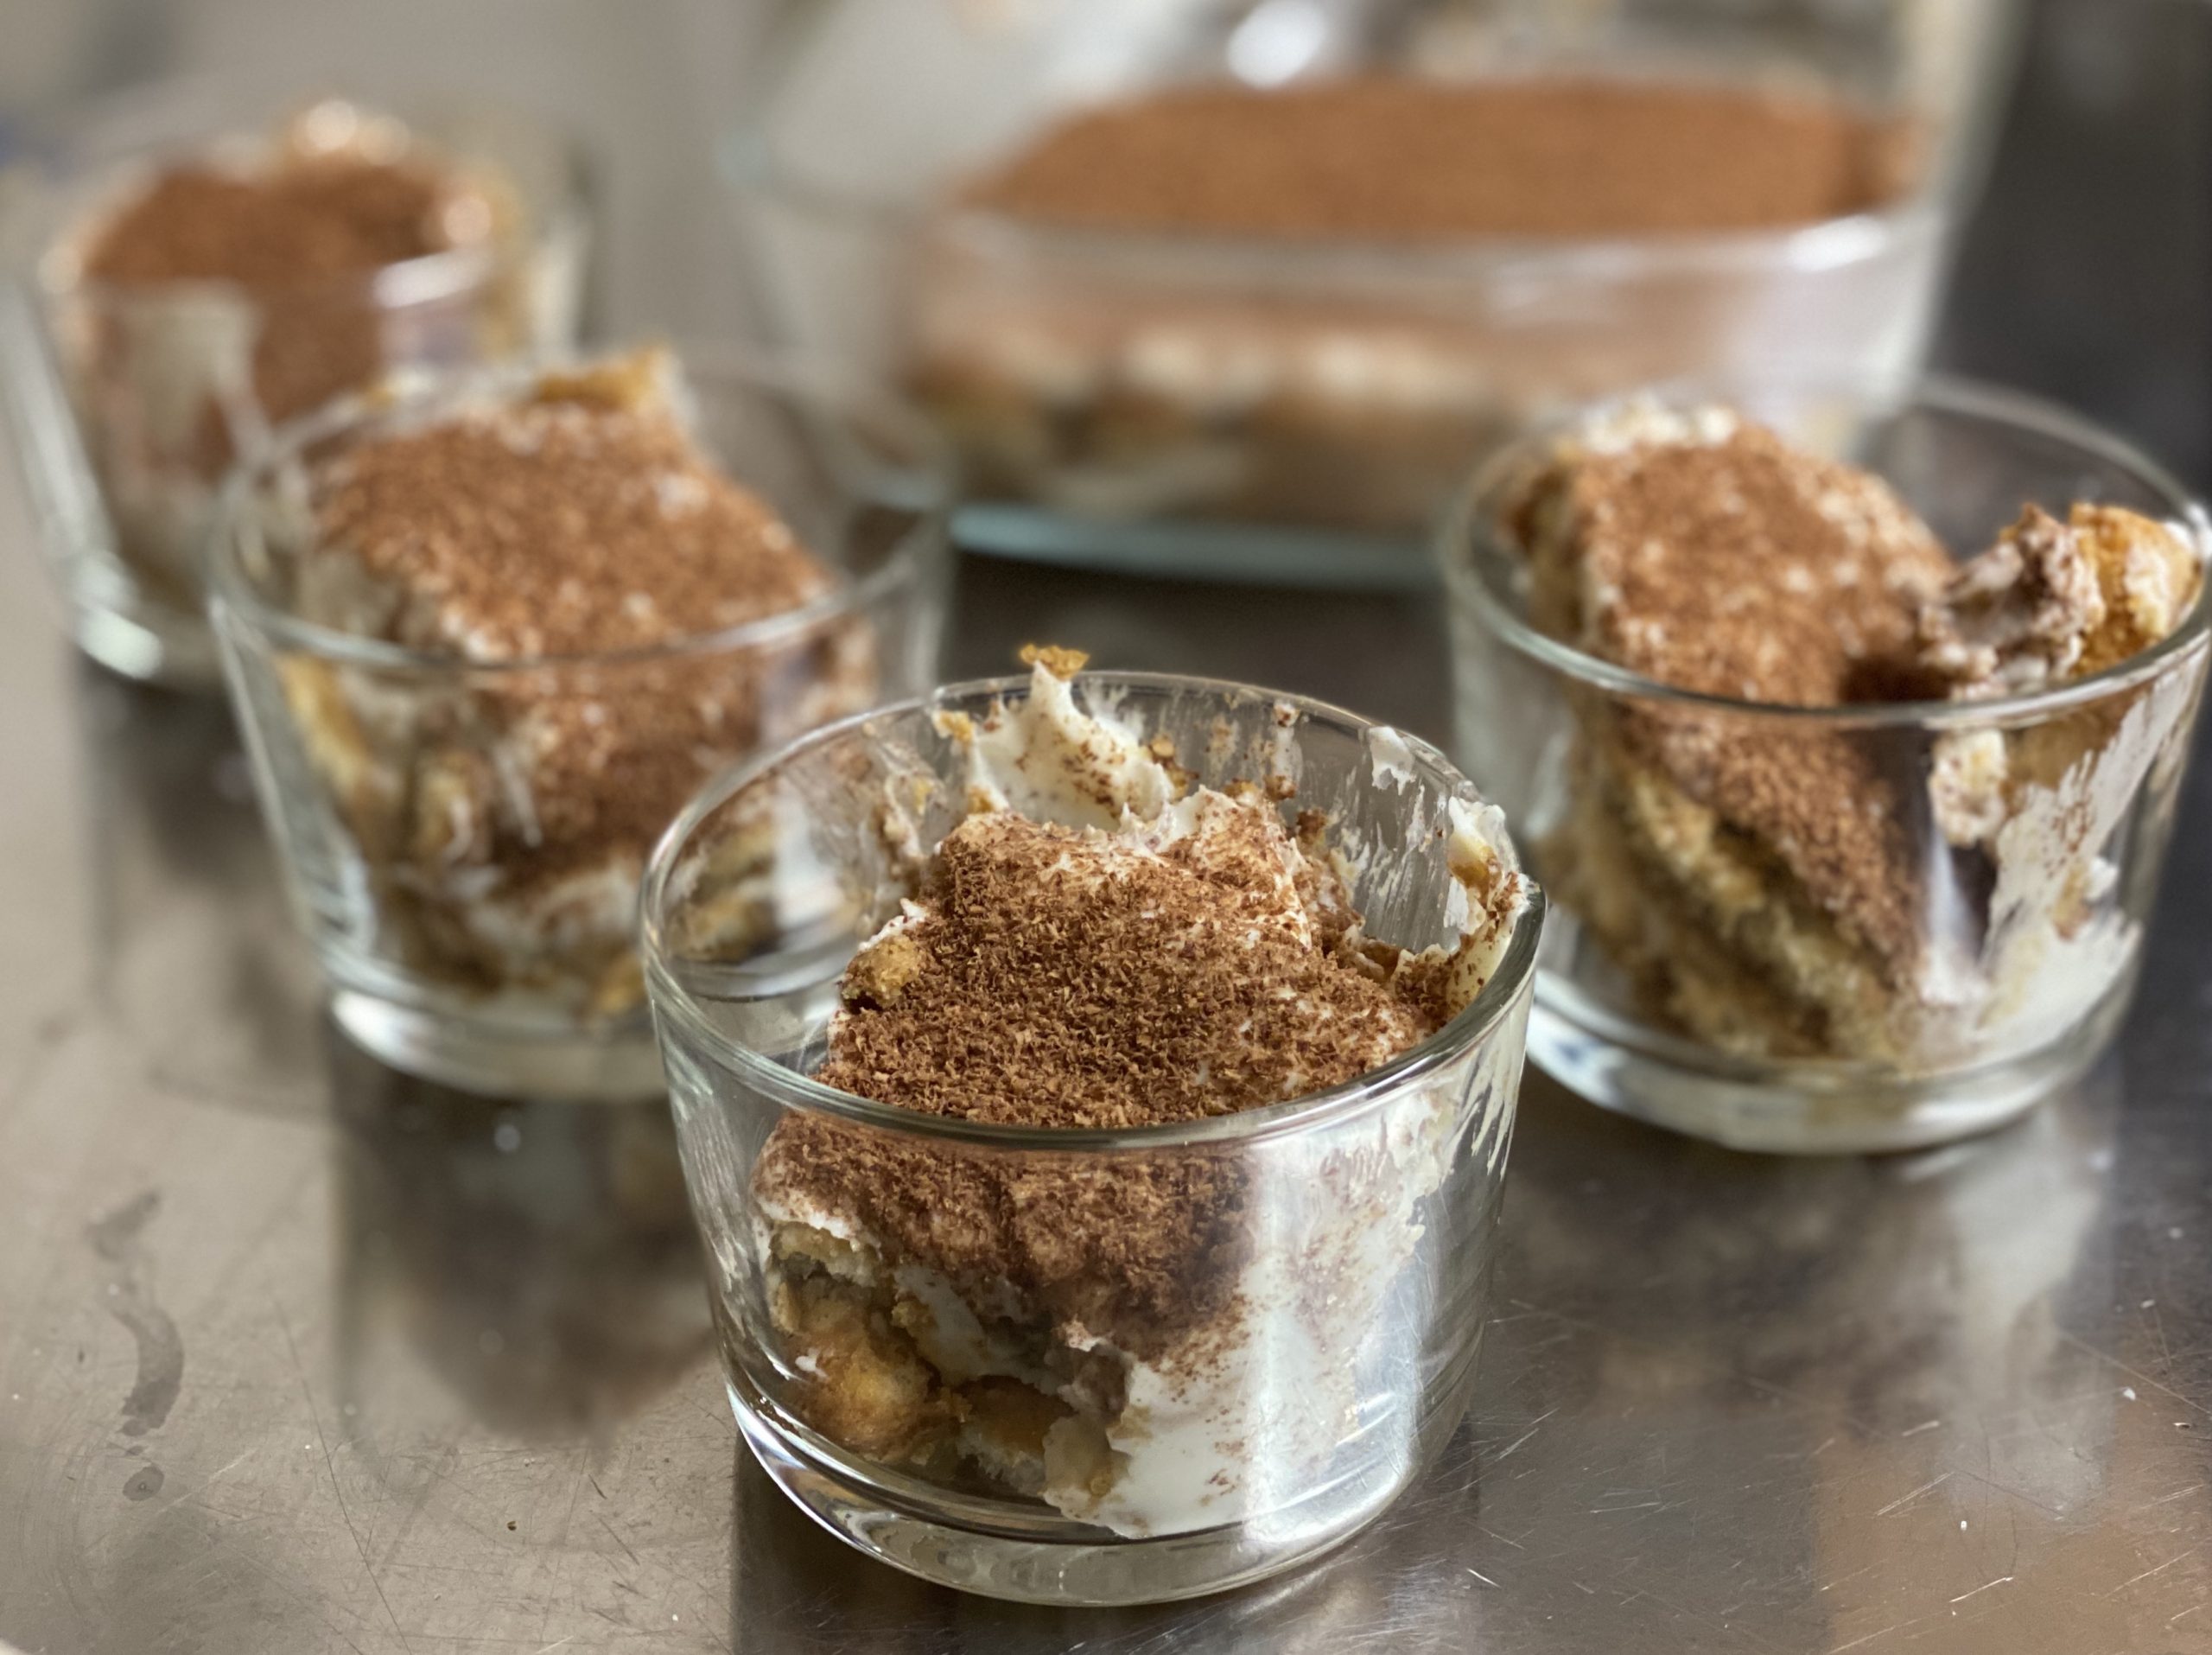
The tiramisu was a huge hit! I wonder what I’ll make for him next year?
-

A 2022 Embroidery Challenge
4 February 2023
I’ve been watching people making temperature quilts on social media for a few years and really liked the idea of making one. But I knew I would struggle to carry such a large project through to the end, plus the idea of knitting a blanket in the heat of summer wasn’t that appealing. Then I […]
-
Little Life Update
3 February 2023
I finally caught COVID, and while I am curled up on my sofa feeling sorry for myself, I thought I would check through things. I realised that I haven’t written anything on this blog for ages (gulp April 2021) and so much has happened! The problem is that Instagram is so much quicker and easier […]
-

Alison Glass Lumen Quilt
19 April 2021
In which I attempt to make a giant quilt, for the first time!
-

Cactus Embroidery – Slow Sewing
6 February 2021
It’s taken just over a year, but this embroidery is finally finished!
-

Mushroom Ragu – Vegan and Delicious!
1 January 2021
It's new year's day and I'm making Mushroom Ragu.
-
A 2022 Embroidery Challenge
4 February 2023
I’ve been watching people making temperature quilts on social media for a few years and really liked the idea of making one. But I knew I would struggle to carry such a large project through to the end, plus the idea of knitting a blanket in the heat of summer wasn’t that appealing. Then I […]
-
Little Life Update
3 February 2023
I finally caught COVID, and while I am curled up on my sofa feeling sorry for myself, I thought I would check through things. I realised that I haven’t written anything on this blog for ages (gulp April 2021) and so much has happened! The problem is that Instagram is so much quicker and easier […]
-
Alison Glass Lumen Quilt
19 April 2021
In which I attempt to make a giant quilt, for the first time!
-
Cactus Embroidery – Slow Sewing
6 February 2021
It’s taken just over a year, but this embroidery is finally finished!
-
Mushroom Ragu – Vegan and Delicious!
1 January 2021
It's new year's day and I'm making Mushroom Ragu.