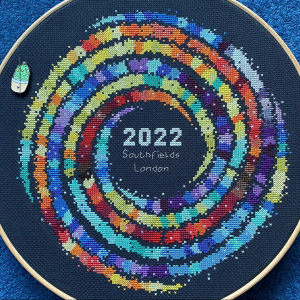
A 2022 Embroidery Challenge
I’ve been watching people making temperature quilts on social media for a few years and really liked the idea of making one. But I knew I would struggle to carry such a large project through to the end, plus the idea of knitting a blanket in the heat of summer wasn’t that appealing. Then I came across the idea of a temperature cross stitch, small, portable and seemed much more manageable!
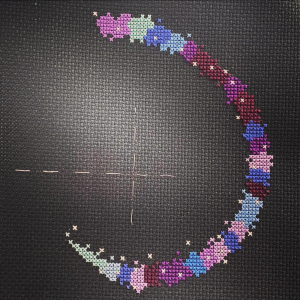
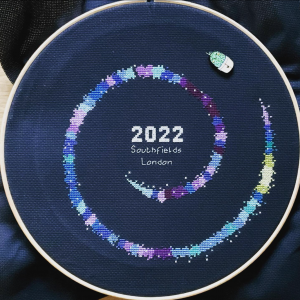
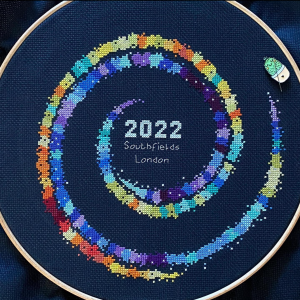
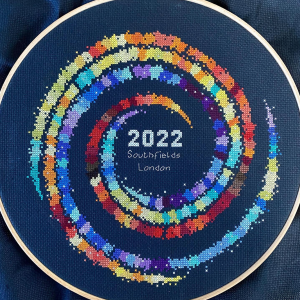
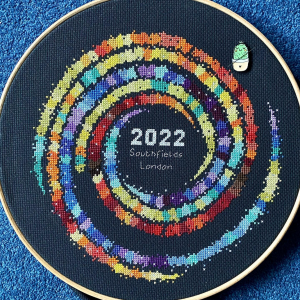
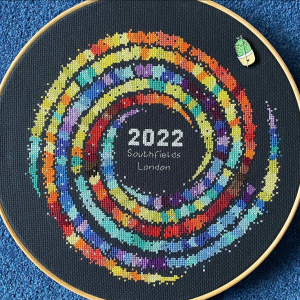
I found this fantastic pattern for a spiral galaxy by Climbing Goat Designs, bought my fabric and a seemingly huge number of threads and prepared for the 1st of January.
January
Started out well, but I didn’t like how messy each day was to start and finish. So I did some research and found out some neater ways of starting. The loop stitch was for when the thread was nice and long and the pin stitch was for when it was a bit shorter.
February
I found out I needed a much bigger hoop, so ended up buying a quilting hoop which was large enough.

March
I worked out that using a seat frame would make it so much easier to cope with embroidering such a large hoop and my left hand was very grateful for the reduced strain! Also blue and purple were getting quite boring by this point, so I was so excited when green started to appear at the end of March.
April
Finding the start of the next spiral was tricky and I did end up unpicking it once. I was also pleased I had kept on top of stitching the sparkly stars.
May
It was interesting having a visual representation of how much warmer it was getting.
June
The end of the academic year was very busy, so I was quite proud of myself for keeping on top of the embroidery. But the stars had to wait until later.
July
We had an unexpected heat wave. Because my temperature scale had been planned on historic average data it only went up to 28°c and July ended up at 38°c, so I had to buy extra colour to cope with the sudden expansion of my heat scale.

August
It continued to be hot, but not as hot as July. I still needed to use my extra colours though!

September
It was a relief to see the cooler colours coming back. But this was a challenging month to sew because I had triggered RSI in my wrist at school.
October
This was an odd month because the majority of the days were 17°c, which did make for a lot of lime green stitching.
November
We spent a lot of this month packing and preparing to move house, so managing to keep on top of stitching was challenging. A lot of November was actually stitched in December.
December
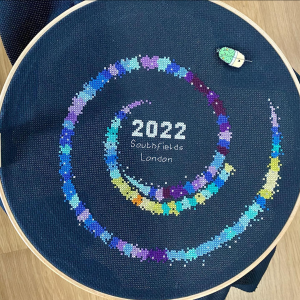
In contrast to the summer, December decide to swing the other way by plunging into negative figures (this is unusual for London!). My scale ended at 5°c, and we had temperatures as low as -1°c. So once again I needed to pick up some extra colour for my scale. My needle finally gave up a week before the end of the year (clearly being threaded so many times had caused metal fatigue), so I didn’t actually finish until the first week of January.
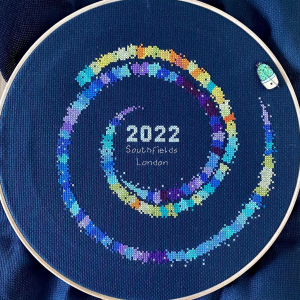
I still have the starts to finish, but that should be done soon.
Some fun facts from the year:
• 2022 here ended with the same temperature as it started. 13°c for both the 1st Jan and 31st Dec.
• The temperature range on this cross stitch goes from -1°c to 38°c and documents both the coldest winter and hottest summer.
• My original plan went from 5°c to 28°c (as that used average data for the area), so I had to buy extra colours both in July and December to work with the wild variations in temperature.
I really enjoyed doing this, but I don’t think I’ll do another one for a while. I do highly recommend Climbing Goat Designs though, fantastic support and community and a very clearly written pattern.
I finally caught COVID, and while I am curled up on my sofa feeling sorry for myself, I thought I would check through things. I realised that I haven’t written anything on this blog for ages (gulp April 2021) and so much has happened! The problem is that Instagram is so much quicker and easier to update, whereas sitting down to write something in long-form takes (unsurprisingly) longer.
I really got into patchwork and quilting. I’ve finished two complete quilts now and have another one made and sandwiched – it just needs quilting.
The second completed quilt (after Lumen) was an exercise in being precise, which it turned out I wasn’t. I foolishly assumed that where my machine had 1/4 inch marked for the seams, was actually 1/4 inch. It wasn’t!

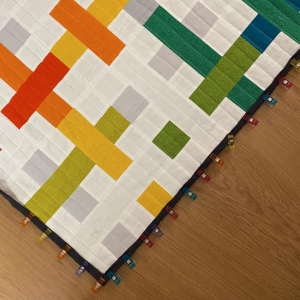
So the joins are a bit wobbly, but the quilt is not bad for my second one.
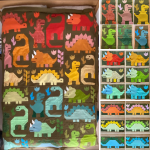
The quilt that is almost finished is for my nephew who loves dinosaurs (he gets that from his mum!). This time I checked where 1/4 inch was and made a tape wall, so I could get my seams better. I did, however, make a minor error in size calculation and didn’t realize that I was making a king-size quilt, for a 5-year-old…
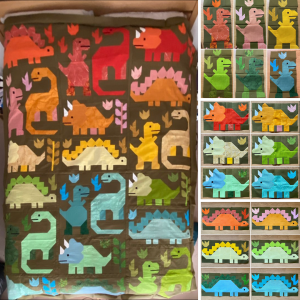
Once it’s quilted I think it’s going to look amazing and my sister seems quite excitied at the prospect of having a huge dinosaur quilt to use as their movie quilt!
I also joined the London Modern Quilt Guild, and in doing so realised just how little I knew about quilting and quilt blocks. So my 2023 challenge is to make a sampler quilt with commonly used blocks. I designed this…
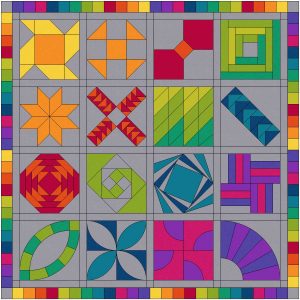
It gets more complex the further along the quilt you go. I have the fabric but am yet to start because I’m waiting for my new sewing cabinet to arrive, so I can sew comfortably.
This leads me to other life news, we finally moved house. We went from a tiny two-bedroom flat to a beautiful four-bedroom house (with a garden!!). We are still unpacking, and there is so much house improvement and DIY to do. But it really has potential. One of the downstairs rooms is going to become a craft room so the boyfriend and I have somewhere to work on our crafty endeavours. Hence the sewing cabinet I’ve bought. Also now that we have a garden I can get back into growing vegetables. So far I have planted onion seeds and hoping to see them germinating soon. The weather needs to warm up a bit more before I start planting anything else though.
As if the amazing life news couldn’t get any more exciting, the boyfriend won’t be a boyfriend for much longer, because we also got engaged just before Christmas! We had so much fun designing an engagement ring with Maya Magal a London based jeweller.
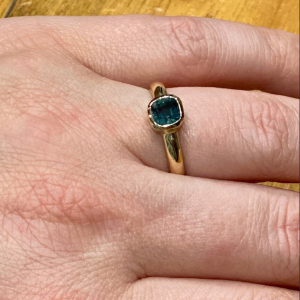
It made from recycled 9ct gold and an ethically sourced sapphire. Wedding plans are still very much in the planning stage, so watch this space!
I could write so much more in this little life update, but then it wouldn’t be so little. So I’ll save the other crafting for some future posts.
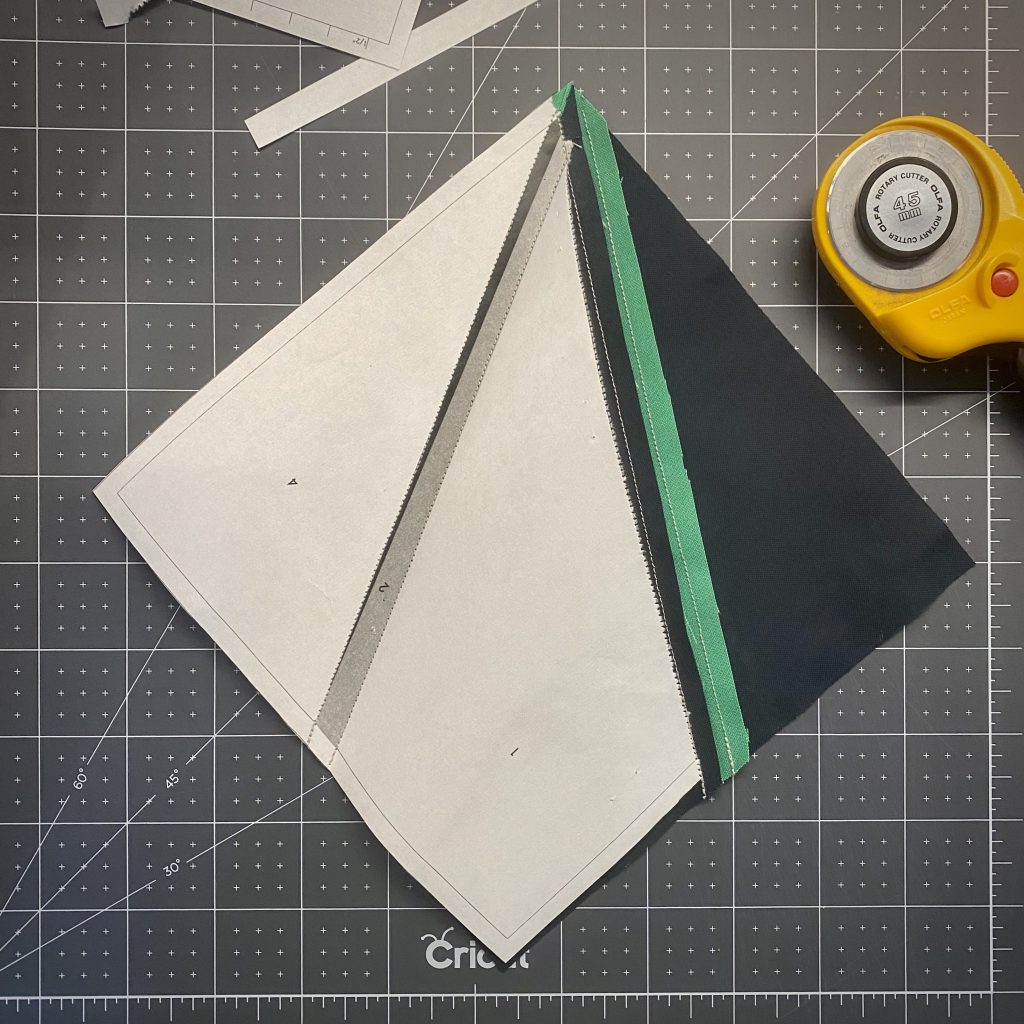
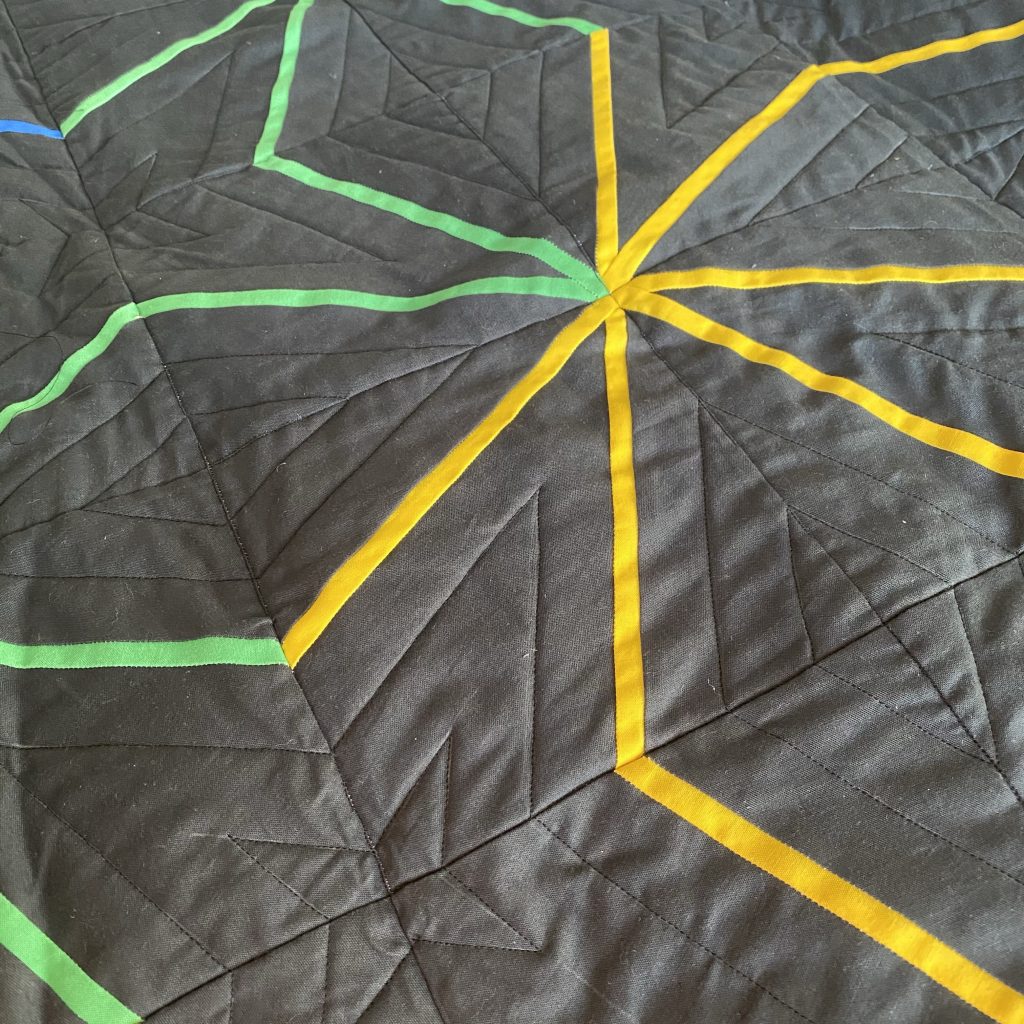
A long term project I’ve been working on for a while (and to be honest it has been finished for a while, but I haven’t posted about it) has been an Alison Glass Quilt. I wanted to try out foundation paper piecing, so I watched a few YouTube tutorials and (in classic “me” fashion) thought “how hard can it be”.
So I bought an Alison Glass pattern called Lumens. I will freely admit that choosing this as my first foundation paper piecing quilt was perhaps a little over ambitious, but I took it slow and completed it after 6 months.
Some errors I made with fpp was using normal printer paper, so I couldn’t see though it at all. This made placing the fabric quite challenging, and I would often have to unpick things and try again.
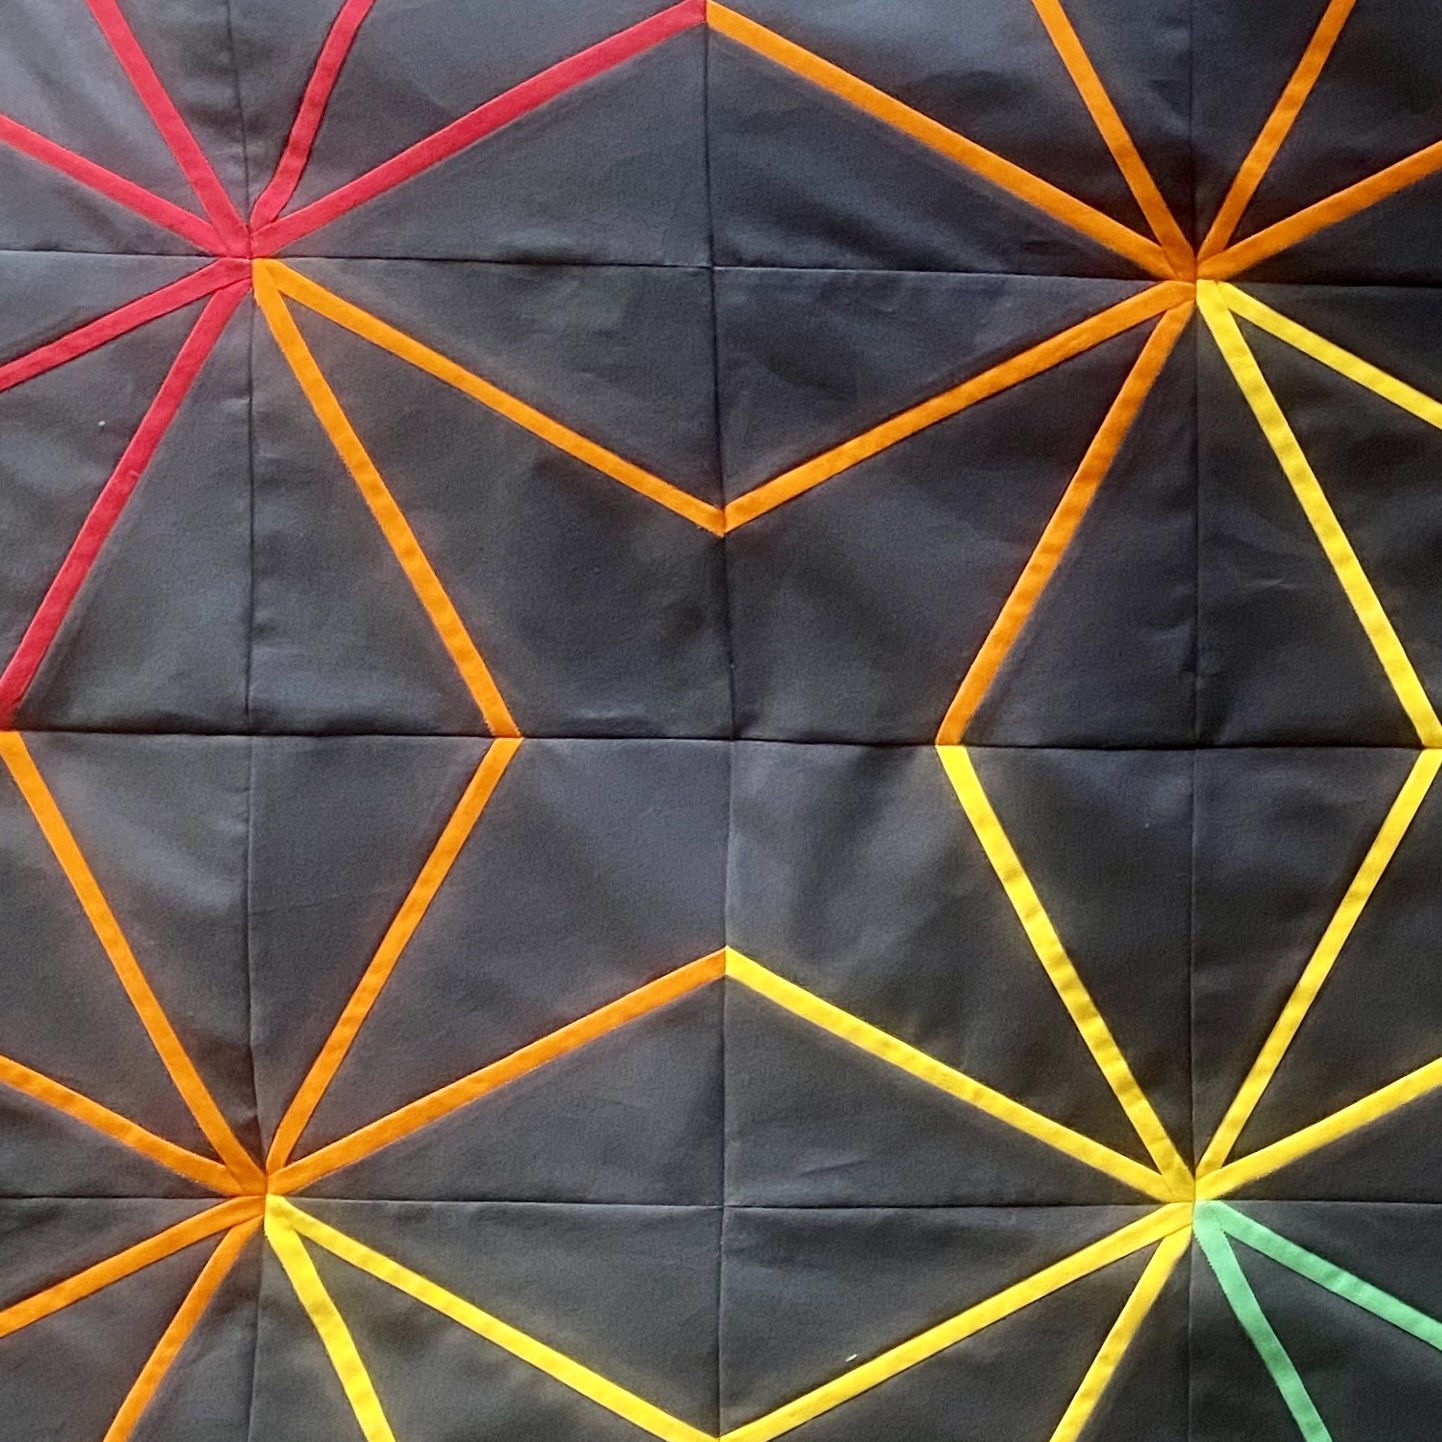
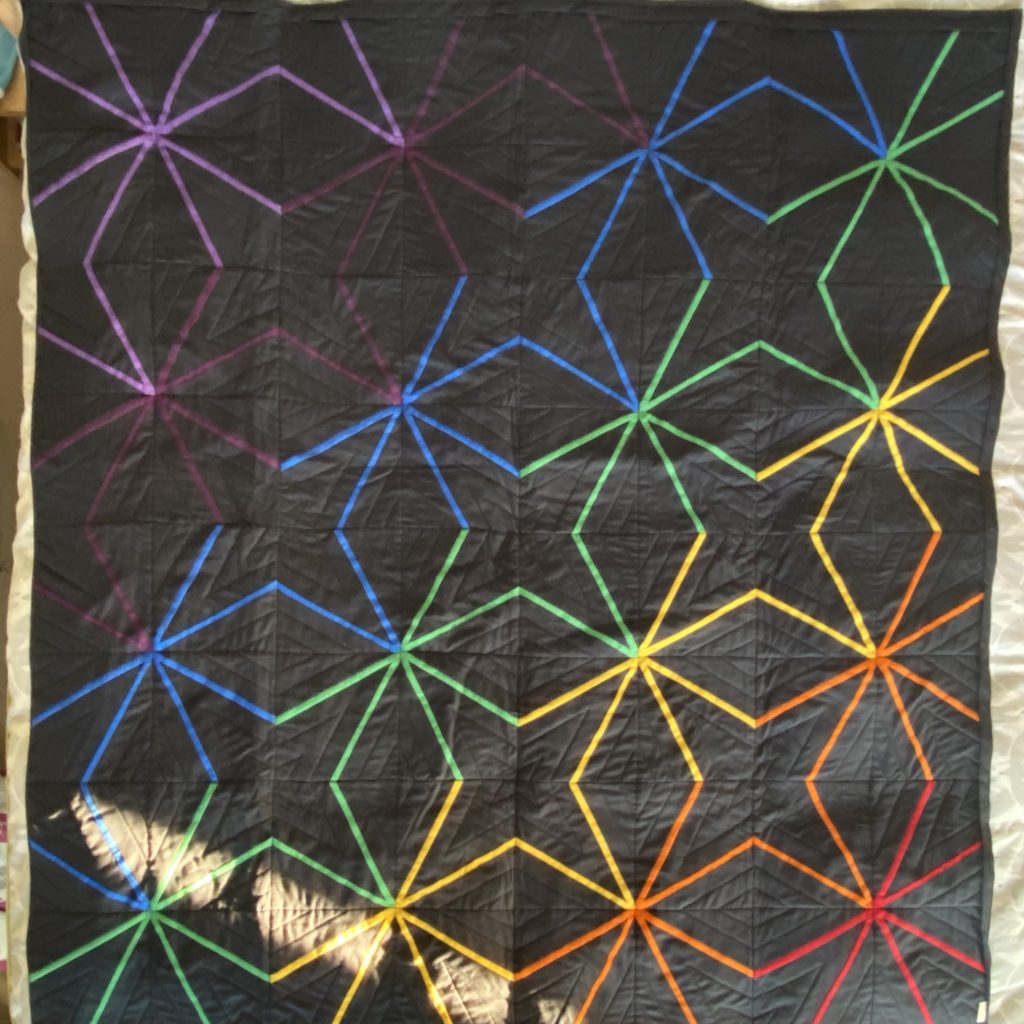
When the panels started coming together, I really liked how the rainbow colour scheme was coming together
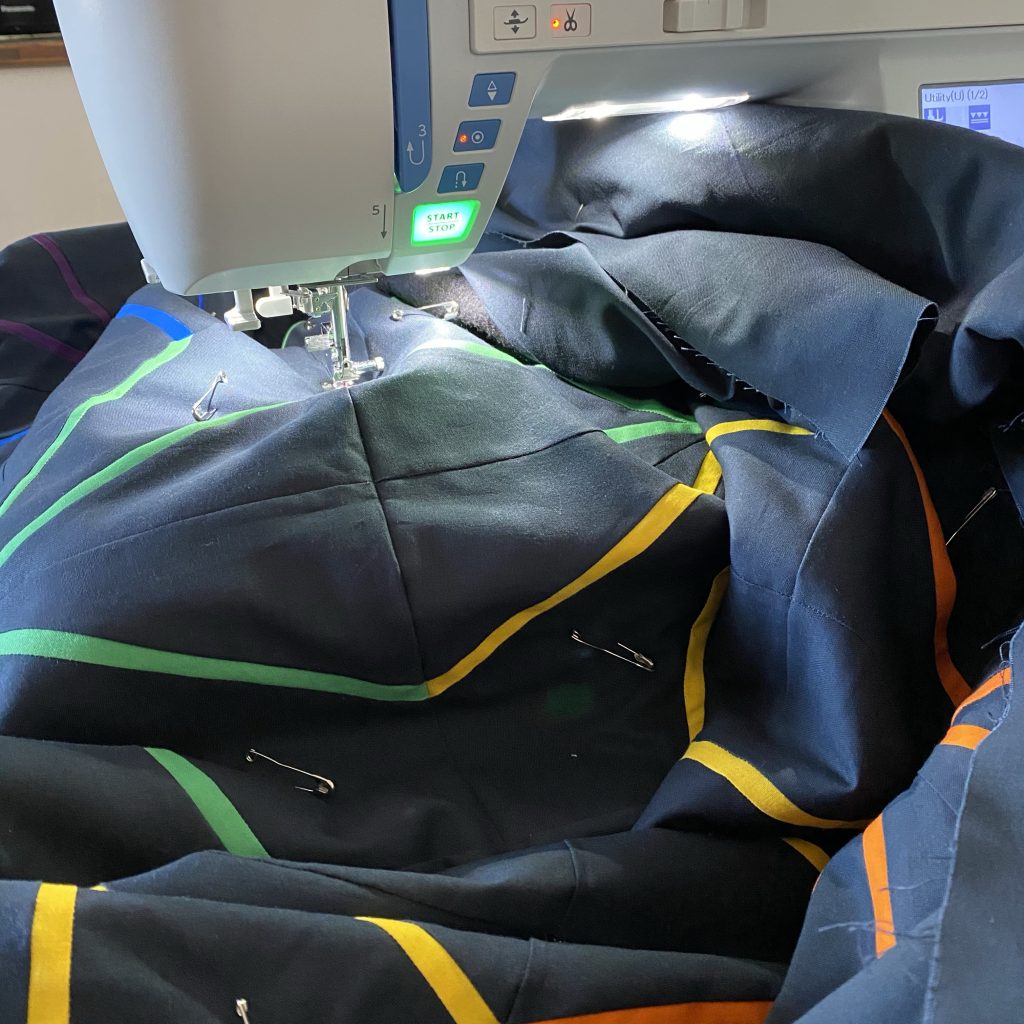
Once all the panels were joined, I used curved safety pins to hold together the back, batting and front before sewing the 3 layers together.

Next mistake, I decided to quilt it myself. Which proved to be a massive workout for my arms! I probably should have sent it away to someone with a long arm quilting machine.
But despite the challenges, I think it turned out ok.
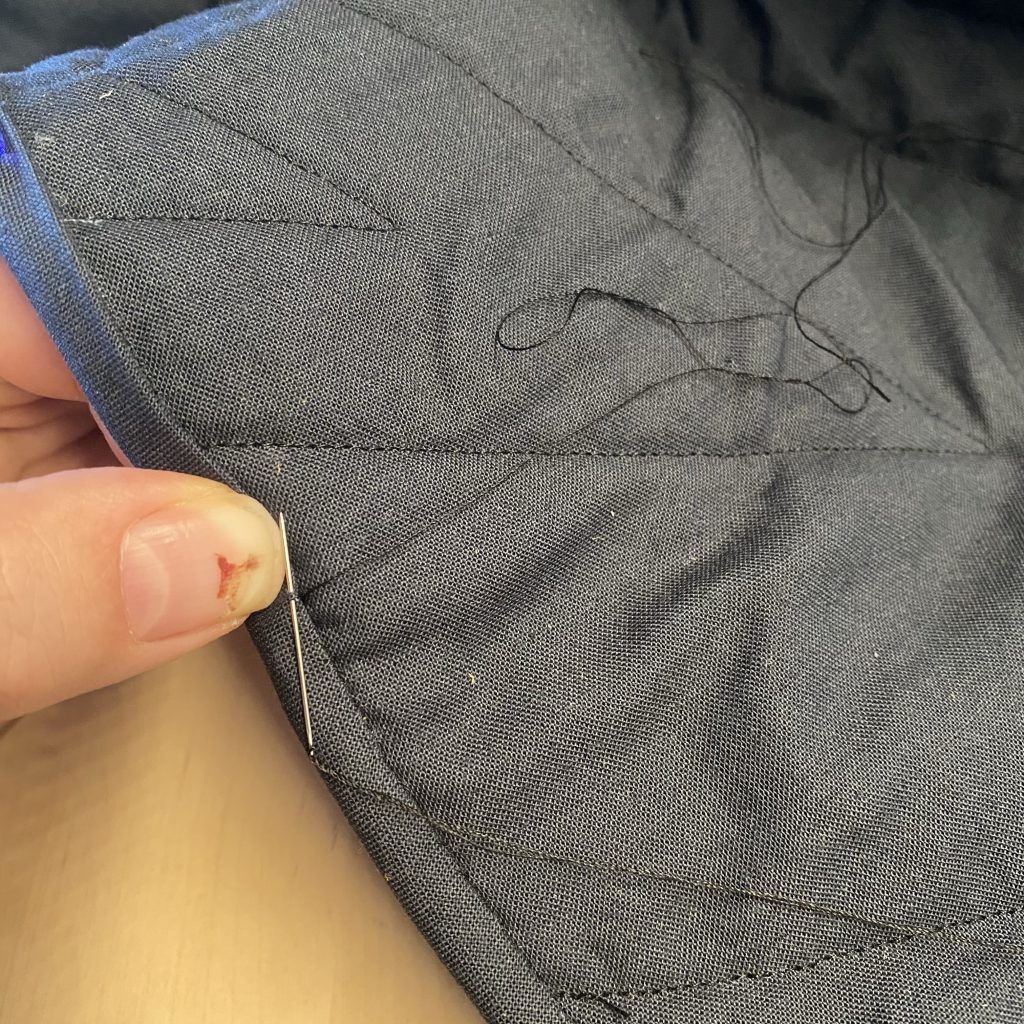
I sewed the binding on by hand, which did take a very long time. I think it worked well, but again hand sewing in the middle of summer with a giant quilt on my lap was, um, tricky.
I have also discovered that taking a picture of a whole quilt of very challenging, especially as it is the size of a king size bed! So here is the best picture I’ve managed so far…
I loved the whole process! And I’m currently deciding on my next fpp quilt. I’ll let you know how it goes.
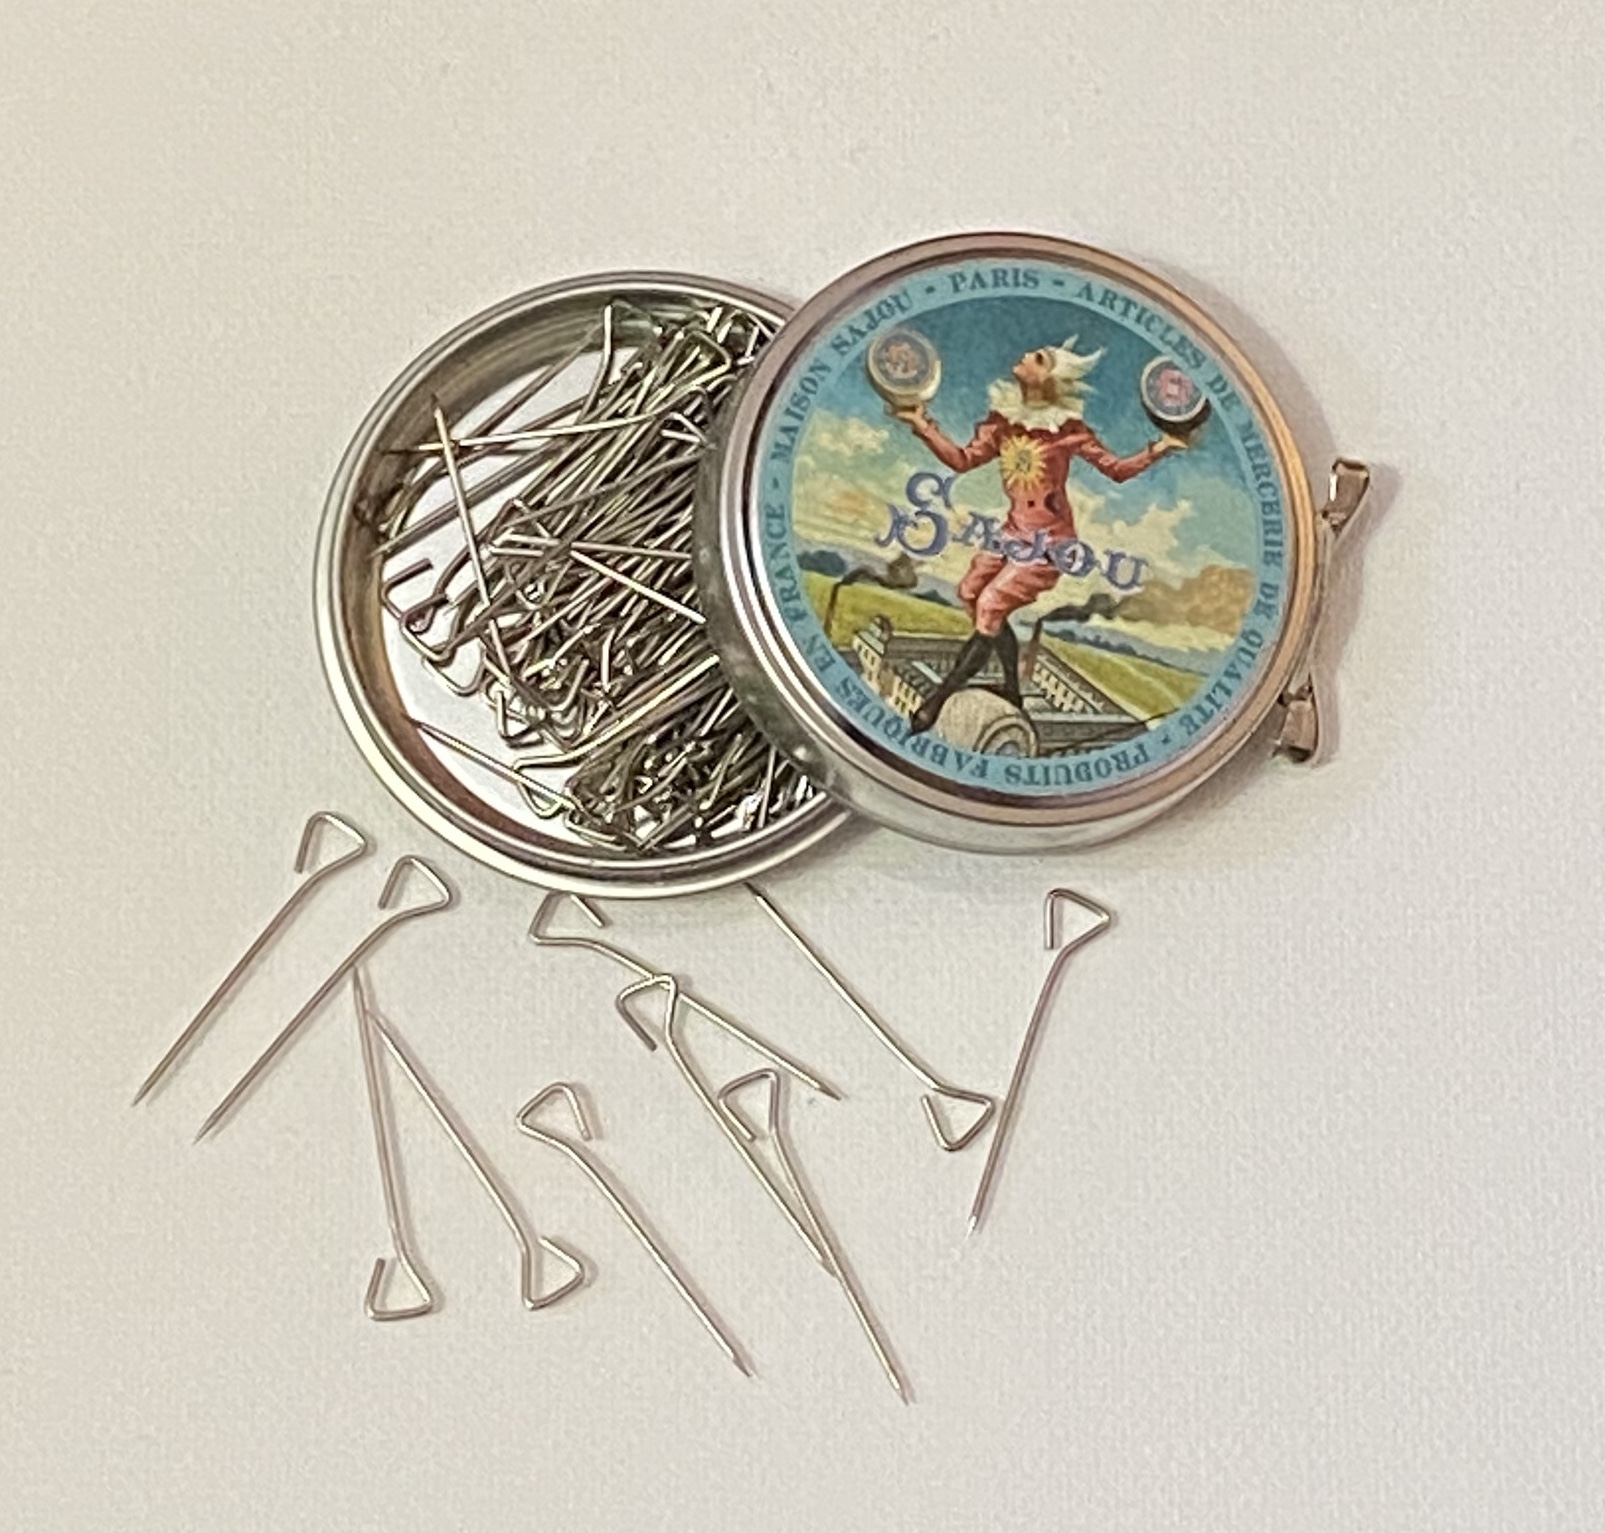
Christmas 2019, I was going to spend the festive season with my boyfriend’s family for the first time. So I wanted to take something crafty, but compact, to do. Embroidery! I thought – so went to Etsy to find a kit to challenge my stitching skills.
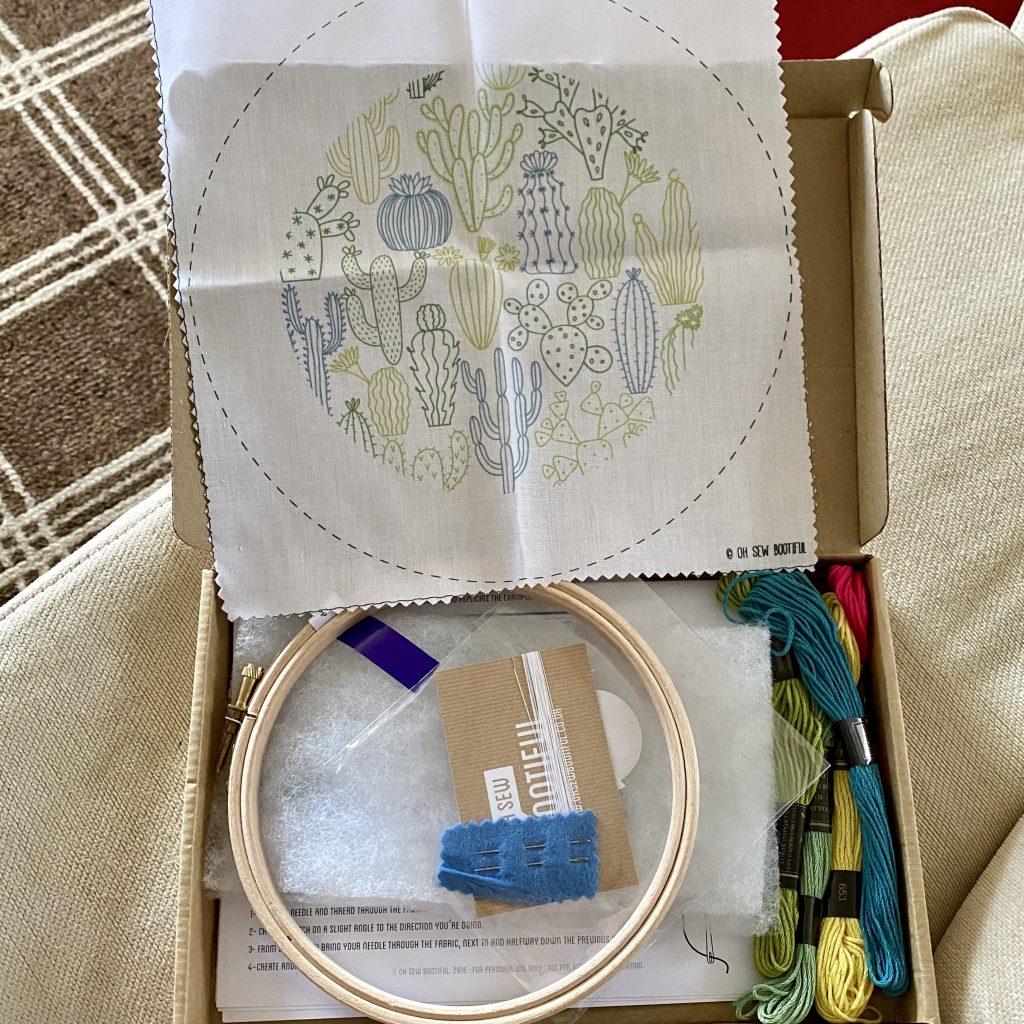
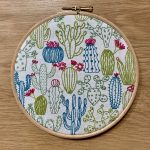
After much browsing I found this cactus kit from Oh Sew Bootiful, which came with everything I needed. Including a comprehensive guide to the stitches I would need to master.
One of the stitches I found the most challenging, which involved watching a few YouTube tutorials, was the French Knot. I still need to practice it, because my knots are still a bit hit and miss. But this cactus ended up with a series of very good knots!
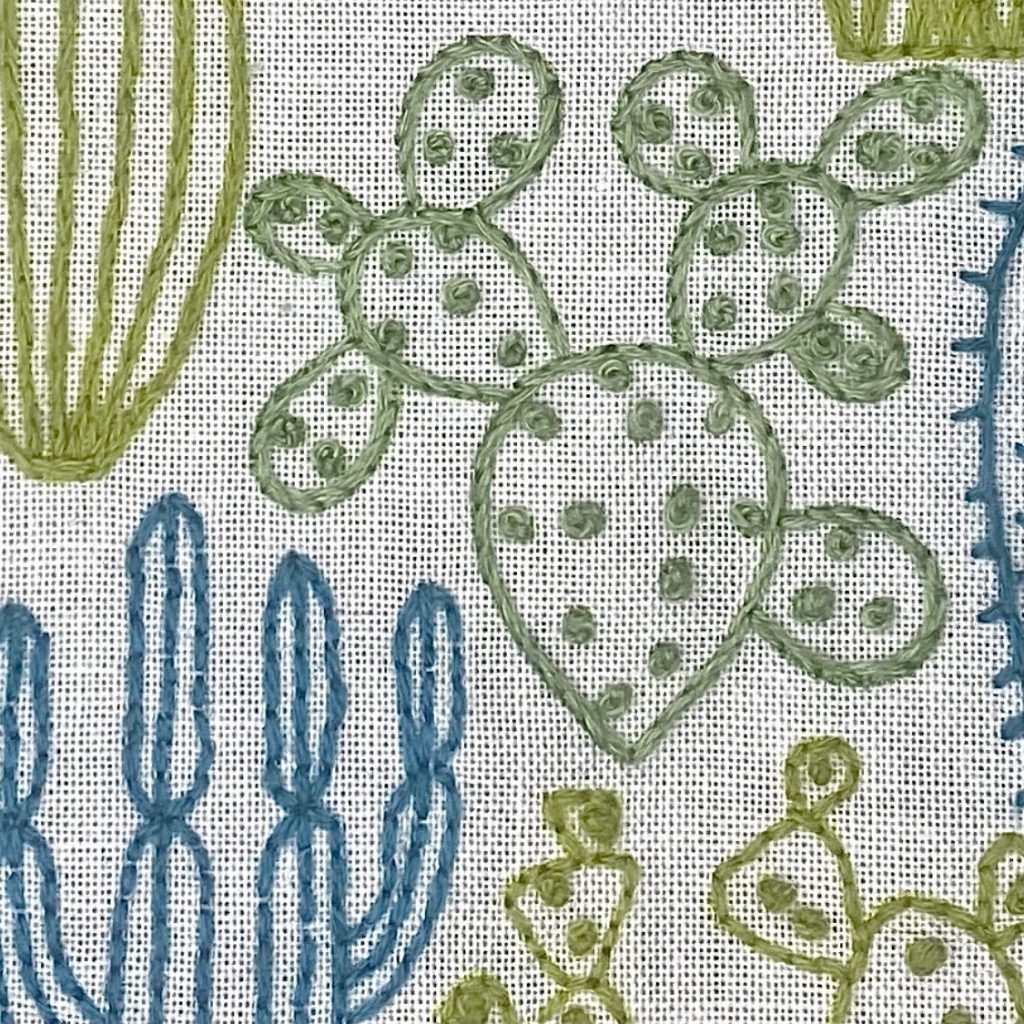
I particularly liked how there was a variety of stitches recommended in the kit. But you could decide which stitch worked best on which cactus. Although I did largely stay true to the cover illustration, there were some cacti that I went “off script”.
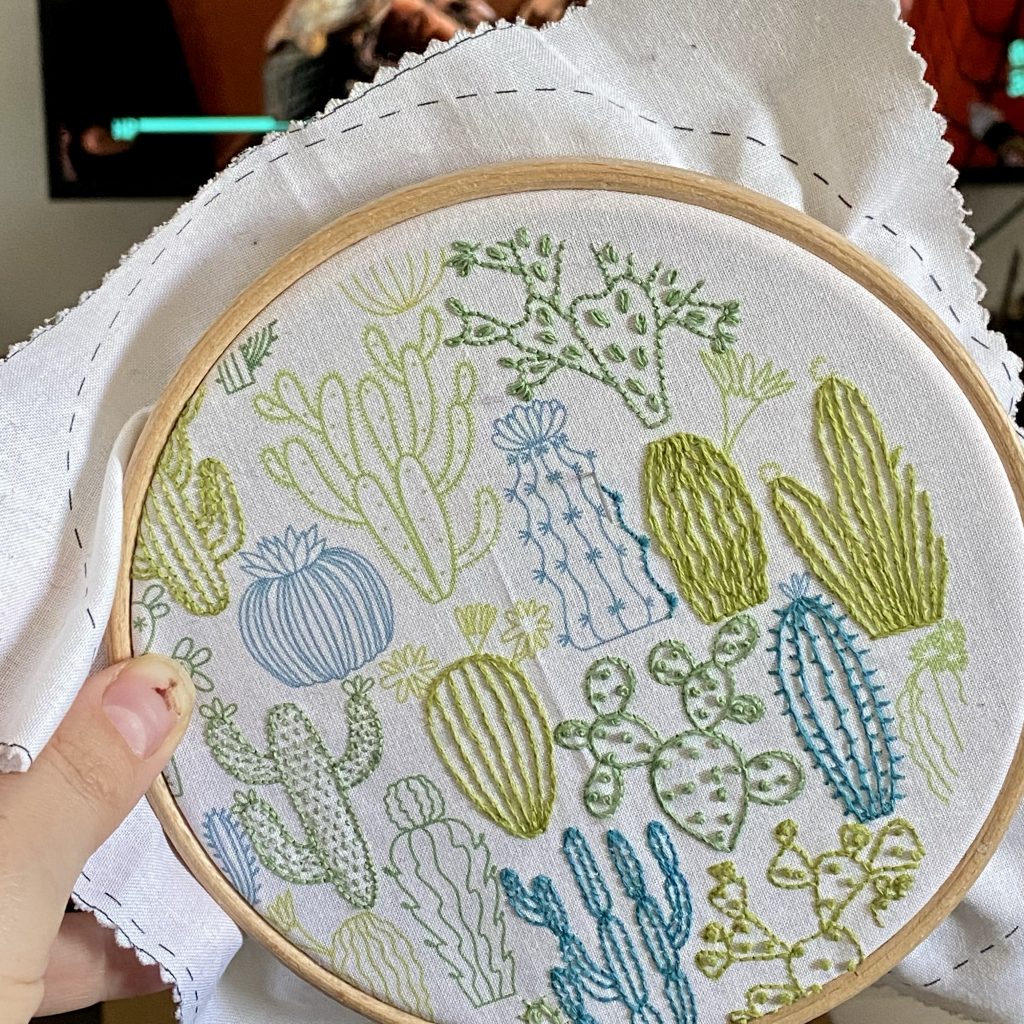
By the start of the first lockdown, I had completed a decent amount of the kit, but then the distractions of baking bread and making scrubs meant that the kit was relegated to a shelf.
However, by the start of lockdown 3, most of my crafting materials had been packed up (we are in the process of trying to move). I left myself 3 unfinished projects, one of which was the cactus embroidery.
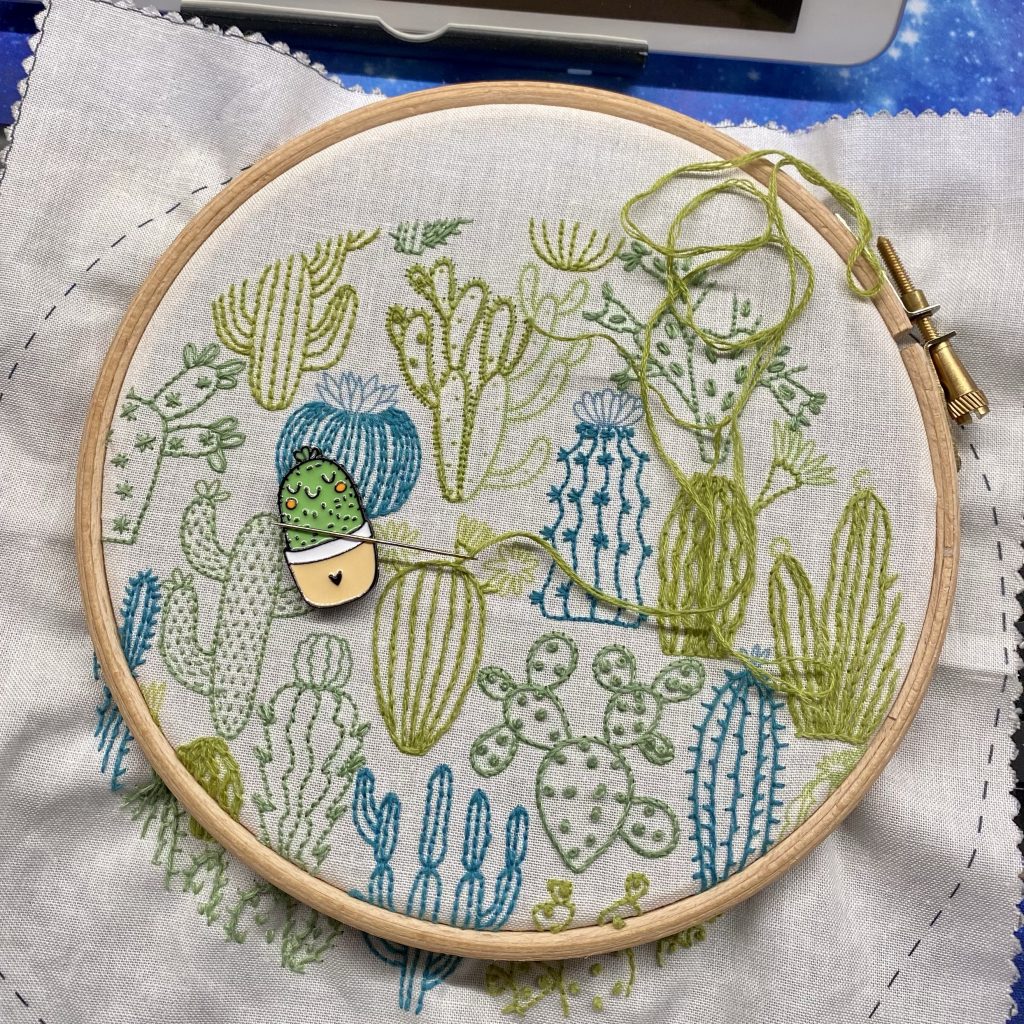
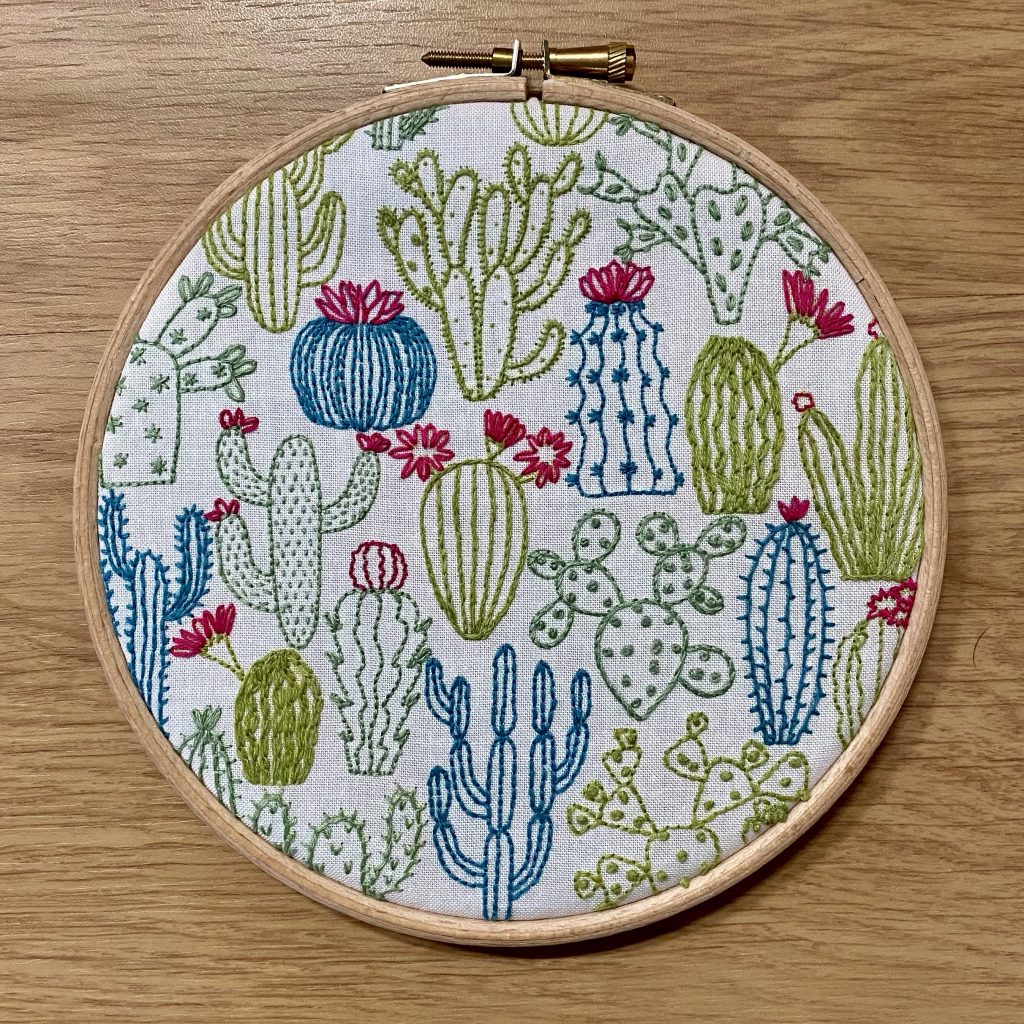
So with fewer distractions, and the addition of a fabulous needle holder from the Dinky Trinket Co on Etsy, I finally completed it.
The next challenge is to find a way of protecting it in a frame. When I am back in school I might have a go at making one on the laser cutter. I would like it to have a glass front with a wide wooden frame and a way of hanging in on the wall. But that is a challenge for the future!
For now, I’ve started my next embroidery. This time it’s blackwork and I’m learning how to do Holbein stitch…
Happy New Year! I think we can all agree that last year was not what anyone expected. So, like many other people, I am going into 2021 with no preconceived plan of what my year will hold. I’ve never been one to make new year’s resolutions, in fact, last year was the first time I had set out some intentions or resolutions for the year! One was not to buy any new clothes, which I maintained until September (my favourite hoodie from hush shrank in the wash, and I felt I had to replace it) and the other was to try and learn Welsh. I can confidently say that I have used Duolingo and have studied Welsh every day for 350 days straight – so in 15 days I can say I have studied Welsh for a full year. But have I learned Welsh, no, not really. I can kind of read it. Definitely can’t speak it, and can only understand spoken Welsh if it’s said very slowly using the few words that I sort of know. But the intention was there!
Another thing I’ve been trying to do is eat less meat. Now that I have found a kind of Tofu I like (specifically Cauldron, preferably Teriyaki) this is a lot easier. But I’ve also been looking around for other recipes that don’t use tofu. I am not a fan of beans, in any format. So this eliminates most of the vegan recipes I seem to come across. But then I found one that substituted minced beef for mushrooms in a pasta sauce. I’ve since made it a few times, and I feel it’s got to the stage where I have tweaked it until I like it.
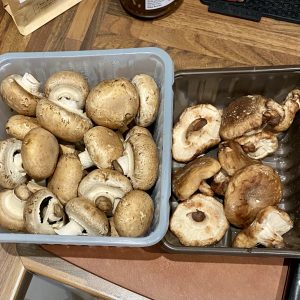
You do need a lot of mushrooms! When I make it for two I used about 500g of mushrooms (a mixture of Shitake and Chestnut). I sometimes throw in some Oyster mushrooms if I have some in the fridge that are past their best.
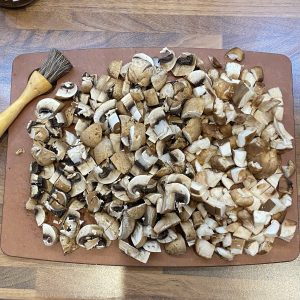
You then need to spend a considerable amount of time cleaning them and chopping them. This process is made a lot easier if you have a decent brush to clean the mushrooms with. I use an Iris Hantwerk brush, and even though it is a bit pricey (considering it is for mushrooms) we use it all the time! This picture shows the pile of mushrooms at the halfway stage!
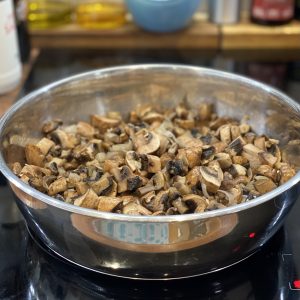
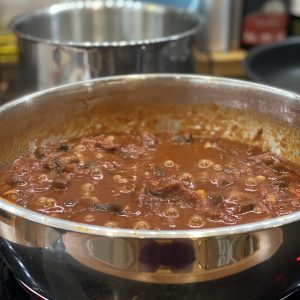
I fry them in a saute pan with some onion and garlic. When you first add them to the pan it looks like a ridiculous amount of mushrooms!
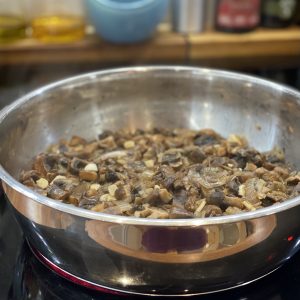
But once the mushrooms have cooked down it looks much more reasonable.
Then I add in tomato paste, chilli paste, chopped tomatoes, vegetable stock, white wine and balsamic vinegar and leave it to simmer until it is thick. I tend to check the seasoning towards the end and this time I needed to add in some salt and sugar.
Then I cook some pasta (adding in a spoon of pasta water to the ragu sauce), the type of pasta varies depending on what I had in the cupboard – today was penne. Once the pasta is cooked I stir it through the sauce and serve.

This sauce is really versatile. Sometimes I add in other vegetables as well, or switch out the vegetable stock for mushroom stock, which really ups the umami!
Mushroom Ragu
Ingredients
- 500 g Mushrooms
- 1 tbsp Olive Oil
- 2 Shallots
- 4 cloves Garlic
- 5 tbsp White Wine (optional)
- 70 g Tomato Puree
- 1 tsp Chilli Paste
- 400 g Tin Chopped Tomatoes
- 1 Vegetable Stock Cube (or Mushroom)
- 1 tbsp Balsamic Vinegar
- Salt and Sugar (to taste)
- 150 g Dried Pasta
Instructions
- Prepare the mushrooms, shallots and garlic by washing/peeling (if necessary) and chopping.
- Heat the olive oil in a pan and fry the onions until soft. Add the mushrooms and fry until reduced in size. Add the garlic and continue to fry until fragrant.
- Add in the wine and cook until you can't smell alcohol any more.
- Add in the tomato puree and chilli paste and stir until well combined with the vegetables.
- Add in the tin of tomatoes, crumble in the stock cube. Stir well.
- Fill the now empty tin with water and add to the pan. Add in the vinegar and stir well.
- Leave to simmer, stirring occasionally, until the sauce has reduced and thickened.
- Tase the sauce and add salt and sugar if necessary.
- Cook your pasta according to the packet instructions You can add some pasta water to the sauce to loosen it slightly before serving (plus it adds in some pasta starch and makes it even more delicious).
- Drain the pasta and stir into the sauce. Serve and enjoy!
It’s been a long Autumn term. In fact, I’ve been back in school since August – preparing for a COVID safe teaching experience. But that’s not what this post is about. Fast forward to December, when I started to think about how I was going to wrap presents this year.
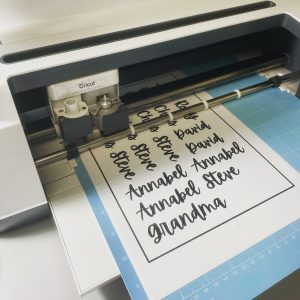
We have a Cricut Maker at school (something I covet and also got for Christmas this year). I wanted to use the Cricut to make custom stickers to make wrapping presents faster, and also fit within a set aesthetic (we have already established how extra I can be). So I decided to use Procreate to create everyone’s names, then turn them into stickers.
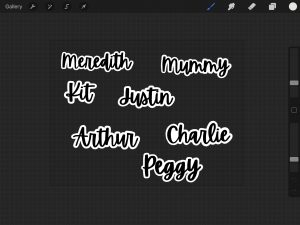
This was challenging, as my handwriting is frankly appaling and my inability to do any kind of fancy letting was going to seriously hinder this. So I went to Creative Market to find a font I liked that could do the job for me. After much searching, I chose one called Apricots.

Now I could enter the text into Procreate and create a white border around each word. I then exported this as a Jpeg, so I could upload it into Design Space.
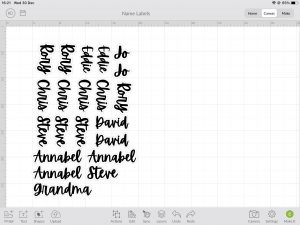
Now I love using the Cricut, I’ve been using digital cutting machines for a long time and the Cricut is one of the most versatile and easy machines I have used. However, Design Space is not in the same league. It is fiddly and annoying to use. I try to avoid using it until the last possible moment, instead using Illustrator or Procreate to prepare files first. So to arrange these name stickers, I created a rectangle the size of an A4 piece of paper and manually arranged the names inside. This enabled me to get a lot more stickers on a sheet, instead of letting Design Space do the arranging for me.
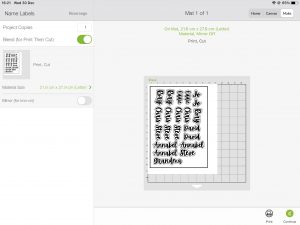
I then printed out the sticker sheets onto plain white sticker paper. I turned bleed off because the outside border was white, so it wasn’t needed. Once the sheets were printed, I loaded them into the Cricut and let the machine perform its magic. (Ok, so I let the machine detect the edge of the black box, and then cut out the different names).
Once all the stickers were printed and cut, they could be applied to the presents as they were wrapped.
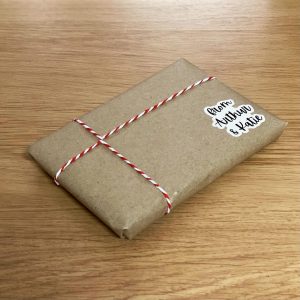
I went for a “brown paper packages tied up with string” aesthetic again, which I really like. Partly because I accidentally bought a much larger roll of brown paper last year (there is enough paper there for several years!) and partly because it’s all completely recyclable.
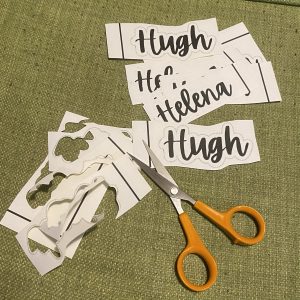
Unfortunately, I forgot to make one set of stickers, and as I didn’t have a Cricut at home (yet) I had to resort to good old fashioned scissors
It’s week 12 of lockdown, but this weekend I got to take part in something really fun! Due to the current COVID-19 crisis, this year the annual Sewing Weekender became an online event! There have been a series of videos with interviews, tutorials and fun chit chat and Zoom webinars, where everyone taking part can show what they have been up to.
I decided that I wanted to spend this weekend sewing up another Kielo Wrap Dress, with sleeves. I will post pictures of the other one I made, once I have some pictures of it on (the lack of outside space, or indeed inside space, is making fashion shoots tricky!).

I managed to cut all the pieces out and sew it together (with the exception of hemming) on Saturday. Annoyingly my self drafted neckline needs some work – because it is too low.
So on Sunday I decided to spend the time drafting a pattern for my favourite pairs of dungarees. I found them in Uniqlo last year and sadly they are no longer for sale. They fit perfectly and have become my lockdown staple.
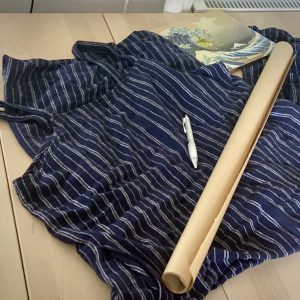
So I dug out some brown paper, a decent pen and set to copying all the elements of the dungarees. It took an afternoon, and quite a bit of maths (to work out how much fabric I will need). Unlike the first time I copied an item of clothing, this time I remembered to add the seam allowance!

But I have now ordered some linen from The Drapers Daughter (using a handy Sewing Weekender discount code to get 15% off my order!). Hopefully, I’ll be able to start sewing them together next weekend.
This post is for me, to remind myself in the future what impact the current news and events have had, not only on me but on people around the world. It is a post where I can remind myself of the intentions and promises I have made.
On the 25th May, George Floyd was murdered by police in Minneapolis. Since then protests have been happening worldwide. But unlike previous Black Lives Matters protests, this time it seems to be having more of an impact. This podcast by RedHanded is a very good explanation of what has been going on.
To quote Anglea Davis
In a racist society, it is not enough to be non-racist, we must be antiracist.
This quote, along with lots of other posts have been widely circulated on social media.
Although I think of myself as non-racist, I haven’t ever actively engaged with educating my self or doing things to enact positive change. But Anglea Davis is right, we need to anti-racist. So I need to make changes.
Step 1 – educate myself.
There have been several lists going around of things to watch for white people to educate themselves.
- The 13th
- When They See Us
- 4 Little Girls
- I Am Not Your Negro
- Freedom Riders
- Southern Rites
- The Central Park 5
- Unseen
- Traffic Stop
- LA92
- Dark Girls
- Teach Us All
Step 2 – change my echo chamber
I have several social media account. Personal ones where I only follow friends and family. But I have several public ones including ones I run on behalf of my department at school.
What Katie Made Next – Instagram, crafting
SPS Engineering – Instagram, school
St Paul’s Engineering – Twitter, school
The crafting sphere of Instagram is very white and very female. I am actively trying to follow POC on Instagram to change my social media echo chamber.
For the school accounts, I am actively trying to follow Engineering related accounts that promote diversity or are owned by POC. So that it can be (especially on Twitter) be retweeted or shared.
Step 3 – take action
I am in a privileged position. I am a teacher in an independent school. I am also a Head of Department, so I am in a position of power and can lead my department to change.
We will be changing our wall displays to make sure that the engineering, inventors and designers represent a diverse range of society. It isn’t going to be easy, as the majority of history has promoted white men – so we will have to research and make sure that our displays are diverse. Pupils walk past these displays all the time. It needs to be normal to see a wide range of races (and genders) on them.
We will be looking at our curriculum and checking which engineering, inventors and designers we talk about. And whose work we use as inspiration for projects. We need to make sure that we have a diverse range of people and don’t just let the white male status quo continue.
We will be asking the exam boards to change the engineering, inventors and designers they ask us to cover in the GCSE. There are petitions already being started in the Design Technology community, which I have signed.
I will continue to talk about this with my tutor group, challenging their preconceptions. Asking them what they are doing to learn about this. But also making sure we listen to the experience of the non-white pupils in the group.
Personally, I will be trying to support more black businesses, especially crafting businesses. I will also think about which pattern companies I support as the big 6 have not been vocal about their steps to change. I will also be speaking out to challenge other peoples views.
Lockdown continues, We’ve been home now for 10 weeks (I stopped counting in days a while ago) and we’ve settled into a routine. On weekdays, I teach (or plan lessons) on weekends I sew and bake.
Oddbox opened up sign-ups recently for new customers. I’ve wanted to try them for a while, and my next-door neighbours recommended them. Each Friday we receive a box of fruit and veg that has been rescued from suppliers for a variety of reasons. Maybe it was surplus, or too small or had been damaged in some way. Each week is slightly different, depending on what Oddbox had to share out.
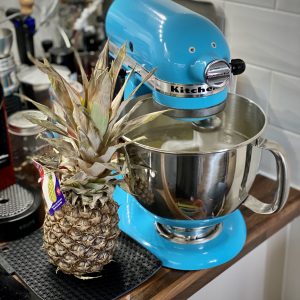
Last week, amongst the box of onions, potatoes, apricots and asparagus was a pineapple. We didn’t know what to do with it, so it sat there for a bit. This weekend we decided it really needed to be eaten!
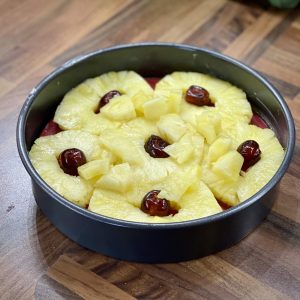
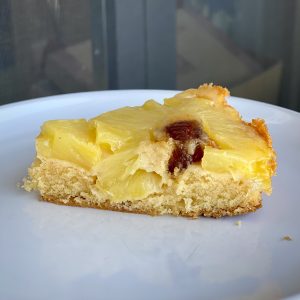
So I chose to make pineapple upside-down cake, something I haven’t had since my childhood! I figured that pineapples ring covered in basic sponge cake was probably the way to go. So a sharp knife (and a tub of glace cherries from my birthday) turned a pineapple into this:
Next up was a sponge cake. So I weighed out my eggs (top tip, always base the weight of the fat, sugar and flour off the weight of the eggs!)
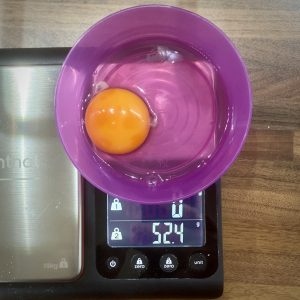
I made a 2 egg sponge batter (so 104g of margarine, sugar and self-raising flour). I beat the margarine and sugar in my KitchenAid until it was light in colour and fluffy.
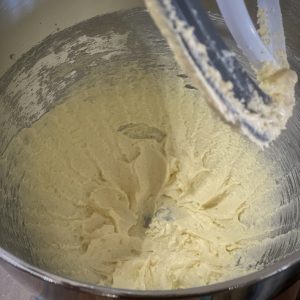
Then added in the eggs and flour and mixed to a smooth batter before pouring over the pineapple rings. Then I baked it in the oven at 180°c until it was golden brown and a cocktail stick came out batter free (about 25mins).
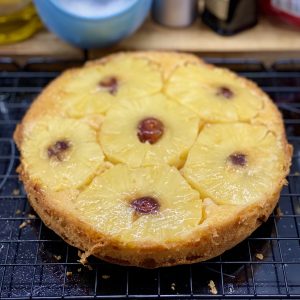
I think it looks pretty good! And I can testify that it is delicious.
Not a bad use for a surplus pineapple!
As I write this, we have been in quarantine for 42 days. That means (apart from 2 very short trips to the local pharmacy to collect a prescription) I haven’t left my tiny flat for 6 weeks. It feels strange how this new normal just feels “normal”. My days and weeks now have a semblance of structure. During the week I teach. Although teaching Product Design over Google Meets and via Classroom is challenging, my teenage pupils have embraced learning how to draw and modelling architecture out of loo rolls and other cardboard packaging they find around their homes.
My weekends are spent making scrubs for the NHS. I found out about the Scrub Hub initiative on social media and waited to see if a local hub would be set up in my area. I knew I wouldn’t have time to run one myself (planning online lessons takes a long time). But as soon as a Wandsworth one was set up I joined. I was amazed by how the local community came together, fundraising on GoFundMe so that the hub could buy fabric.
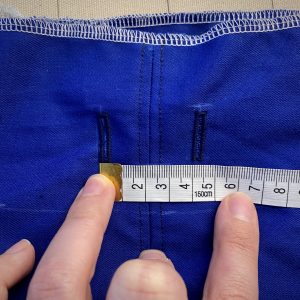
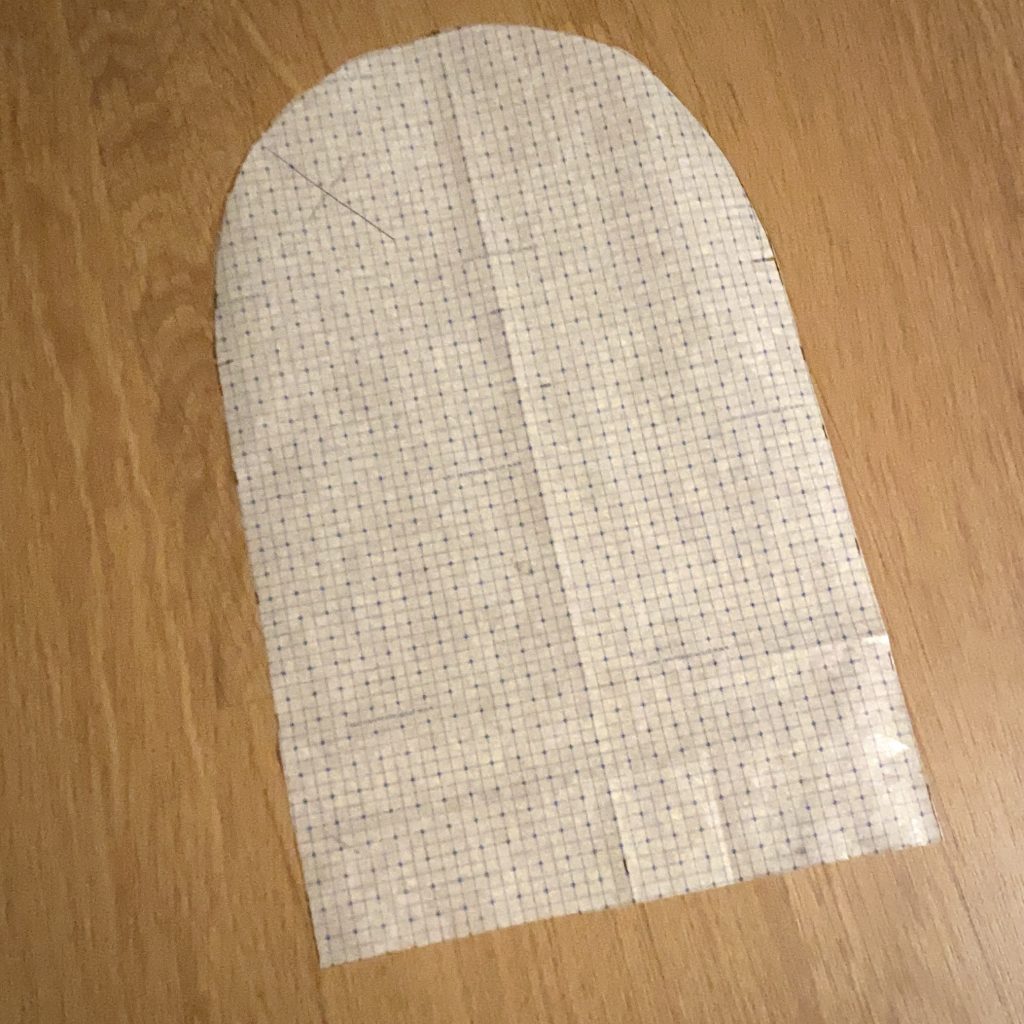
Within a few days of signing up, I had a delivery of Gabardine fabric in royal blue and an order to make 2 sets of large scrubs. We have a network of volunteers who make deliveries and collections between members of the hub. I hit a bit of a problem when I didn’t have a printer to print out the pattern, but one of my neighbours offered to print all 68 pages of it for me.
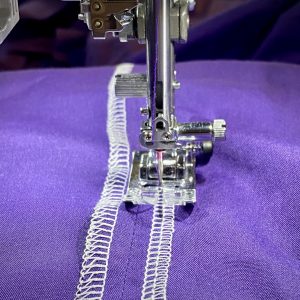
Taping and cutting out the pattern took an evening, while the fabric had a wash and tumble dry. The first set of scrubs took me 3 days to make (I made the 2 sets at the same time). All the seams had to be overlocked and topstitched down, as the finished clothing would be washed a lot and had to be sturdy.
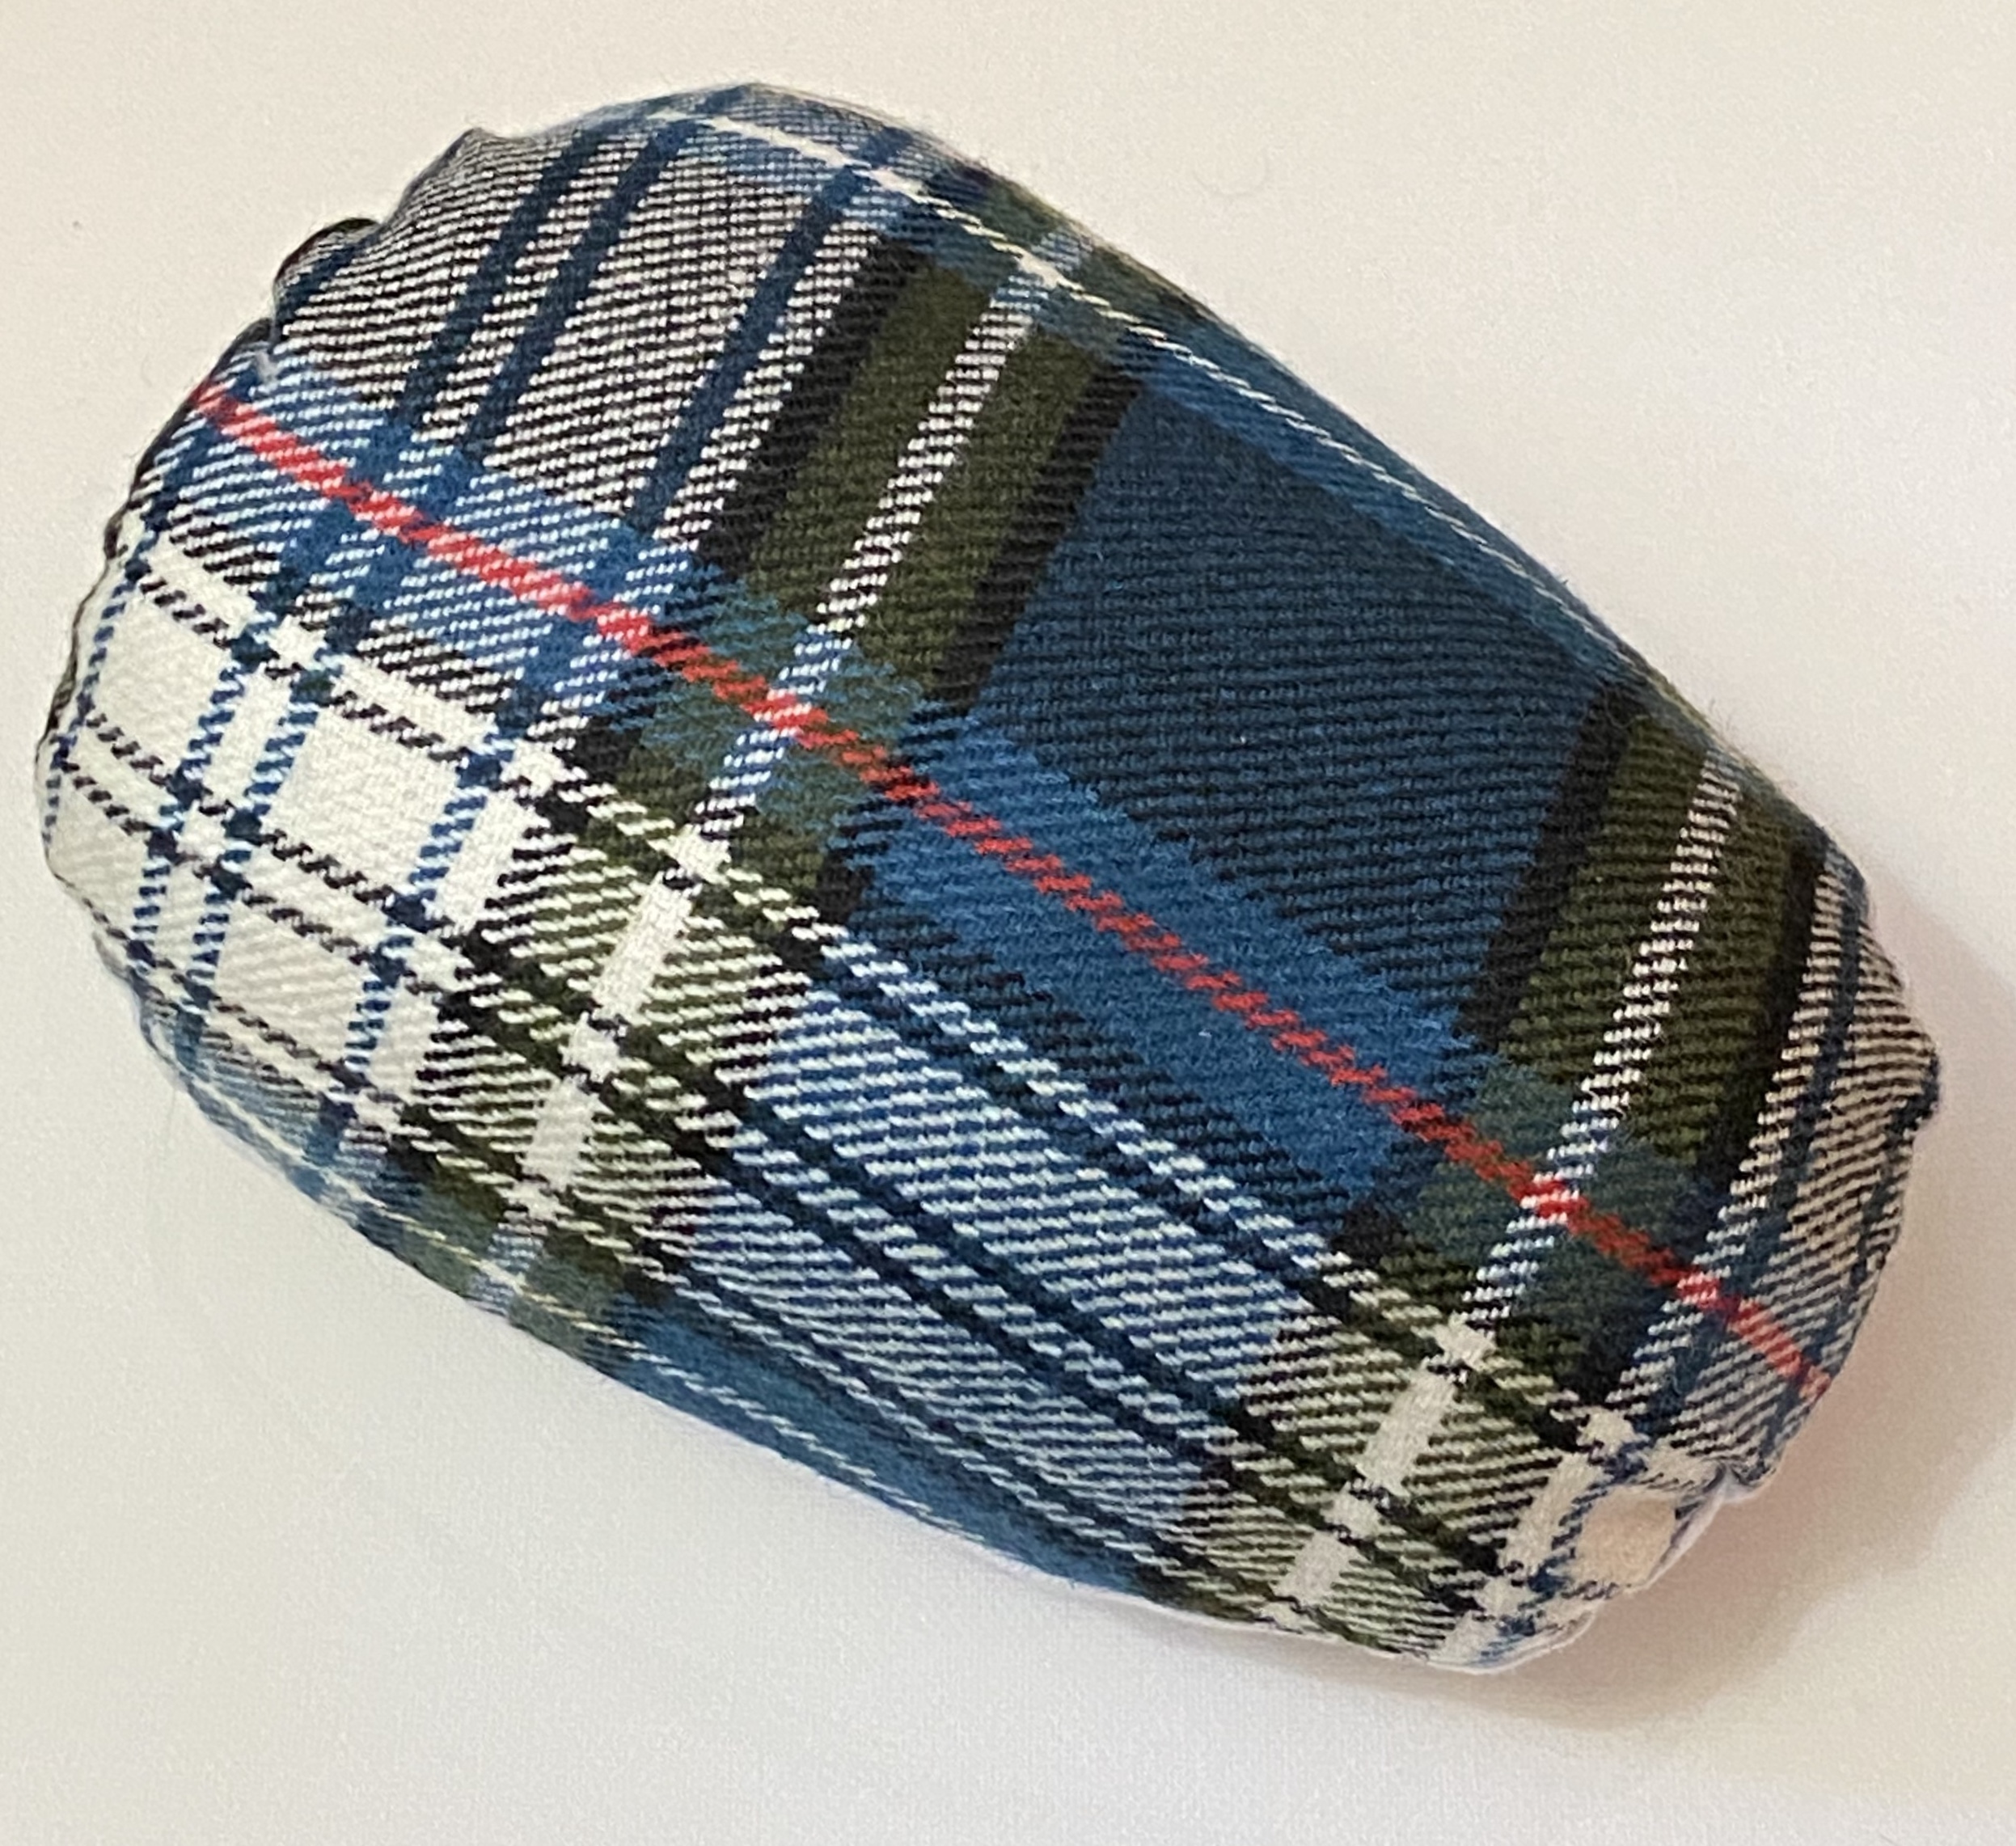
I finally had a reason to use all the sewing equipment the boyfriend had bought me for Christmas. The tailors ham proved to be very useful for pressing all the seams!
I also finally learnt how to use the automatic buttonhole foot on my sewing machine, to make a sturdy entry point for the waistband tape.
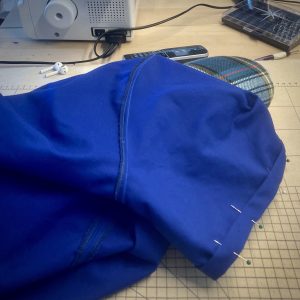
The second weekend I was asked to make scrubs again, but this time I tried out a different style neckline I had found online.

It has on overlapping v-neckband, so it is easier to take on and off. I found this tutorial on YouTube very useful when making the adjustments.
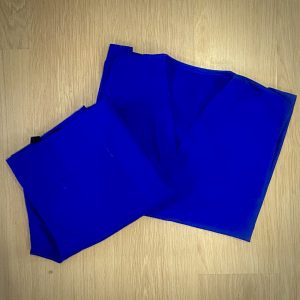
I also got a lot faster at making the scrubs, perhaps unsurprisingly! Although this shade of royal blue is very hard to photograph.
This weekend I am making purple scrubs, requested by a nurse. This time they are out of polycotton, so not as sturdy at the gabardine. But they are sewing up well.
I may not be producing scrubs at the rate that some of the other people in the hubs are, but I feel like I’m helping. I just hope that these scrubs last – and help to make the NHS workers who wear them feel able to do their job in comfy well made clothes.
I am in a lucky position, I don’t have to worry about not being able to refill my cupboards with food. But that doesn’t mean that buying food regularly isn’t a challenge. I’m doing everything I can not to leave the flat and that includes going out to buy supplies. So we have to try and judge our food deliveries carefully. As we approach the end of a food delivery cycle, some of our dishes have to get “creative”.
This week we had some minced beef, an aubergine and some potatoes left. So I thought I would attempt to make a sort of Moussaka. I have a well-stocked drawer with what seems like random spices and herbs, so I had a dig to pull out things that felt like it would go in a Moussaka.
A cinnamon stick, some bay leaves, oregano, rosemary, ground cumin and barberries later, I felt up for the task. Side note, I have no idea where the barberries came from, but they looked interesting!
So I set to making a tinned tomato-based sauce with minced beef, onions and garlic. Fried up some aubergine slices and prepared some potato slices as well. Then I started to layer them in a ceramic dish, sort of like a lasagne.
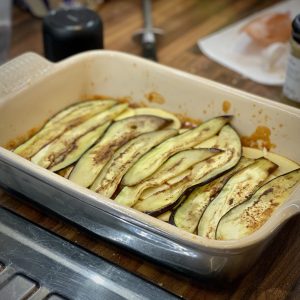
I asked the boyfriend to make his cow’s milk-free white sauce (it’s a little unconventional, but absolutely delicious) and used it to top the Moussaka.
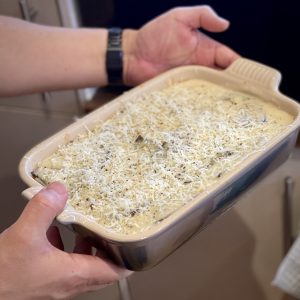
Yes, that is a dusting of pecorino cheese (it’s made from sheep’s milk, so my cow’s milk allergy boyfriend is fine!). And yes, that is the boyfriend, beautifully posing with said moussaka.
Finally, after 40mins in the oven, it was ready!
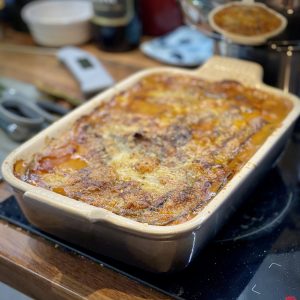
It was delicious, but next time I need to add more flavours and possibly some heat (chilli?). Also, if you have a second aubergine then I would recommend using it as well.
Beef Almost Moussaka
Ingredients
Meat Sauce
- Olive Oil
- 500 g Minced Beef
- 2 Echalion Onions the pointy onions - sliced
- 3 cloves Garlic crushed
- 2 tsp Cumin
- 1 Cinnamon Stick
- 4 Bay Leaves
- 2 tsp Oregano
- 2 tsp Rosemary
- 200 ml Red Wine
- 2 tbsp Tomato Puree
- 400 g Pulped Tomatoes (tinned)
- 1 tbsp Barberries Optional
Layers
- 1 Aubergine Sliced finely
- 6 Charlotte Potatoes Sliced finely
White Sauce
- 80 g Pure Margarine
- 80 g Plain Flour
- Hot Water
- Salt
- Pepper
- 100 g Goats Cheese grated
- 50 g Pecorino Cheese grated
Instructions
Meat Sauce
- Gently fry the onions and garlic in oil until the onions are translucent.
- Add the minced beef and continue to fry until the meat is cooked.
- Add cumin and tomato puree and stir until well combined and fragrant.
- Add red wine and cook until you can't smell the alcohol anymore.
- Add the bay leaves, cinnamon stick, oregano, rosemary and barberries and mix well.
- Pour over the tin of pulped tomatoes, the fill the tin with water and add to the pan.
- Season to taste and simmer until the sauce is thick (stirring occasionally).
Layers
- Meanwhile, fry the slices of aubergine until they have some colour, put aside on a plate.
White Sauce
- Over a medium heat, combine the margarine and flour together to form a paste.
- Add a drop of hot water to bring it together into a ball.
- Keep stirring and continue cooking until the raw flour taste has gone.
- Add hot water a little at a time, stirring well, until you have a thick sauce.
- Add the goat's cheese and melt through.
Cooking the Moussaka
- Preheat the oven to 200°c
- Put half of the meat sauce in a ceramic baking dish.
- Layer on half the sliced potatoes and top with half the aubergine.
- Repeat with the other half of the meat sauce, potatoes and aubergine.
- Top with the white sauce and cover the top with pecorino cheese.
- Bake in the oven for 40mins, or until the potatoes are cooked through and the top is golden brown.
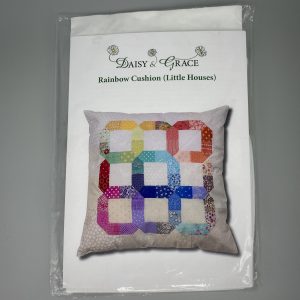
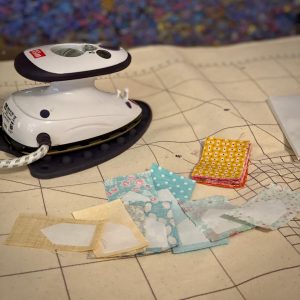
Back at the beginning of March, we went to the Stitch Festival. One of the many things I picked up was a patchwork cushion kit from Daisy and Grace.
I hadn’t done patchworking before, and the idea of English paper piecing was completely new to me. But I thought, how hard can it be? And went off to YouTube to find out how it worked! I watched quite a few videos, but this one was very thorough.
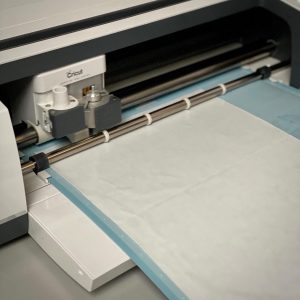
The kit came with clear instructions and all the pieces of fabric were pre-cut, so it was ready to go with hardly any prep work. Step one was to draw round the included acrylic template and cut out lots of little house shapes from freezer paper. So I (very sensibly) recreated the house on Cricut Design Space and cut the houses out of freezer paper on my Cricut Maker.
Then I had to iron the paper houses on the fabric and baste them in place.
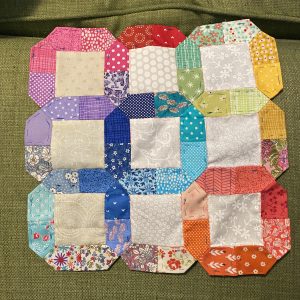
Before finally stitching them all together. This was quite fun and something I worked on each evening in front of the TV. After two weeks I had a finished cushion front.
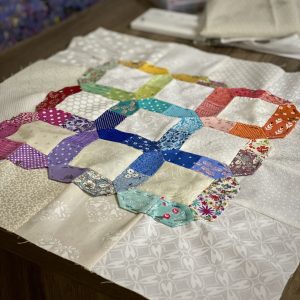
Then I had to stitch together the outer ring of paler coloured fabric.
Before finally digging out my sewing machine to create the back panel, with invisible zip, and finally sew the front and back together.
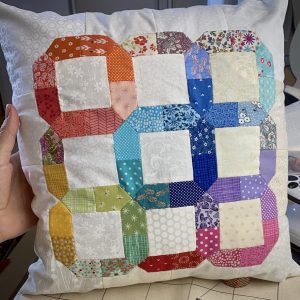
I think it looks really good! I was surprised by how much fun it was, so much so that I decided I wanted more of a challenge. So I’ve decided to make a patchwork quilt. I’ll keep you updated with the progress.
Like everyone else in COVID-19 lockdown, getting basic food is challenging. My teenager is fragile (both emotionally and physically) and so to protect them we are trying not to leave the flat. As my teenager is also autistic, they also have a limited diet (due to sensory issues) and, as if life wasn’t fun already, is also lactose intolerant.
One of the things that is a staple part of my teenager’s diet is basic white bread with a soft, non-floury, crust. But getting bread is difficult. Especially when you can’t get weekly food deliveries and you are trying really hard not to leave the flat (17 days and counting).
So I’ve taken to trying to bake my own bread. The first one I made didn’t work, it “tasted weird”. But the second one got a thumbs up. So here is my recipe for the most basic of white bread. With a (hopefully) soft crust and absolutely no floury top!
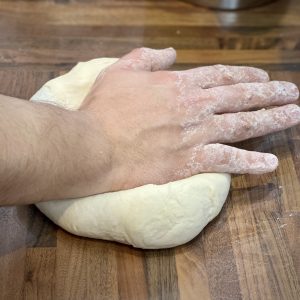
It helps to have an (optional) boyfriend on hand, who really enjoys kneading!
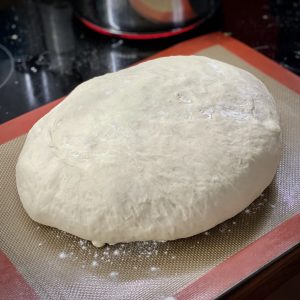
The bread is simply strong flour, salt, sugar, yeast and water (specific quantities below) and a lot of patience and time – something I seem to have a lot of at the moment.
After your ingredients are mixed well and you have a dough, you need to knead it. This works the gluten in the bread making it soft, warm and stretchy. You are aiming for dough you can stretch until it is translucent without breaking (the windowpane test).
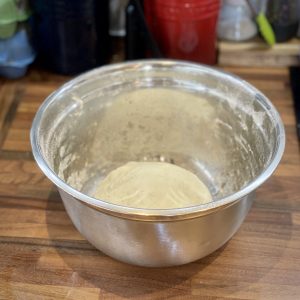
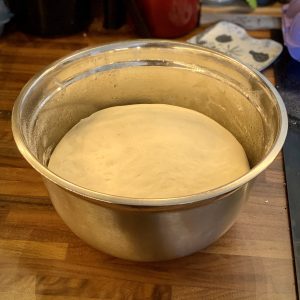
Once it is soft, warm and stretchy, scoop it into a ball and place in an oiled bowl. Cover with a tea towel and leave for 2 hours to double in size (this is called proving). Don’t do what I did and mix up your proving times and leave it only to prove for 1 hour before working it.
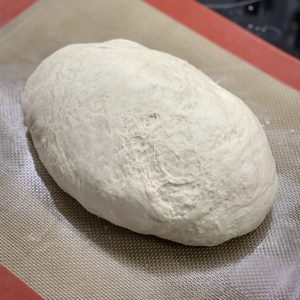
After the first proving, it will have doubled in size. Knock it back, something that is very satisfying, and knead again. For the uninitiated, knocking back is when you gently punch the air out of your dough before scooping the now floppy dough out of the bowl again.
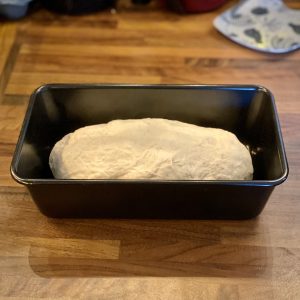
Then roll it into a sausage shape and pop into a loaf tin (you don’t have to use a loaf tin, but I am aiming for as uniform and simple a bread as possible – remember I have a teenager who needs to eat this!). Cover it with the tea towel again and leave for an hour (not 2 hours as I did – sigh!).
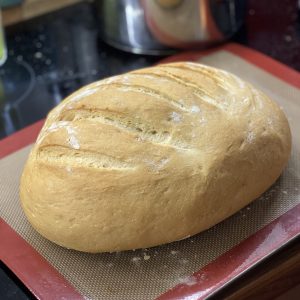
Once again it will have doubled in size. Now you just need to slash the top of the bread with a serrated knife and pop it in the oven.
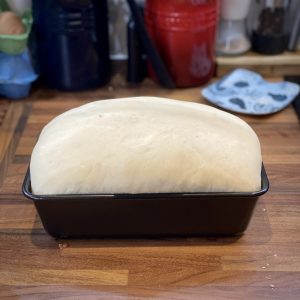
All being well, after 30mins in the oven you’ll have a lovely, incredibly simple-looking, loaf of bread. Due to my ahem tiny proving error, mine collapsed in the oven a bit. But it is still bread and still tastes good.
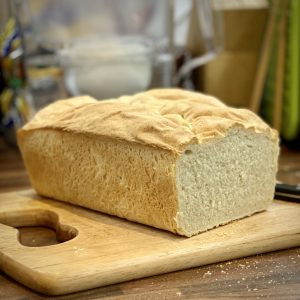
Most importantly, my teenager has just devoured 3 slices of marmite on toast – courtesy of my homemade bread! Success!
Basic White Bread
Ingredients
- 500 g Strong White Bread Flour
- 1 ½ tsp Salt
- 1 tsp Caster Sugar
- 1 sachet Fast Action Yeast 7g
- 300 ml Warm Water
Instructions
- Put the flour, sugar, salt and yeast in a bowl. Make sure the yeast and salt are on opposite sides of the bowl!
- Mix the dry ingredients together.
- Add the warm water (make sure this is not from the hot tap, but is a mix of water from your kettle and cold water, should be between 40°c and 50°c, or warm to the touch).
- Mix the water into the dry ingredients until you have a dough. It might be a bit sticky, but don't worry.
- Turn the dough onto a clean table and knead. Keep kneading until the dough feels warm, soft and not sticky. This might take about 10 mins.
- Lightly oil the bowl and place the dough back in. Cover with a tea towel and leave for 2 hours.
- When the dough has doubled in size, knock it back and turn out onto the table surface again.
- Knead again, but only for a couple of minutes this time. Shape into a sausage, trying to keep a smooth surface on the top. Place into a loaf tin.
- Cover and leave for 1 hour.
- Heat your oven to 190°c.
- When the dough has again doubled in size, slash the top with a serrated knife and put in the oven.
- Bake for 25-30 mins. You can take the bread out of the tin with a clean tea towel and tap the bottom. If it sounds hollow, then it's done.
- Take your bread out of the oven and out of the tin and leave to cool.
- The finished bread keeps well, I keep mine in an old loaf's plastic bag.
It seems like a lifetime ago, but on the 1st March, we went to the Stitch Festival. I remember joking at the time that we would be surrounded by 100’s of people and we should watch out for people who were coughing. Now it doesn’t seem so funny.
But let’s think back to those happier times, so I can share with how wonderful it was!
We’d bought the tickets ages ago, even splashing out for VIP tickets so we could have somewhere nice to go for lunch. This, by the way, is a brilliant idea! Not only did we get a gift bag with all sorts of crafty things in and priority entrance we also had a nice room to escape to when it got really busy. It was more than worth the extra cost! And I will definitely do it again next time. The VIP lounge was lovely and quiet and had comfy chairs, something my fragile back was very grateful for!

We went on the last day of the show, so it was very busy and lots of the stalls were running low on supplies. However, I did manage to find the stalls I wanted to see.
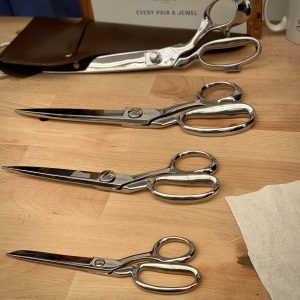
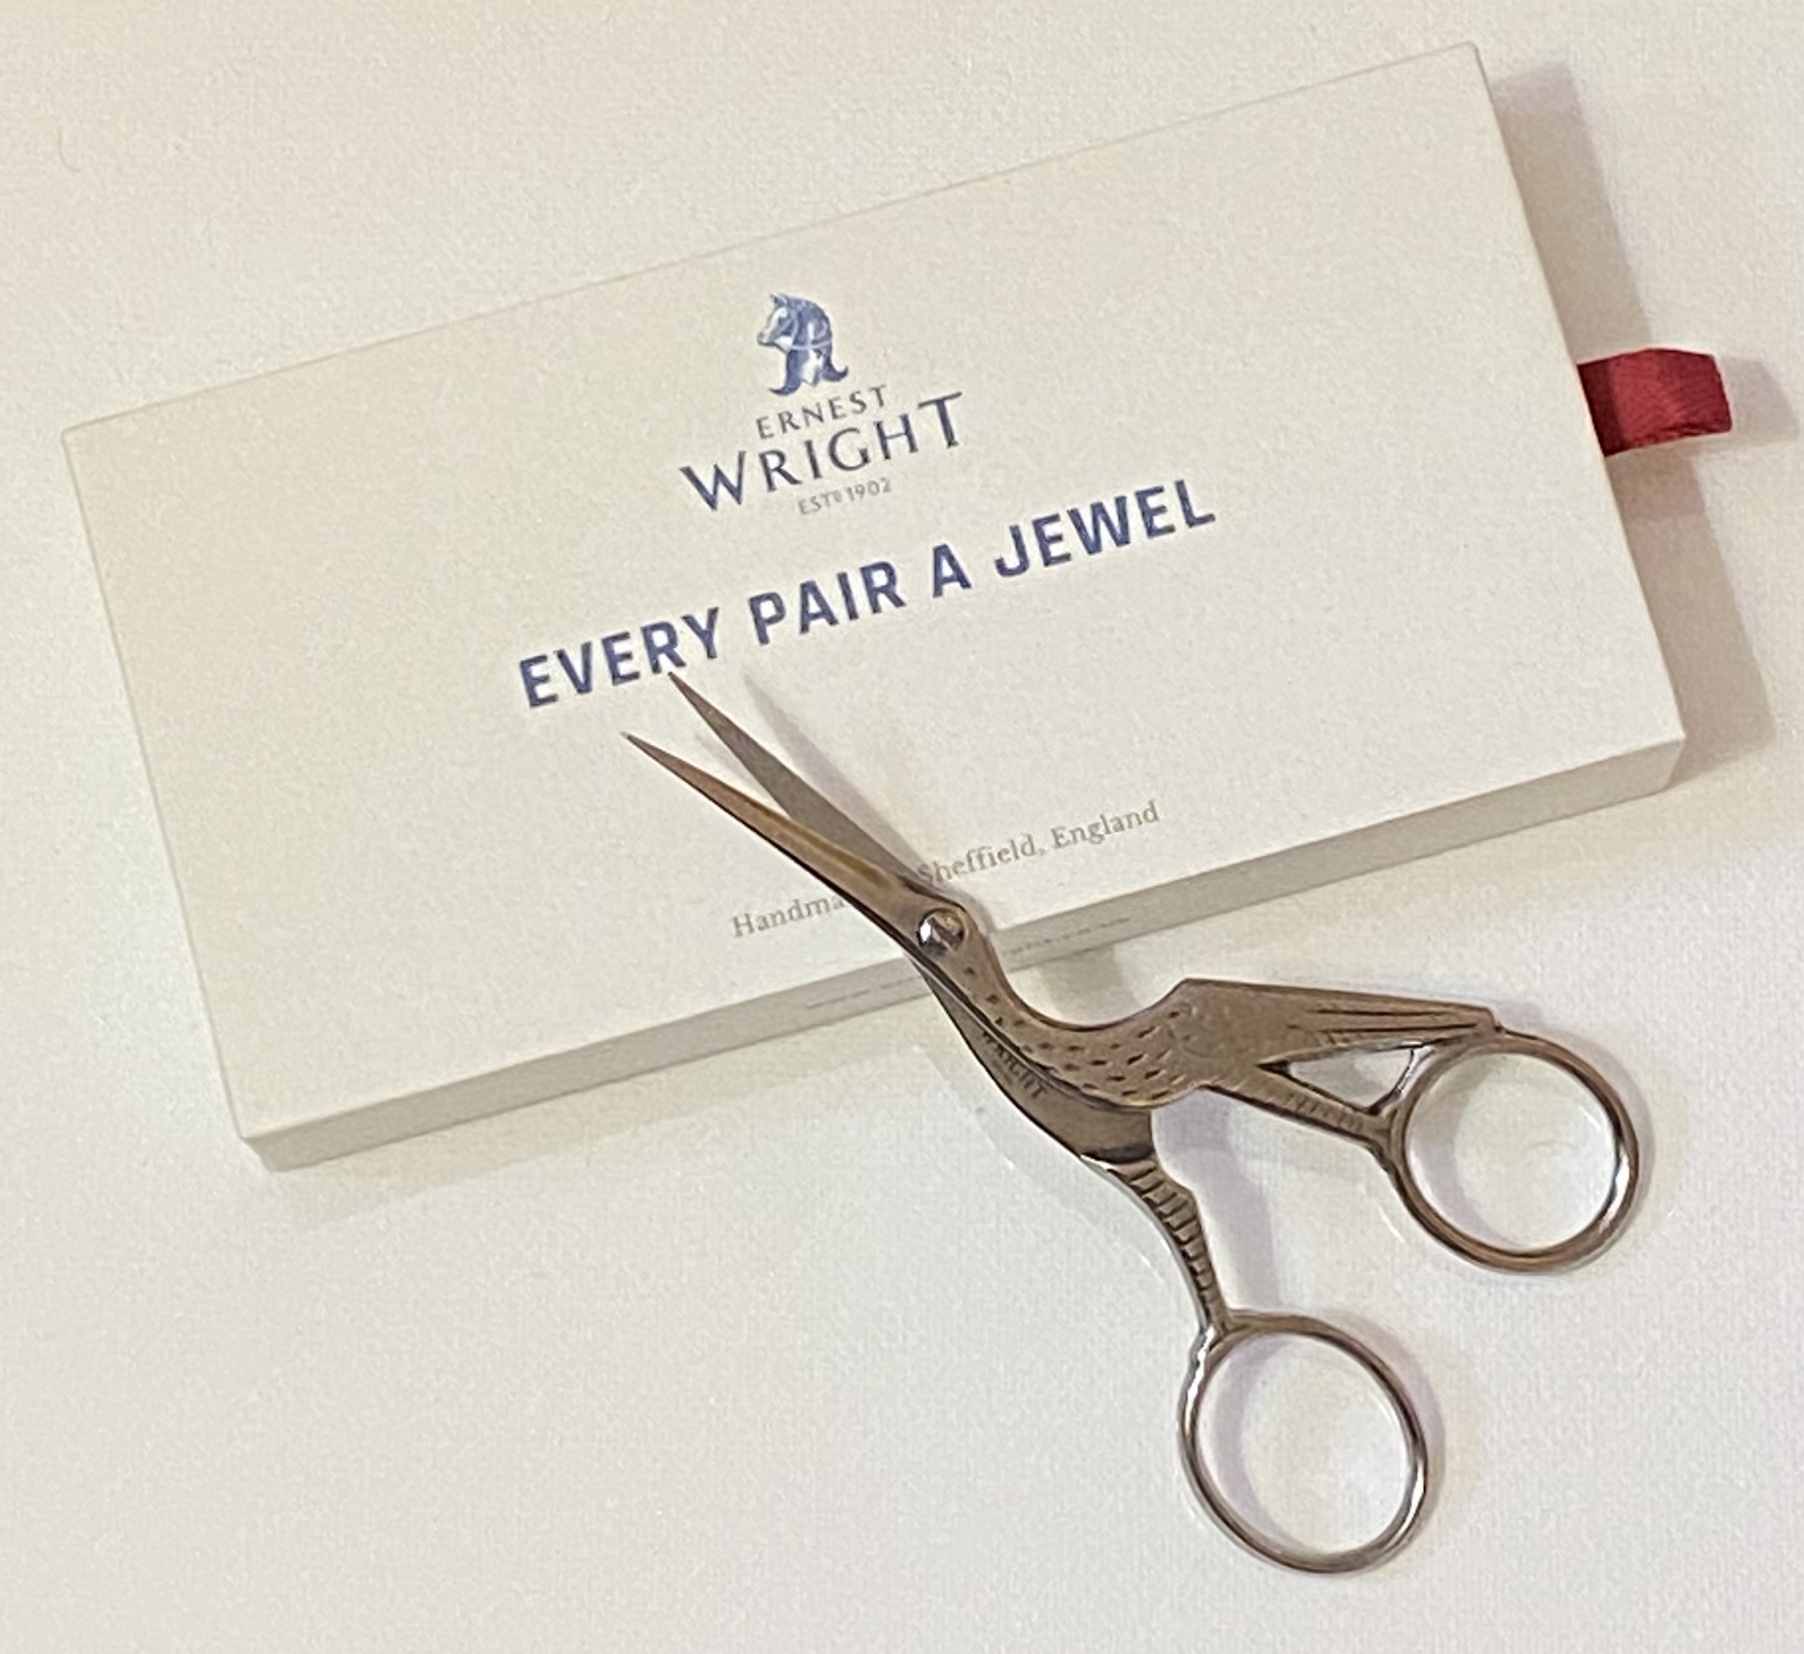
Top of my list was Ernest Wright, as I wanted to look at their dressmaking scissors. The guys running the stall were very knowledgeable (and hilarious). My boyfriend spent an enjoyable time chatting manufacturing and F1 with them. Meanwhile, I checked out the dressmaking scissors. I can confirm they are as amazing as I’d been led to believe and I bought a pair of 8.25″ dressmaking shears.
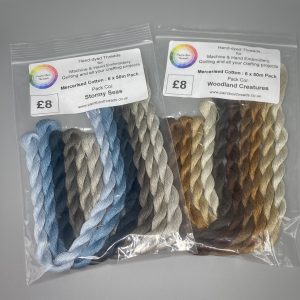
We also stopped by lots of stalls that caught my eye. Like Paintbox Threads who had a gorgeous range of embroidery threads (a set of which has also been purchased, probably now for some quarantine crafting!)

Knowing how easy it is to spend lots of money on things that just end up in a cupboard, I was careful. I had a specific budget and I had planned what I wanted to try and get. Looking back now, I managed to get the materials for quite a few complete projects – perfect for the situation I now find myself in.
A quick summary of the project supplies I picked up (you may see these appearing in future posts):
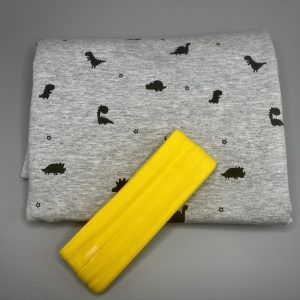
Fabric and stretchy binding to make a t-shirt for a soon to be 2 year old.
A patchwork cushion kit (disclaimer: I hadn’t done any patchwork before, so I didn’t know if I was going to like it – but I did!) from Daisy & Grace.
Embroidery thread from PaintBox Threads (I already have a pattern I want to do with these).
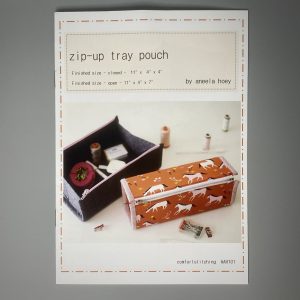
A pencil case pattern from Beyond Measure (it uses Fat Quarters, and I seem to have quite a few of those in the stash).
Will I go back to the Stitch Festival next year? Absolutely yes! If it’s on that is.
But for now, I will continue staying home and staying safe – while getting on with my quarantine crafting.
It’s been a while since I posted. January and February passed by in a blur, it was the busiest term at school. The term when we have to get all the Year 11 pupils to finish the coursework they’ve been working on for a year. The coursework that is worth 50% of their GSCE grade. It was lots of late nights and feeling stressed.
Then March arrived, we all started becoming more and more worried about this new virus that was starting to spread. Before we knew its, pupils and staff were self-isolating and then in a blur school was closed down and we were working from home.
It’s been a very strange spring term. By now I’ve already taught remotely for a week and started my Easter holidays. I also haven’t left my flat for 2 weeks.
My days are now filled with creating tutorials for stressed teachers trying to teach online (for many a new scary place), crafting (I’ll do a post about my quarantine quilt), keeping my autistic, depressed teenager calm and fed (more stressful than you think it’s going to be) and baking basics.
So far in my basic food baking adventure, I have made:
- Bread (white, with a soft crust – very specific instructions from said teenager)
- Pitta Bread (which I will try and post about at some point)
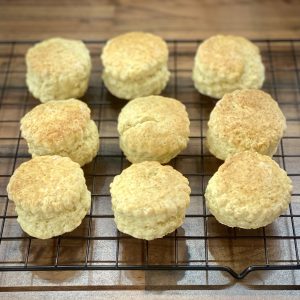
- Scones
Today I thought I would share my very basic completely dairy-free scone recipe.
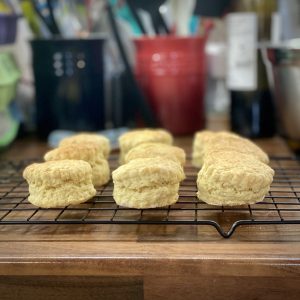
Now the trick to a good scone is to touch it as little as possible and to eat them as soon as possible!
It has 3 basic stages:
- Rub together the flour and fat, using the tips of your fingers until it resembles bread crumbs. If you have naturally hot hands (which I do not!) then you might want to wash them in cold water first, just make sure you dry them really well.
- Mix in cold milk, using a table knife – so you don’t touch it with your warm hands!
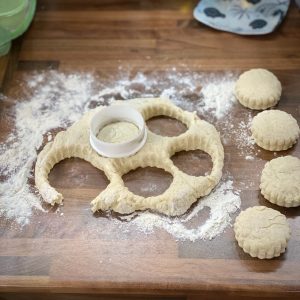
- Very briefly knead it before gently squishing it and then cutting out rounds with a cutter.
By minimising touching and keeping things cool, you should end up with crumbly soft scones.
Back when I taught Food Technology (a very, very long time ago), I used to teach 13 yr olds how to make scones. They would invariably end up squishing the dough around before finally cutting it out and then say the scones didn’t taste nice, as they were dense and chewy. So when I say handle as little as possible, I mean it!
Scones (Dairy-Free)
Ingredients
- 225 g Self Raising Flour
- 1 pinch Salt
- 55 g Stork Margarine
- 25 g Caster Sugar
- 150 ml Oat Milk
Instructions
- Preheat the oven to 220°c (200°c fan)
- Rub the flour, salt and margarine together using the tips of your fingers, until it resembles breadcrumbs.
- Stir in the sugar with a table knife.
- Mix in the oat milk, a little at a time, with the table knife until the dough has come together. It should be a soft dough, not sticky. You'll probably have some leftover milk.
- Turn out the dough onto a lightly floured surface. Gently knead it.
- Gently squish the dough until it forms a slab about 2cm thick. Cut out rounds of dough with a 5cm cutter.
- Gently squish the leftover dough together and repeat, until you have no dough left.
- Places the rounds on a baking tray and brush some leftover milk on the top of each scone.
- Bake in the oven for 10-15mins. Until the scones have risen and are golden brown.
- Take them out of the oven and leave them on a wire rack to cool.
I like to split my scones in half and slather them in raspberry jam when I eat them. I know that a scone purist would be cross with me, but what can I say – I like what I like!
I’ve been sewing clothes for tiny people recently. To be clear, I mean my nephew (age almost 2) and my boyfriend’s friend’s daughter (age 4ish). Once I have some pictures of adorable children wearing homemade clothes, then I’ll write it up as a blog post. But before I gave them these, I wanted to add a label inside, with my logo on – obviously.
So I went hunting for a custom label making company. After a lot of research, which I won’t bore you with (I did fall down the rabbit hole of internet research), I decided on printed ribbon labels from The Creative Artisan Co on Etsy. They were reasonably priced, but most importantly I could get a small batch.
I designed what I wanted on Illustrator and sent it off to Nicky (the shop’s owner) and later that day she sent me a proof showing what my order would look like.

They were exactly what I wanted so I sent back the thumbs up. A few days later they arrived, ready to be sewn into clothing.

I would highly recommend using The Creative Artisan Co, Nicky was incredibly quick at processing my order and the finished product is brilliant!
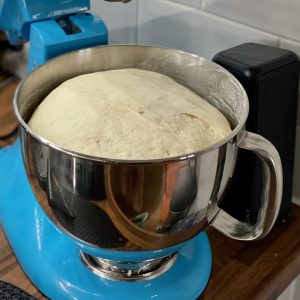
I love bread (to be fair, who doesn’t!), so this morning I thought I would bake a fresh loaf. I have a dough hook for my Kitchen Aid mixer, so I wouldn’t even need to knead it!
I’ve included the recipe below. Top tip for making bread in a Kitchen Aid is not to go above speed 2 on the side, otherwise, your bread starts climbing up and over the bread hook.
The actual making the bread doesn’t take too long, but you need to factor in the proving time.
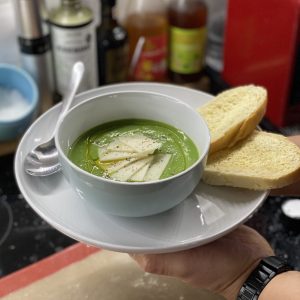
The bread was ready for lunch, just in time to have with some homemade broccoli soup (courtesy of my boyfriend).
Basic Bread (Dairy-Free)
Equipment
- Kitchen Aid Mixer (optional)
Ingredients
- 500 g Strong Bread Flour
- 2 packs Easy Bake Yeast approx 14g)
- 30 g Pure Margarine
- 1 pinch Salt
- 500 ml Tepid Water
Instructions
Making the Dough
- Attach the dough hook to the KitchenAid.
- Put the flour in the Kitchenaid mixing bowl. Put the yeast on one side of the bowl and the salt on the other side of the bowl (otherwise the salt can kill the yeast). Add the margarine.
- Lower the dough hook and set the mixer on speed 2. The ingredients will start mixing together. Don't worry if the margarine doesn't look to be mixing in, it will eventually.
- Add the tepid water a little at a time until the mixture forms a ball of dough. You probably won't need all the water.
- Once you have a ball of dough, let the KitchenAid knead the dough for approximately 4 mins.
- Stop the Kitchen Aid and check the dough. It should be soft and elastic (you can check this by pulling on a piece of dough). If it isn't then let it knead for a bit longer.
Proving the Dough
- Once the dough is soft and elastic, remove the dough hook and cover the bowl with a clean tea towel. Leave the dough for 2 hours to prove.
- After 2 hours the dough should have doubled in size.
- Knockback the dough and take it out of the bowl (you may need to gently scrape the sides). Gently knead the dough and shape it into the loaf shape you want.
- Place the dough on a baking tray lined with baking parchment, you might want to use a Silpat.
- Dust the top lightly with flour and cover with clingfilm. Leave the dough to prove a second time until it has doubled in size again.
Baking the Bread
- Preheat the oven to 200°c and boil a kettle of water
- Add a few slashes to the top of the bread. You need to do this very quickly with a very sharp knife.

- Place the bread in the oven and pour the boiling water into the grill tray at the bottom of the oven (if you don't have a grill tray then put a heatproof bowl of boiling water in the base of the oven.
- Wait 20 mins, then check the bread. It should be golden brown. Turn the loaf over and tap the bottom, if it sounds hollow then it's done. If not then bake for 5 more minutes and then check again.
- Leave to cool and then slice with a sharp serrated knife
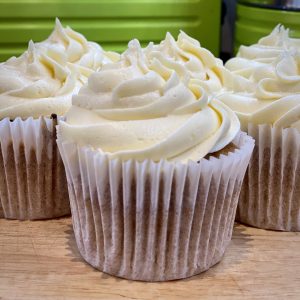
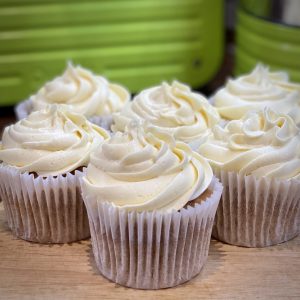
Yesterday I had my birthday party. I rarely go all out for birthdays, but because this was a special one, I hired a pub function room and invited all my friends to come and celebrate with me. Of course, this also meant baking cupcakes! I made the coffee cupcakes again from the previous week, as they were really popular. I also made basic vanilla cupcakes, with 2 colour buttercream icing. This recipe was from the Hummingbird Bakery, and it works really well. I just subbed the butter for Pure Margarine and the milk for Oat Milk.

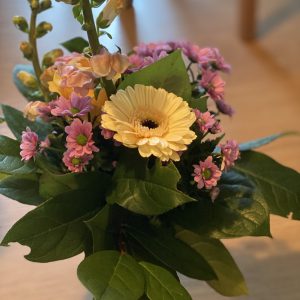
I chose the icing to match the flowers I decorated the room with. I asked my local florist (which I adore, and not just because their name is Doris Florist) to make small bunches to go into some jam jars that I decorated with hessian. They did a brilliant job!
I wanted a third kind of cupcake, one that didn’t have buttercream icing. After thinking (and browsing Pinterest) for a while I decided on a Cherry Bakewell cupcake.
A Cherry Bakewell Tart has four very distinct parts:
- An almond frangipane layer
- A raspberry jam layer
- A thick layer of fondant icing
- Half a cherry on top
It is usually encased in a sweet pastry case, but I didn’t want to include that part.
I started by making an almond cupcake with half flour and half ground almonds. However, when I took it out of the oven it had an odd granulated texture. The cake itself was quite dense and sank in the middle. So I went back to the drawing board!
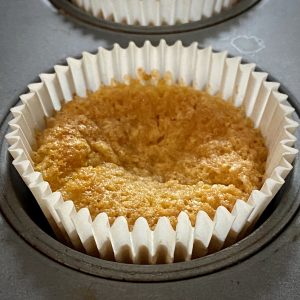
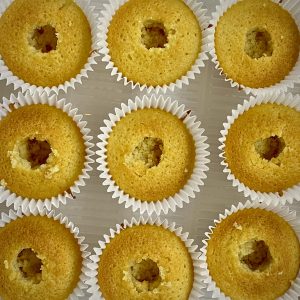
The next batch I made were basic cupcakes with almond extract for the flavouring. This worked perfectly. They were light and fluffy with a satisfying almond taste and smell. Once they were cool, I used a cupcake corer to remove the middle from each cake.
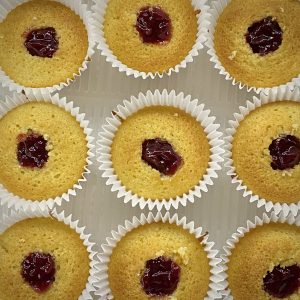
I then filled the holes with raspberry jam, I didn’t want the jam to be too sweet (the cake with icing was going to be overwhelmingly sweet!), so I bought some Bonne Mamon Raspberry Intense, which said it had more fruit and less sugar. I can confirm that it does! It is delicious, not too sweet and packed with raspberries.
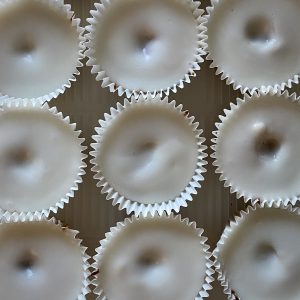
I then mixed up icing sugar with lemon juice, to get that thick fondant icing that has a satisfying tart aftertaste. With hindsight, I realised that I should have saved the cupcake cores, so I could cover the jam centres before icing. Once the icing set there was a definite sinkhole where the jam was.
Fortunately, I still had to add the cherries, so I made sure to cover each sinkhole with half a glace cherry. Again, I wanted to try and avoid that overly saccharine taste with the cherry, so I chose the Waitrose Cook’s Ingredients ones, as they were slightly less sweet than the bright red version.
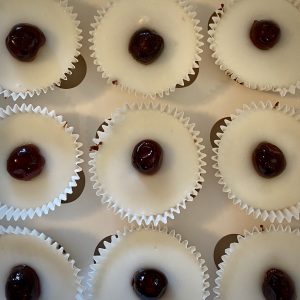
I asked my guests to let me know what they thought and the feedback was very good. Everyone agreed that it tasted very similar to a Bakewell Tart. I’ve already been asked to make them again.
Cherry Bakewell Cupcakes (Dairy-Free)
Equipment
- cupcake tin
- Cupcake Corer (or a teaspoon)
Ingredients
Almond Cupcakes
- 120 g Plain Flour
- 140 g Caster Sugar
- 1 ½ tsp Baking Powder
- 40 g Pure Margarine
- 120 ml Oat Milk
- 1 Egg
- 1 tsp Almond Extract
- Raspberry Jame
Icing
- 500 g Icing Sugar
- Lemon Juice
- 6-12 Glace Cherries
Instructions
Cupcakes
- Preheat the oven to 170°c
- Put the flour, sugar, baking powder and margarine in a bowl and mix until you have a breadcrumb-like consistency (this is much easier if you do it with a freestanding mixer).
- Add the egg, milk and almond extract and mix until the mixture is smooth. It will be very liquid, don't worry!
- Divide the mixture into 12 cupcake cakes. This is easier if you decant it into a jug and pour it into the cases.
- Bake in the centre of the oven for 20mins. A cocktail stick should come out clean, if not then give them a few more minutes.
- Leave the cakes on a wire rack to cool.
- When they are cool, use the corer to remove the centre of the cupcakes (or use a teaspoon). Spoon raspberry jam into the hole.
Icing and Decoration
- Put the icing sugar in a large bowl. Add lemon juice 1 tsp at a time mixing well. You are aiming for a thick icing.
- Spoon or pipe the icing over the top of the cakes. Make sure the icing covers the whole of the cake top.
- Leave the icing to fully set, otherwise, your cherry will sink.
- Cut the glace cherries (I cut ⅔ of a cherry because I wanted a more generous cherry on top of the cake).
- Place the cherry on top of the icing.

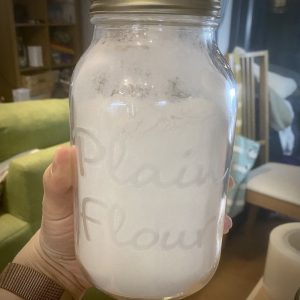
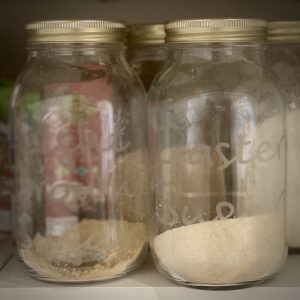
When the new BYO (bring your own) shop opened in the local market I was quite excited to be able to buy my cupboard staples without having to contend with shop packaging. The premise is simple, you bring your own container, they weigh it, you then fill it with whatever you want to purchase and bring it to the container to pay for it. They weigh it again and subtract the original weight from the new weight – so you only pay for what you purchase.
We use the BYO shop to buy sugar, pasta, rice, salt, oil and now laundry detergent.
I’ve been using a set of Kilner jars to hold my dry goods. They are airtight and wash really well. Plus they nest inside my cupboard very nicely! However, the Sharpie written labels rub off really easily.
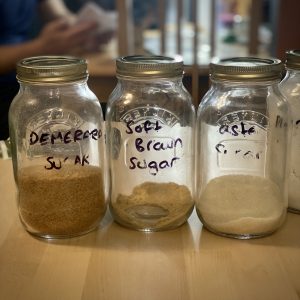
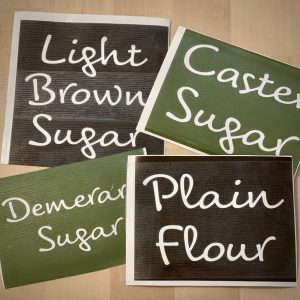
So I decided to make some more permanent labels. I read about using reversed vinyl decals and Armour Etch to etch onto glass, it sounded fun so I thought I would have a go!
I started by making some reverse vinyl decals on my Cricut (well my school’s Cricut – one day I will own my own). A reverse decal is one where the image you want is removed (weeded).
I then cleaned the outside of my glass jars really well with window cleaner and applied the vinyl decal. I made sure it was really well stuck down, especially on the edges of the letters.
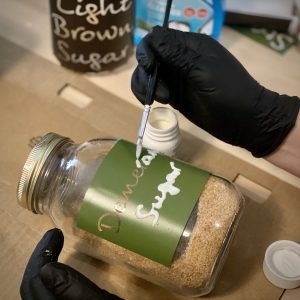
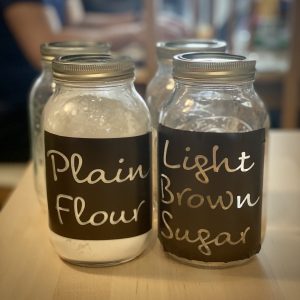 I then put on some protective gloves and after shaking the Armour Etch really well, I used a paintbrush to apply an even reasonably thick layer over the letters. After 15mins I washed off the Armour Etch with cold water and peeled away the vinyl. I was really pleased with how easily the vinyl peeled off the glass (I was concerned that it wouldn’t). After a final wash and dry the Kilner jars were finished!
Ironically, the finished jars are really hard to photograph but they do look very good. The etched glass has a matt/satin look to it, which contrasts with the gloss of the glass.
Although based on the jars in my cupboard, it looks like I need to go to the BYO shop soon.
The final batch of cupcakes for my birthday were Apple & Maple Syrup cupcakes. These turned out to be quite popular (I called them Caramel Apple Cupcakes). They are very easy to make and, once again, I managed to make them dairy-free.
Apple & Maple Syrup Cupcakes
Ingredients
Cake
- 125 g Pure Margarine
- 225 g Soft Brown Sugar
- 300 g Self Raising Flour
- 2 tsp Ground Cinnamon
- 120 ml Maple Syrup
- 4 medium Eggs
- 180 g Grated Apple about 2 Bramley Apples
Frosting
- 175 g Pure Margarine
- 500 g Icing Sugar
- 2 tbsp Maple Syrup
- 2 tbsp Oat Milk
Instructions
Cake
- Preheat the oven to 175°c
- Beat the butter and sugar together until light and fluffy.
- Add an egg, followed by ¼ of the flour and cinnamon and mix well.
- Repeat until all the egg, flour and cinnamon is mixed in.
- Mix in the maple syrup
- Mix in the grated apple.
- Spoon the mixture into cake cases, I found that it filled 18 cupcake cases, each about ⅔ full.
- Bake for 20 mins, or until a cocktail stick comes out clean.
- Leave to cool, while you make the frosting.
Frosting
- Mix the margarine, icing sugar, maple syrup and milk until well combined. It should be quite stiff!
- Spoon into a piping bag and pipe a swirl of frosting onto the cold cupcake.
- If you don't have a piping bag then you can spoon the frosting on.
The finished cupcakes were moist and delicious.
It’s my birthday party next Saturday. I have decided to make the coffee cupcakes again, but also to make plain vanilla ones (with coloured icing) and hopefully Cherry Bakewell cupcakes. So watch this space, I’ll let you know how they go!
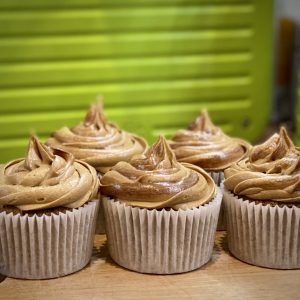
To continue the birthday theme, I also made coffee cupcakes with coffee buttercream icing. I also wanted to make this dairy-free, but this proved to be more challenging because Pure Margerine is quite watery and so I had to adapt the recipe to make a good consistency buttercream. The boyfriend offered to pipe the icing on and added an extra swirl of coffee.
I think they look quite good!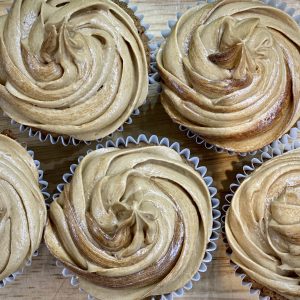
Dairy-Free Coffee Cupcakes
Equipment
- cupcake tin
- cupcake cases
- (optional) piping bag and nozzle
Ingredients
Coffee Cupcakes
- 165 g Pure Margarine
- 165 g Soft Brown Sugar
- 150 g Self Raising Flour
- 3 medium Eggs
- 1 ½ tsp Oat Milk or another dairy-free milk
- 1 pinch Salt
- 2 tbsp Instant Coffee Granules
Coffee Buttercream
- 400 g Icing Sugar
- 100 g Pure Margarine
- 3 tbsp Instant Coffee Granules
- 1 ½ tbsp Boiling Water
Instructions
Coffee Cupcakes
- Preheat the oven to 160°c (140°c fan oven)
- Use a pestle and mortar (or rolling pin) to grind the coffee granules to a reasonably fine powder. Put to one side.
- Cream the margarine and sugar together until pale and fluffy.
- Add ⅓ of the egg and a spoon of flour and mix in. Continue adding the egg and flour until it is all mixed in.
- Add the remaining cupcake ingredients (coffee powder, salt and milk) and mix in.
- Place cupcake cases into a cupcake tin. Then spoon the mixture into the cases, the cases should be ⅔ full.
- Bake in the oven for 20 mins. Check the cakes are cooked through with a cake tester (or cocktail stick).
- Place the cakes on a rack to cool down. Do not ice the cakes when warm! The icing will melt.
Coffee Buttercream
- Mix the coffee granules and boiling water together to make a very thick coffee paste, it will be quite sticky! Leave to cool.
- Beat the icing sugar and margarine together until well mixed and fluffy.
- Add the cooled coffee paste and mix in well.
- You should have quite a firm buttercream, if not then mix in some more icing sugar.
- Pipe the buttercream onto the cupcakes (make sure they are cool). If you want a coffee swirl then add a stripe of the coffee paste into the piping bag before you add the buttercream.
These cupcakes have a lovely strong coffee taste!
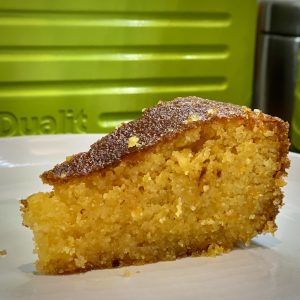
Tomorrow is my birthday. I don’t normally take cakes into work to celebrate, but as it’s my 40th birthday I thought I would this year. I really like polenta cake, but I find the lemon ones a bit too zingy, so I decided to make an orange one instead. I also need it to be dairy-free, so I substitute the butter for Pure Dairy-Free Baking Spread. It does make very good cakes!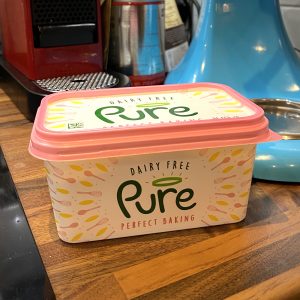
Orange Polenta Cake (Dairy-Free)
Equipment
- 23cm Springform Cake Tin
Ingredients
- 200 g Margarine Dairy-Free
- 200 g Caster Sugar
- 200 g Ground Almonds
- 100 g Fine Polenta or Cornmeal
- 1 1/2 tsp Baking Powder
- 3 Medium Eggs
- 3 Oranges Zest and Juice
- 130 g Icing Sugar
Instructions
- Line the base of the cake tin and grease the sides.
- Preheat the oven to 180°c (Gas Mark 4, 350°f)
- Beat the margarine and sugar together, either in a free-standing mixer or by hand, until light and fluffy.
- Mix the ground almonds, polenta and baking powder in a separate bowl.
- Add some of the almond mixture and beat into the margarine/sugar mixture, followed by beating in 1 egg. Continue alternating until the eggs and almond mixture are all mixed in.
- Finally, beat in the orange zest.
- Put the mixture into the greased cake tin and level and best as possible.
- Bake in the middle of the oven for 40 minutes. The cake may still seem a little wobbly, but a cocktail stick should come out clean.
- Leave the cake in the tin, while you make the syrup.
- Mix the orange juice and icing sugar in a small pan. Bring to a boil (the sugar should be completely dissolved.
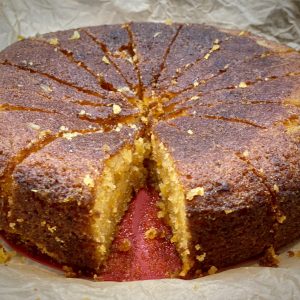
- Use a cocktail stick to make several small holes all over the cake. Spoon over the orange syrup Spread the syrup around, so it sinks into the cake.
- Leave the cake to completely cool in the tin. Then take out and serve.
The finished cake is moist and delicious, and not as harsh as lemon cake can be.
I always thought that I would finally be a “proper grown-up” when I owned a KitchenAid mixer. Then back in 2015 I finally decided to buy one for myself. I love it! I use is for all of my baking.
But my poor KitchenAid sits on the side of my very small kitchen. Due to its proximity to the hob, it’s been getting quite greasy.
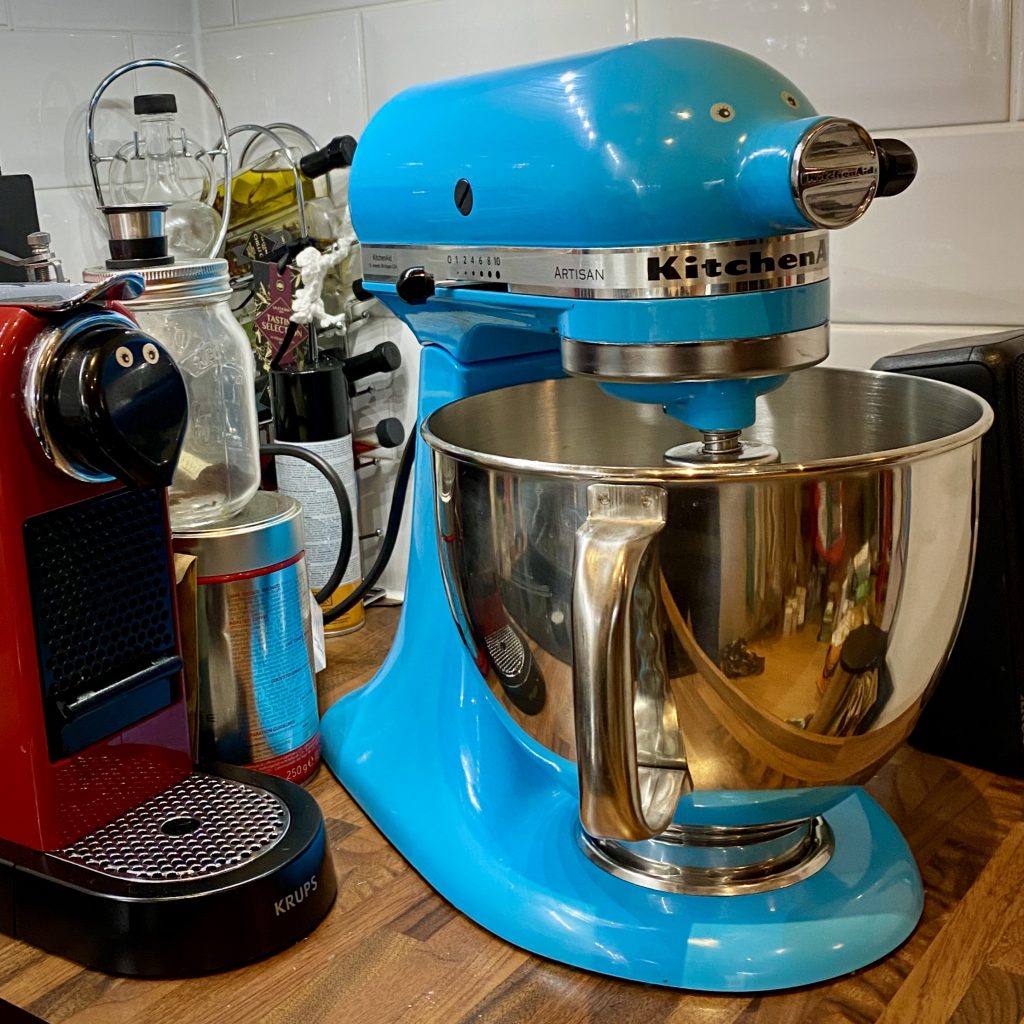
I also wanted to take part in the #makenine challenge this year, which is to challenge yourself to make nine things over the course of 2020. I thought I would start by making a cover for my KitchenAid.
I decided to make a quilted cover, but as I’ve never quilted anything before it was going to be a challenge!
I started by drafting the front of the cover and then cut out the fabric and wadding.
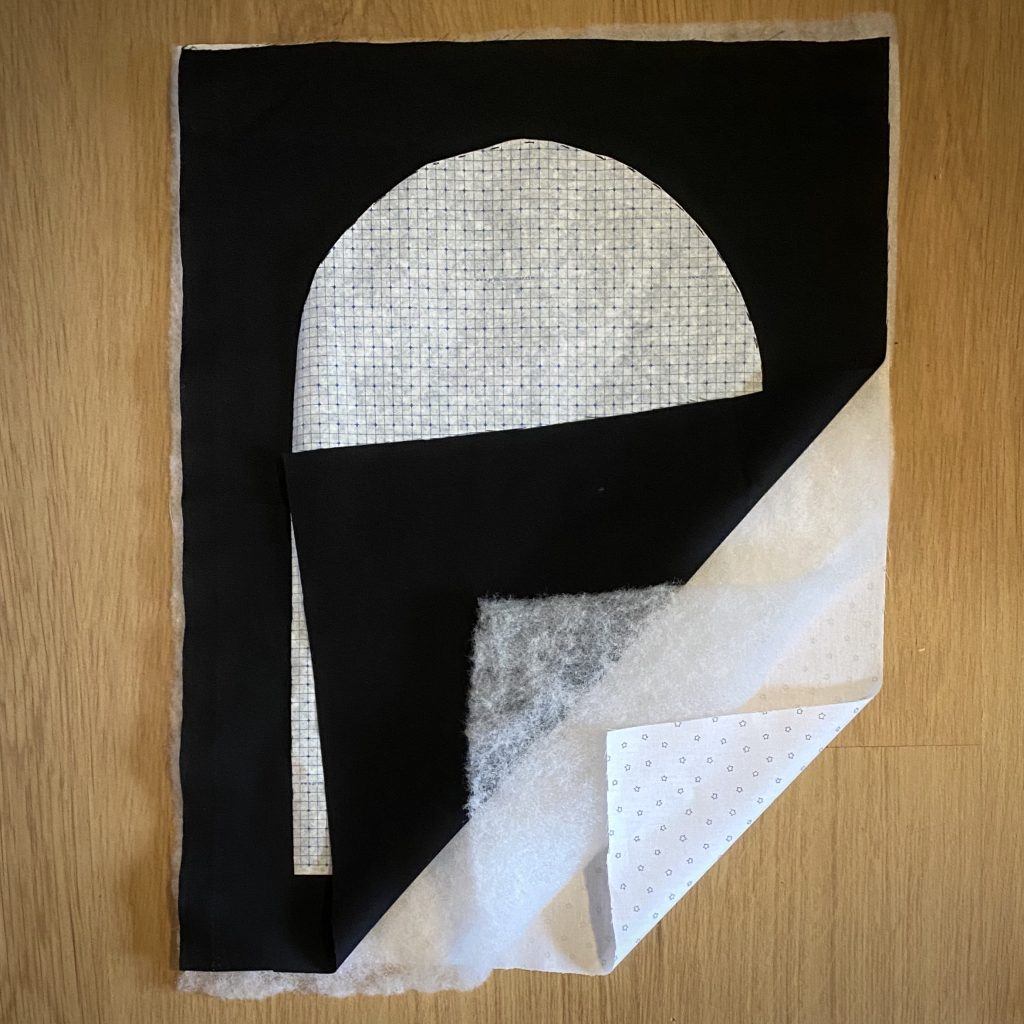
I cut the fabric bigger than the pattern, so that I had space to quilt as I suspected that the fabric would shrink.
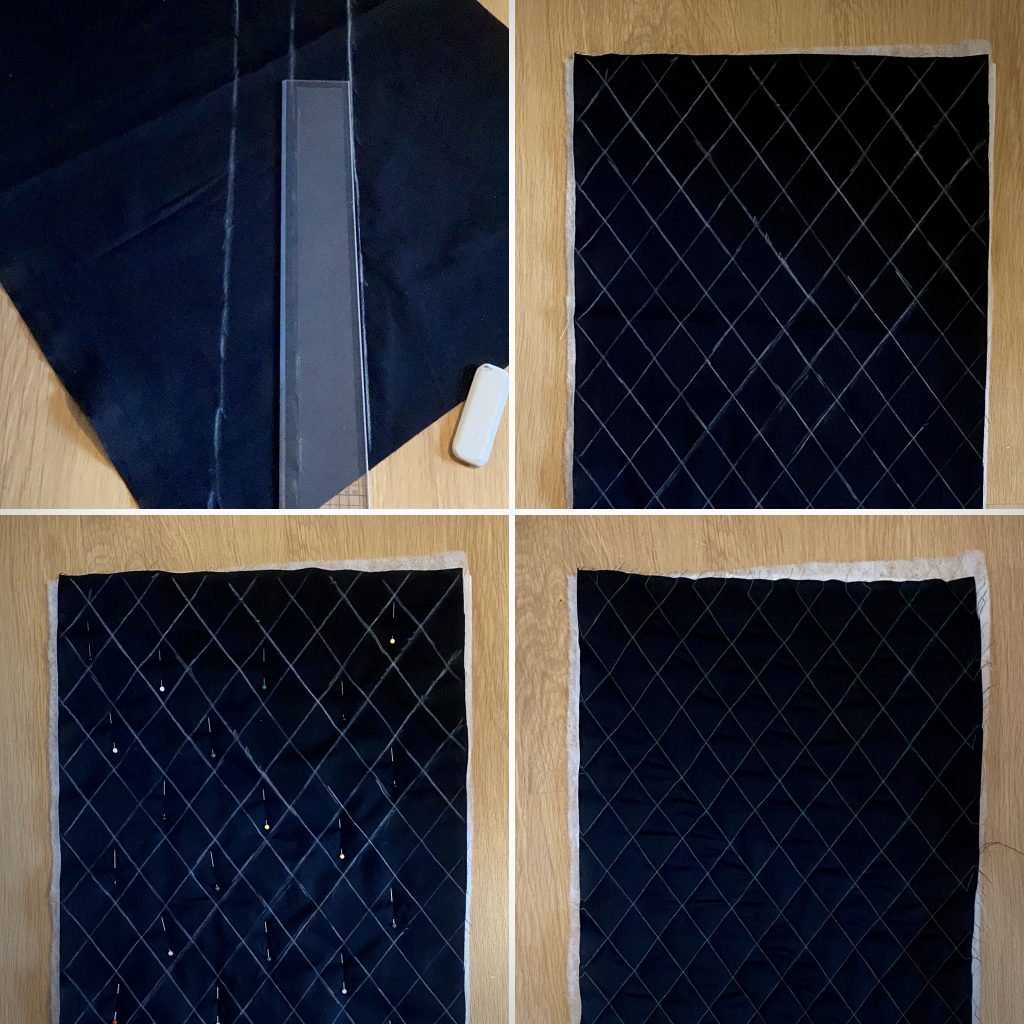
I then used tailors chalk to mark out the quilting lines and pinned the 3 layers together. I then sewed the quilting lines.
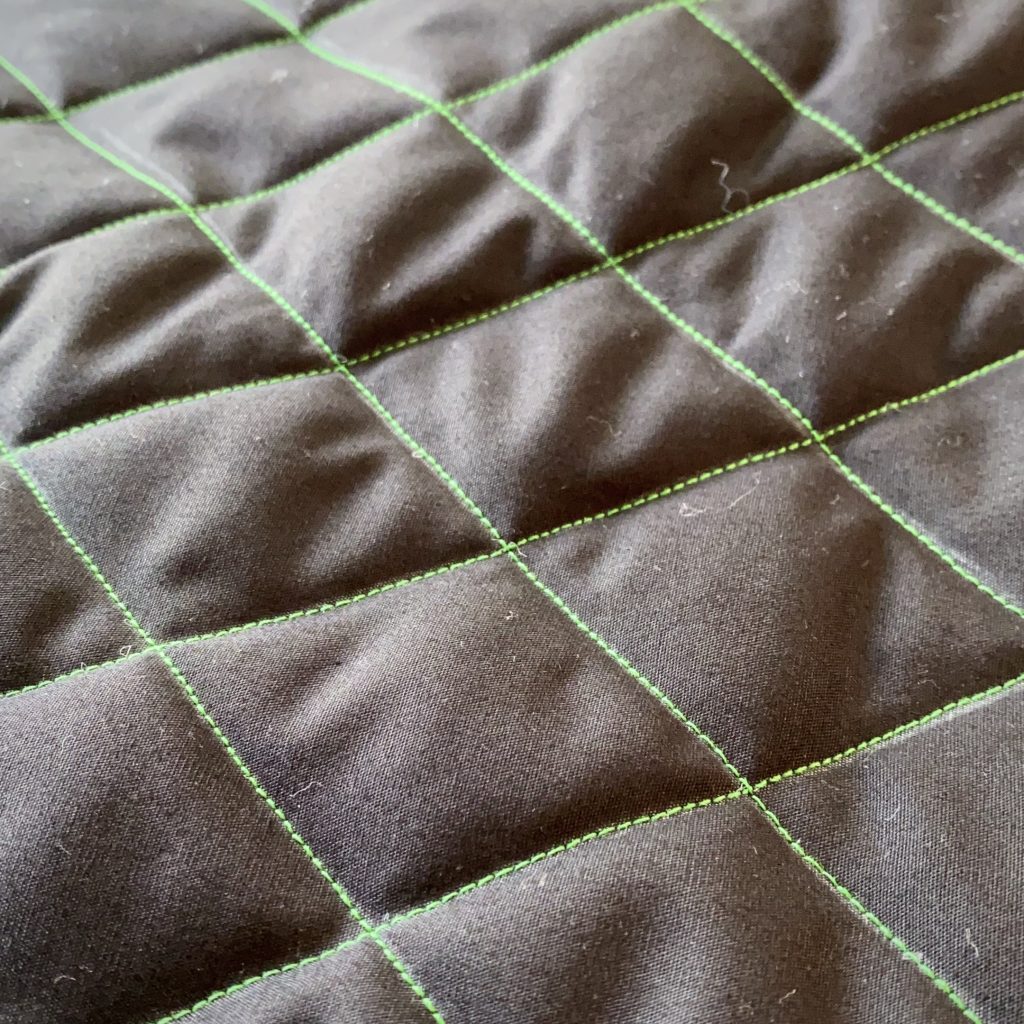
The final quilted piece looked amazing! I really liked the green thread on the black fabric. I repeated this process on the back piece and a rectangular piece that would make the top and sides. After cutting out the shaped pattern pieces I could pin it all together and see the edges.
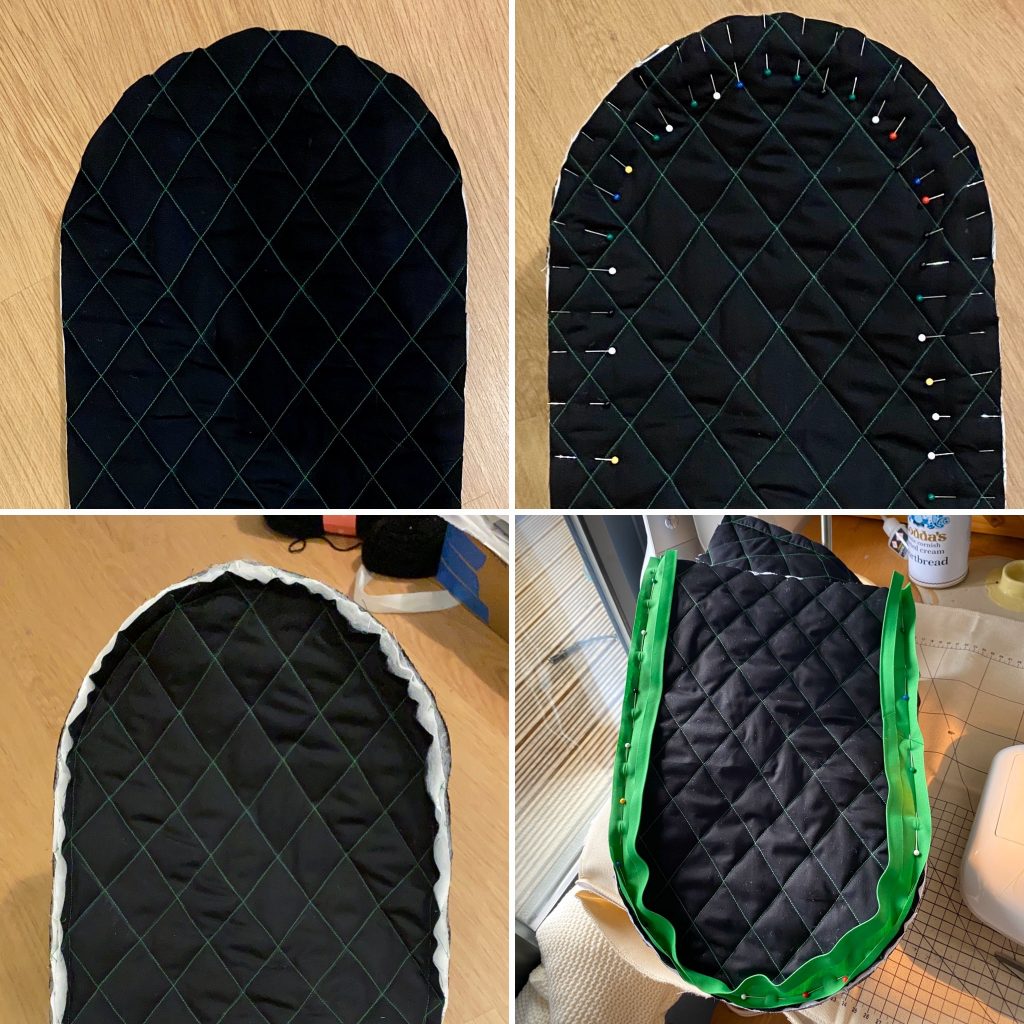
I decided to finish the edges with bias binding, which involved a lot of hand sewing!
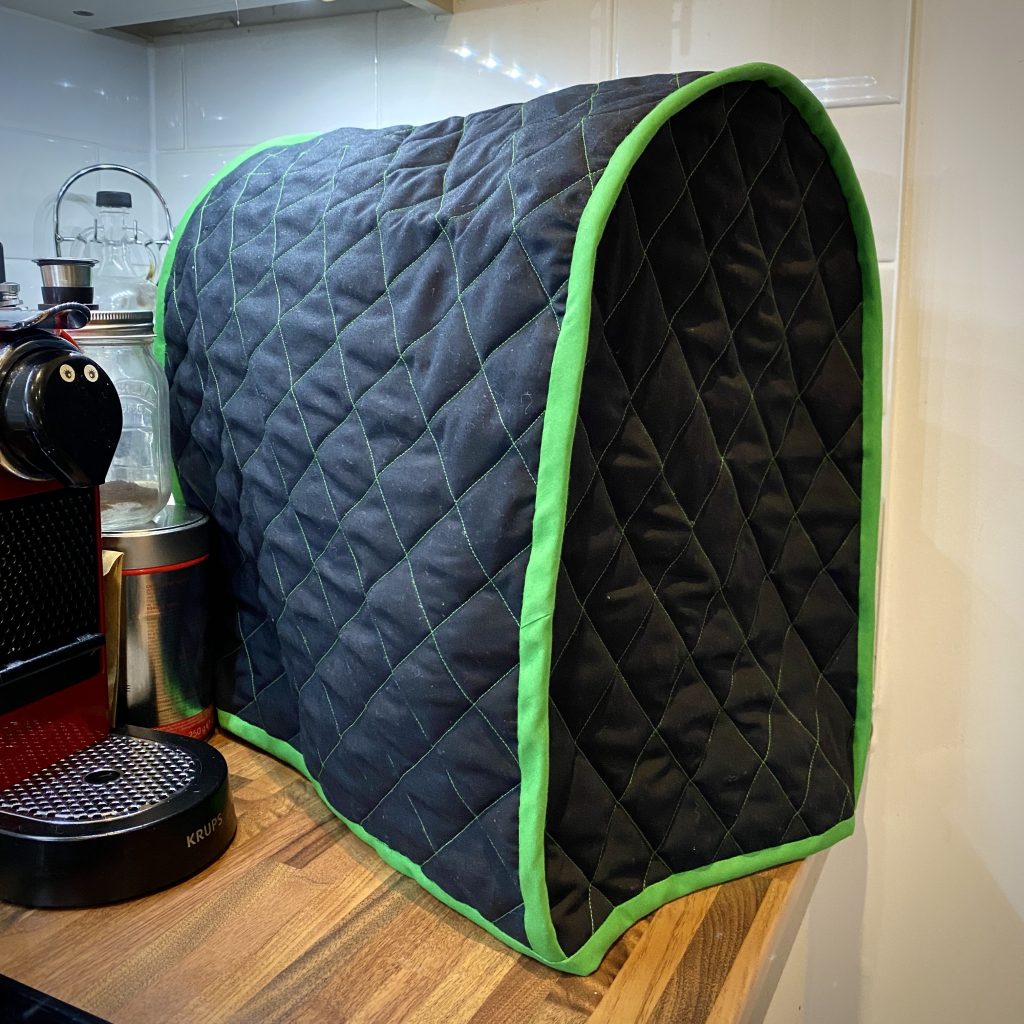
The finished cover fits perfectly! And looks great in my kitchen. One down on the #makenine nine to go.
I recently picked up a copy of the Merchant & Mills Sewing book. It was an impulse purchase (well sort of). I had to go to Waterstones to collect a large pile of books purchased by my teenager in the Boxing Day sale, and I saw this book in the sewing section. I had been eyeing it up online for a while, so it seemed like fate! The book was wrapped in plastic, so I couldn’t flip through it before purchasing – which is always annoying, but they needed to protect the removable pattern pieces at the back.
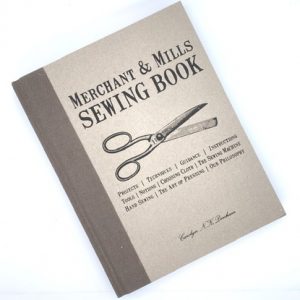
The book is 175 pages long and has a folder on the back cover containing two patterns (more on that later). The first 64 pages are really interesting. They contain beautiful illustrations and key knowledge (mainly for beginners, but more experienced sewists can also learn some things).
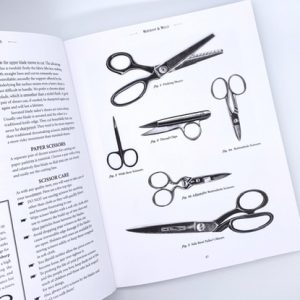
I think I need to increase my scissor collection!
The rest of the books contains a series of basic projects to practice sewing skills. Some of them are quite useful (such as the Tailors Ham, Sleeve Roll and Travel Sewing Kit) but most of them are types of bags or cushions.
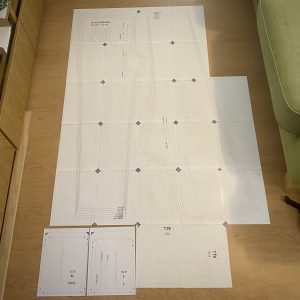
The last two patterns (a Shawl and a Fisherman’s Top) require the pattern pieces in the folder. I was quite annoyed when I saw that the pattern pages need enlarging on a photocopier.

Especially as, with slightly thinner paper, they could have included full-size patterns.
Overall, I think it is an interesting book. I will be referring to the first third of the book a lot as I continue to refine my sewing kit. But I’m not that fussed about the projects.
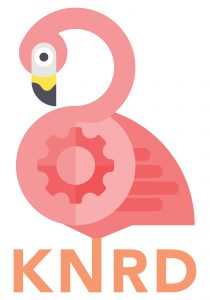
My logo is a flamingo. I didn’t choose this, it was given to me by a group of teenage boys as a thank you for all the work I had done with them. However, despite originally being a bit perplexed at their choice of logo, I have come to understand how it came about and more importantly to love and embrace my branding!
Back in 2017, my child was taking their GCSE exams. This was such a stressful process for them that I had to wait in the school’s reception area in case something happened and I was needed to provide calming support.
This meant several hours of sitting and waiting, in case I was needed (spoiler – I wasn’t, thank goodness!). So I crafted. I chose small projects I could easily put down if needed. And my main one was cross-stitch. I choose a kit from the Geeky Stitching Company on Etsy.
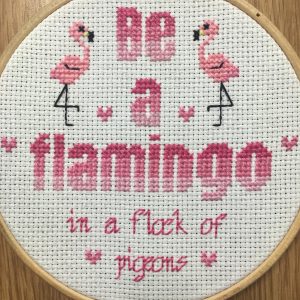
This was the finished cross-stitch, which now hangs in my office at school. At the same time, I was supporting a fledgeling racing team. The boys (the pupils from my school) were building a racing car with a volunteer engineer (now my boyfriend). At the end of the racing season, the boys and my now boyfriend presented me with this logo as a thank you for everything I had done.
Fast forward 2 years and this logo adorns everything. From my school cup (teachers live off caffeine).

My school apron, which I blogged about here.
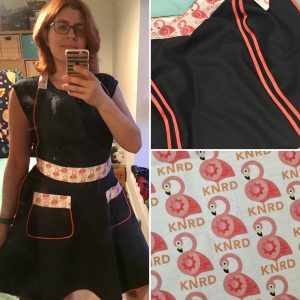
Even the racing cars, which we still race, and which I still run (albeit with significantly more pupils).
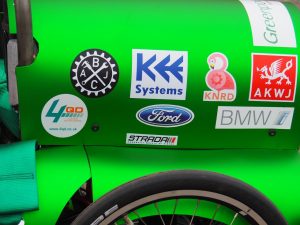
So in case you wondered why my logo is a flamingo (an engineering flamingo, in case you hadn’t spotted the gear on the wing), now you know!
Today is my boyfriend’s birthday. He loves Italian food (well, to be perfectly honest he just loves food). So for his birthday, I wanted to make him tiramisu for dessert. However, he has a serious dairy allergy, so I had to get creative!
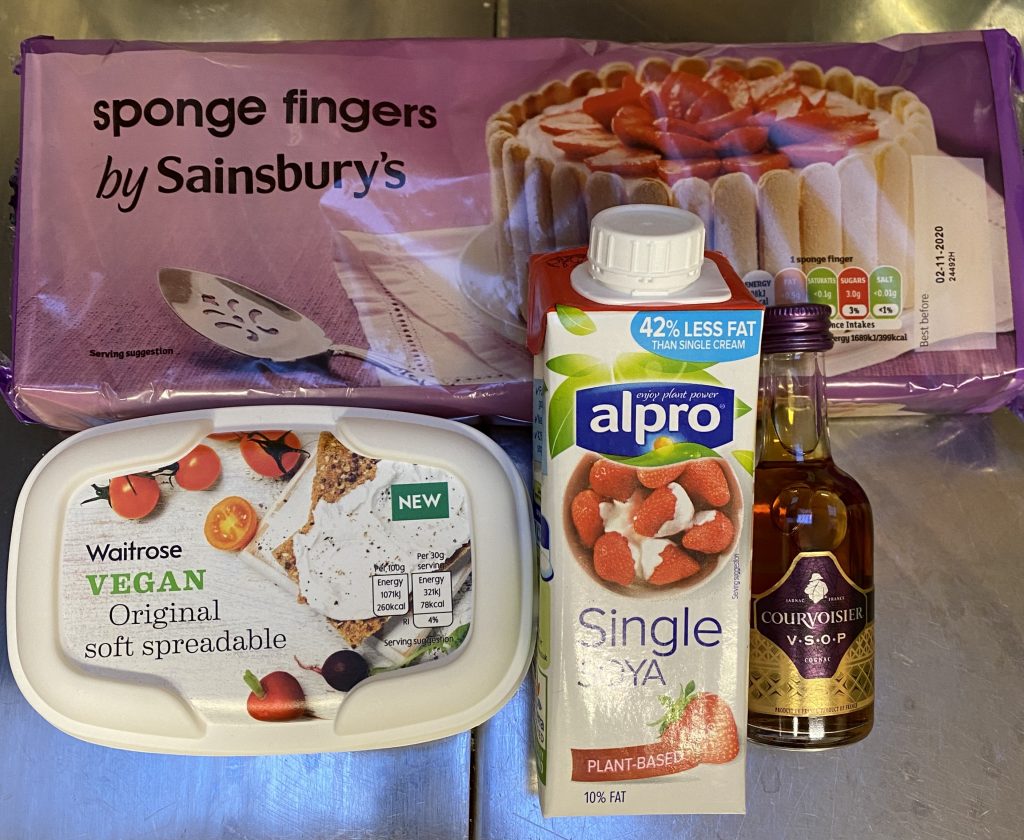
Sainsbury’s sponge fingers are dairy-free (unlike those in most other supermarkets) and I found coconut milk cream cheese and soya cream in Waitrose. He can’t have things that “may contain milk”, so I need to be extra careful.
Dairy-Free Tiramisu
Equipment
- Rectangular Dish
- Whisk
- Shallow Bowl
Ingredients
- 170 g Vegan Cream Cheese
- 60 g Caster Sugar
- 100 ml Soya Cream
- 1 Pack Sponge Fingers
- 1 Cup Strong Coffee cooled
- Mini Bottle Cognac
- 1 Pack Dairy-Free Dark Chocolate or Cocoa Powder
Instructions
- Whip the cream cheese, sugar and soya cream together.
- Add a splash of cognac and mix well.
- In a shallow bowl, pour some strong coffee and add a splash of cognac. Dip a sponge finger in this mixture then put the slightly soggy sponge finger into a Pyrex dish.
- Repeat this until the base of the dish is covered in a layer of sponge fingers (you may need to top up your coffee/cognac mix).
- Spread half of the cream cheese mixture over the sponge finger layer.
- Make another layer of soaked sponge fingers and top with the other half of the cream mixture.
- Grate over a generous layer of chocolate.
- Cover and refrigerate for 2-4 hours.
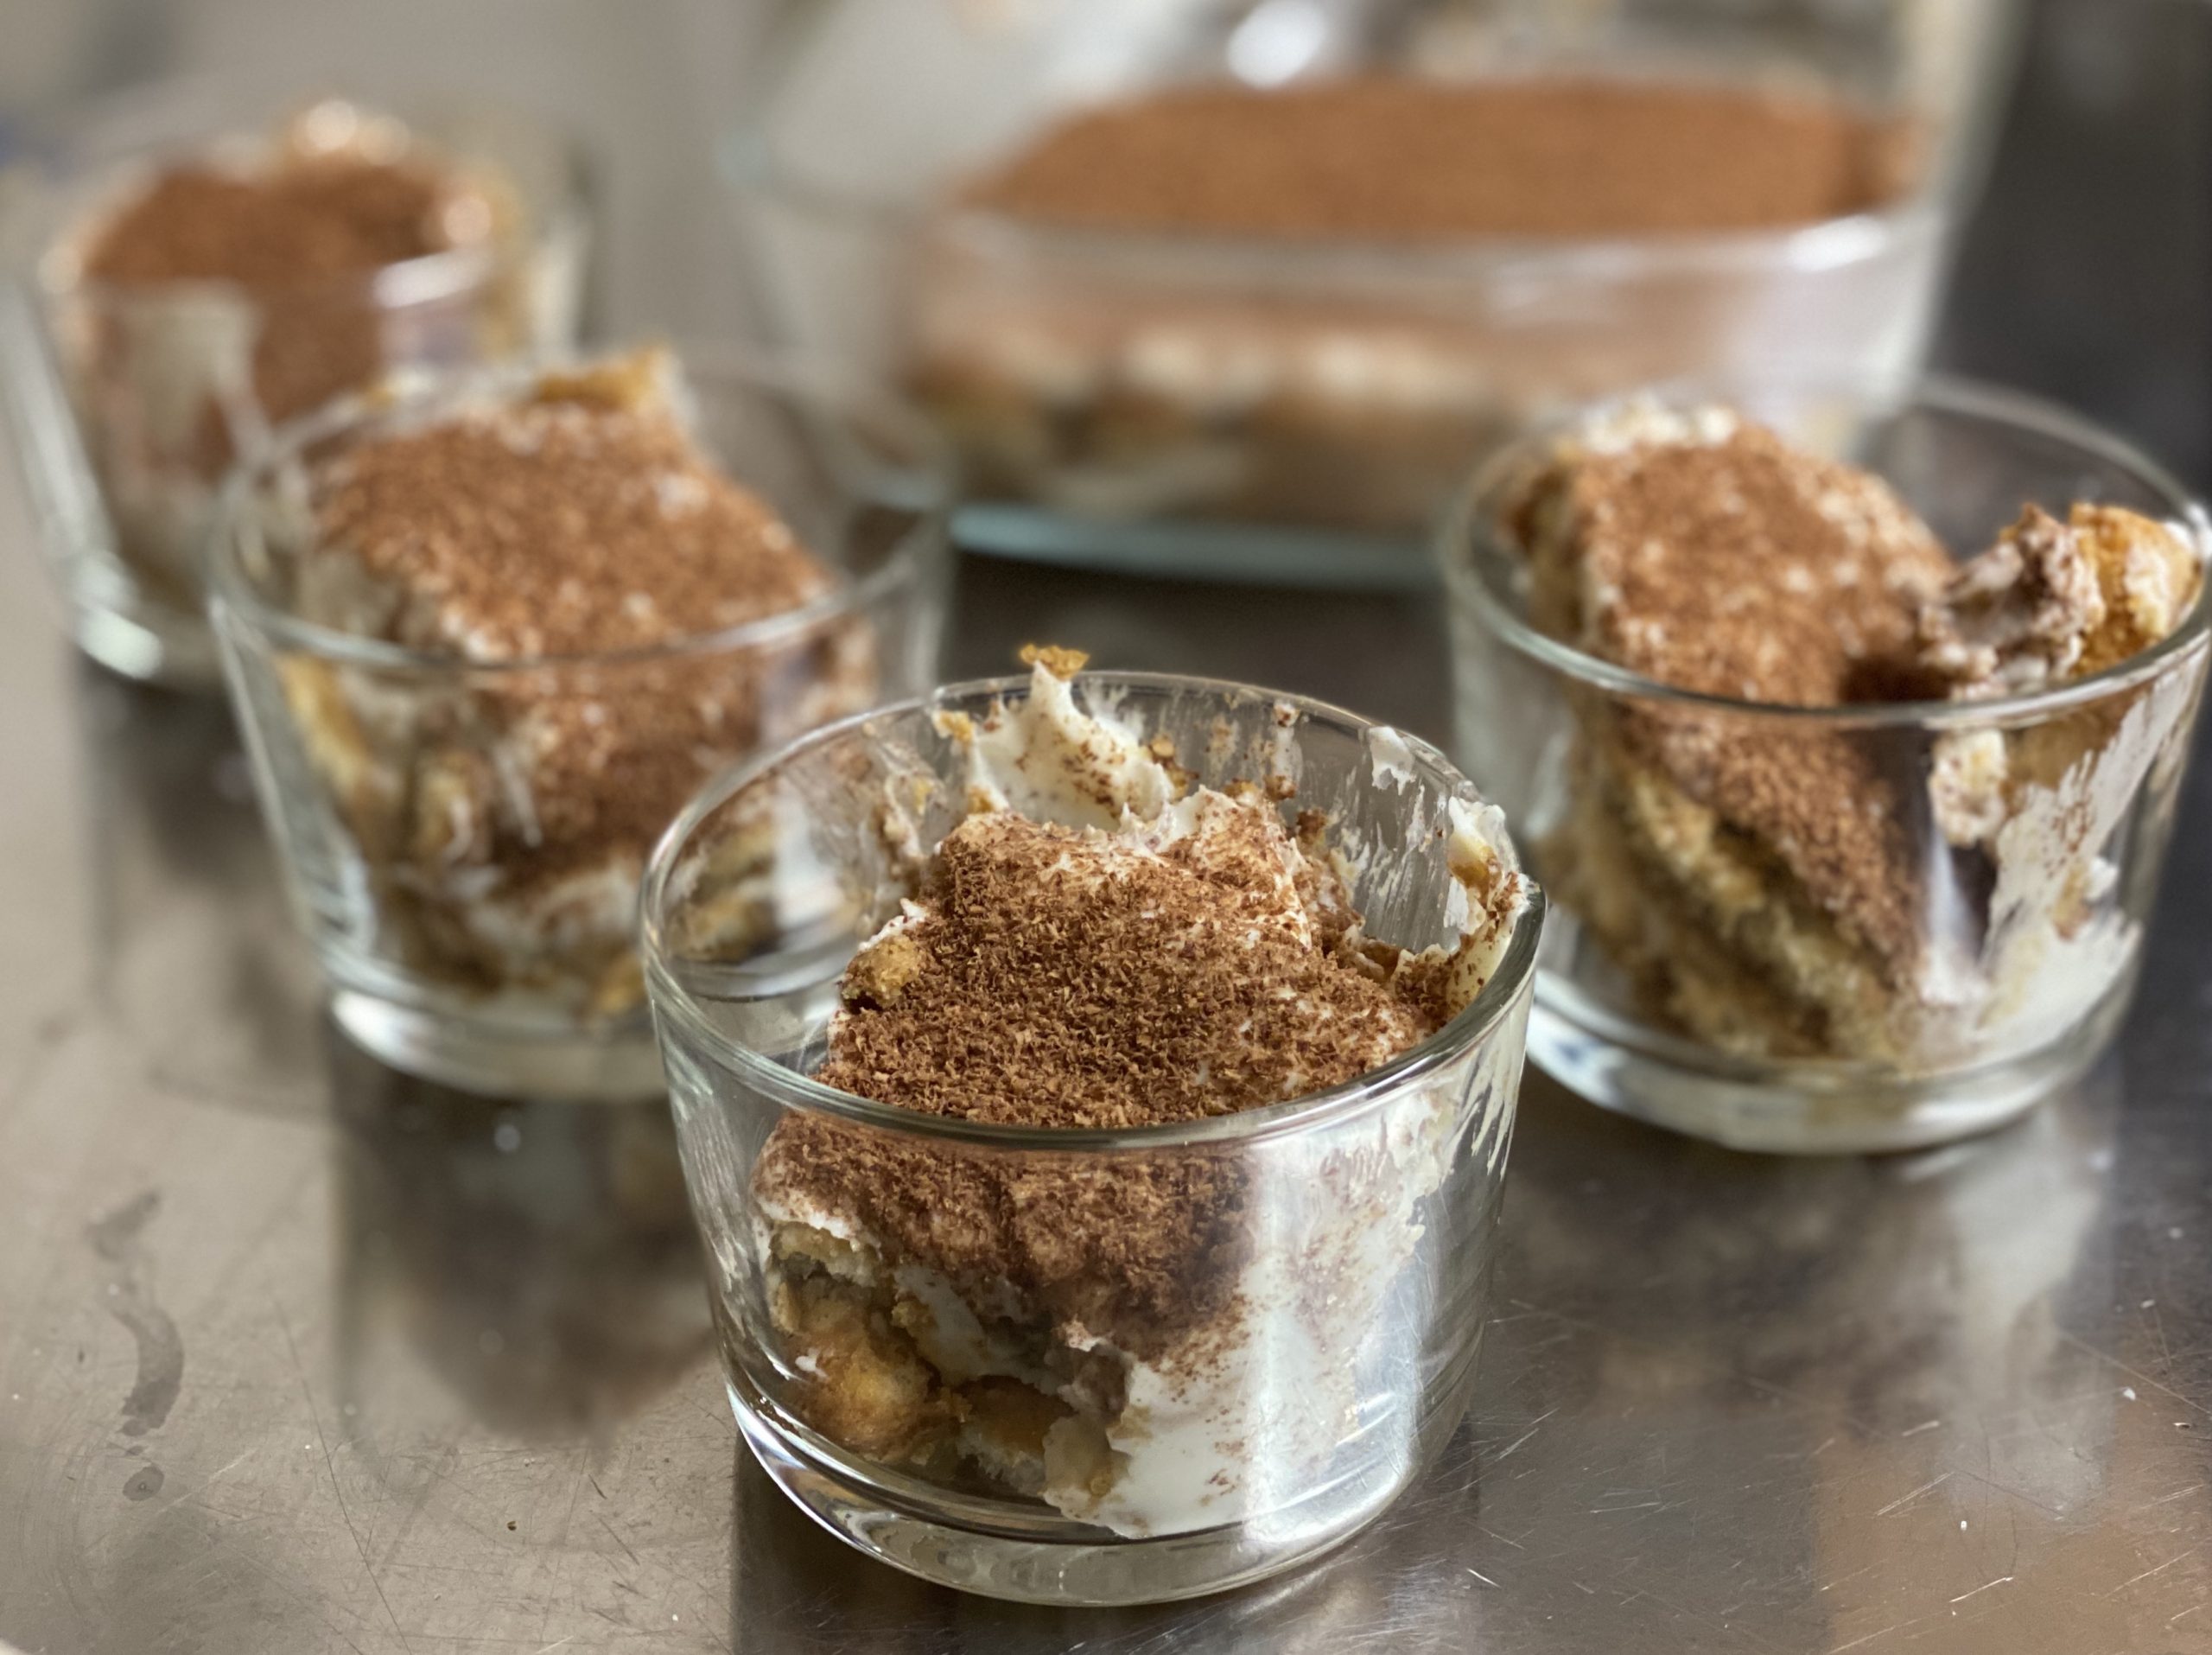
The tiramisu was a huge hit! I wonder what I’ll make for him next year?
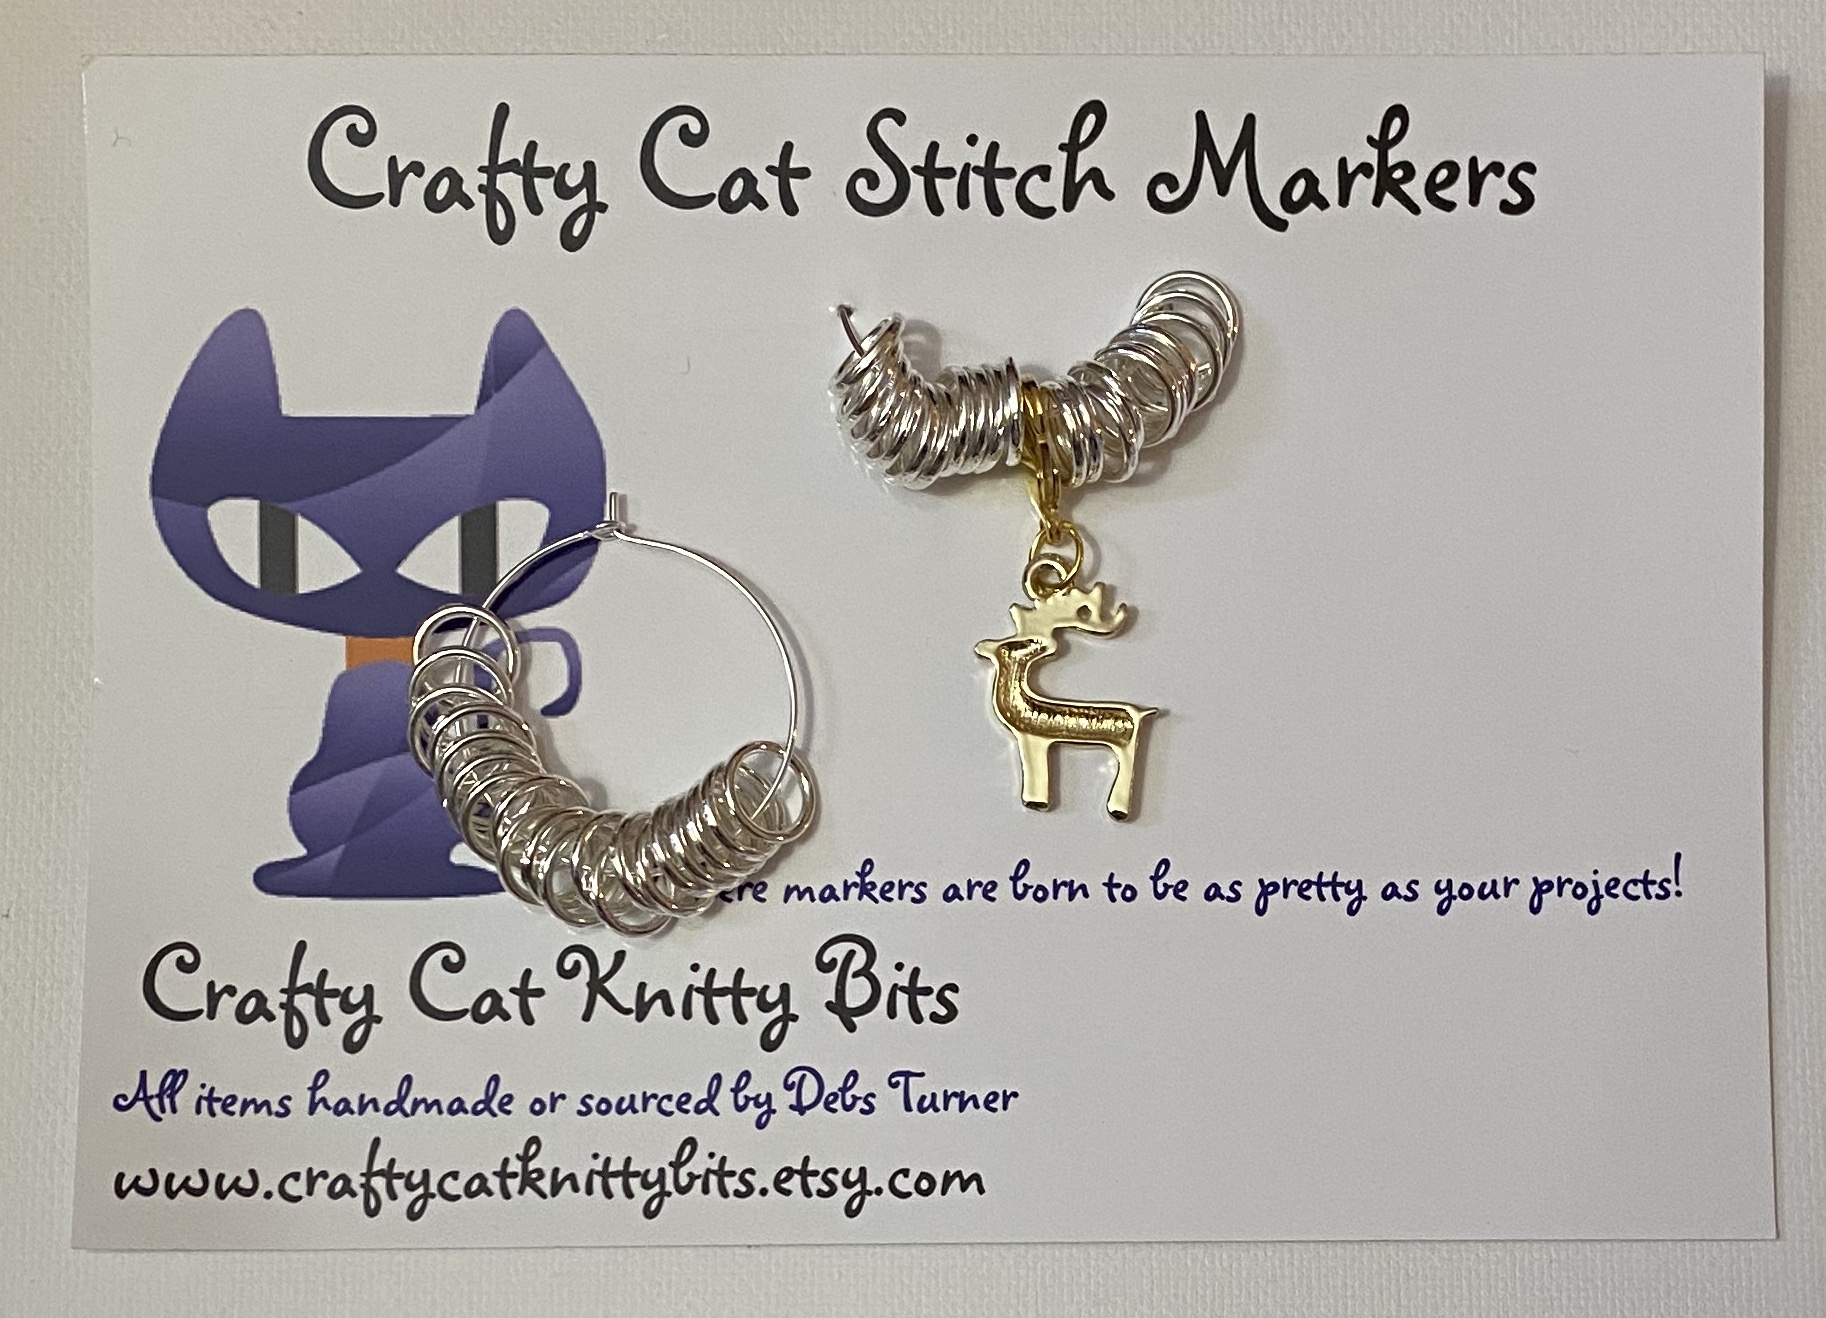
This year I received lots of useful sewing tools and crafty books. I am incredibly thankful to the lovely people in my life who clearly know me so well. (I’ve linked each picture to the shop in case you want to get one).

This year, the boyfriend and I decided to try and use completely compostable wrapping paper and present decorations. We decided to use brown paper to wrap the presents, held together with jute string (which is biodegradable) and I managed to find some that were red and green. If you aren’t humming “brown paper packages tied up with string” by now, then your brain doesn’t go where mine does!
We wanted to make some gift tags for the presents, but we needed to batch produce them. Fortunately, as a Product Design teacher, I have access to a laser cutter.
I purchased a snowflake gift tag design on the Cricut Design Space (it was the end of term and I didn’t have time to design anything myself).
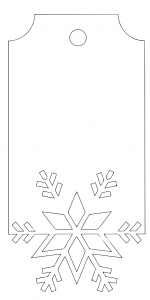
I then converted the file to be readable by the laser cutter software and cut it out of kraft board. I set the machine to cut as many as would fit, so I ended up with 71 gift tags.
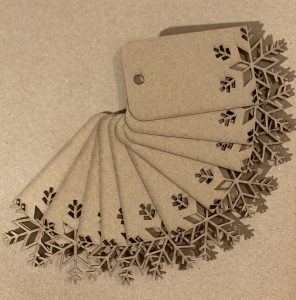
I think they look quite smart!
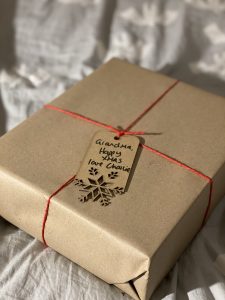
While I’m still getting the hang of wrapping presents without any tape or glue, I think they are coming out quite well. I just hope the recipients like them.
About a month ago I made a Delia Christmas cake (yes, I know, I am obsessed with Delia’s Christmas recipes – but they just work!). If you want to make your own next year, then you can see her recipe here. I need my house to be dairy-free (due to an allergic boyfriend and an intolerant child) so I replace the butter with Pure Dairy Free Spread, or as my mother would say “marg”.
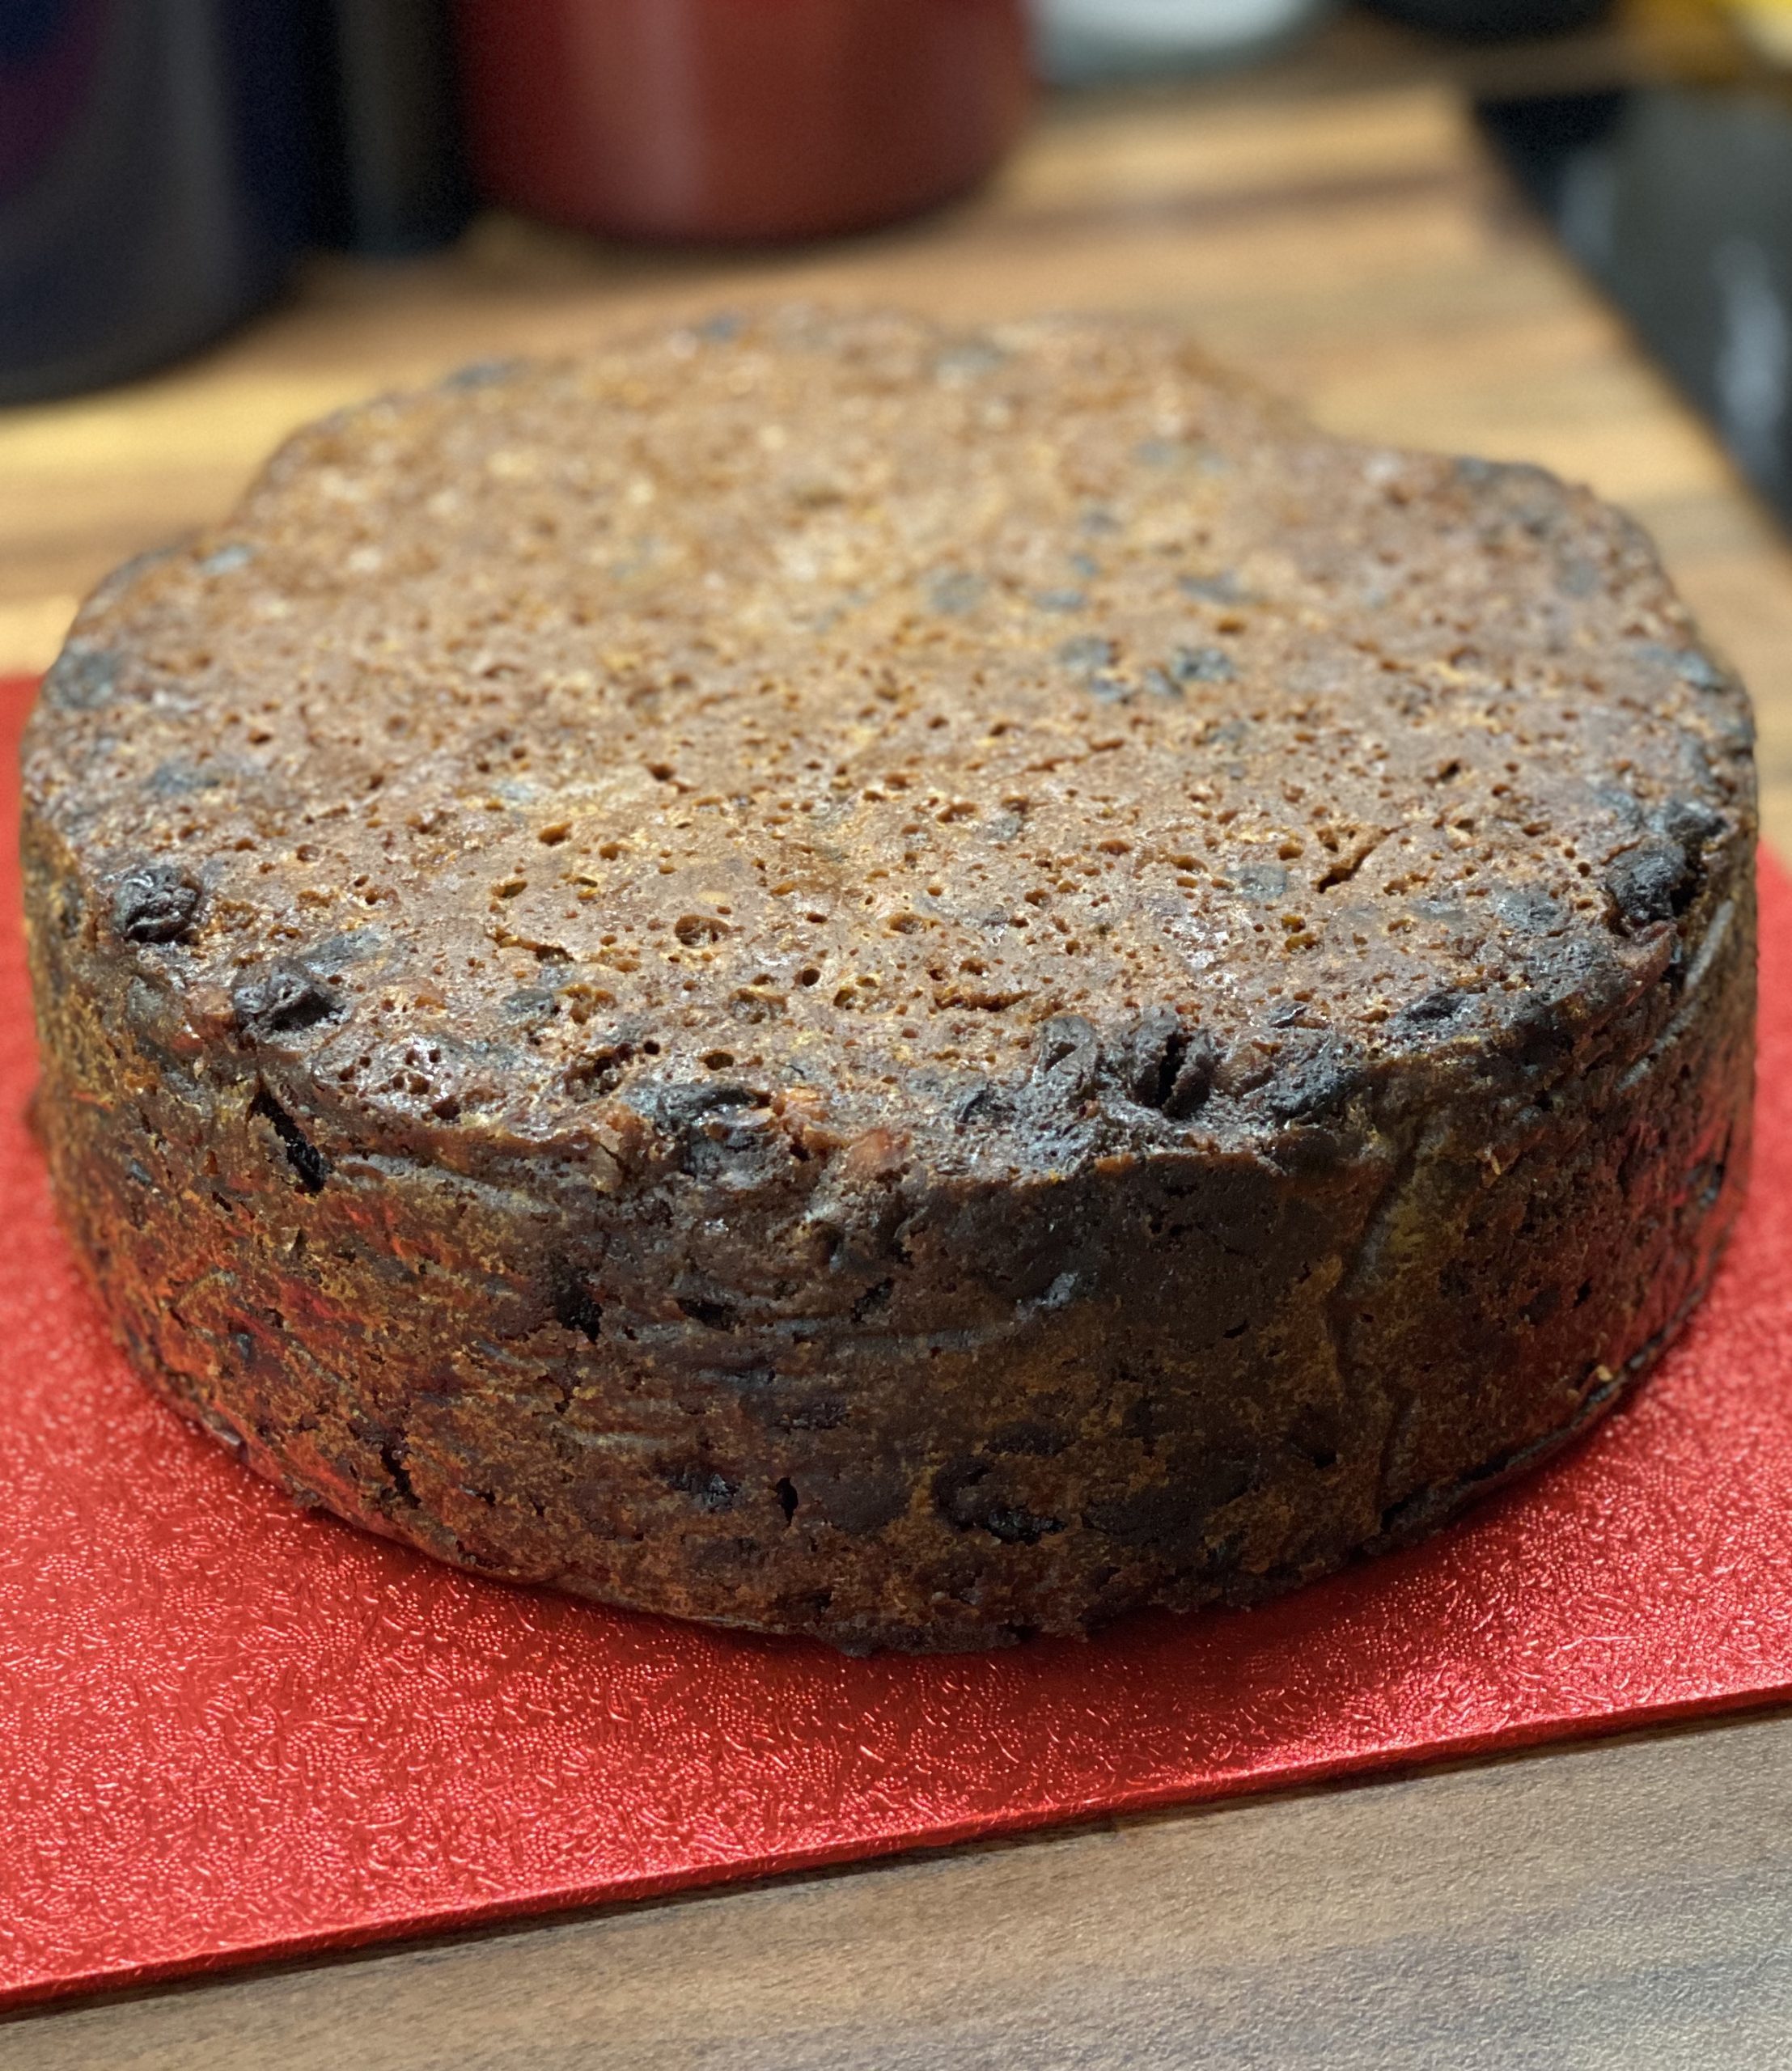
Once a week since making it, I have been feeding the cake with brandy. This involves spooning copious amount of brandy over the top of the cake and let it soak through some carefully placed holes (or in my case, spaces where I stabbed the cake with a knife).
But today was the day to decorate it. I have a tiny kitchen and a limited range of kitchen equipment. So my decorating methods are a little unorthodox. First I gathered my equipment.
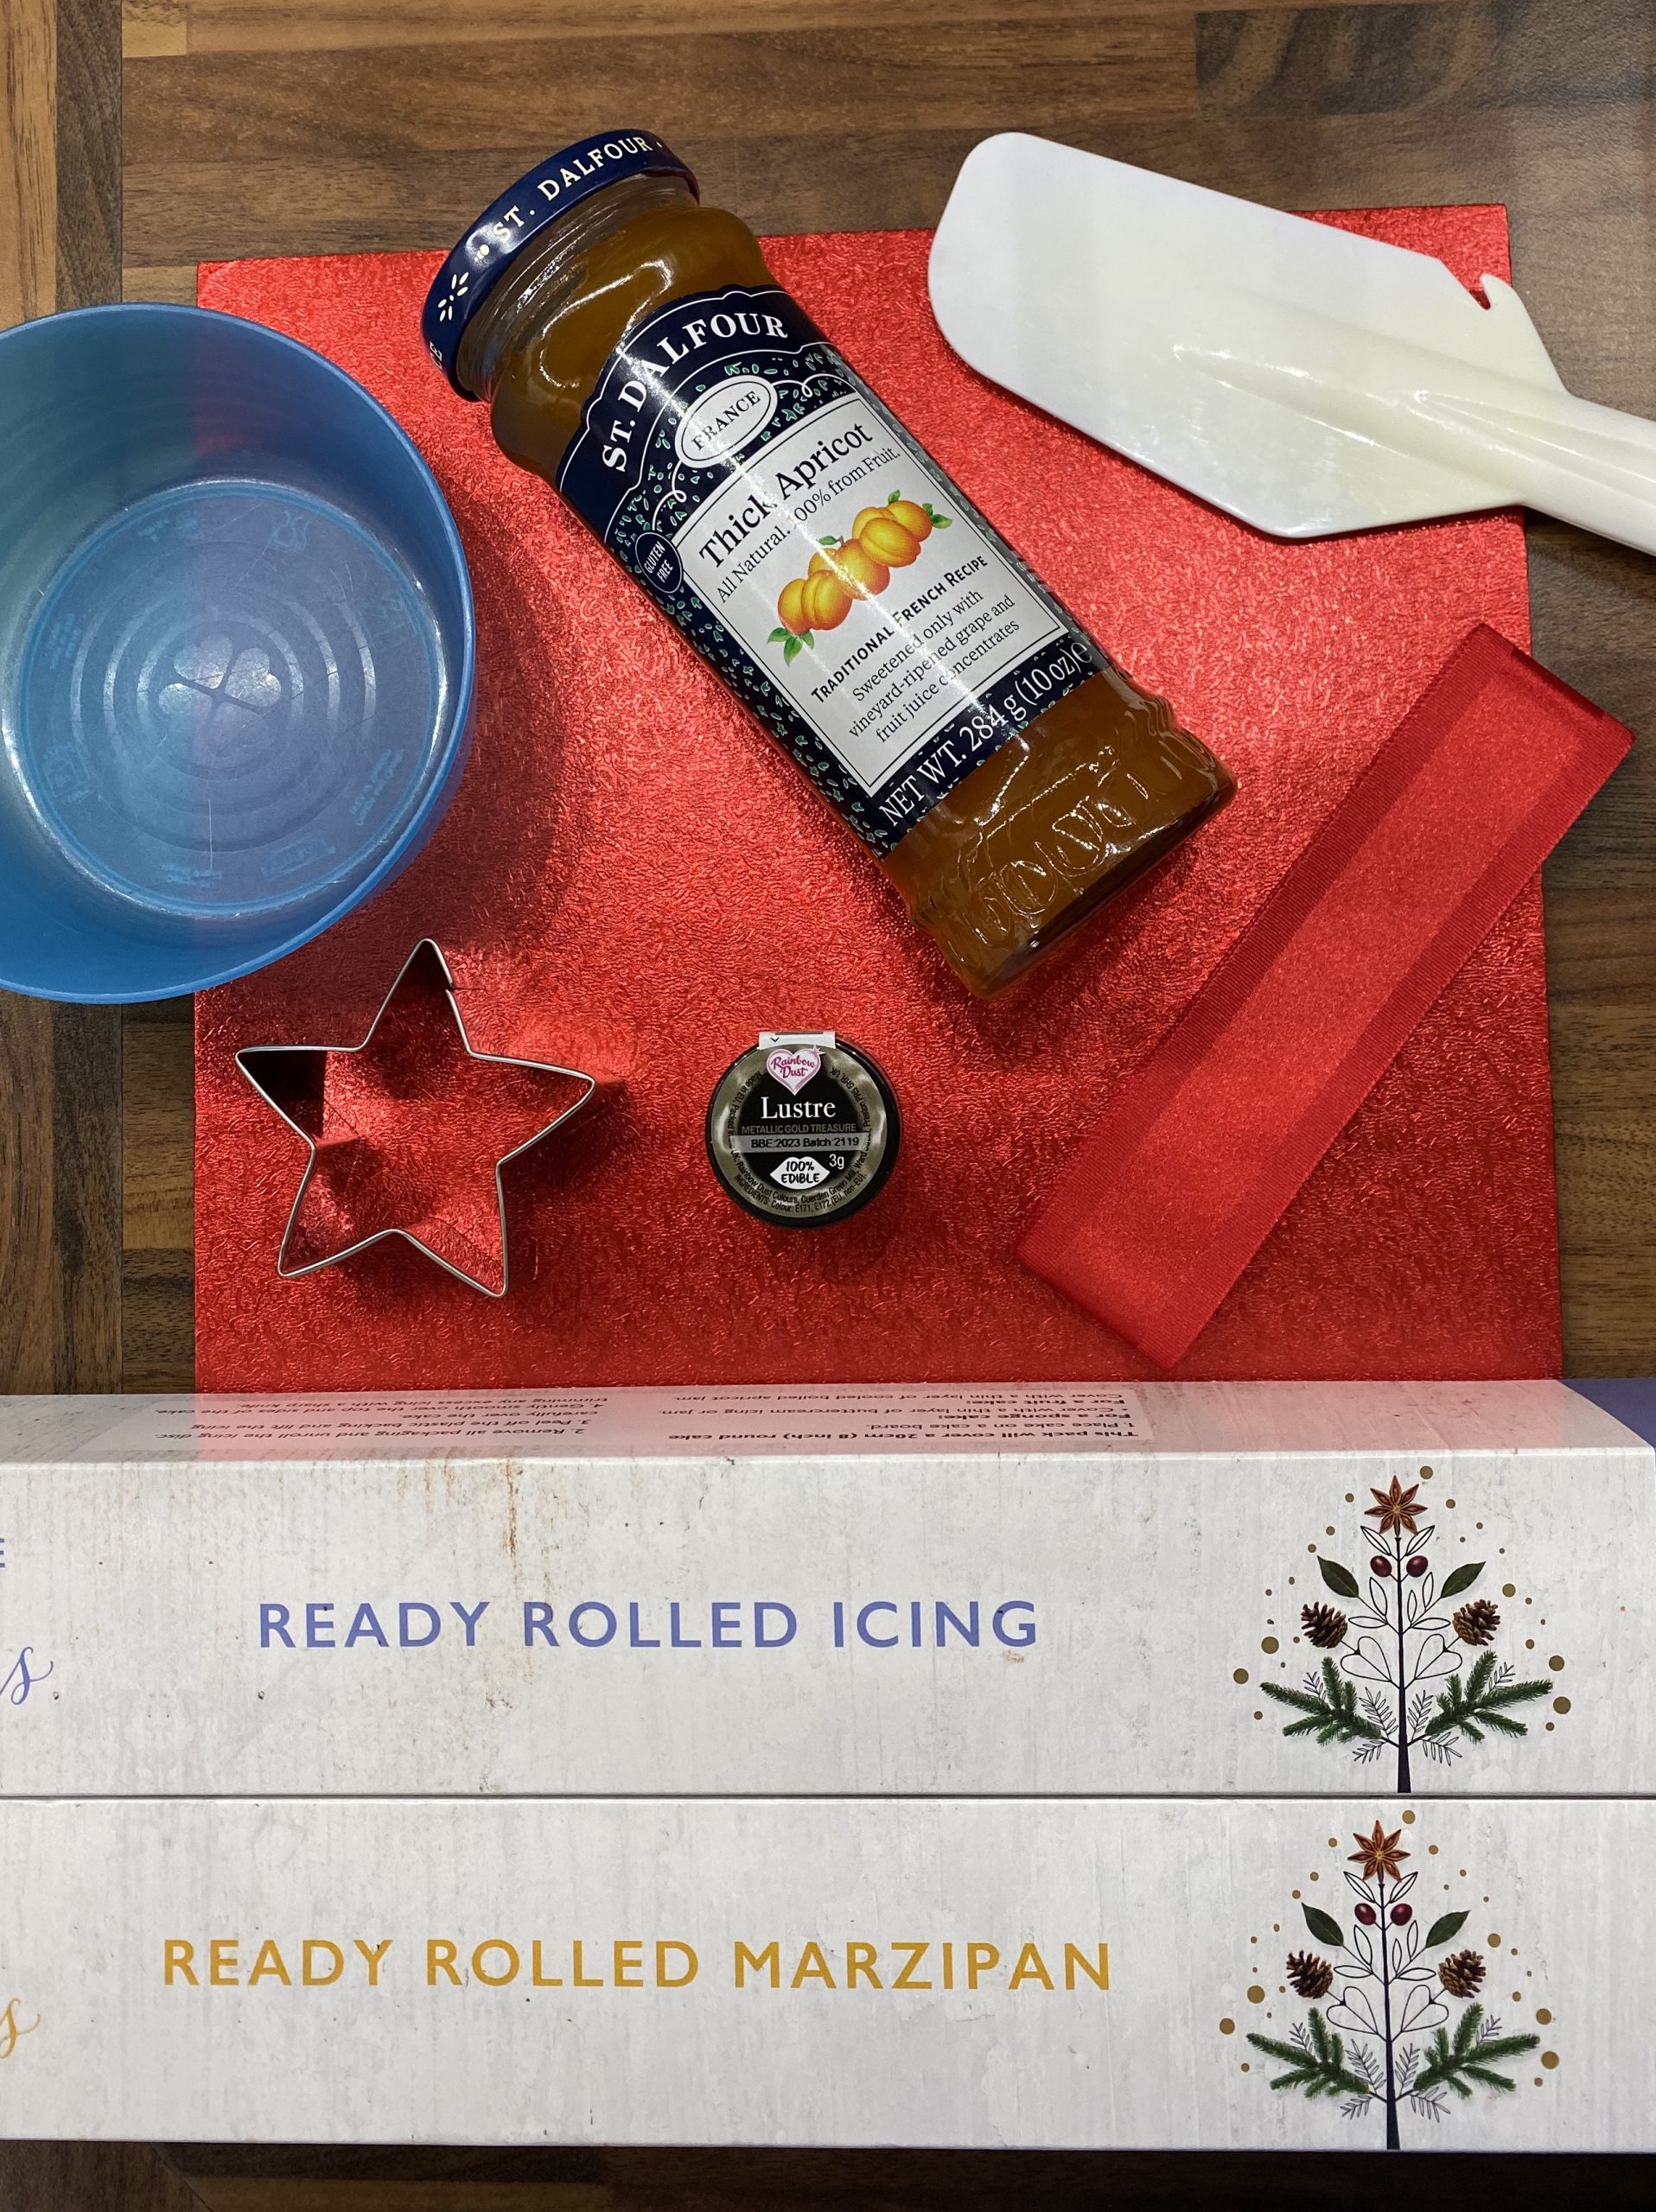
- A cake board (I got mine from Waitrose and it came with a ribbon to go round the cake)
- Good quality apricot jam, with a microwavable bowl and something to spread it with.
- Ready rolled icing and marzipan (my kitchen counter has limited space, and from previous experience trying to roll out my own is usually a bit of a disaster).
- A star-shaped cutter.
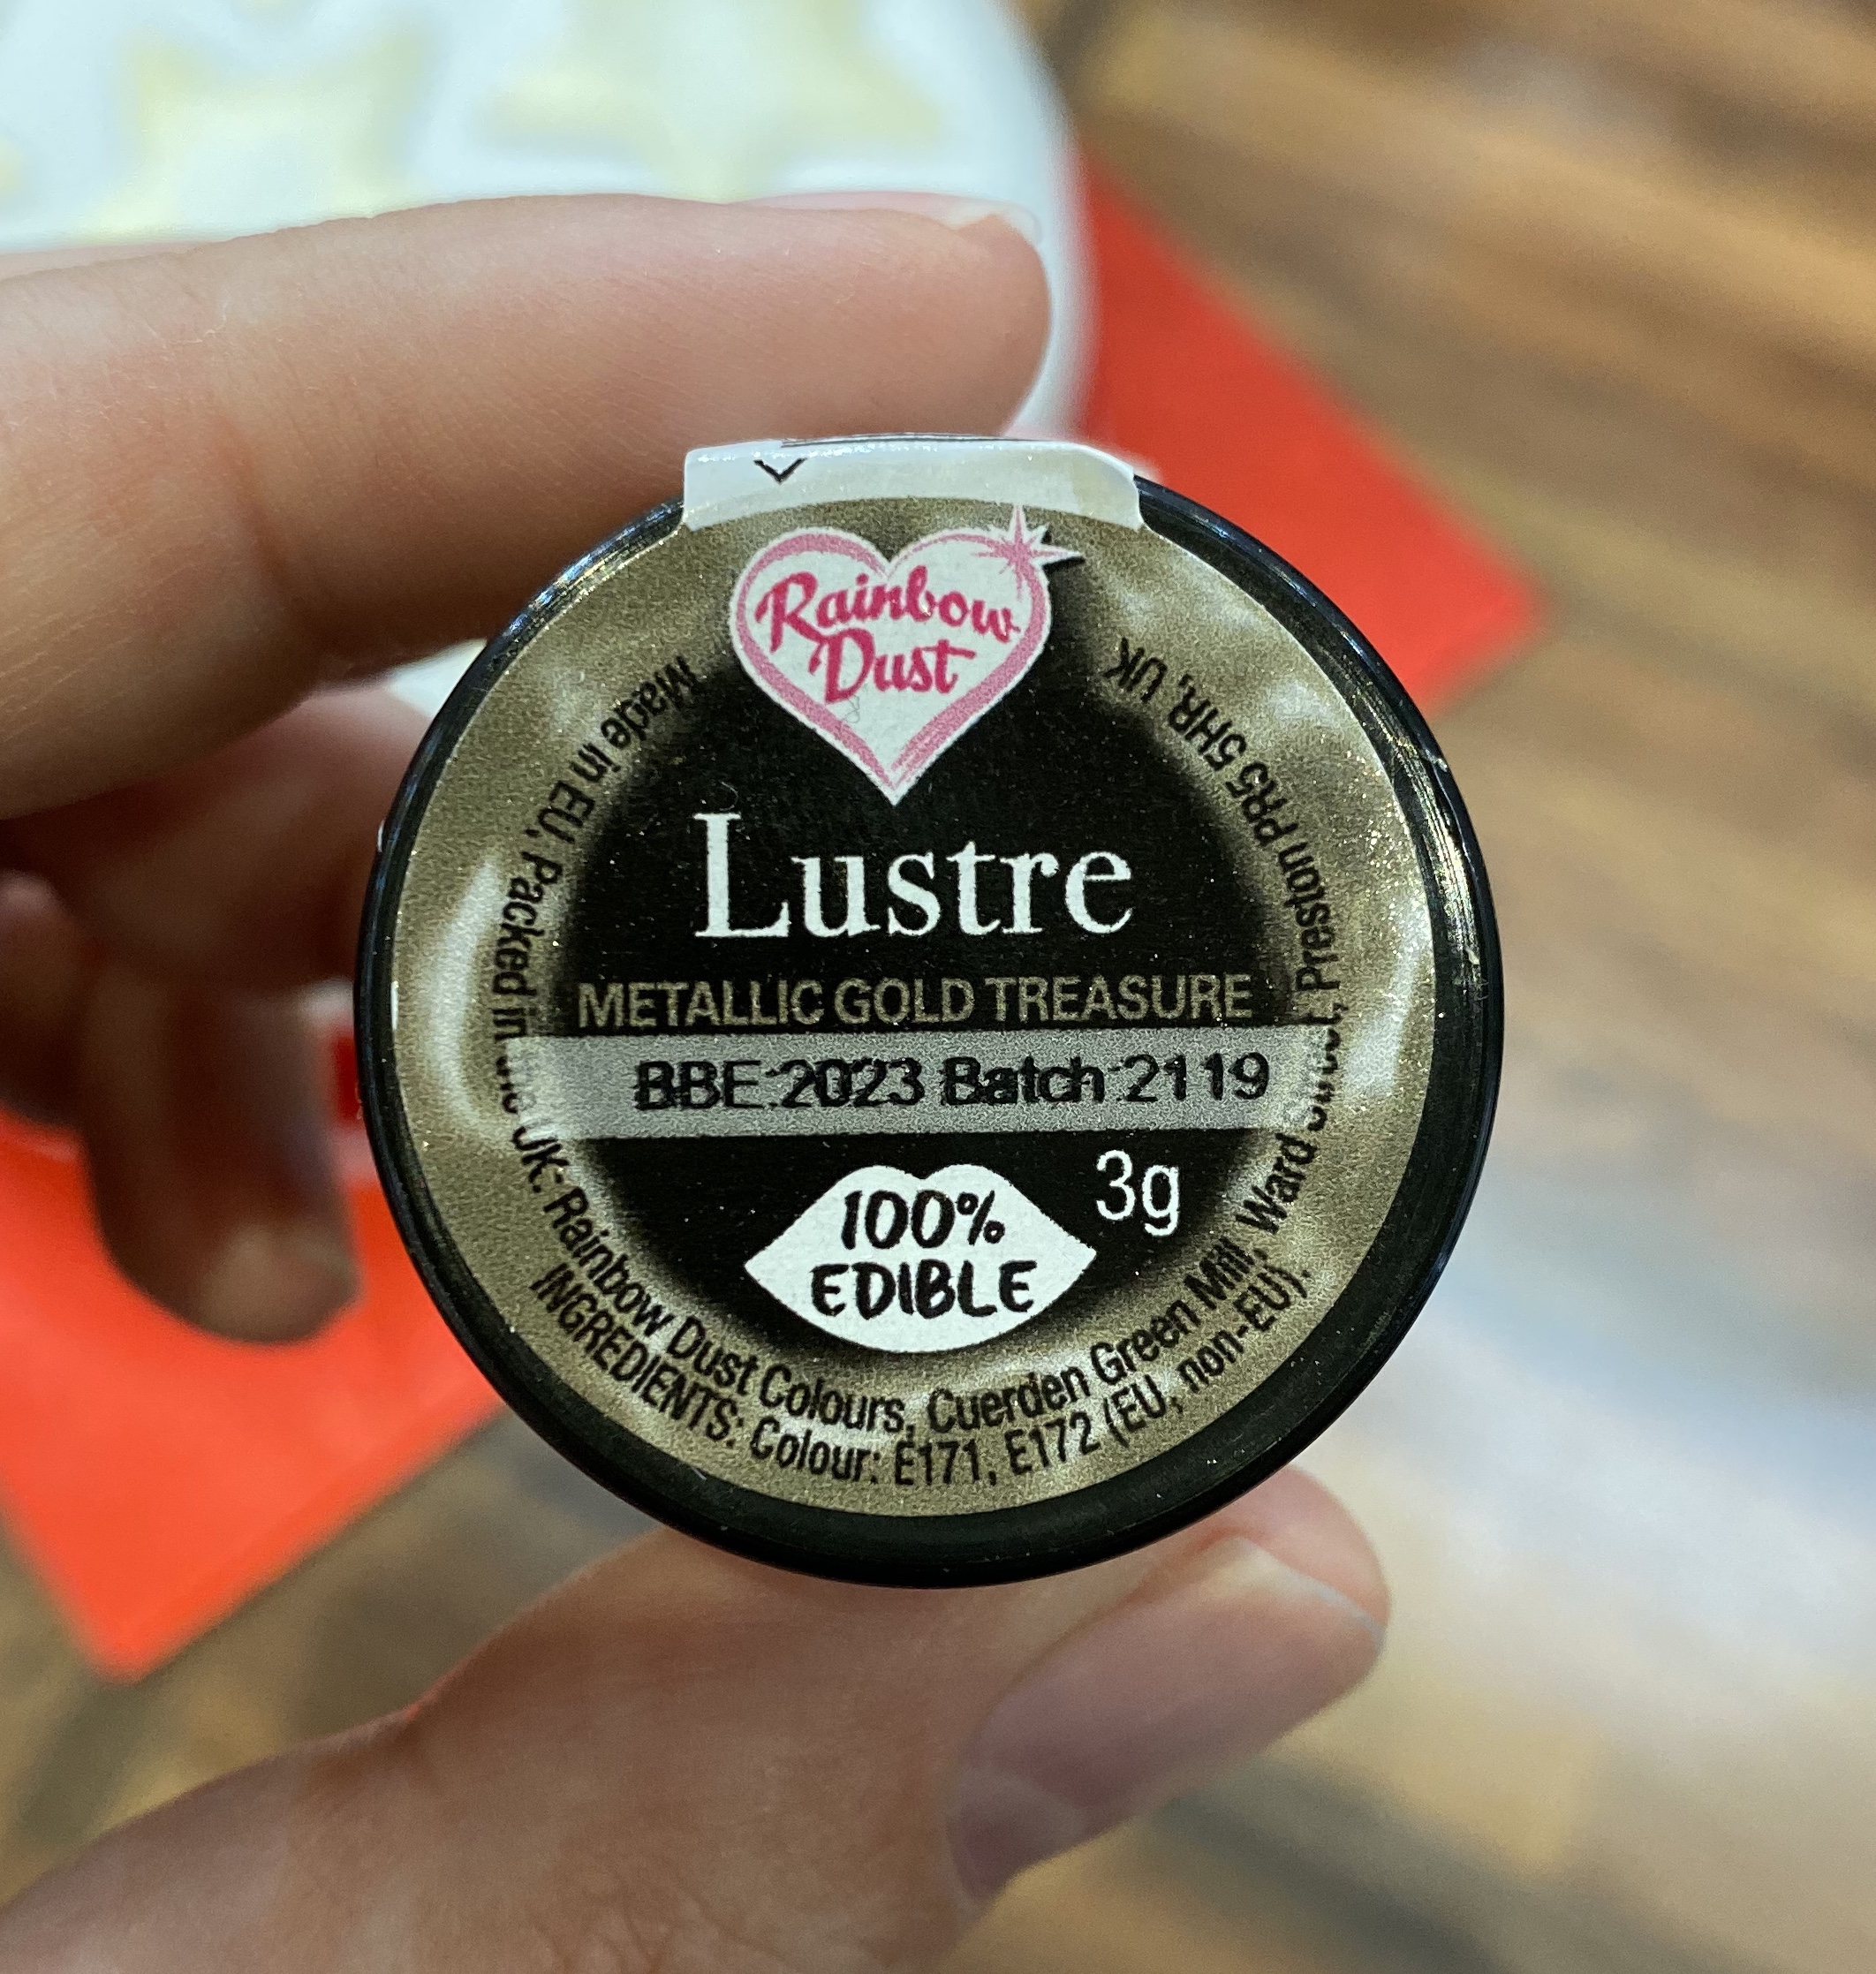
- And new for this year, some gold edible dusting powder (I got mine from Hobbycraft).
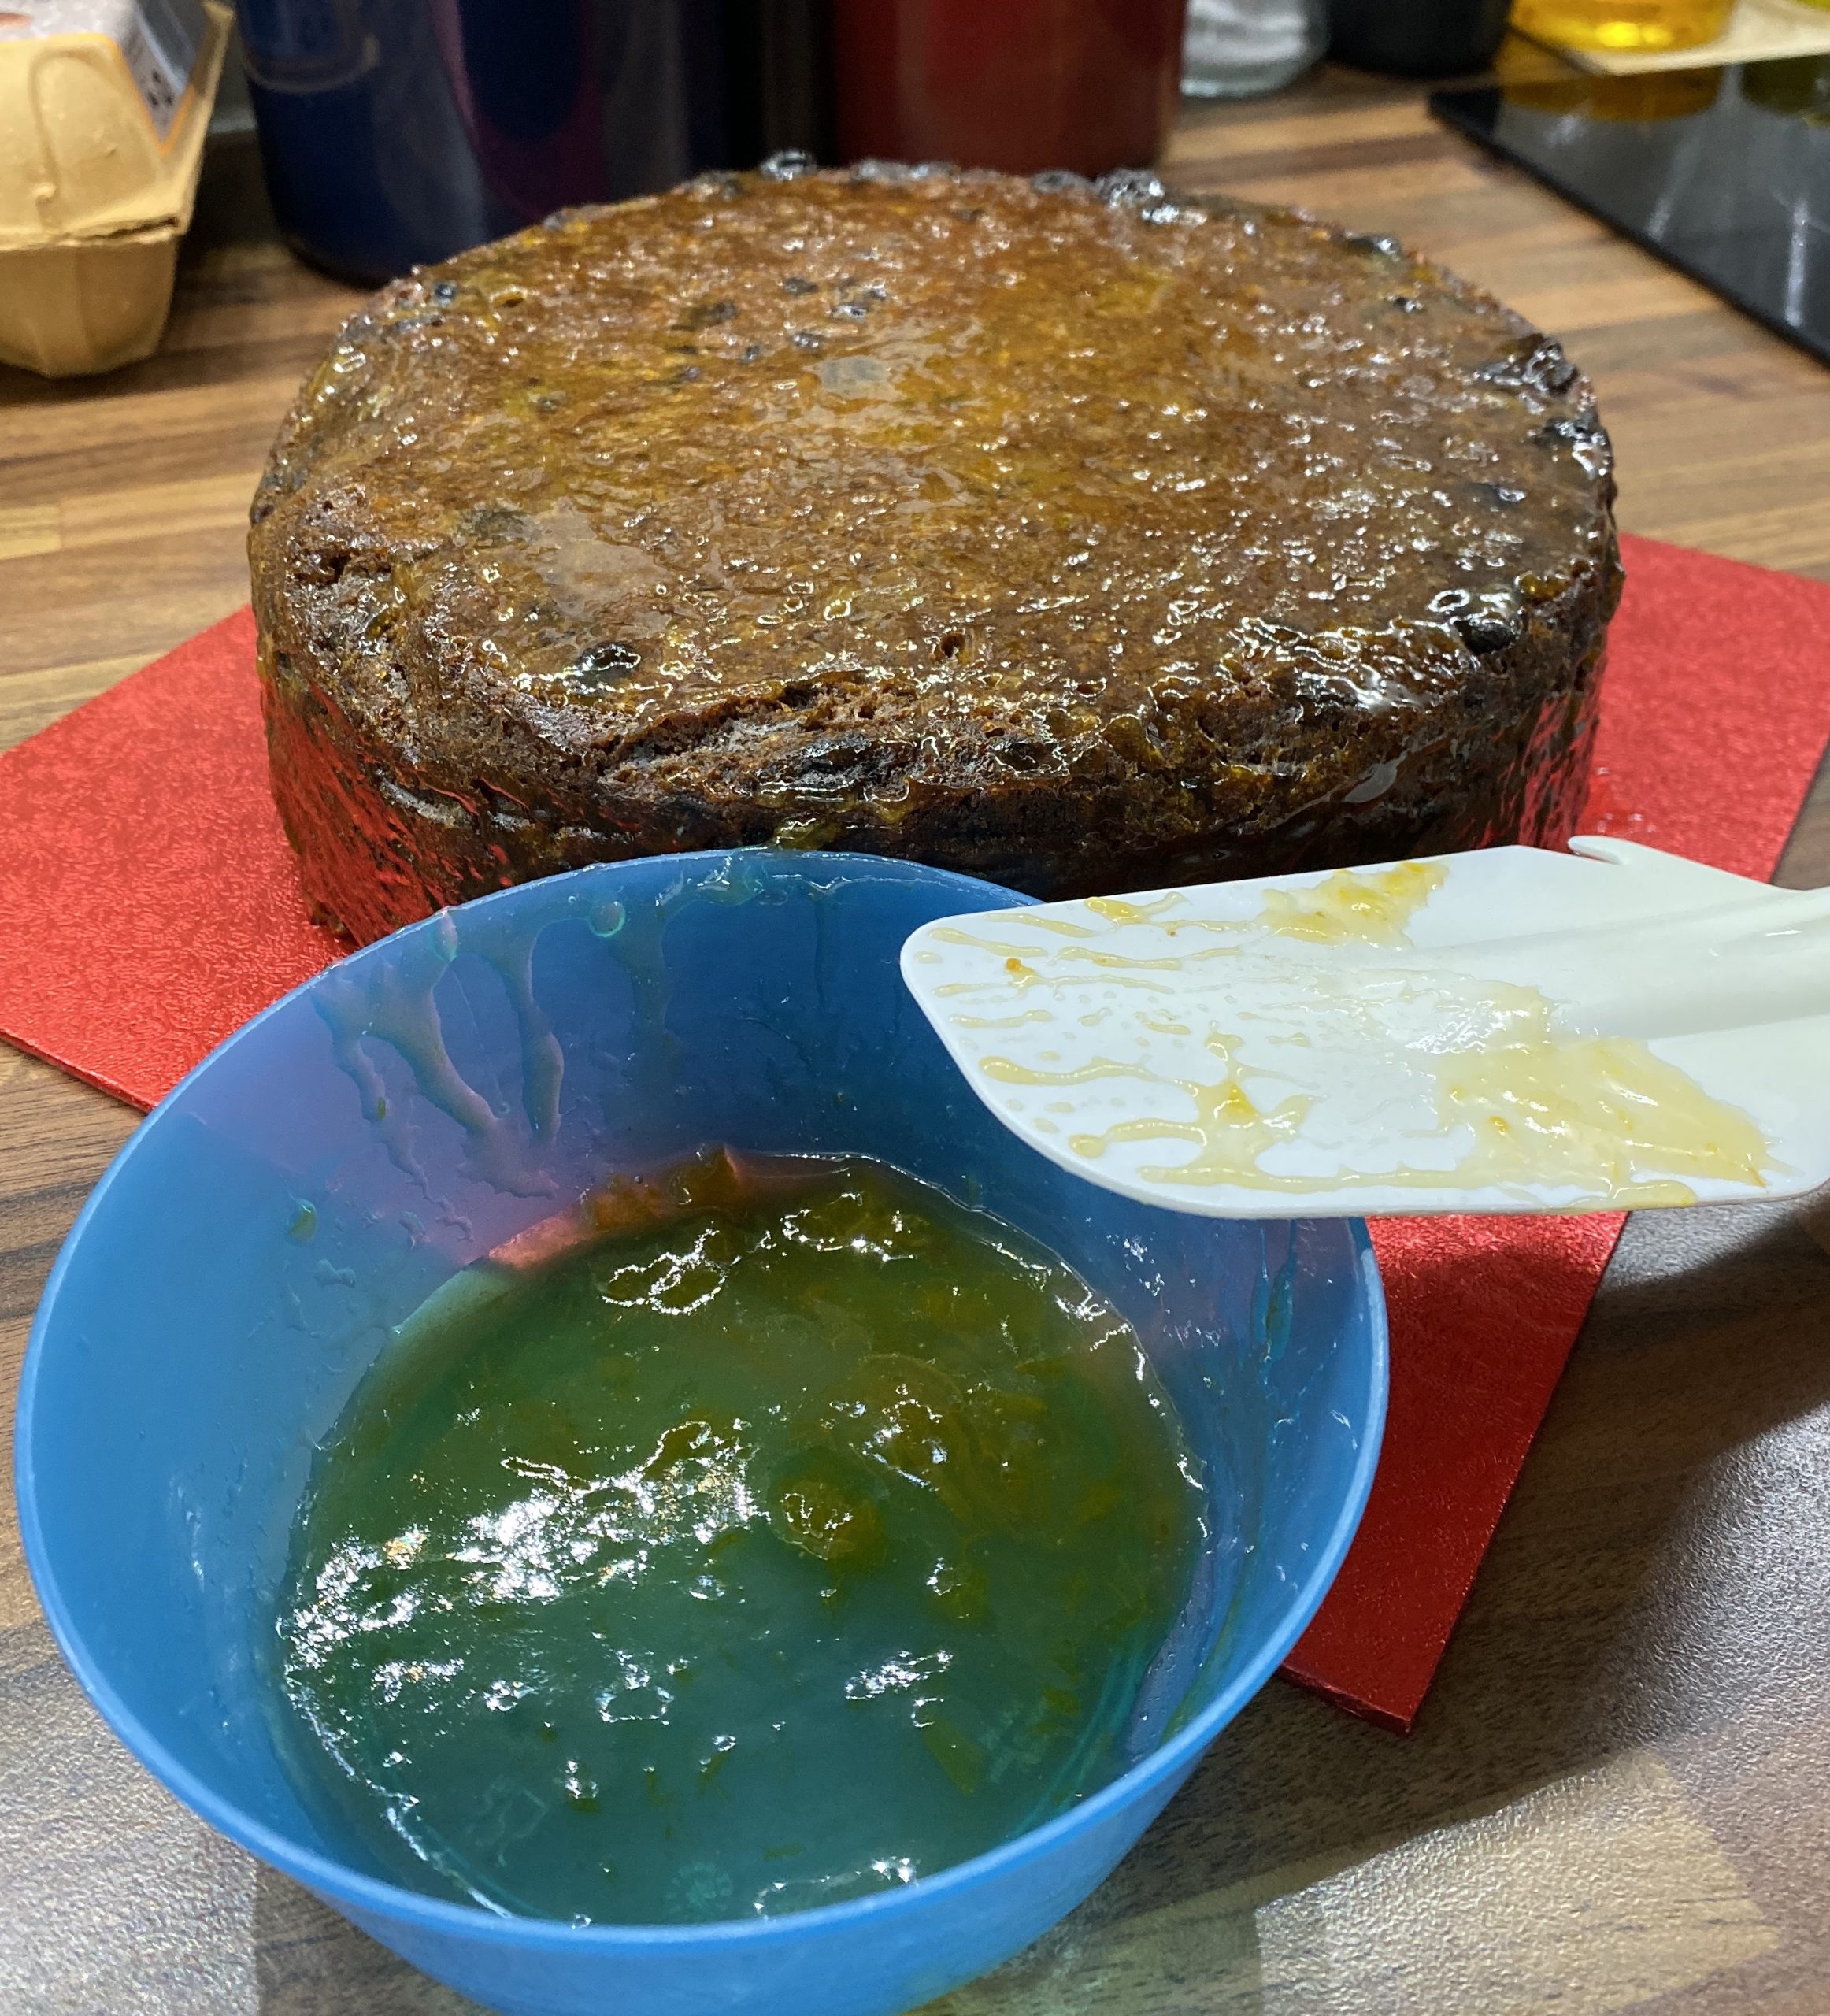
Now to start icing. After having placed the cake on the cake board, microwave a decent amount of jam for about 10 seconds (to warm it up so it spreads more easily). Try to avoid any chunks of actual apricot! Then carefully coat the cake in a thin layer of jam. This smooths out the surface a bit and helps the marzipan stick.
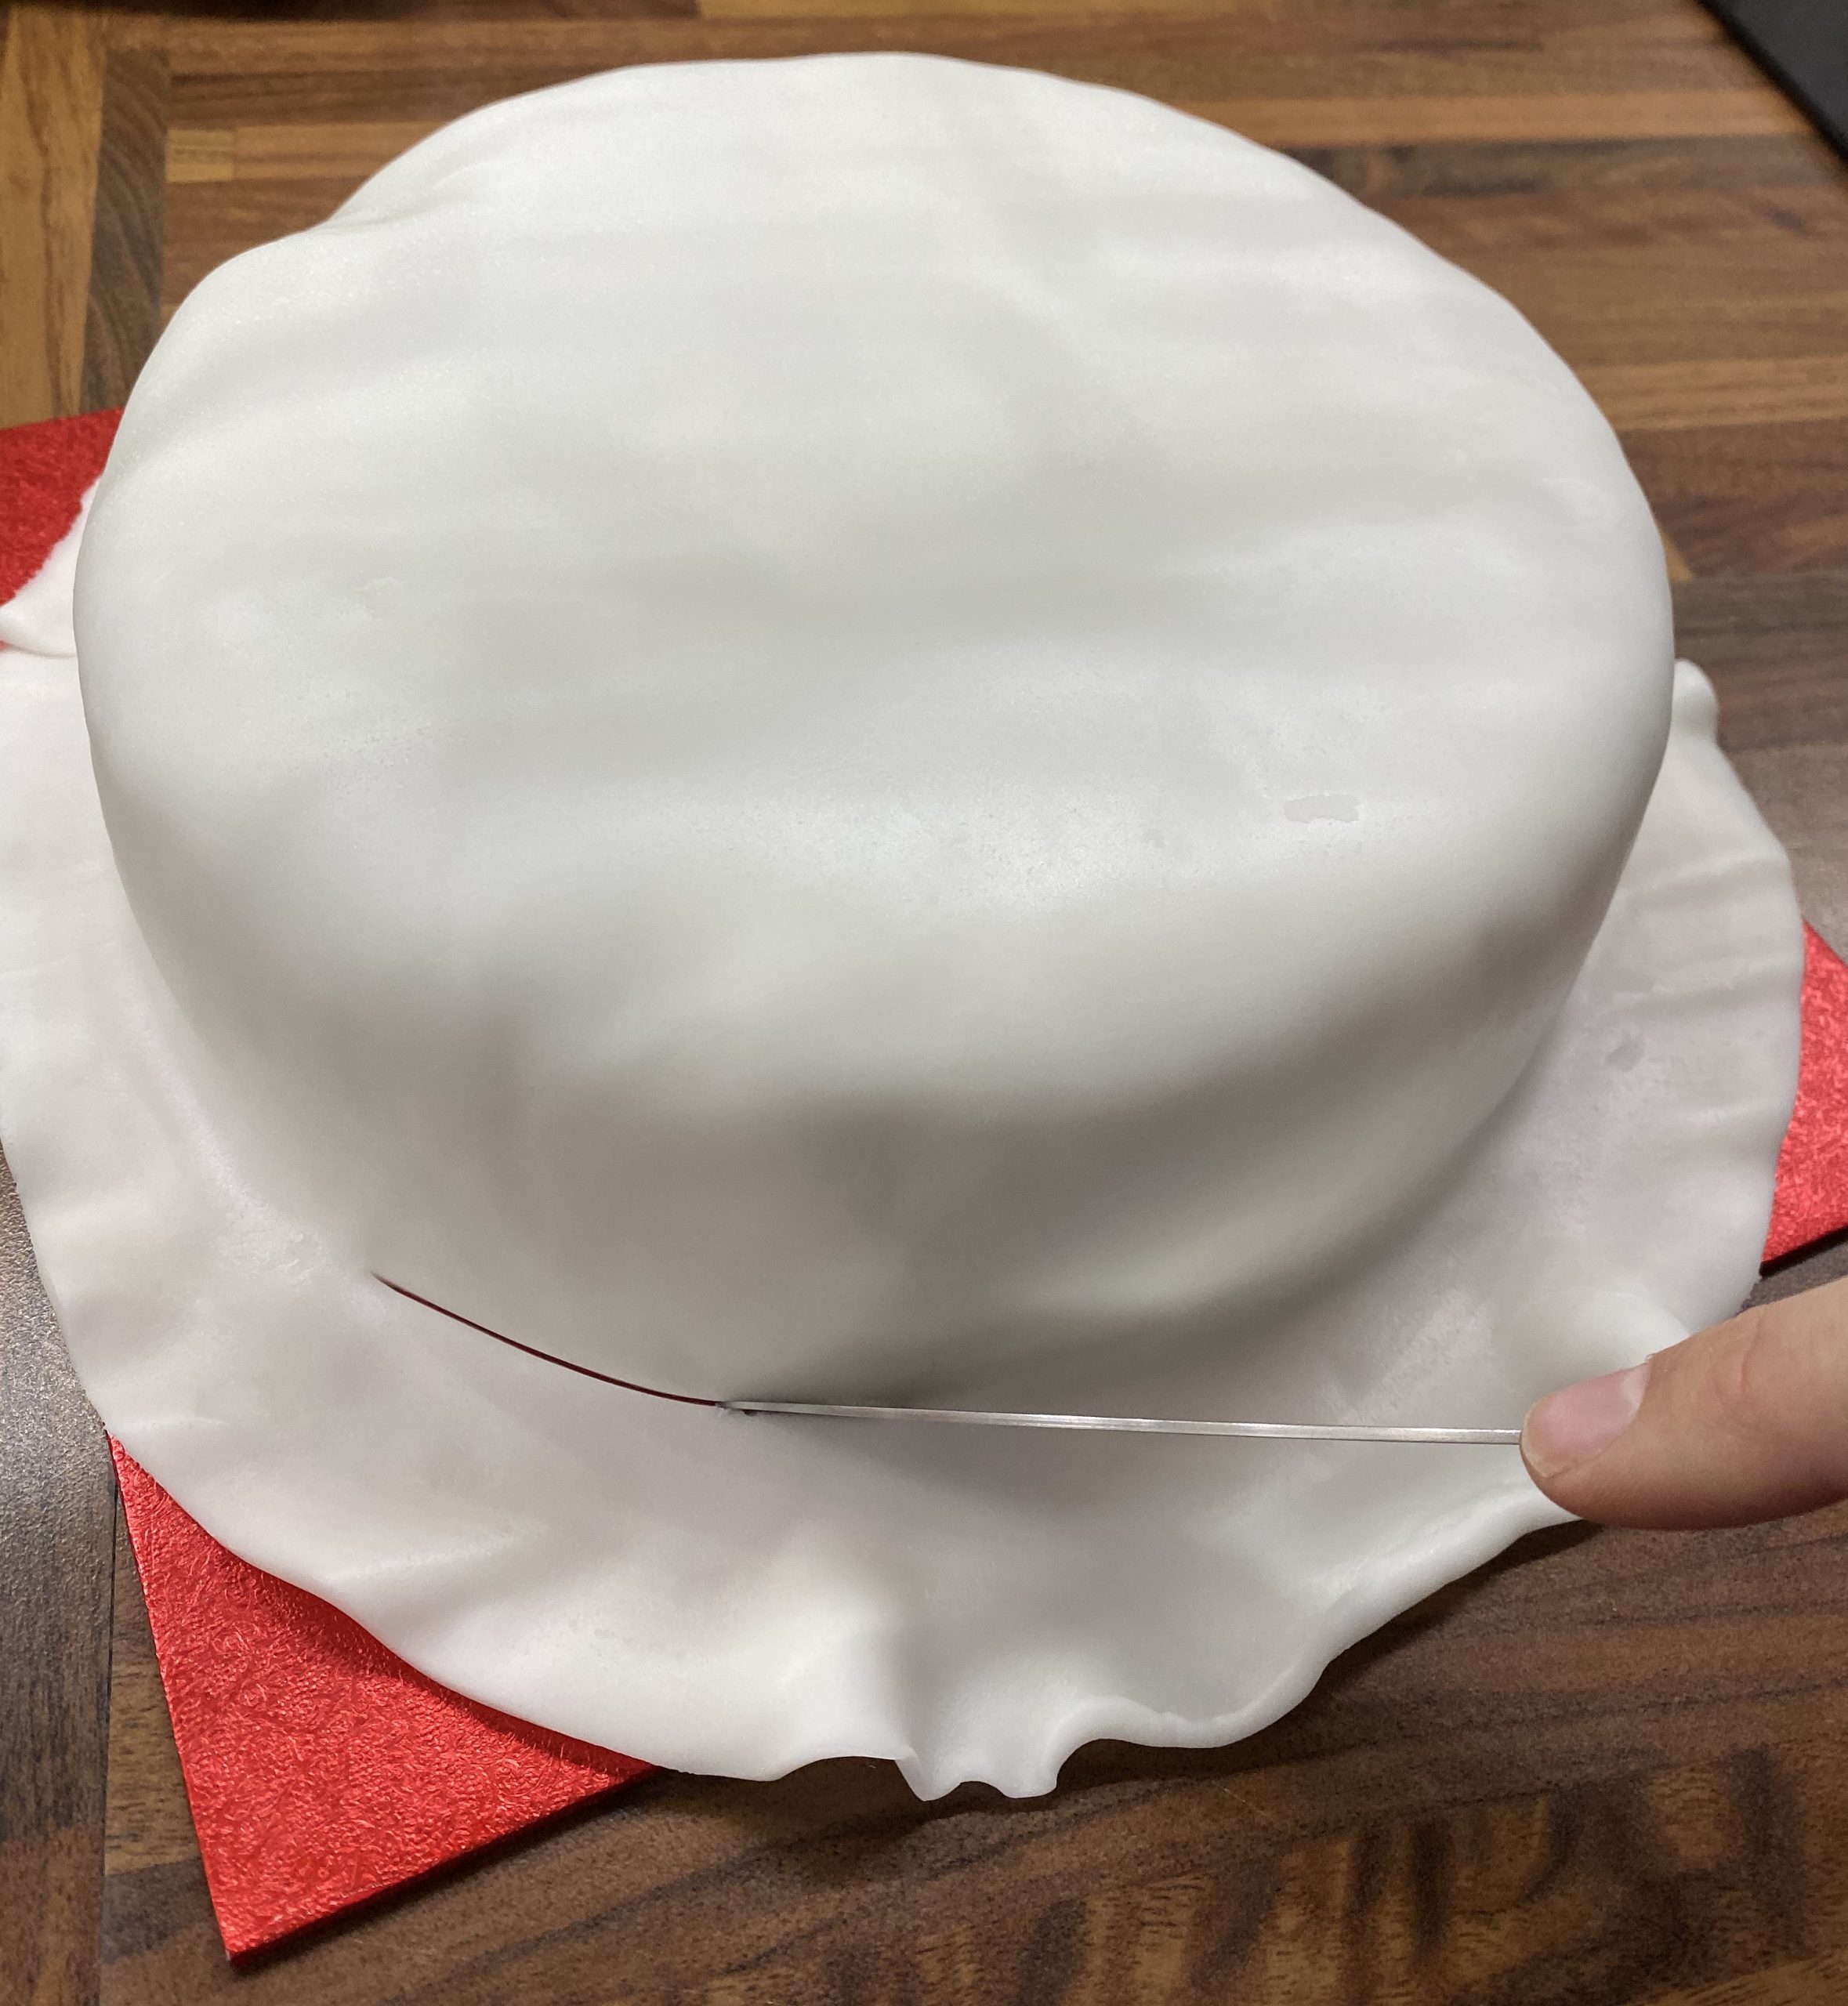
Next, you need to extract the marzipan from all the packaging – keep the plastic sheet for later. It’s quite useful. Drape the marzipan over the cake, trying to get it centred. Then using your hand smooth the marzipan over the edge and around the sides. My marzipan was quite sticky, so I wet my hand with cold water, so it slid round better.
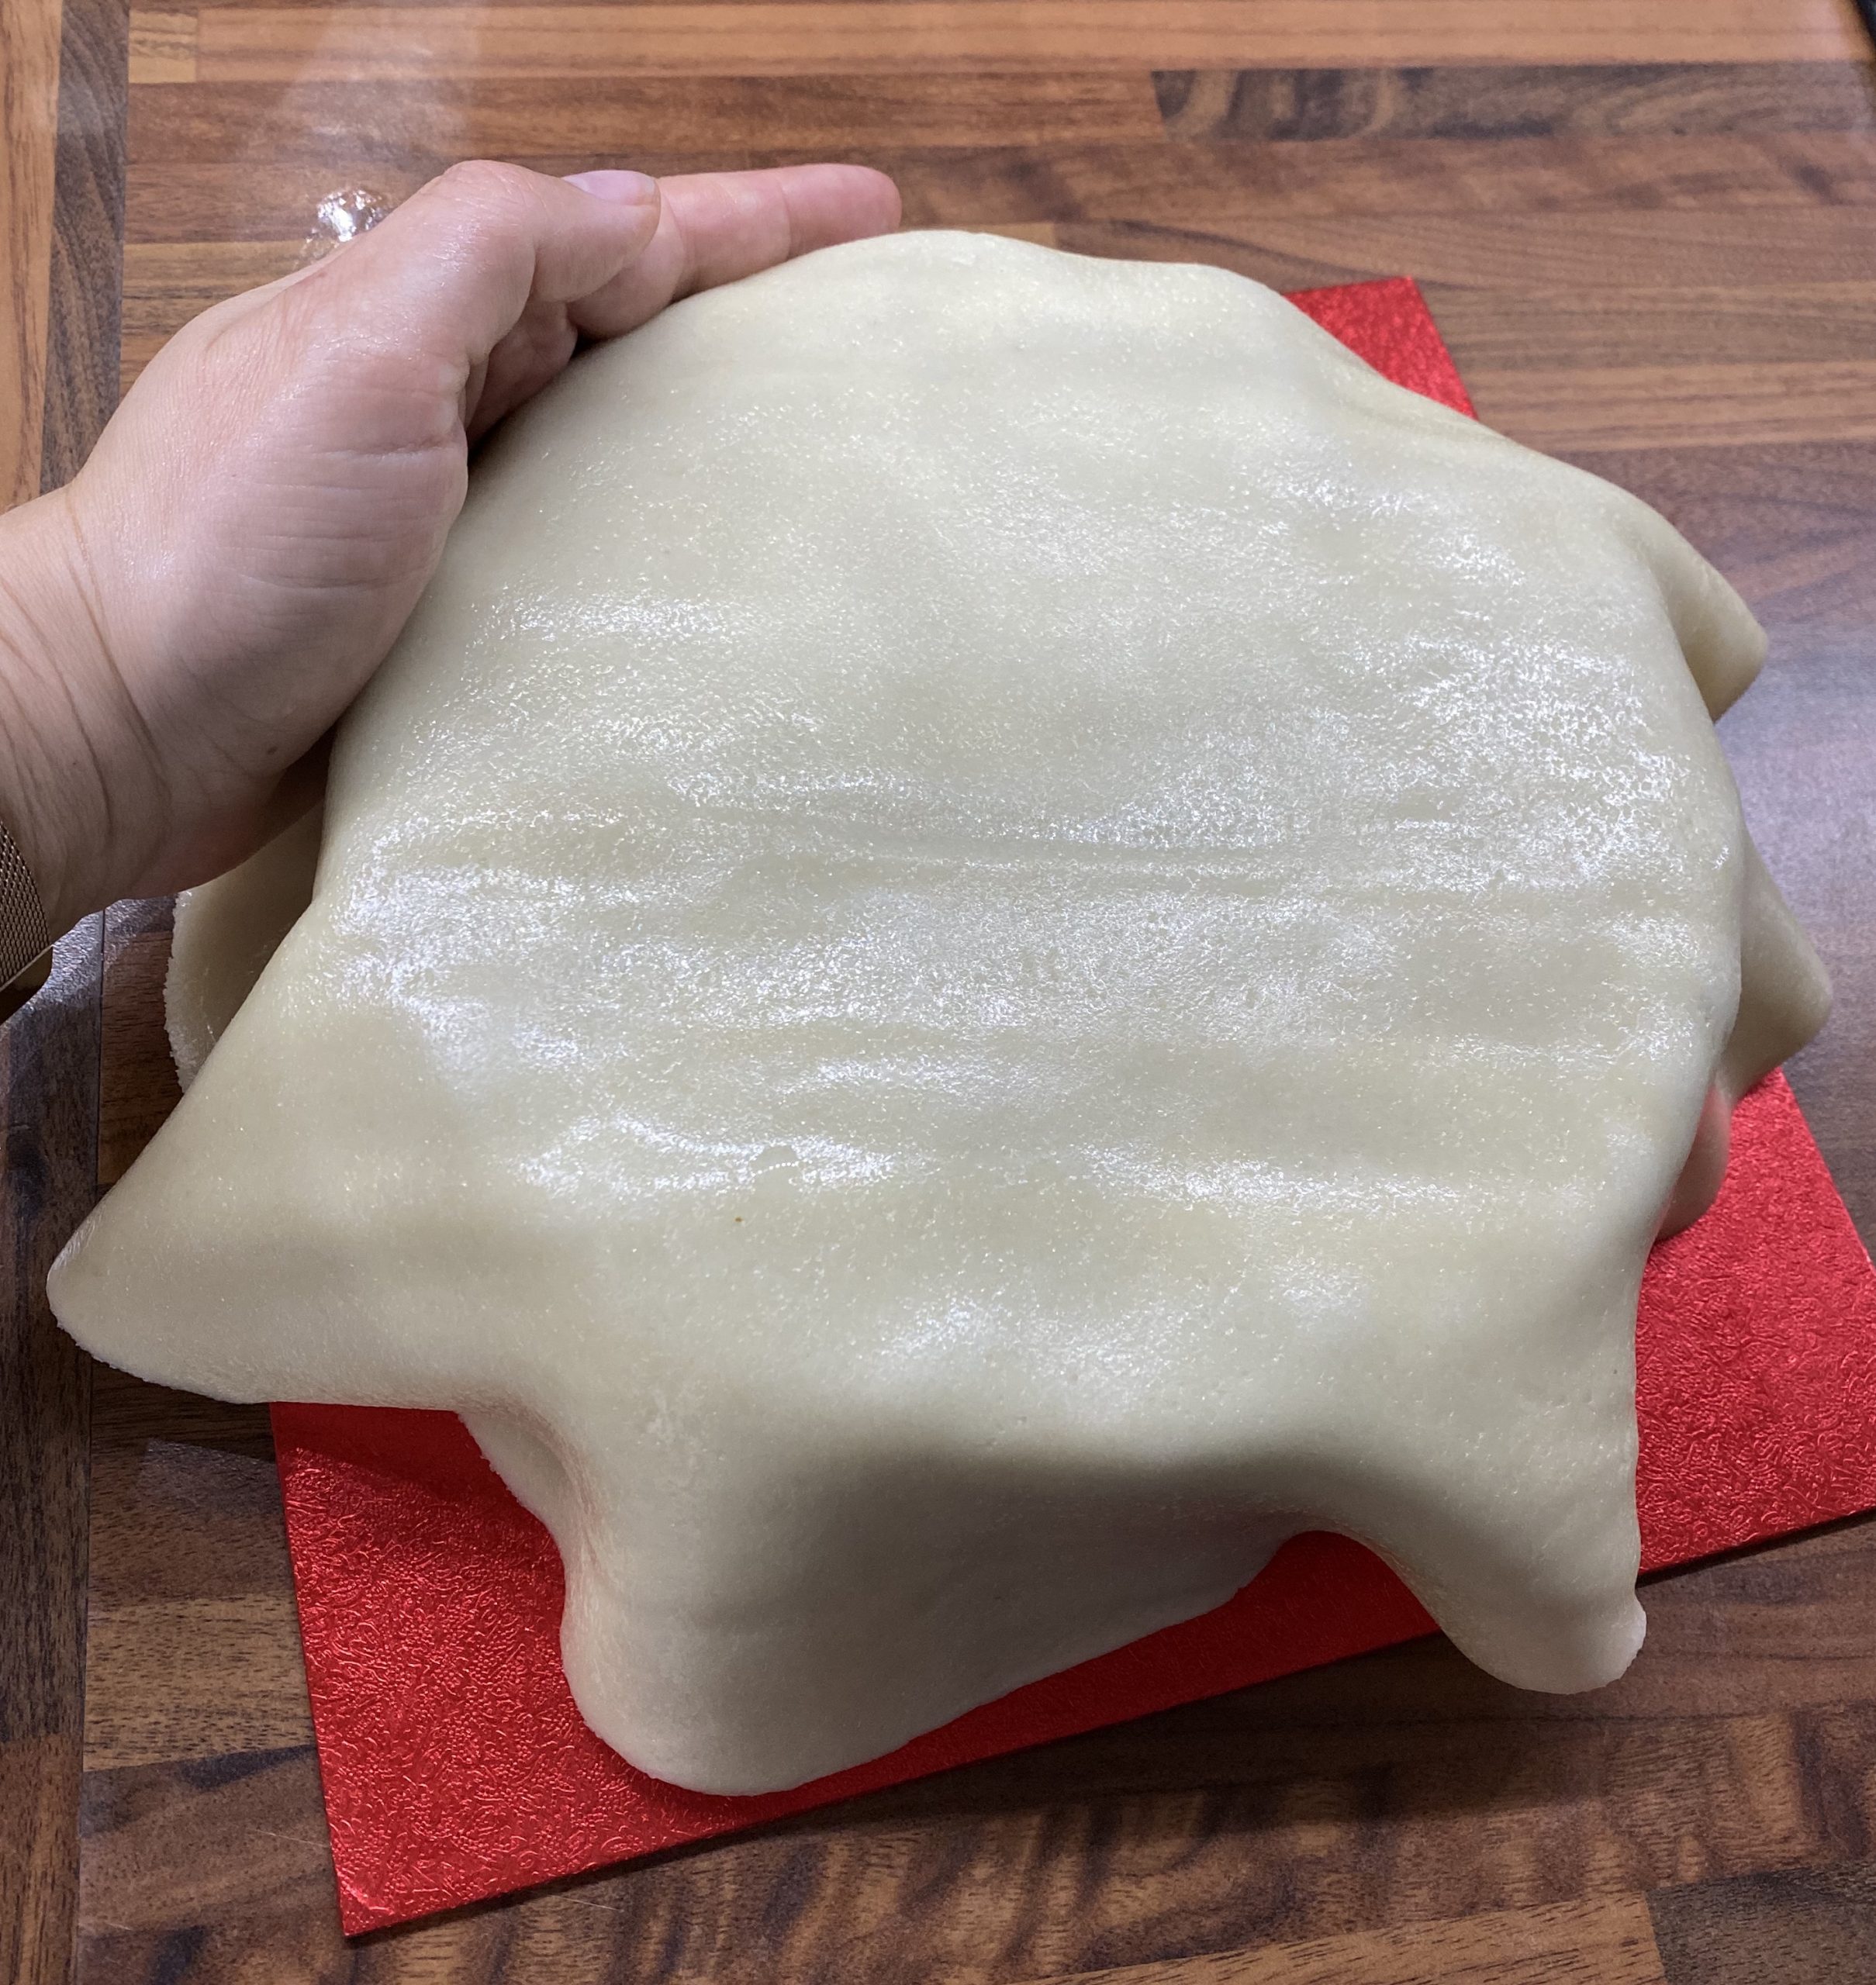
Trim away the excess with a sharp knife. I like to run a table knife around the bottom because it smooths out any rough bits.
Now repeat with the icing, no need for jam this time (as the marzipan is quite sticky!). Don’t wet your hand this time, or you will have a sticky icing disaster. Trim and smooth as before. Keep the leftover bits of icing, as you will need them.
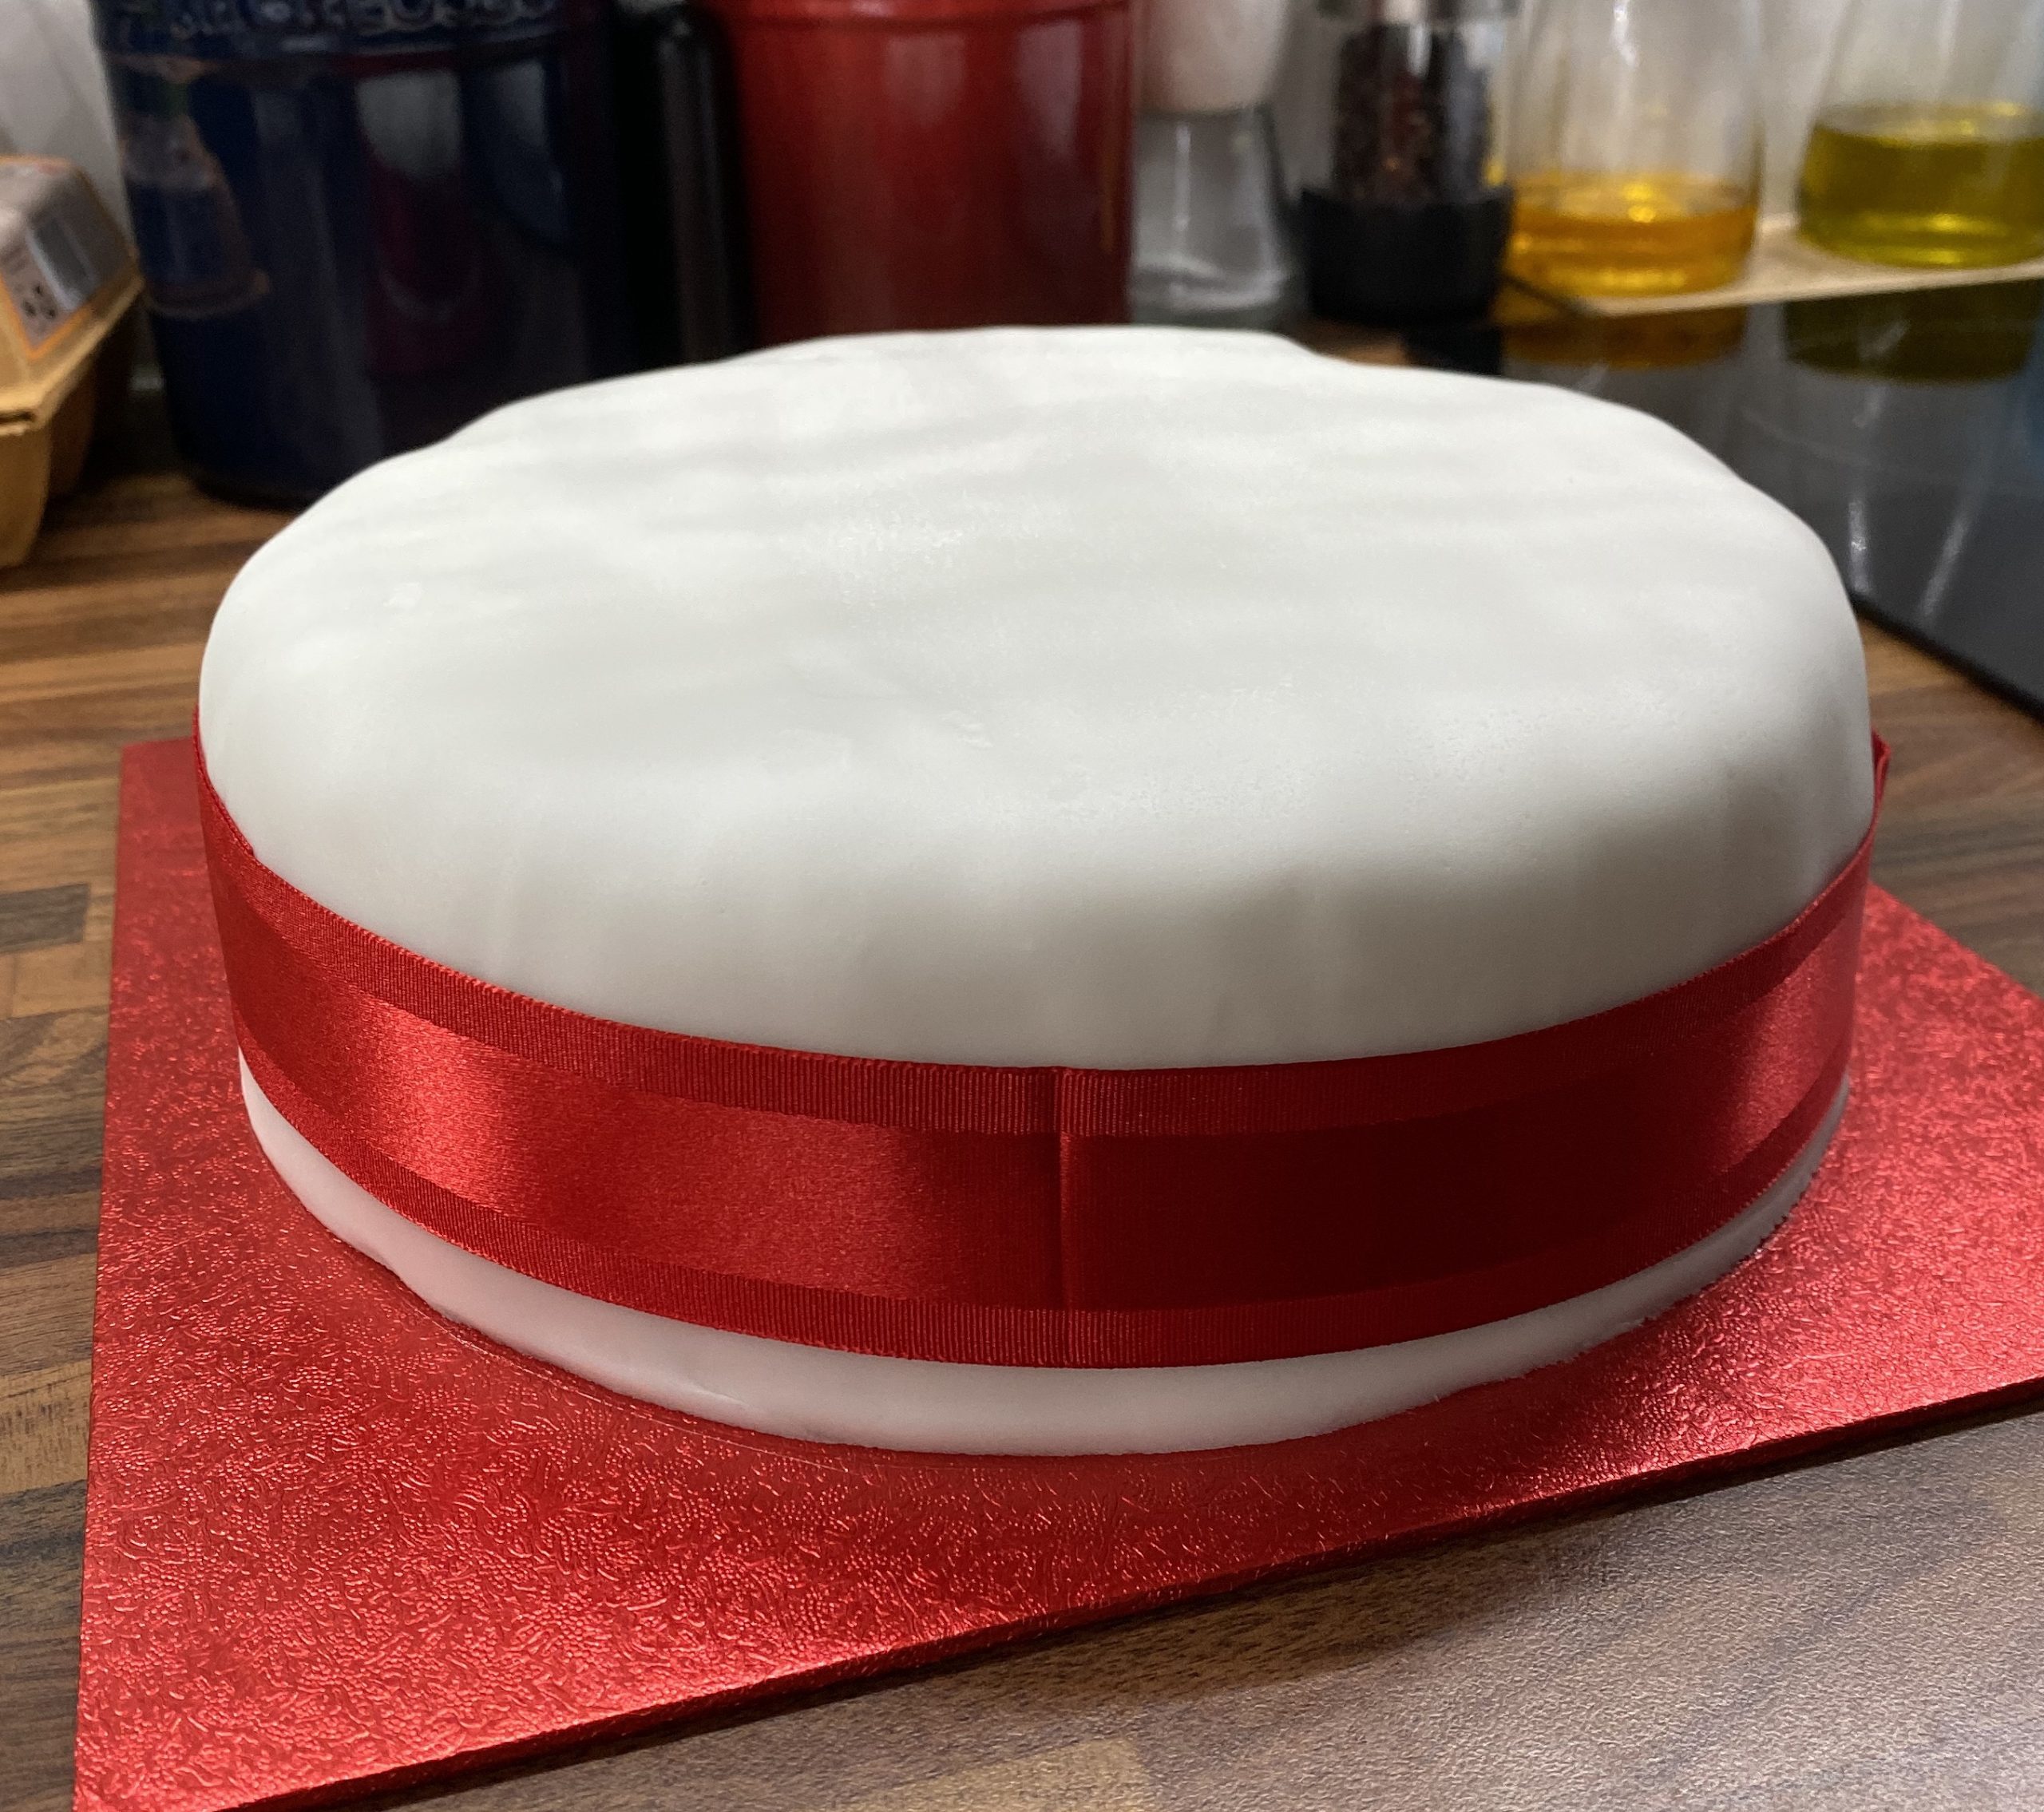
Then I added the fabulous ribbon that came with the base. I was very impressed that it had food-safe sticky tape on, so I could stick it on the cake! If you don’t have a fancy ribbon, then you can just stick extra stars round the edge.
Squish the leftover icing into a ball and flatten. Put it onto the plastic sheet the icing came in (see I told you it would useful later), fold the plastic sheet over and roll the icing flat. I used a rolling pin, but a wine bottle works just as well.
Using a star cutter, cut out 6 stars (or more if you want to overlap them).
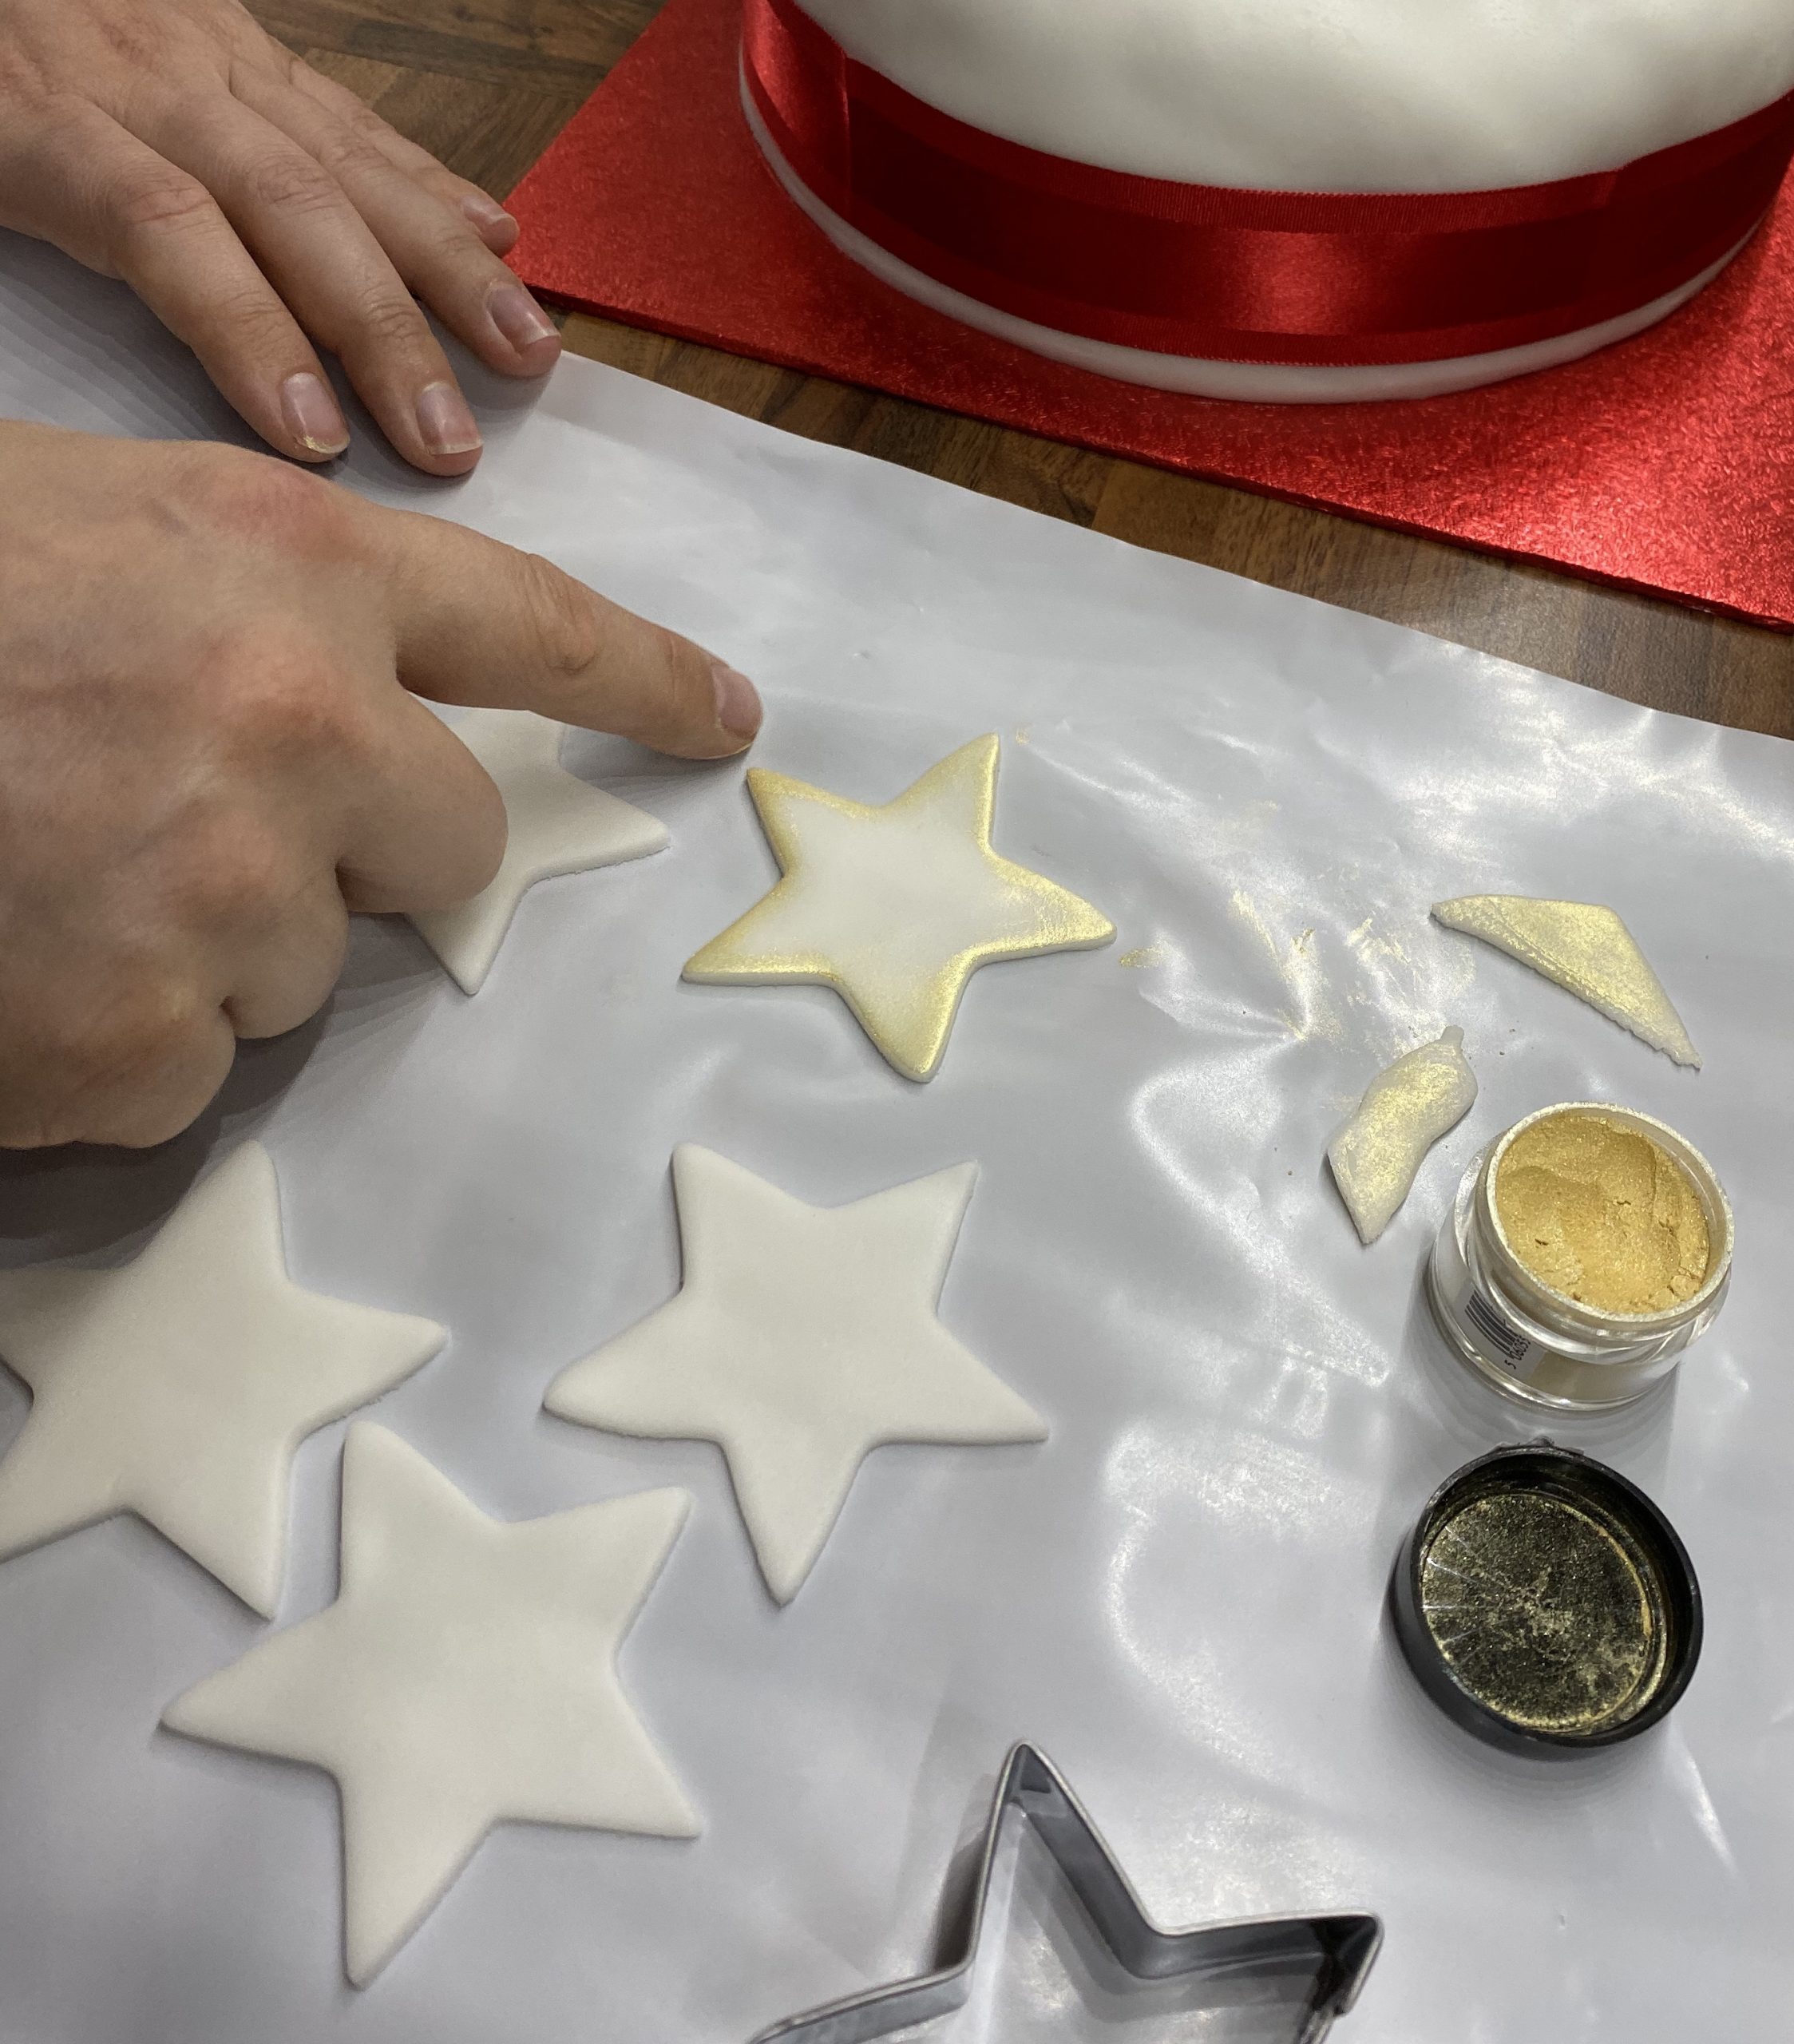
I used my finger to rub some of the gold powder into the stars, but this isn’t essential! Then place the stars onto the top of the cake.
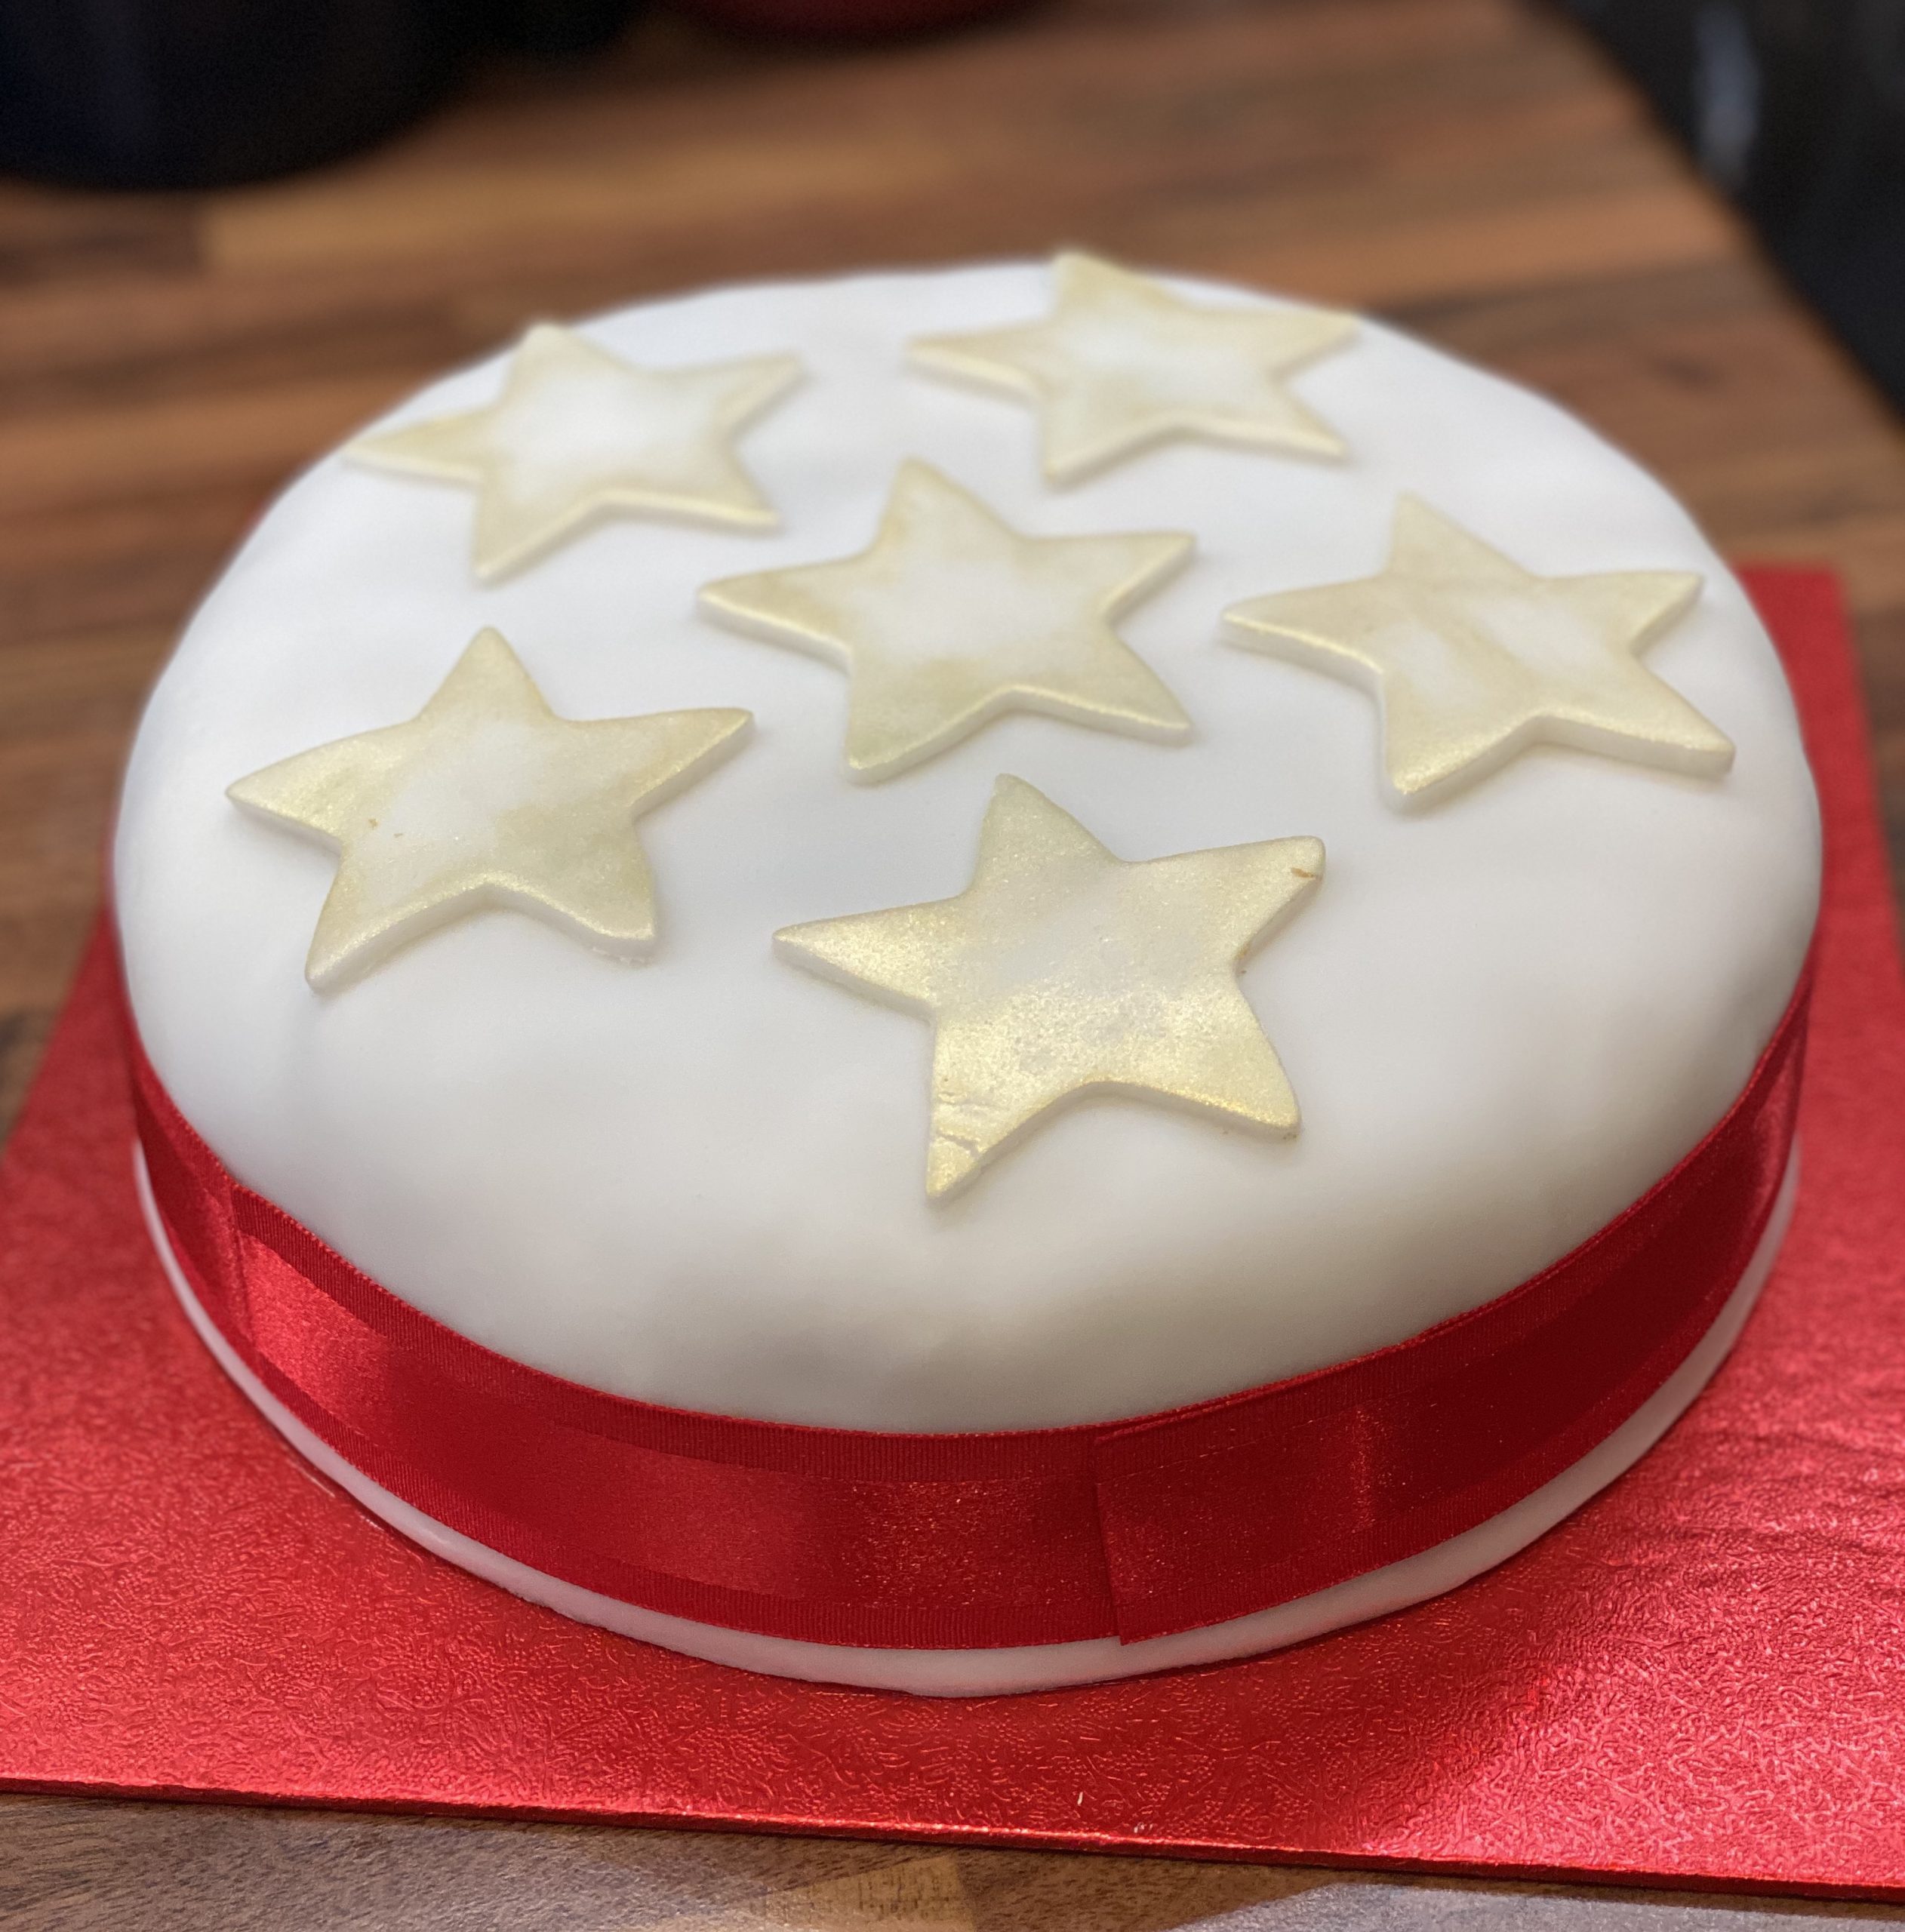
Et voila! Elegant Christmas cake, with hardly any equipment.
Every Christmas I make mincemeat. Normally I make about 10 jars and give most of them away to friends and family. This year, I felt like being a little bit extra. I have been learning how to use the Adobe Suite of software this year. Mainly Illustrator and Premiere Pro. So I thought this would be the ideal opportunity to work on my Illustrator skills (or lack thereof!) and make fancy labels for my jars!
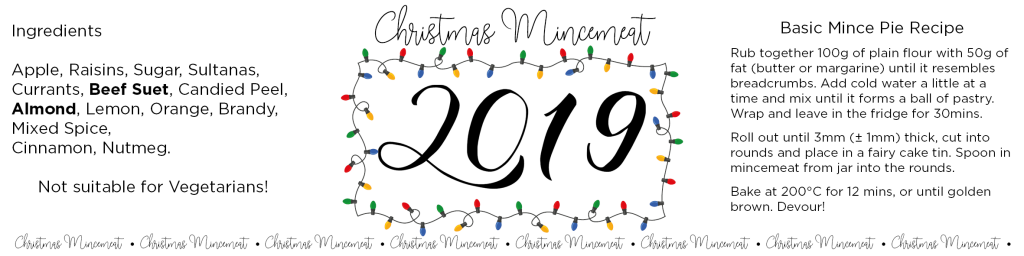
First the mincemeat recipe! I always use a Delia recipe, which has never failed me. The quantity perfectly fits 10 mini jars from Lakeland. They are 8oz jars, and Kilner does some nice ones as well. Conveniently, each mini jars holds enough mincemeat to make 12 mince pies (made in a standard fairy cake tin). It takes a weekend to make. I prep the ingredients on Saturday evening and leave them overnight, then Sunday the bowl is in the oven for a few hours. So make sure you factor in enough time!
I wanted to create a label for the top of the jar with a Christmassy version of my Flamingo Logo.
After a bit of fiddling with adding text in a circle, the label for the lid was complete. The wrap-around label for the jar was much more complicated, as I wanted to add fairy lights and a mince pie recipe. So I decided to use InDesign. Several frustrating hours later (spread over a few days) and quite a bit of googling, I came up with this.
Now I had to work out how to print and then cut them out. I could just use scissors, but we’ve recently bought a Cricut Maker at school and I knew it had a print and cut feature. After quite a bit of trial and error, I worked out how to print out a PDF of my design and send it to cut on the Cricut.
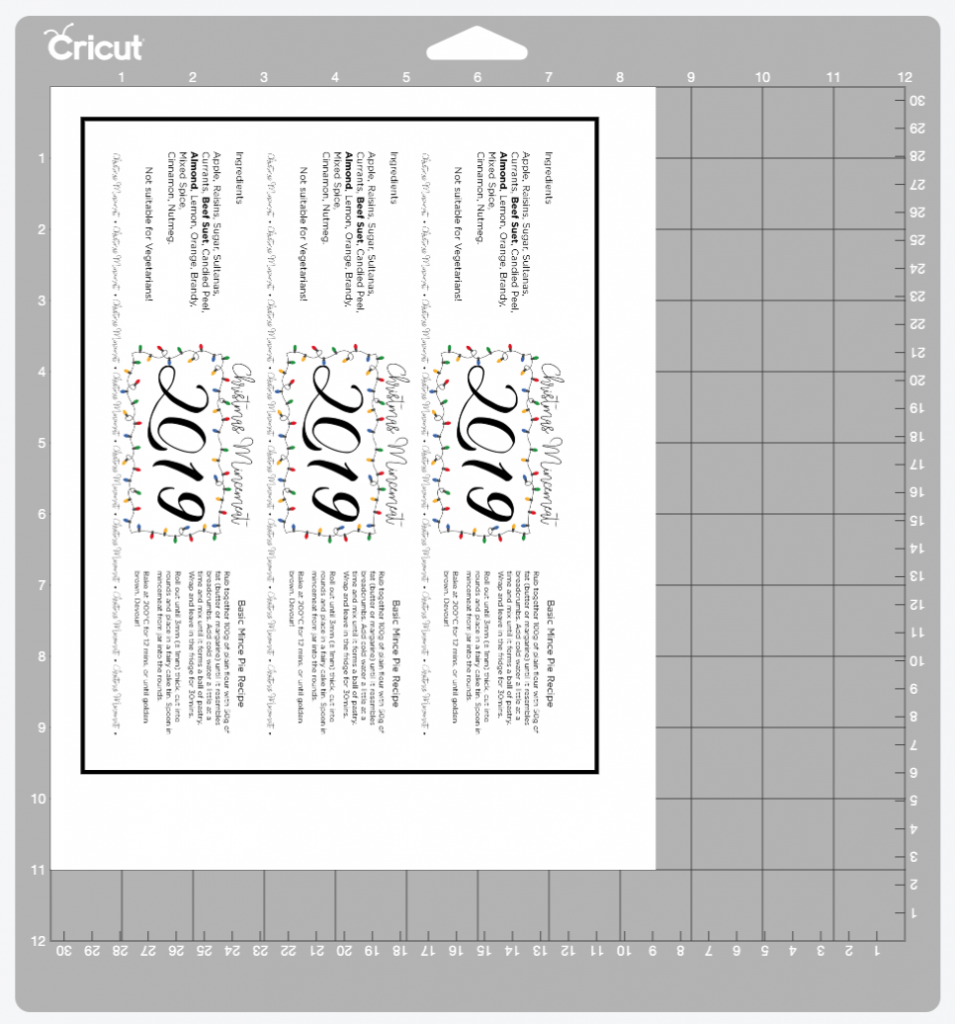
It worked very well, although I do need to work on the bleed at the edges of the design (the circular labels didn’t fair as well).

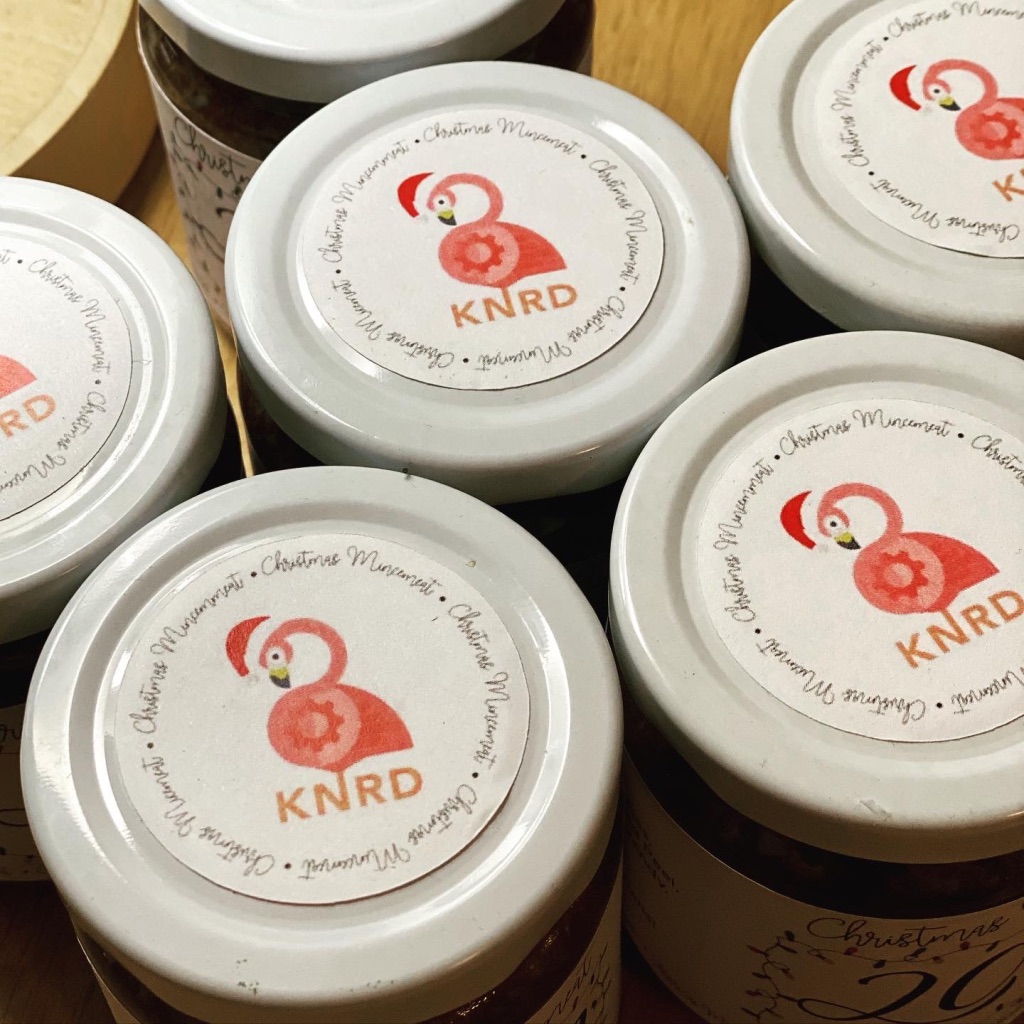
The finished jars look very professional and the jar tops, with my logo, look amazing! Now that I have the basic template it should be much faster to make labels again next year.
-

A 2022 Embroidery Challenge
4 February 2023
I’ve been watching people making temperature quilts on social media for a few years and really liked the idea of making one. But I knew I would struggle to carry such a large project through to the end, plus the idea of knitting a blanket in the heat of summer wasn’t that appealing. Then I […]
-
Little Life Update
3 February 2023
I finally caught COVID, and while I am curled up on my sofa feeling sorry for myself, I thought I would check through things. I realised that I haven’t written anything on this blog for ages (gulp April 2021) and so much has happened! The problem is that Instagram is so much quicker and easier […]
-

Alison Glass Lumen Quilt
19 April 2021
In which I attempt to make a giant quilt, for the first time!
-
Cactus Embroidery – Slow Sewing
6 February 2021
It’s taken just over a year, but this embroidery is finally finished!
-

Mushroom Ragu – Vegan and Delicious!
1 January 2021
It's new year's day and I'm making Mushroom Ragu.
-
A 2022 Embroidery Challenge
4 February 2023
I’ve been watching people making temperature quilts on social media for a few years and really liked the idea of making one. But I knew I would struggle to carry such a large project through to the end, plus the idea of knitting a blanket in the heat of summer wasn’t that appealing. Then I […]
-
Little Life Update
3 February 2023
I finally caught COVID, and while I am curled up on my sofa feeling sorry for myself, I thought I would check through things. I realised that I haven’t written anything on this blog for ages (gulp April 2021) and so much has happened! The problem is that Instagram is so much quicker and easier […]
-
Alison Glass Lumen Quilt
19 April 2021
In which I attempt to make a giant quilt, for the first time!
-
Cactus Embroidery – Slow Sewing
6 February 2021
It’s taken just over a year, but this embroidery is finally finished!
-
Mushroom Ragu – Vegan and Delicious!
1 January 2021
It's new year's day and I'm making Mushroom Ragu.