Alison Glass Lumen Quilt
A long term project I’ve been working on for a while (and to be honest it has been finished for a while, but I haven’t posted about it) has been an Alison Glass Quilt. I wanted to try out foundation paper piecing, so I watched a few YouTube tutorials and (in classic “me” fashion) thought “how hard can it be”.
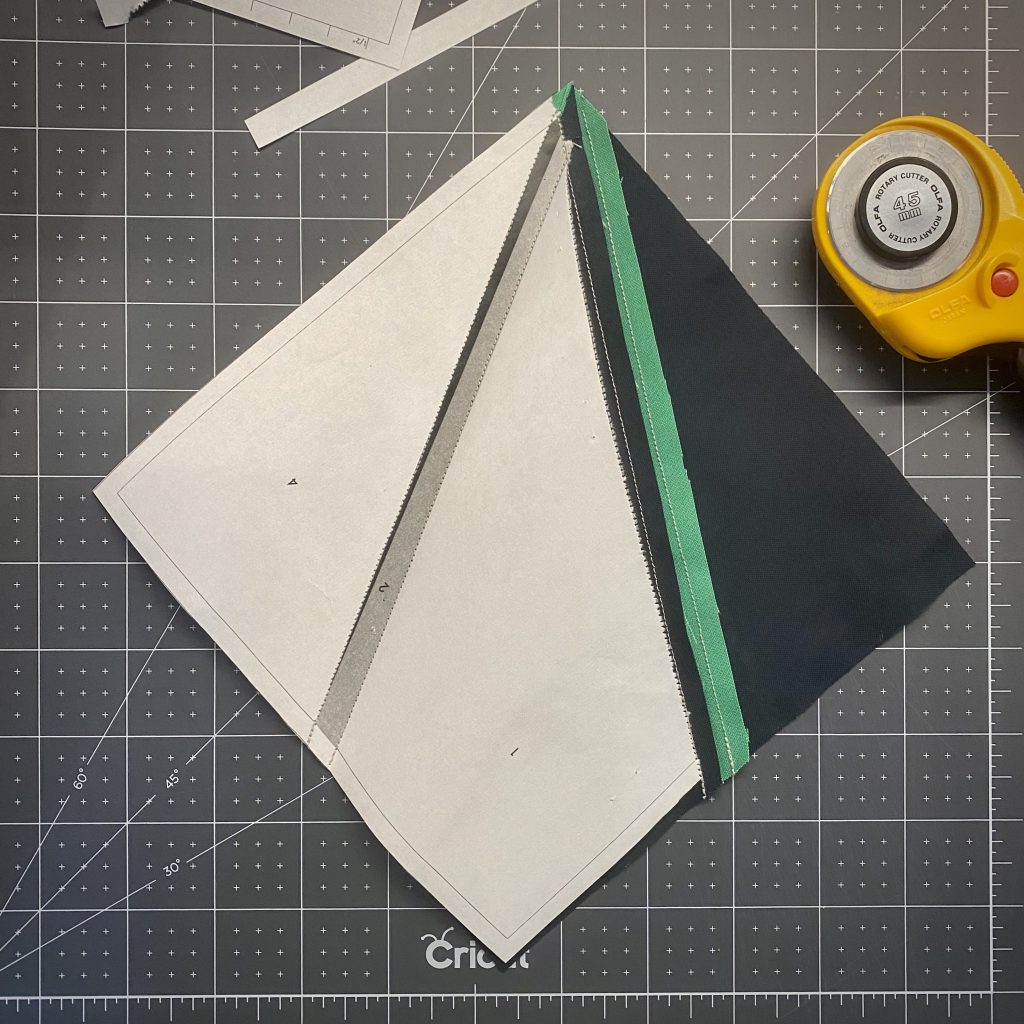
So I bought an Alison Glass pattern called Lumens. I will freely admit that choosing this as my first foundation paper piecing quilt was perhaps a little over ambitious, but I took it slow and completed it after 6 months.
Some errors I made with fpp was using normal printer paper, so I couldn’t see though it at all. This made placing the fabric quite challenging, and I would often have to unpick things and try again.
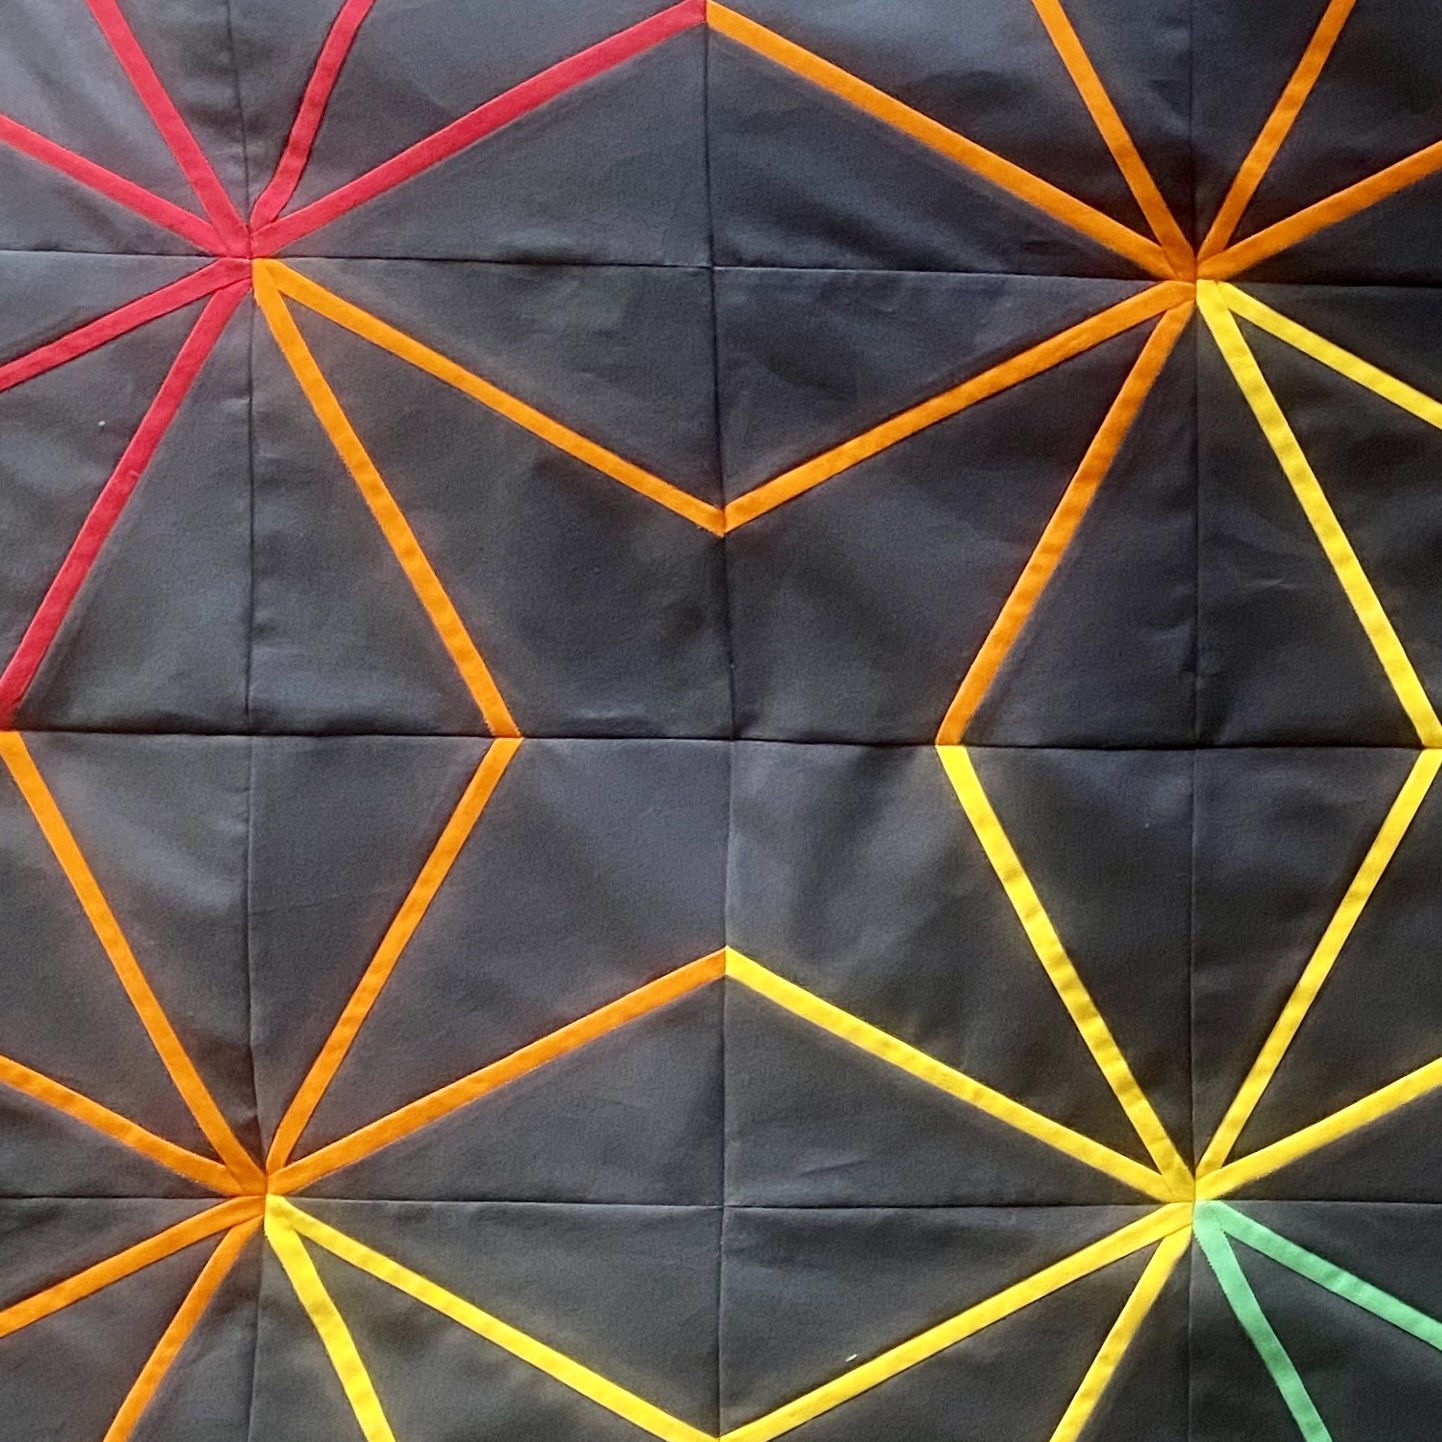
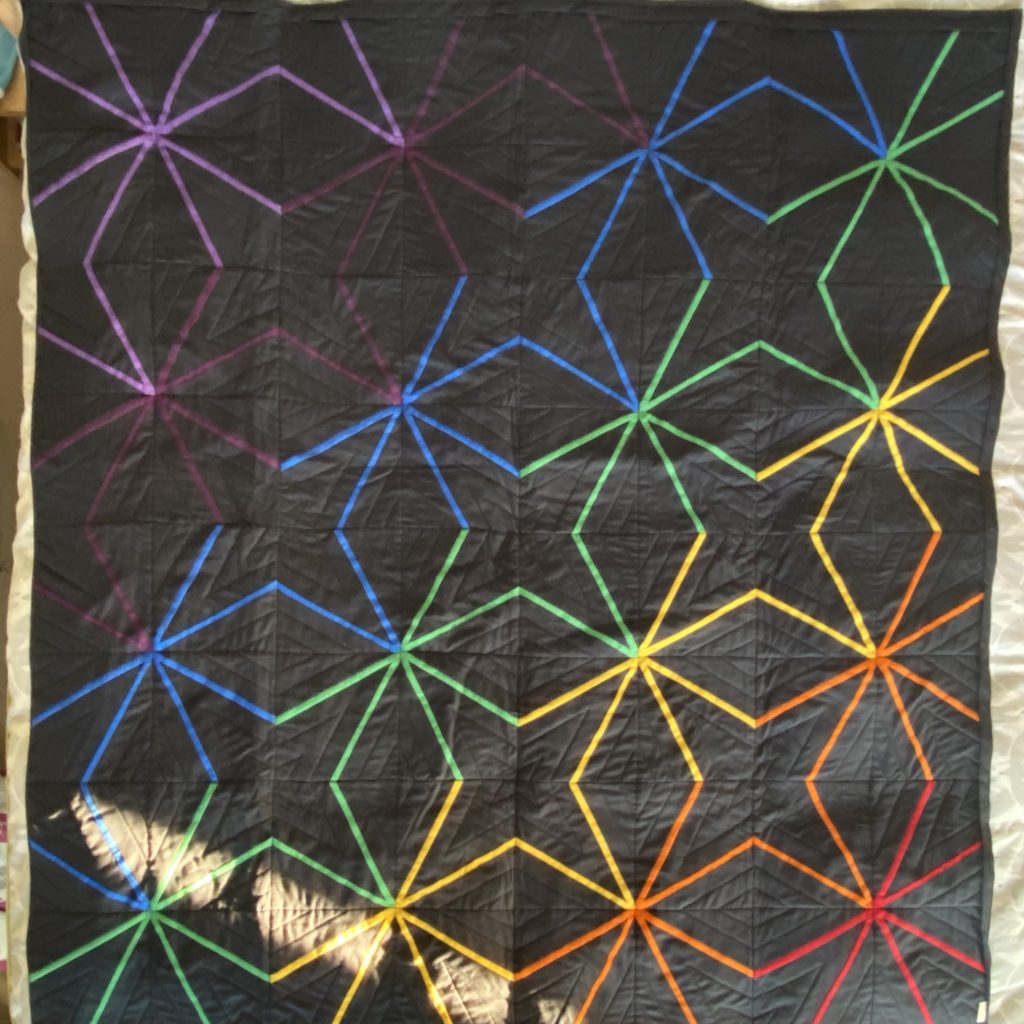
When the panels started coming together, I really liked how the rainbow colour scheme was coming together
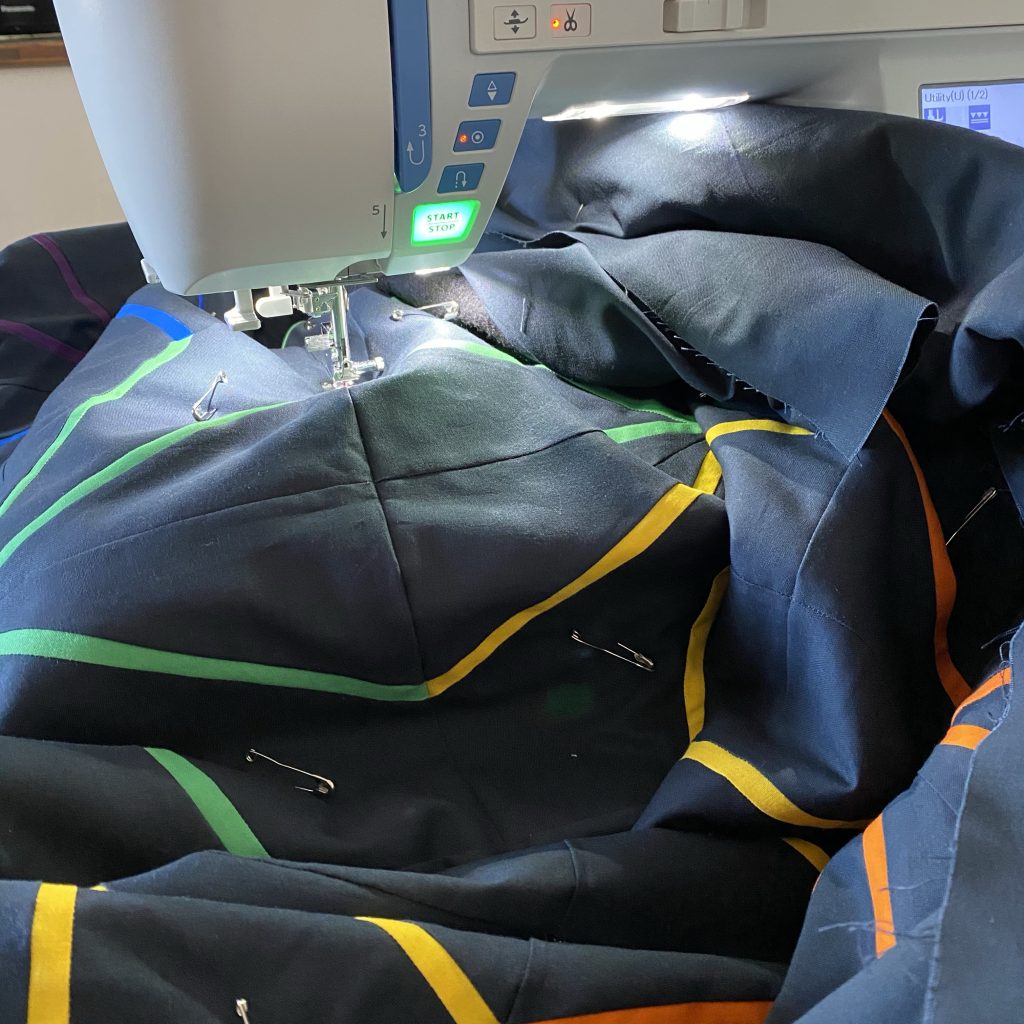
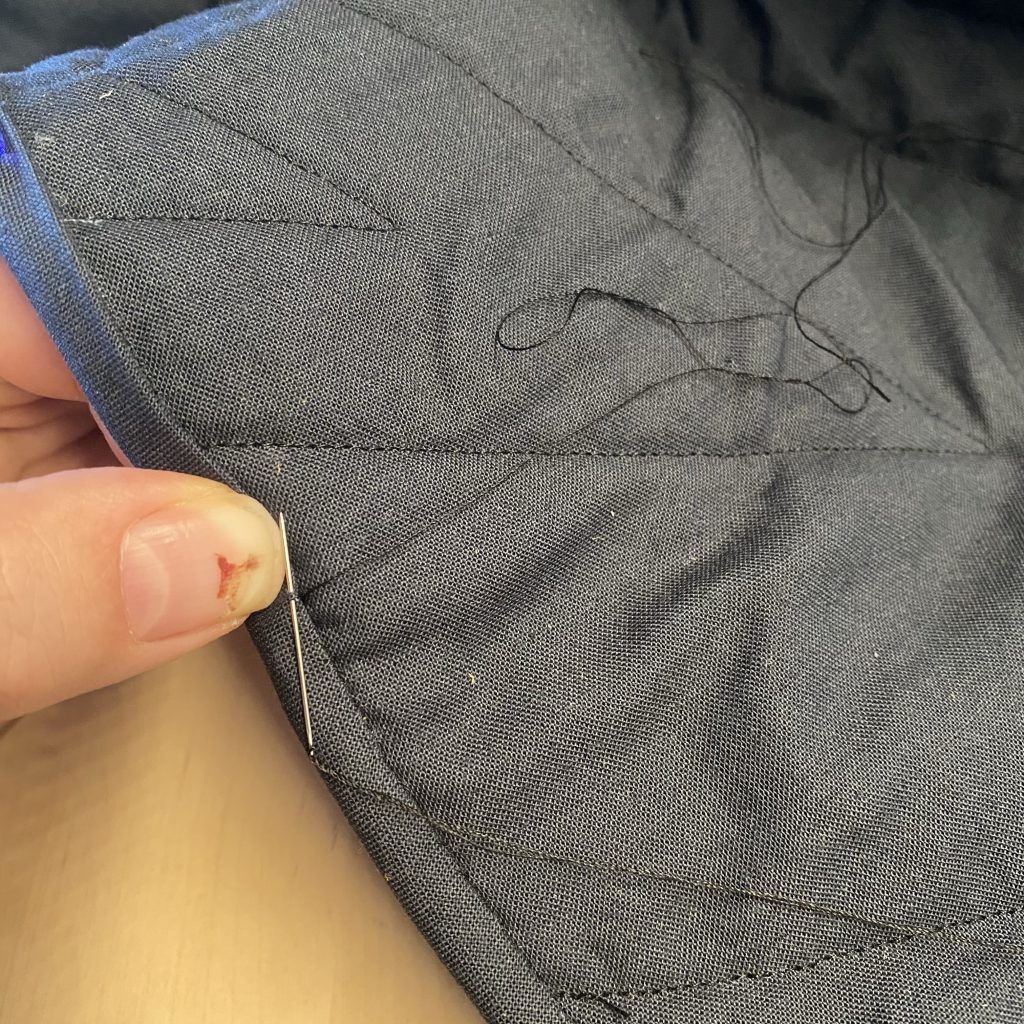
Once all the panels were joined, I used curved safety pins to hold together the back, batting and front before sewing the 3 layers together.

Next mistake, I decided to quilt it myself. Which proved to be a massive workout for my arms! I probably should have sent it away to someone with a long arm quilting machine.
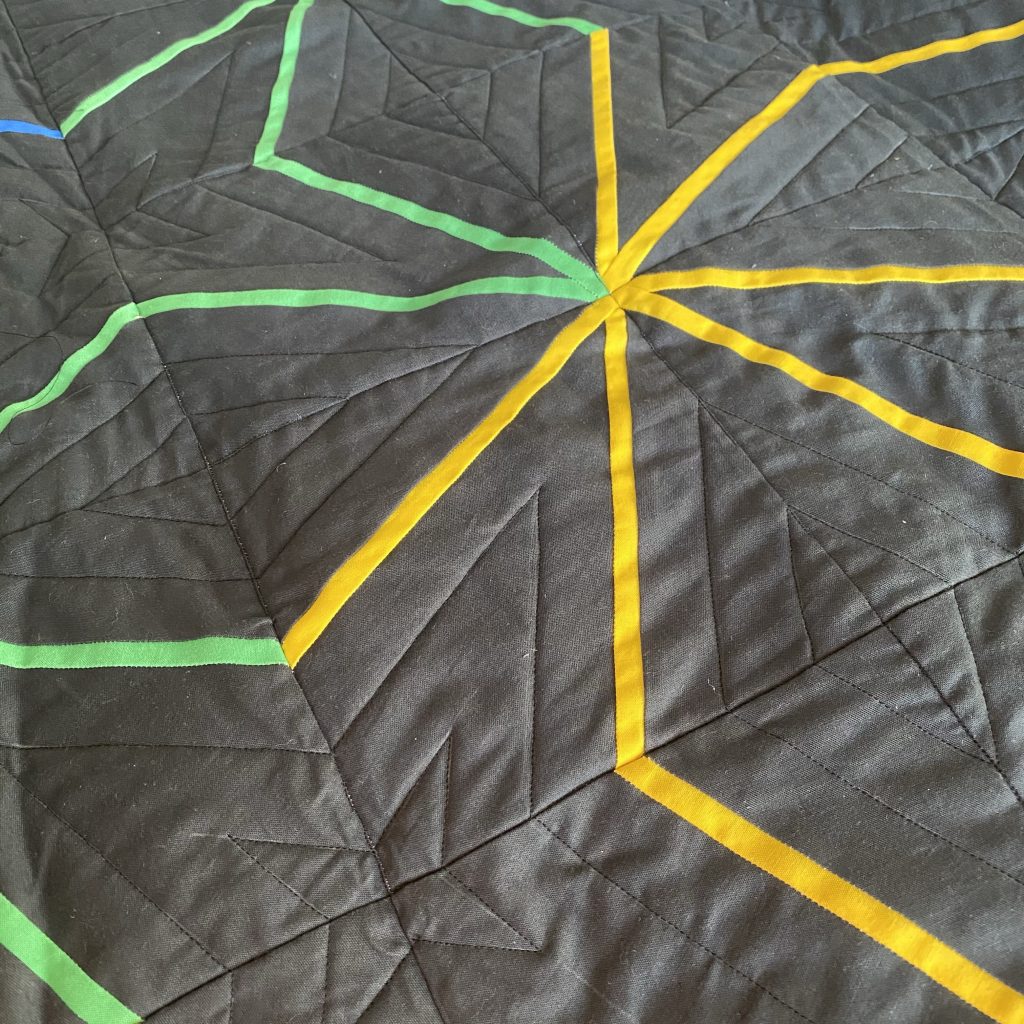
But despite the challenges, I think it turned out ok.
I sewed the binding on by hand, which did take a very long time. I think it worked well, but again hand sewing in the middle of summer with a giant quilt on my lap was, um, tricky.
I have also discovered that taking a picture of a whole quilt of very challenging, especially as it is the size of a king size bed! So here is the best picture I’ve managed so far…
I loved the whole process! And I’m currently deciding on my next fpp quilt. I’ll let you know how it goes.
I always thought that I would finally be a “proper grown-up” when I owned a KitchenAid mixer. Then back in 2015 I finally decided to buy one for myself. I love it! I use is for all of my baking.
But my poor KitchenAid sits on the side of my very small kitchen. Due to its proximity to the hob, it’s been getting quite greasy.
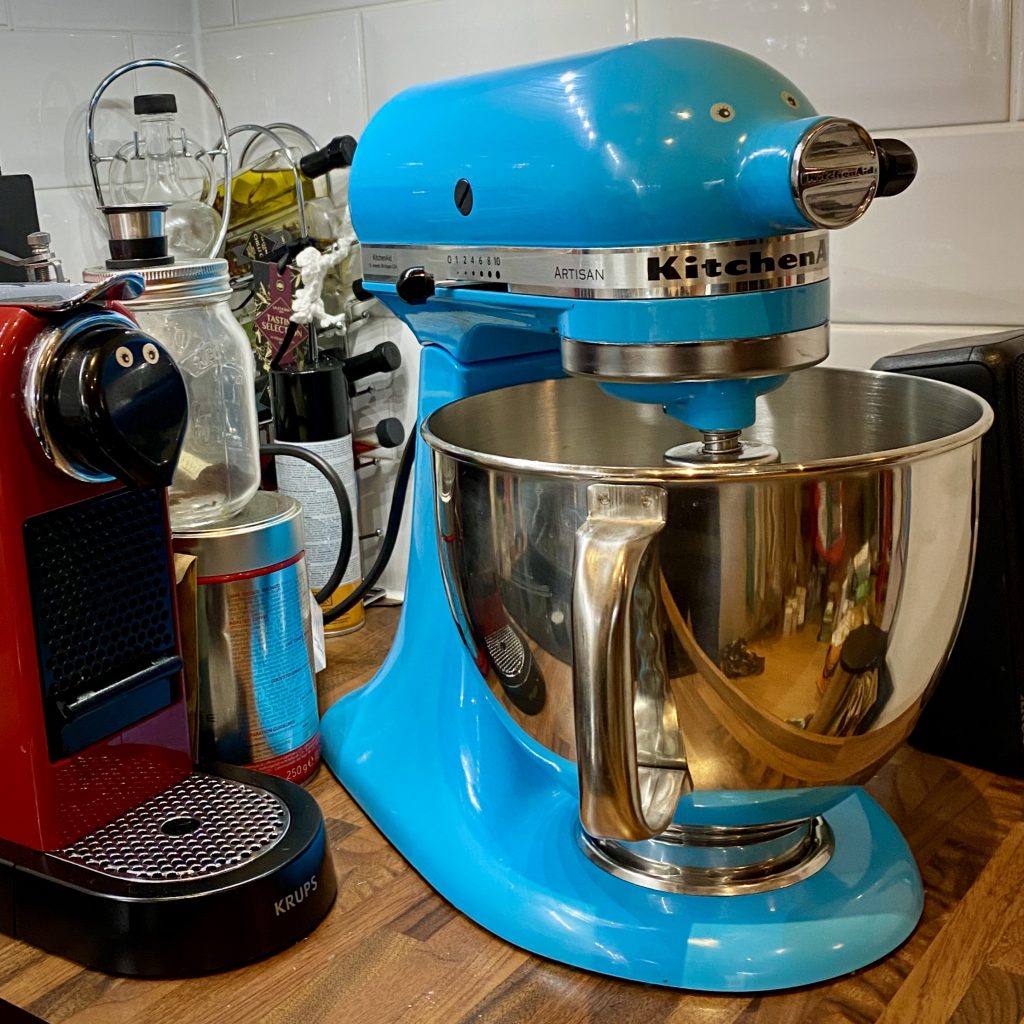
I also wanted to take part in the #makenine challenge this year, which is to challenge yourself to make nine things over the course of 2020. I thought I would start by making a cover for my KitchenAid.
I decided to make a quilted cover, but as I’ve never quilted anything before it was going to be a challenge!
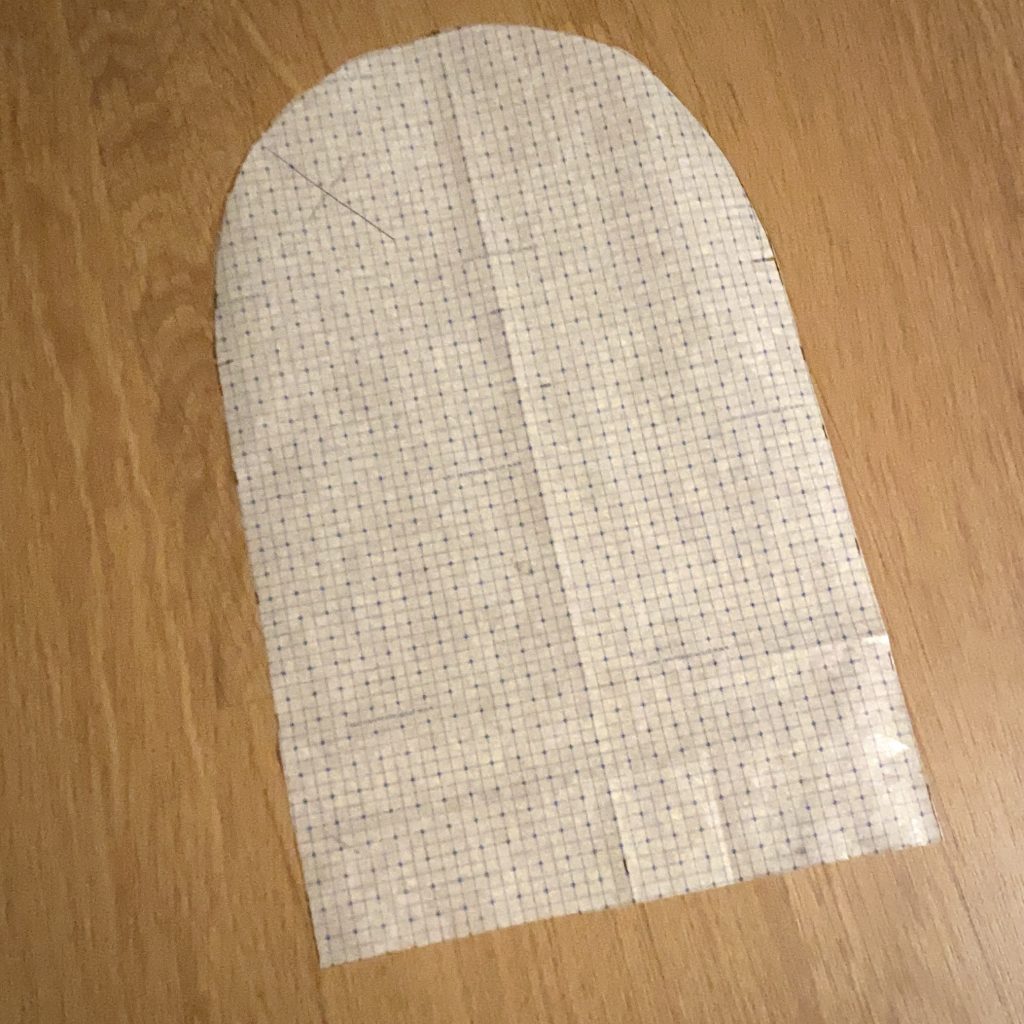
I started by drafting the front of the cover and then cut out the fabric and wadding.
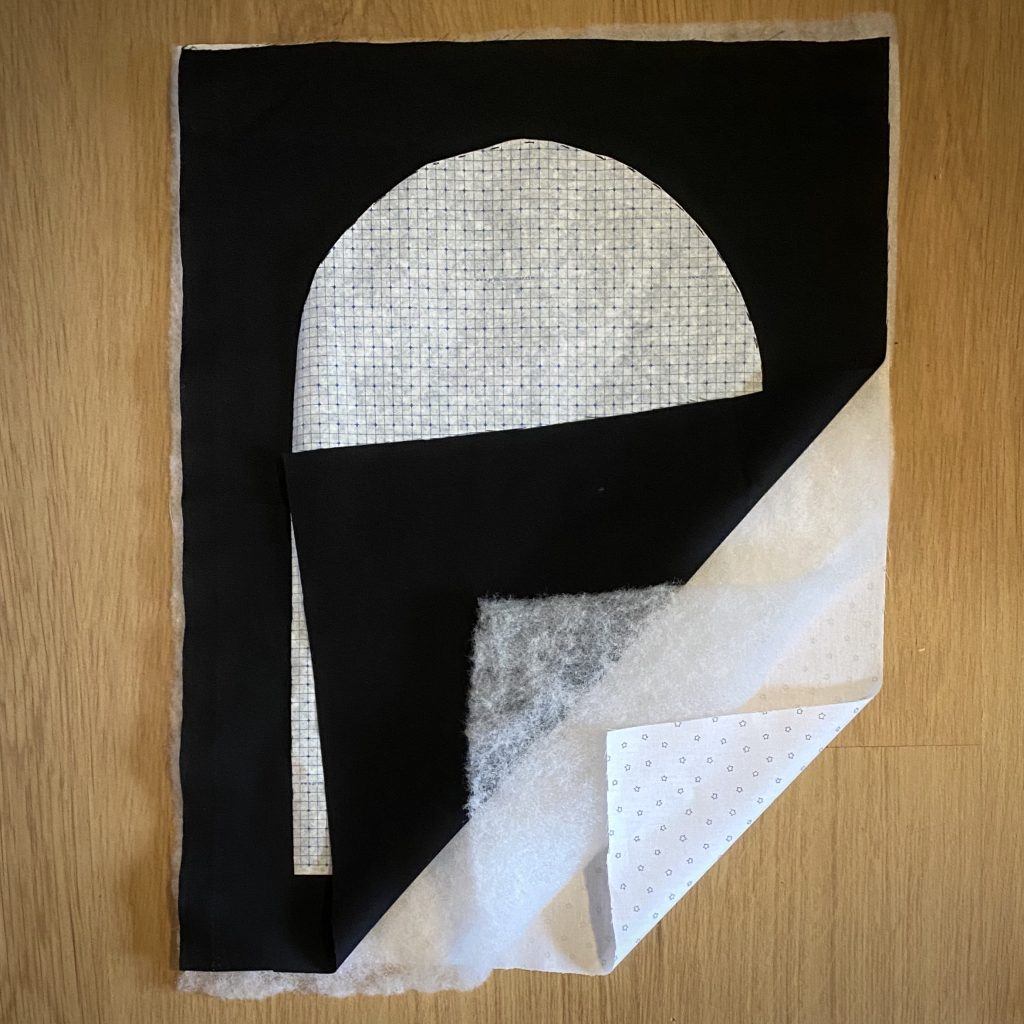
I cut the fabric bigger than the pattern, so that I had space to quilt as I suspected that the fabric would shrink.
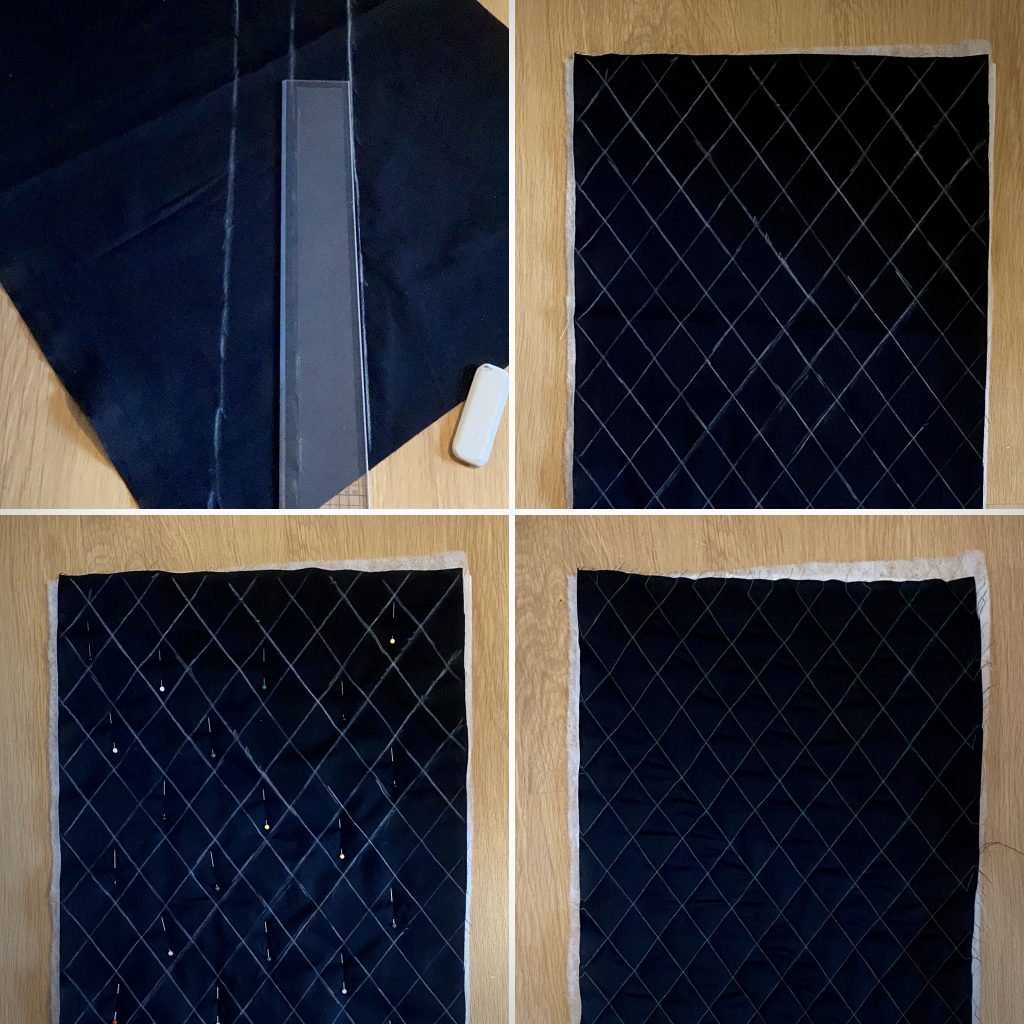
I then used tailors chalk to mark out the quilting lines and pinned the 3 layers together. I then sewed the quilting lines.
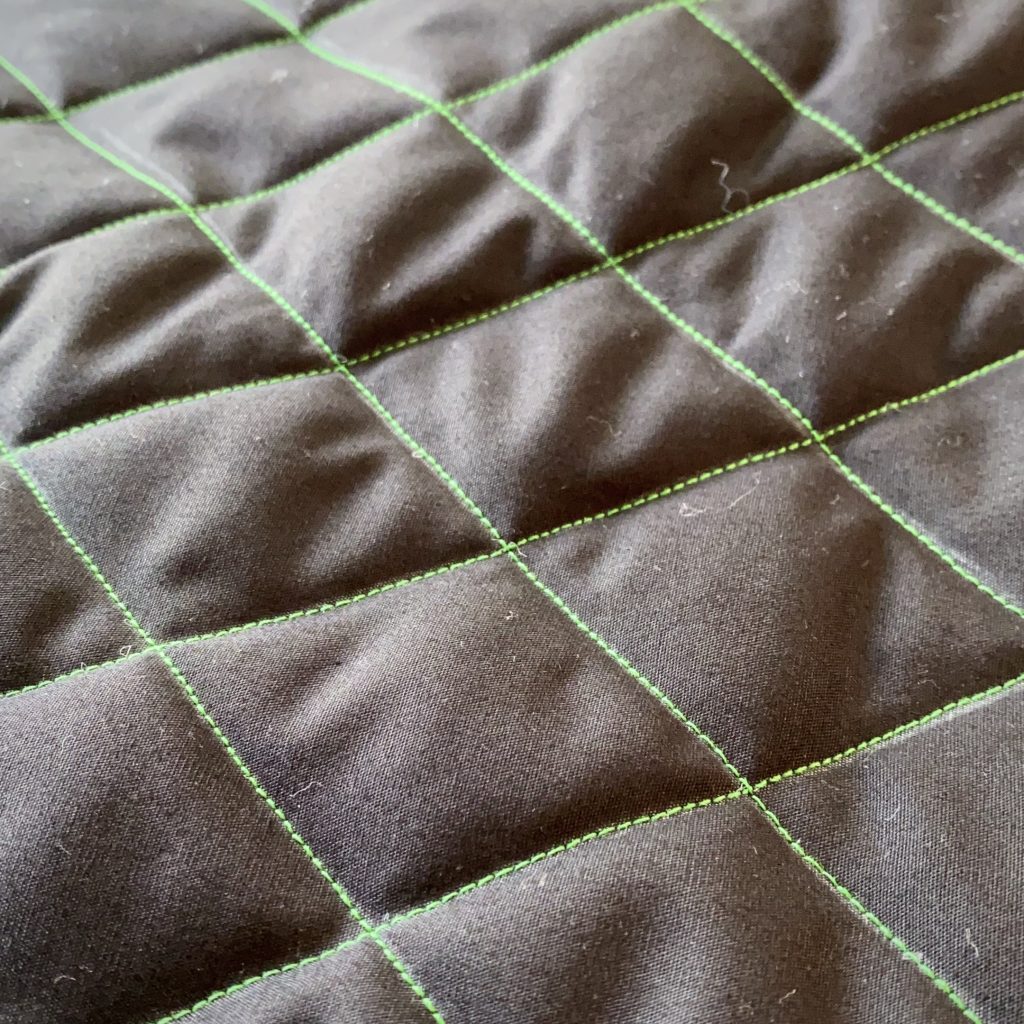
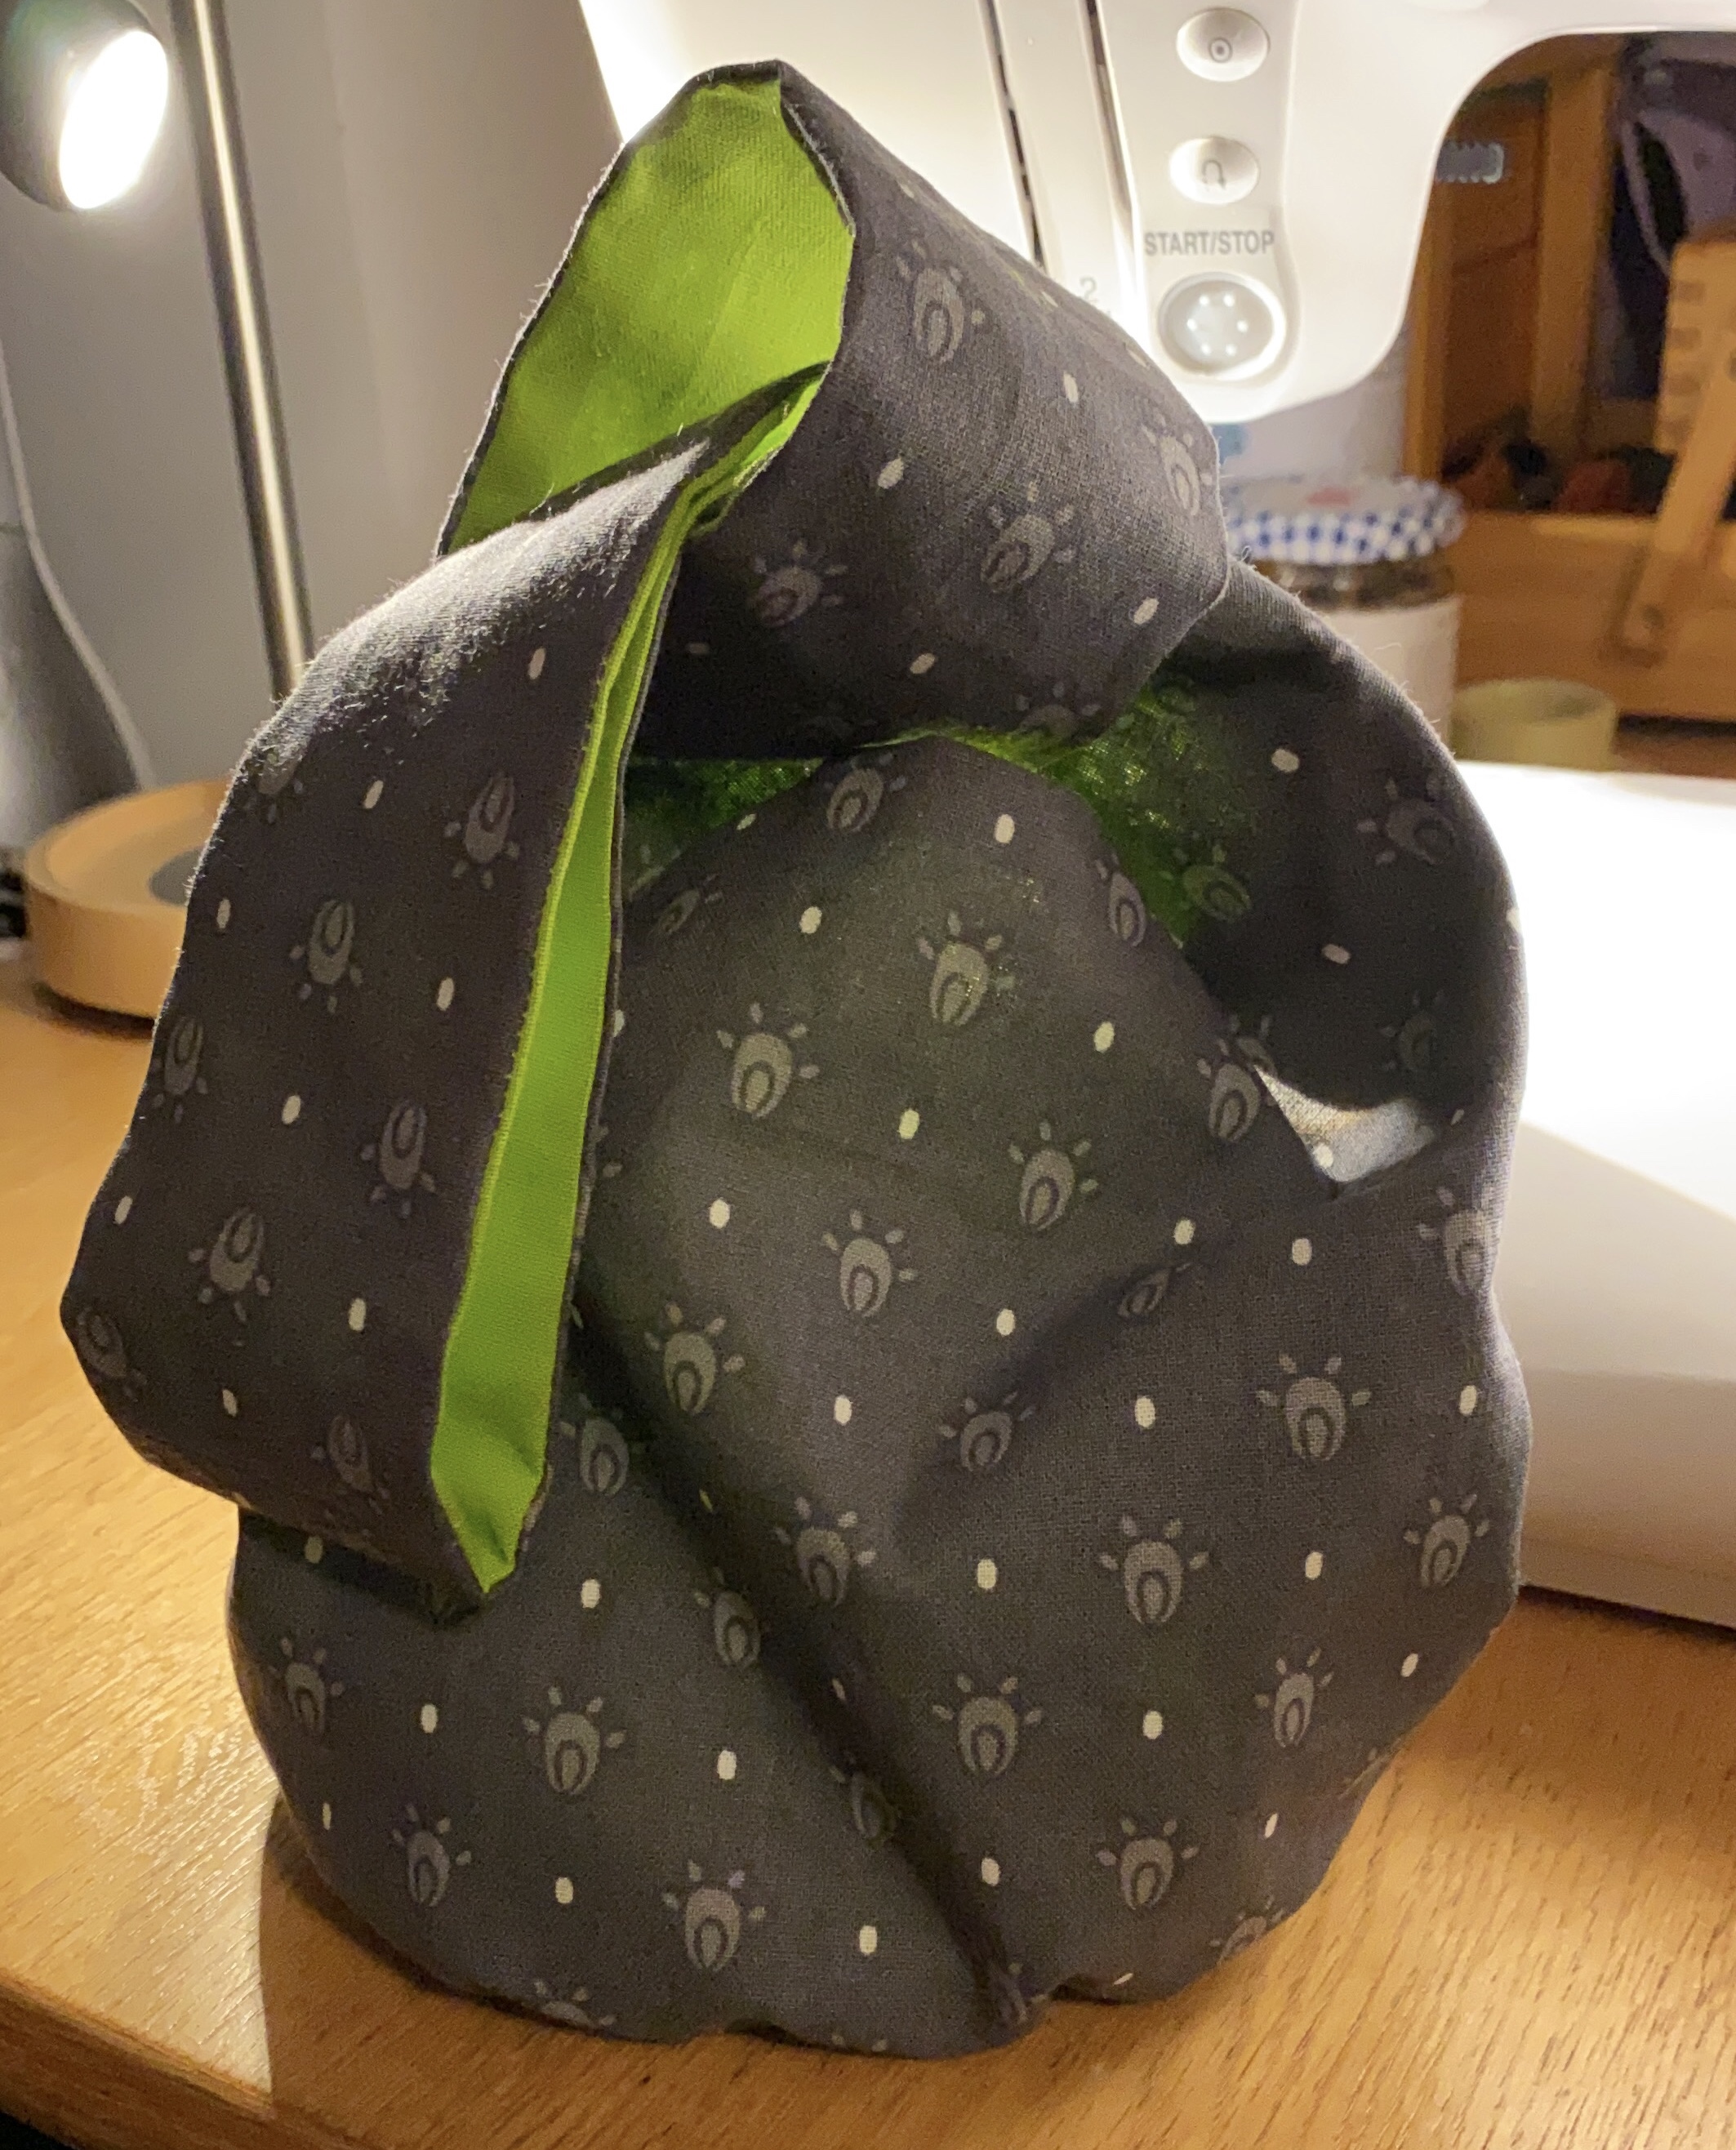
The final quilted piece looked amazing! I really liked the green thread on the black fabric. I repeated this process on the back piece and a rectangular piece that would make the top and sides. After cutting out the shaped pattern pieces I could pin it all together and see the edges.
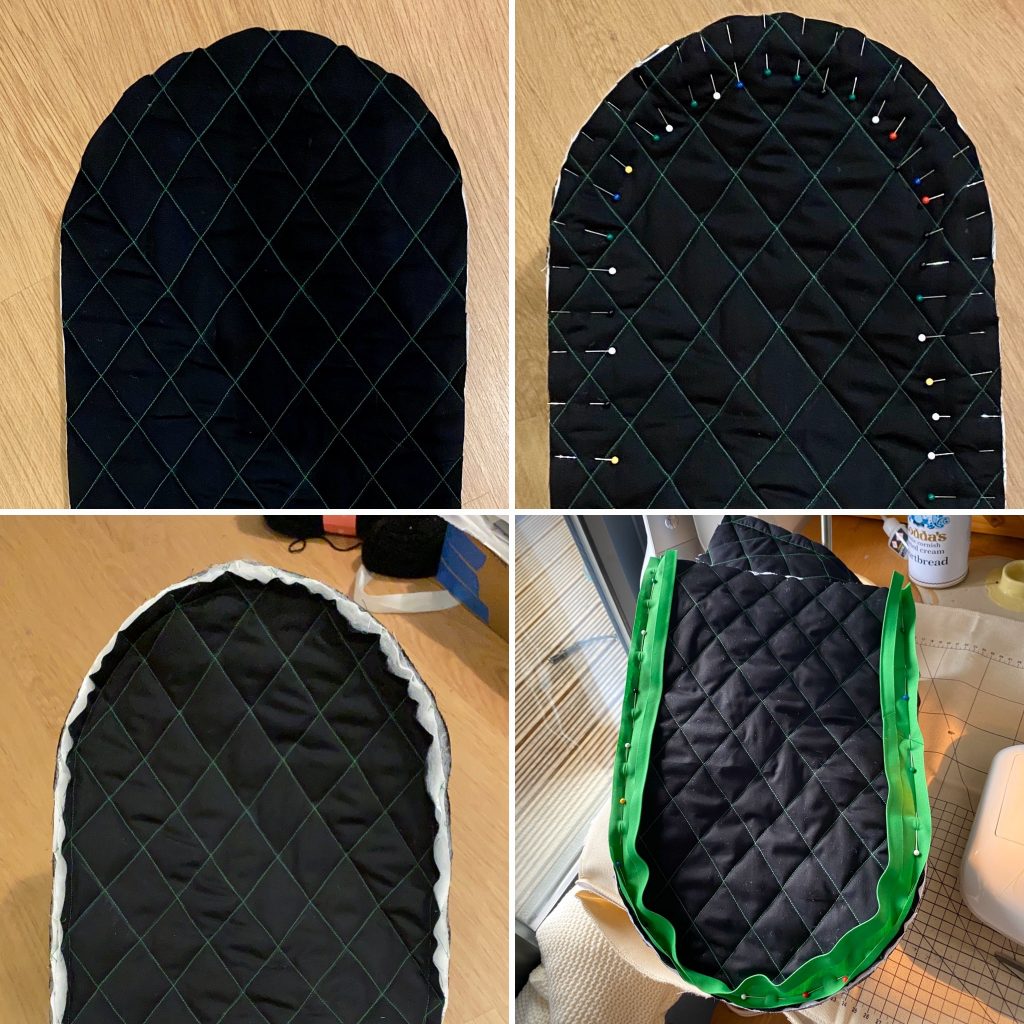
I decided to finish the edges with bias binding, which involved a lot of hand sewing!
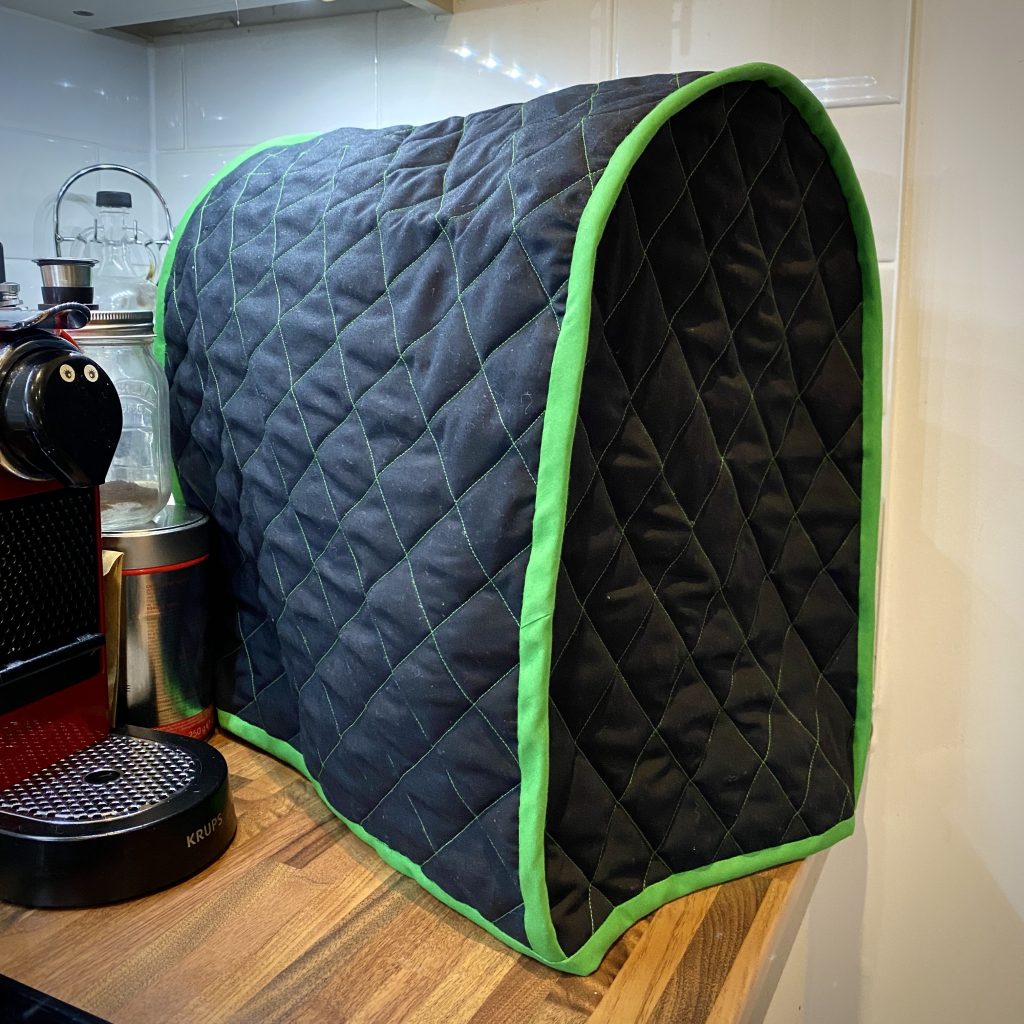
The finished cover fits perfectly! And looks great in my kitchen. One down on the #makenine nine to go.
This Christmas I wanted to make some project bags for my family, as I am (perhaps unsurprisingly) surrounded by crafty people. One bag I particularly wanted to make was a round base Japanese knot bag. My boyfriend’s mum had been very impressed by my own knot bag when I went to visit, so I wanted to make one for her. But as the one I owned had been given to me in a swap, I didn’t know how to make one!
I naively thought ‘how hard can it be’, as I knew how to make a basic two sided knot bag. This one only had the addition of a round panel at the bottom. It turned out to be very difficult, and two failed bags later I decided to search for some instructions!
It transpired that there were very few places with instructions. In fact the only complete set of instructions I could find was on a French site called DIY District. The obvious problem was it was in French, a language I only have rudimentary knowledge of. So Google Translate to the rescue!
So I don’t forget how to make this bag in future, I am going to write my own set of instructions below. But I would like to thank DIY District for their very clear instructions!
Step 1
Draft a pattern. I used the measurements on DIY District. There is a minor maths equation error, but trust me – the circle does need to be 147mm diameter.
All seams are 10mm.
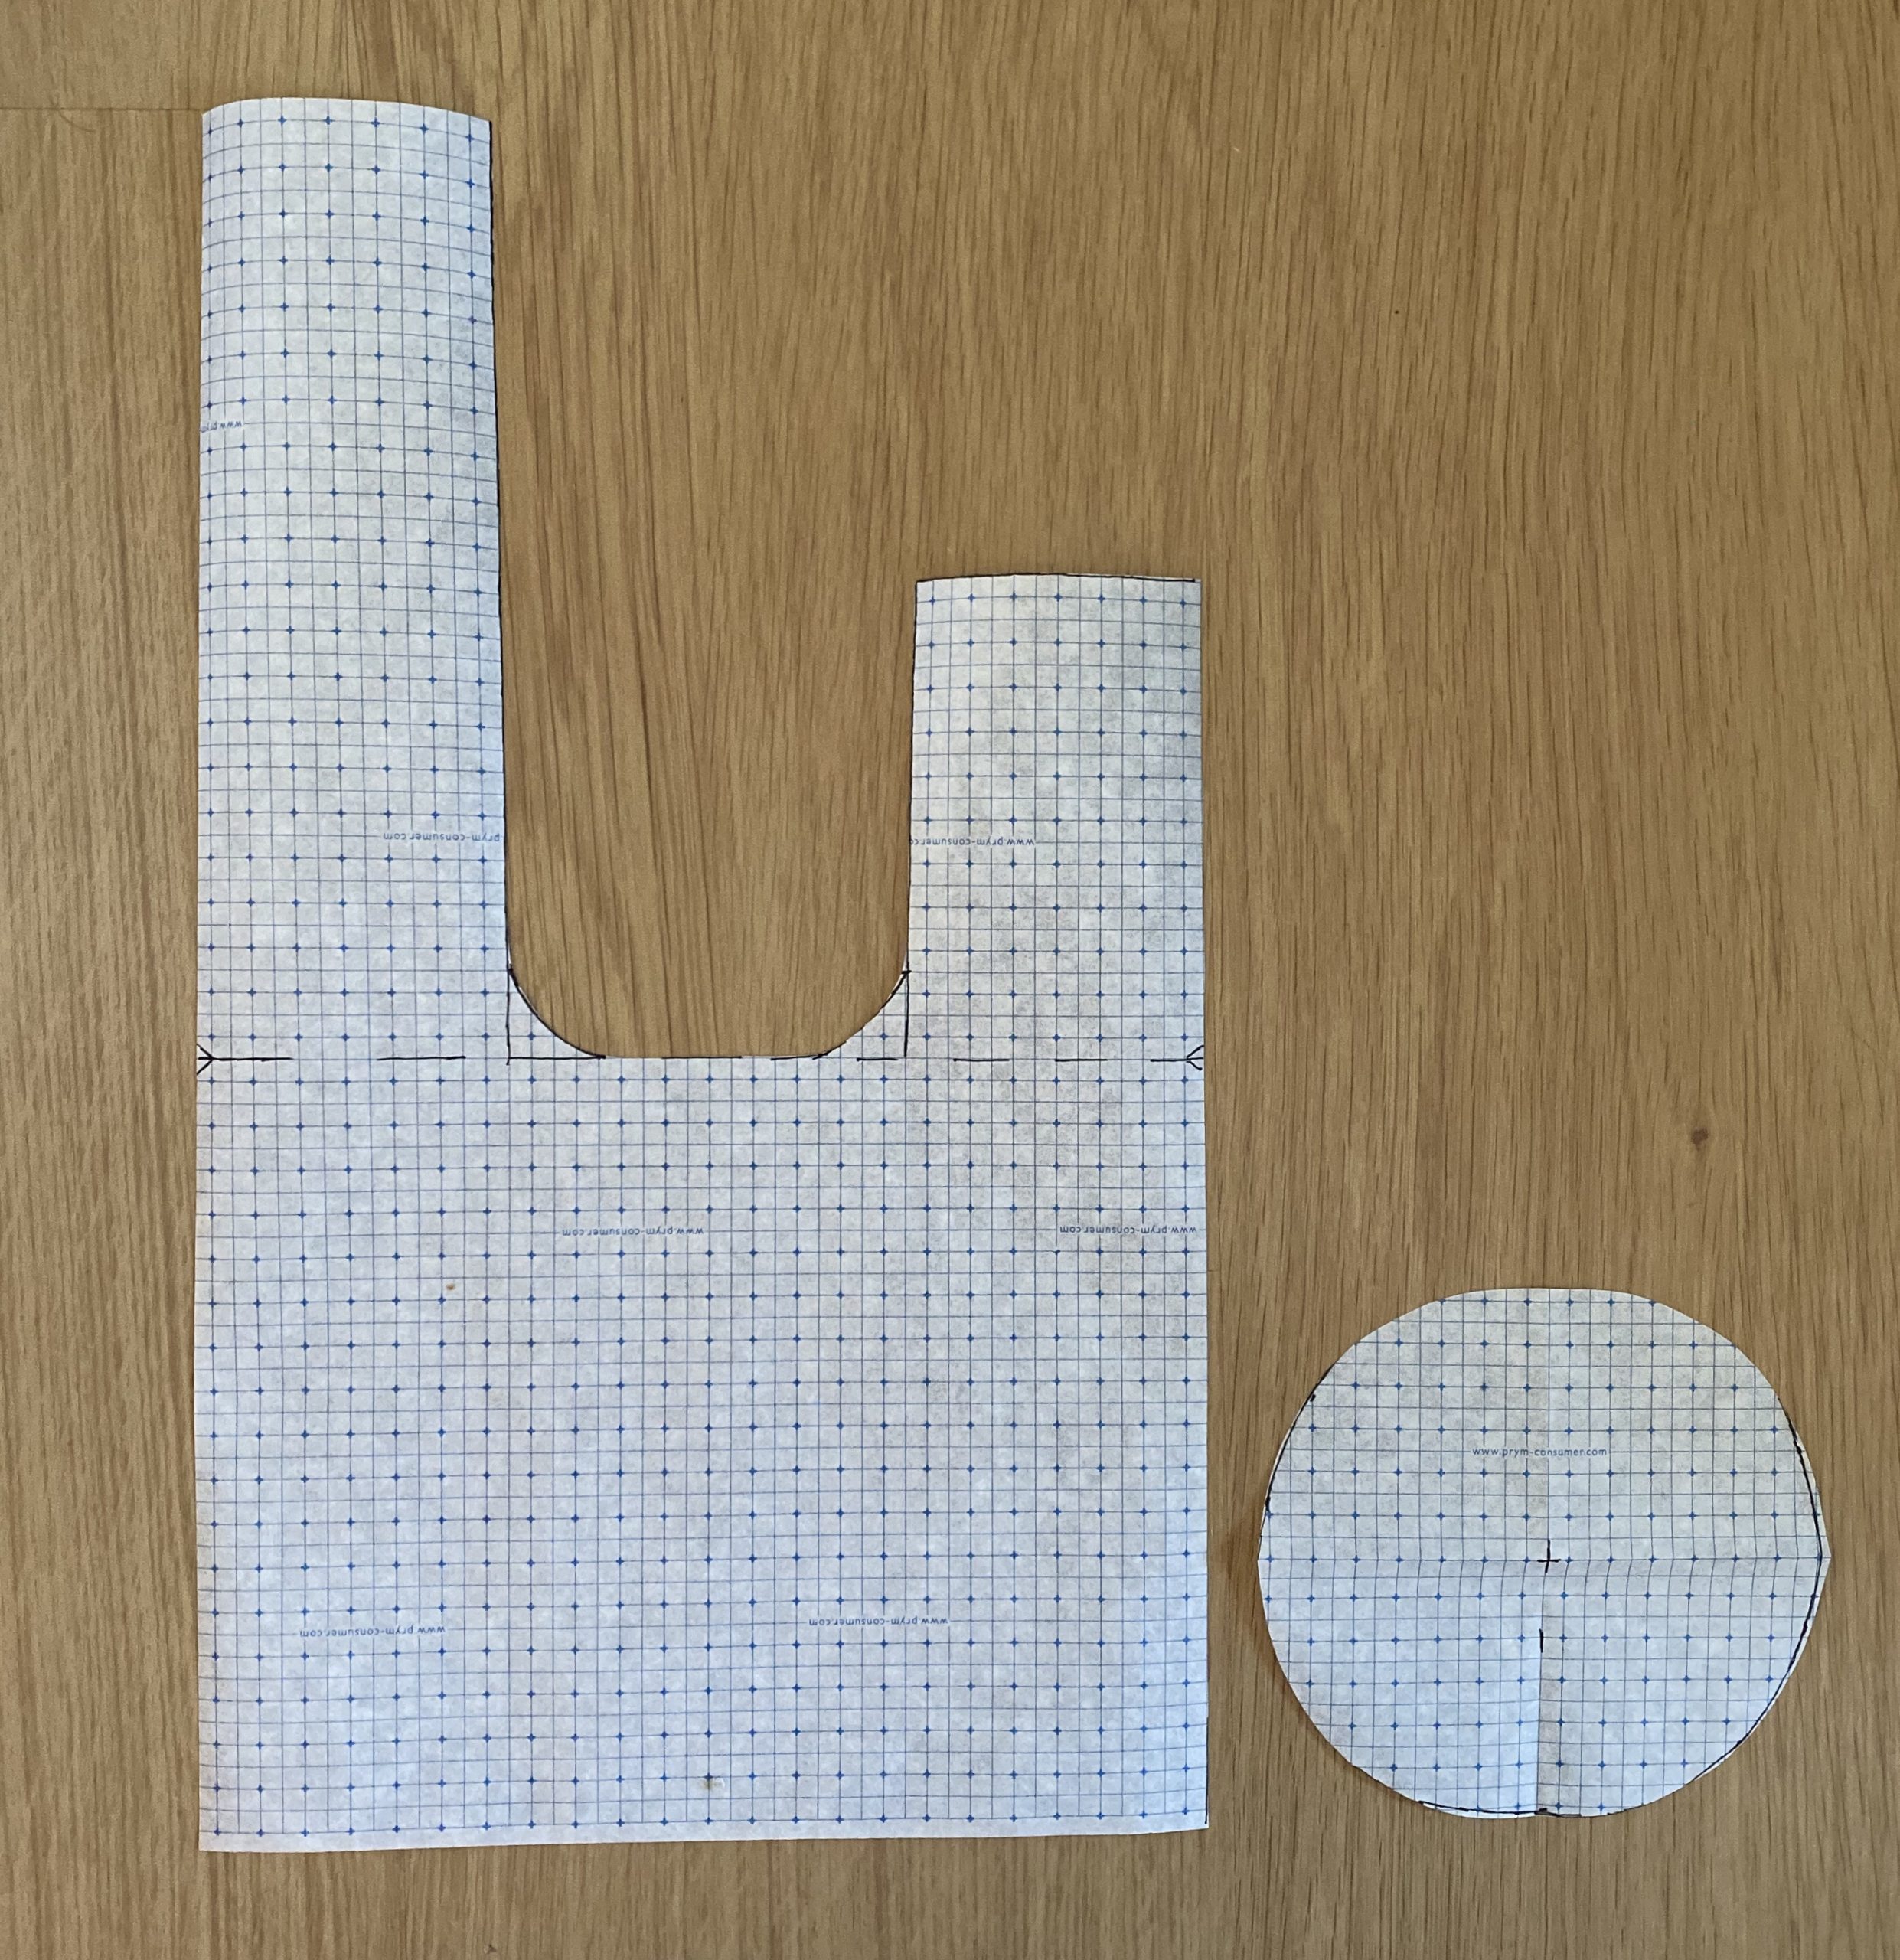
Step 2
Cut 2 bag pieces out of your outer fabric, 2 from your lining fabric and 1 circle from each.
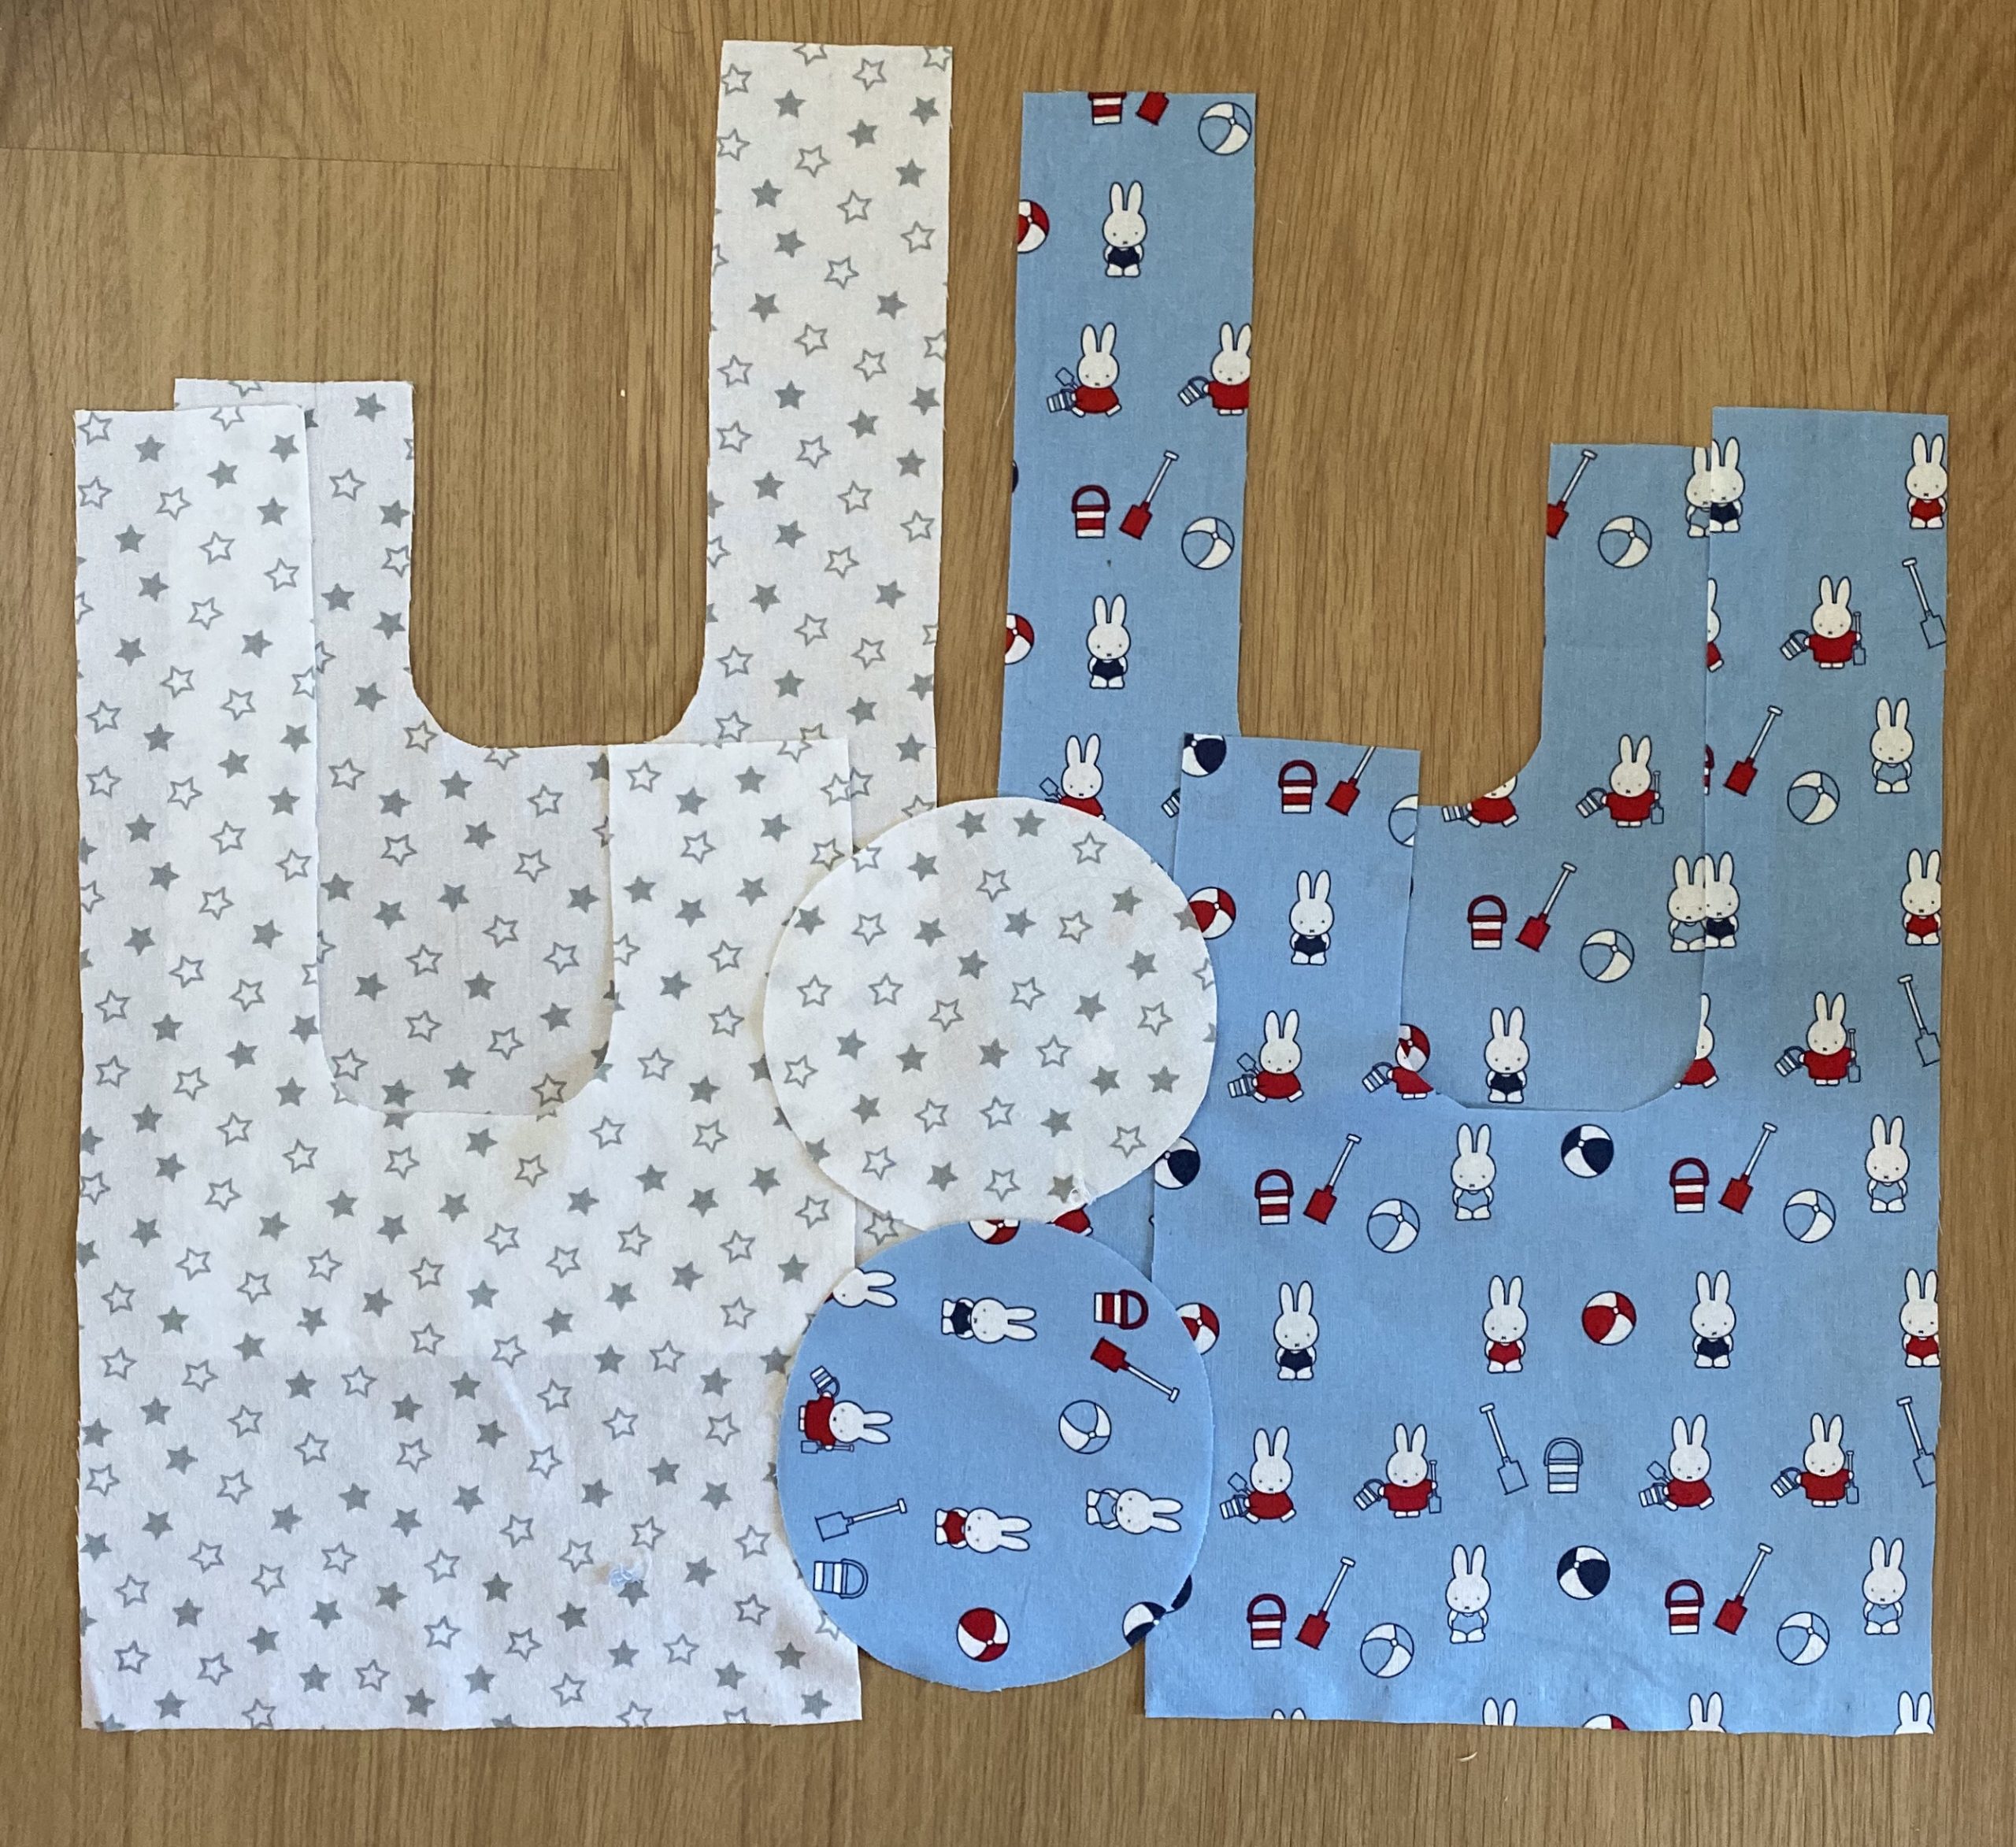
I interfaced my outer circle, but it works ok without.
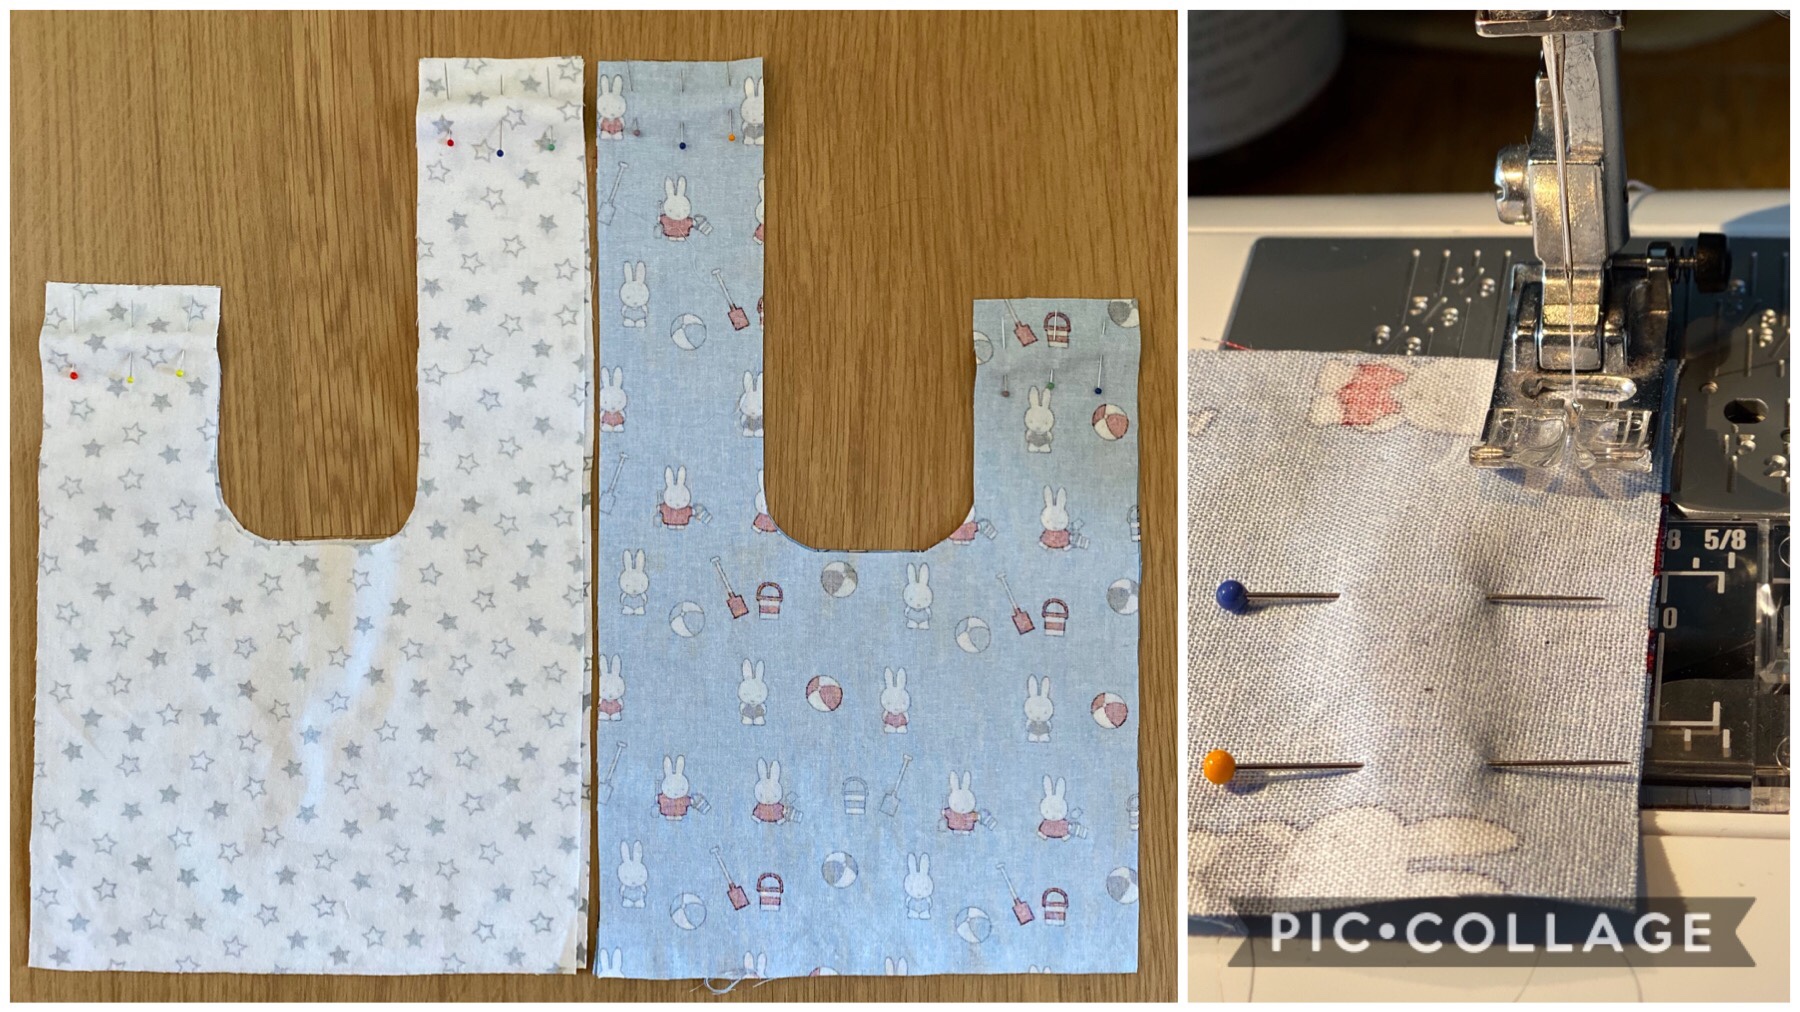
Step 3
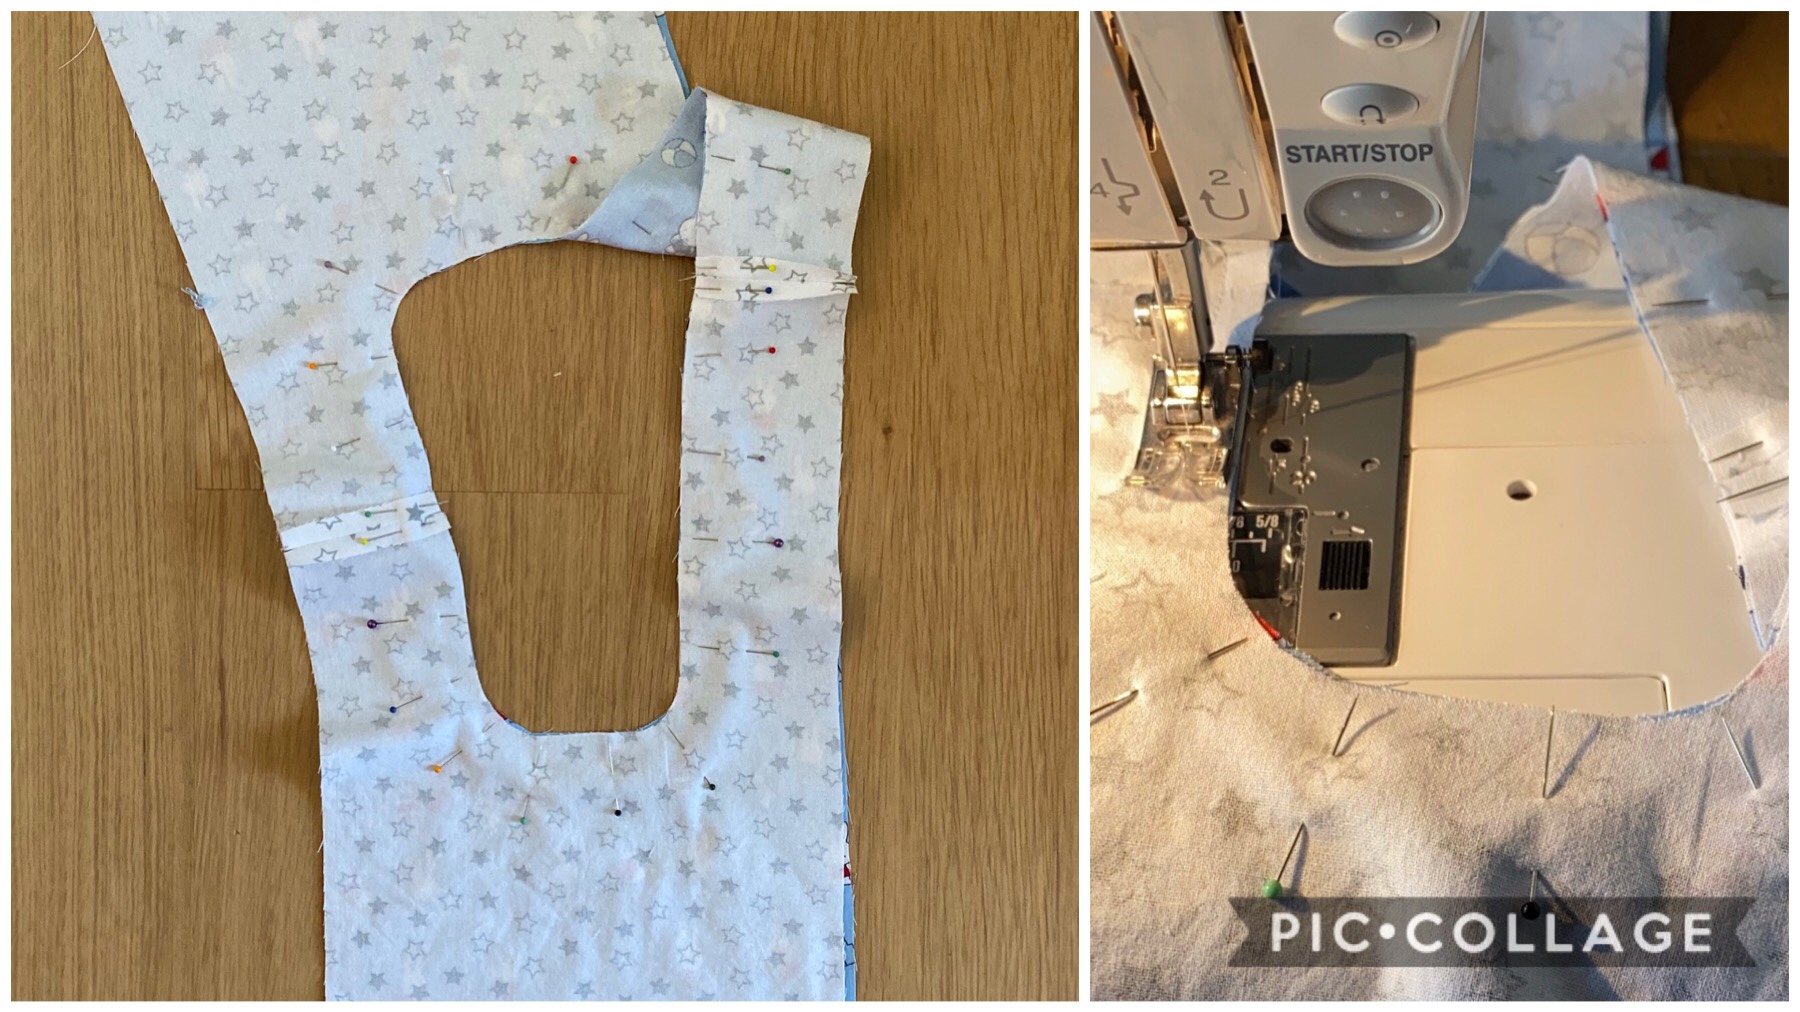
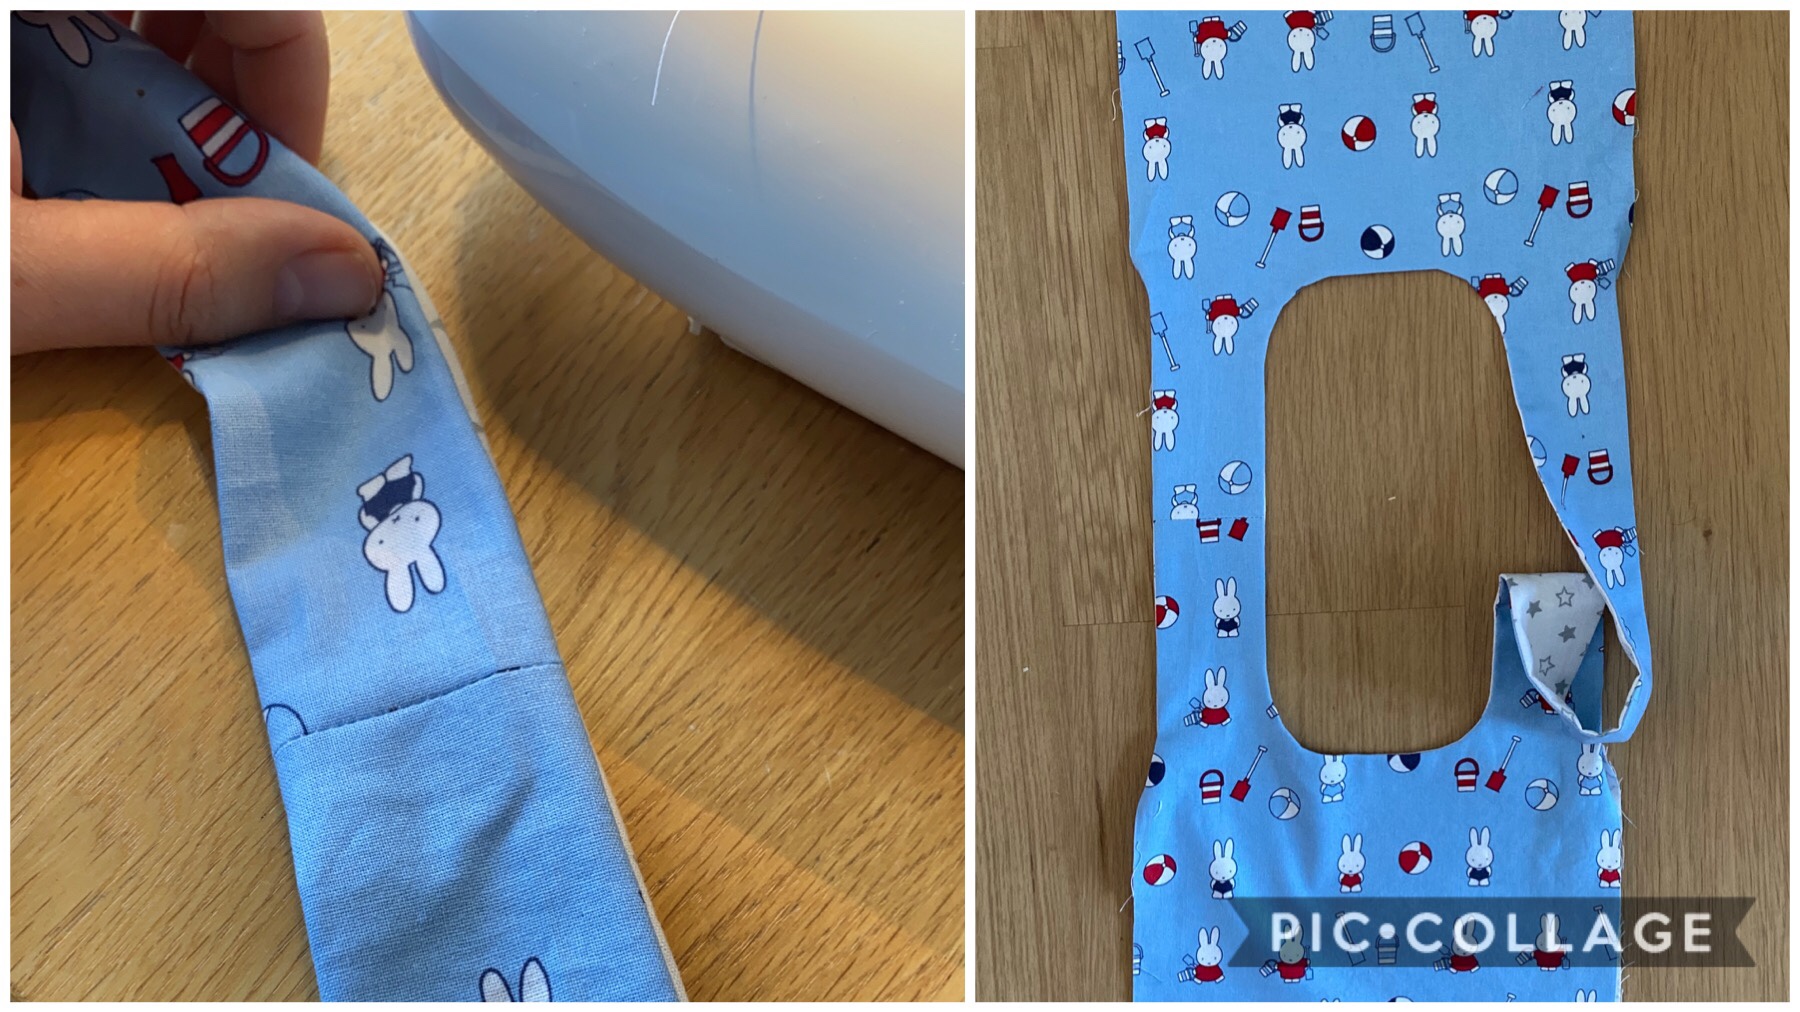
Pin and sew the shoulders of the bag straps (outer and lining). Press flat when done.
Step 4
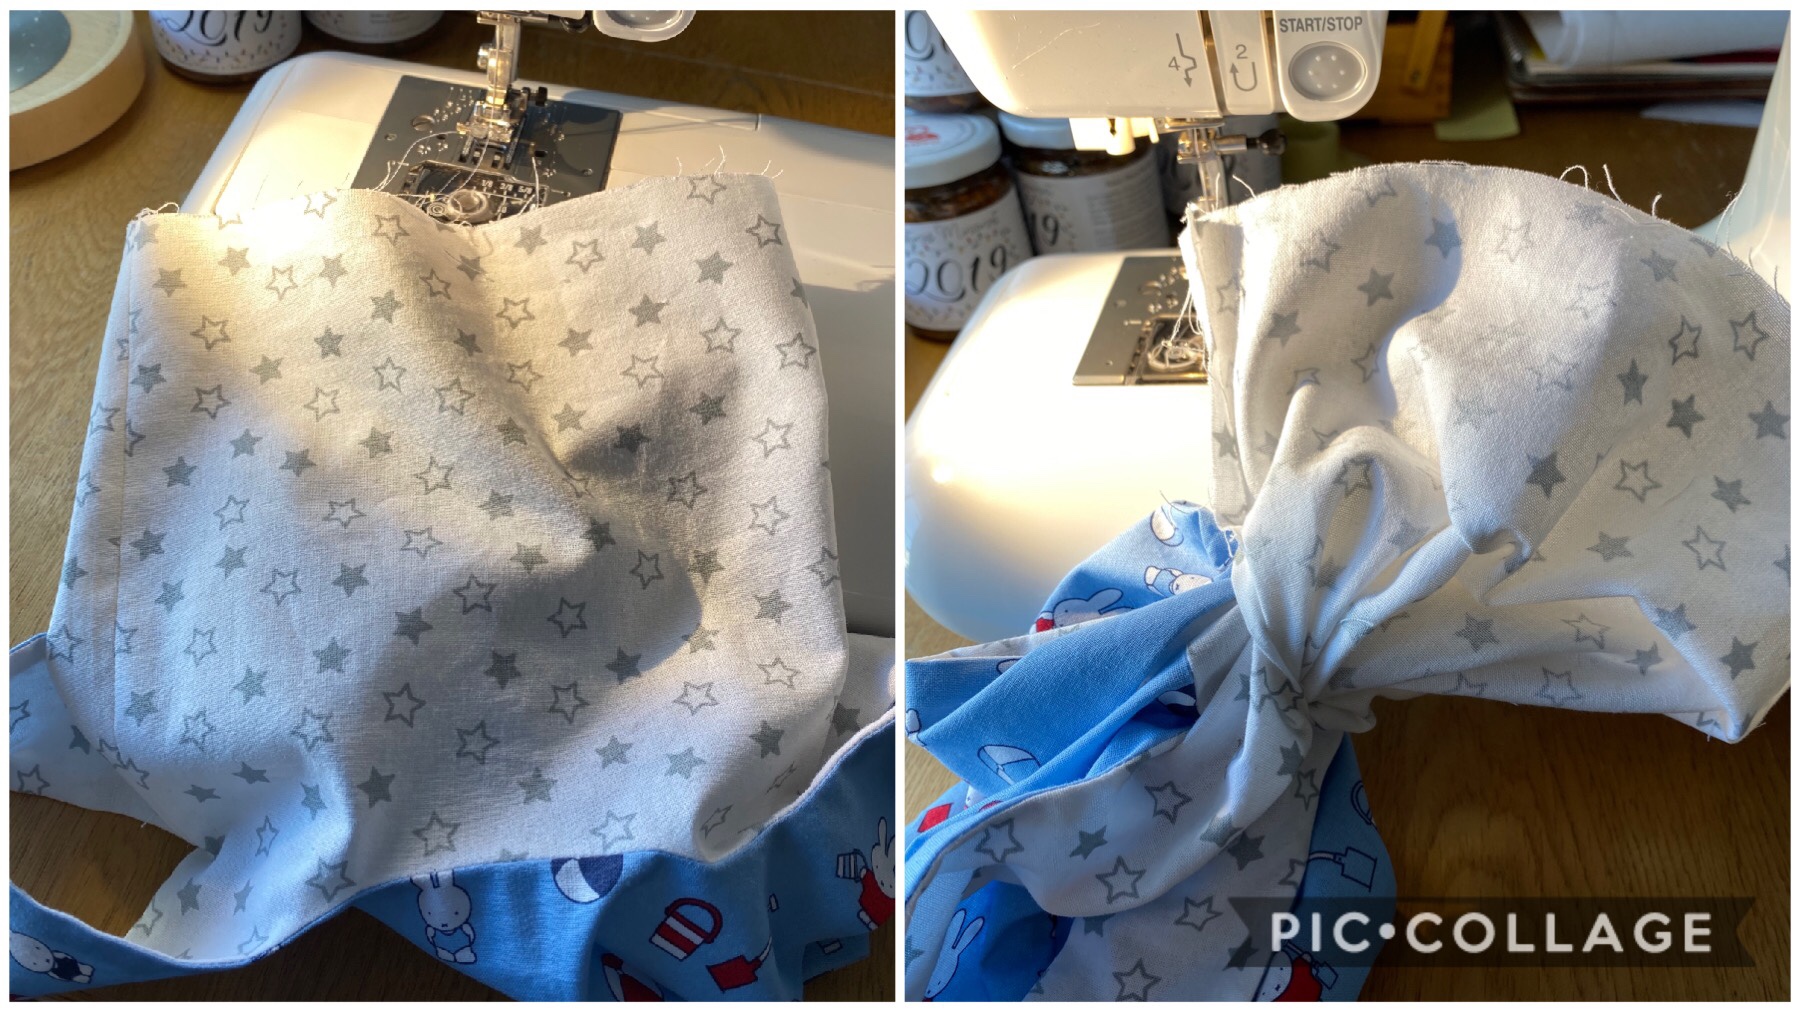
Place right sides together and pin the centre seams (around the oval) and sew together. Clip the curves, turn right way round and press flat.
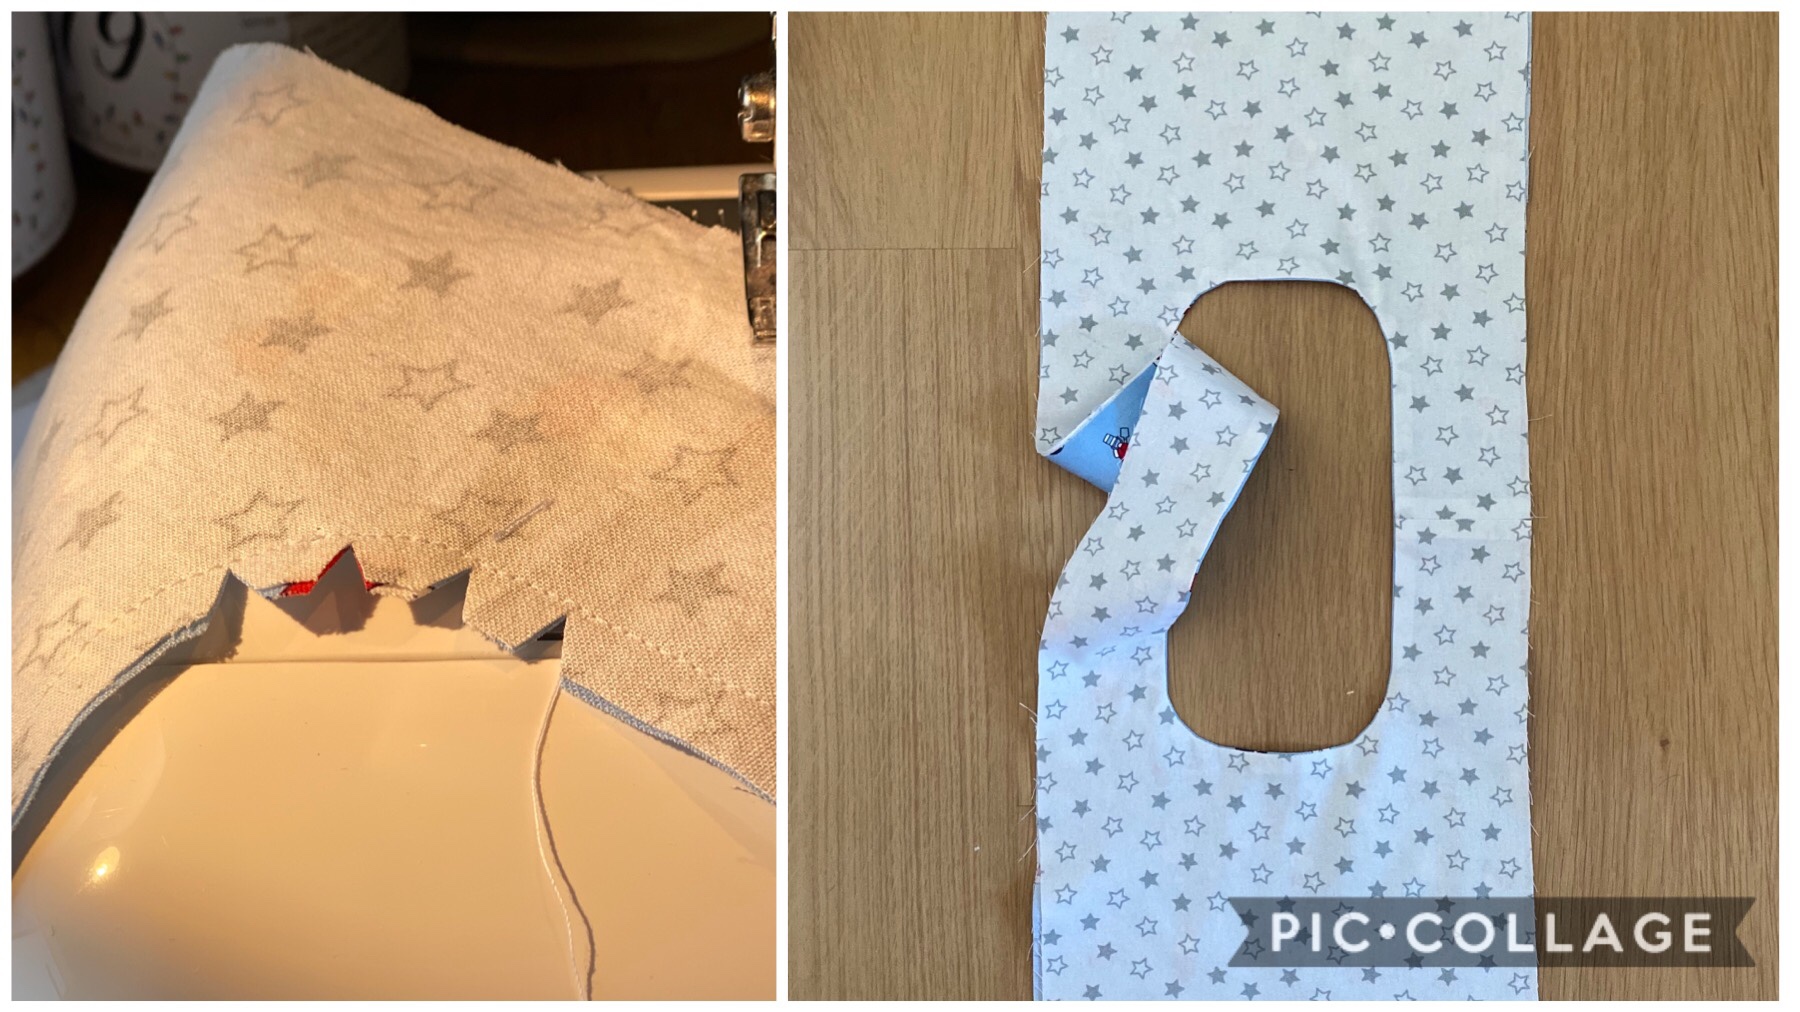
Step 5
This bit is really tricky, so tricky in fact that DIY District made a video showing how it works. I would highly recommend going to their site to watch it!
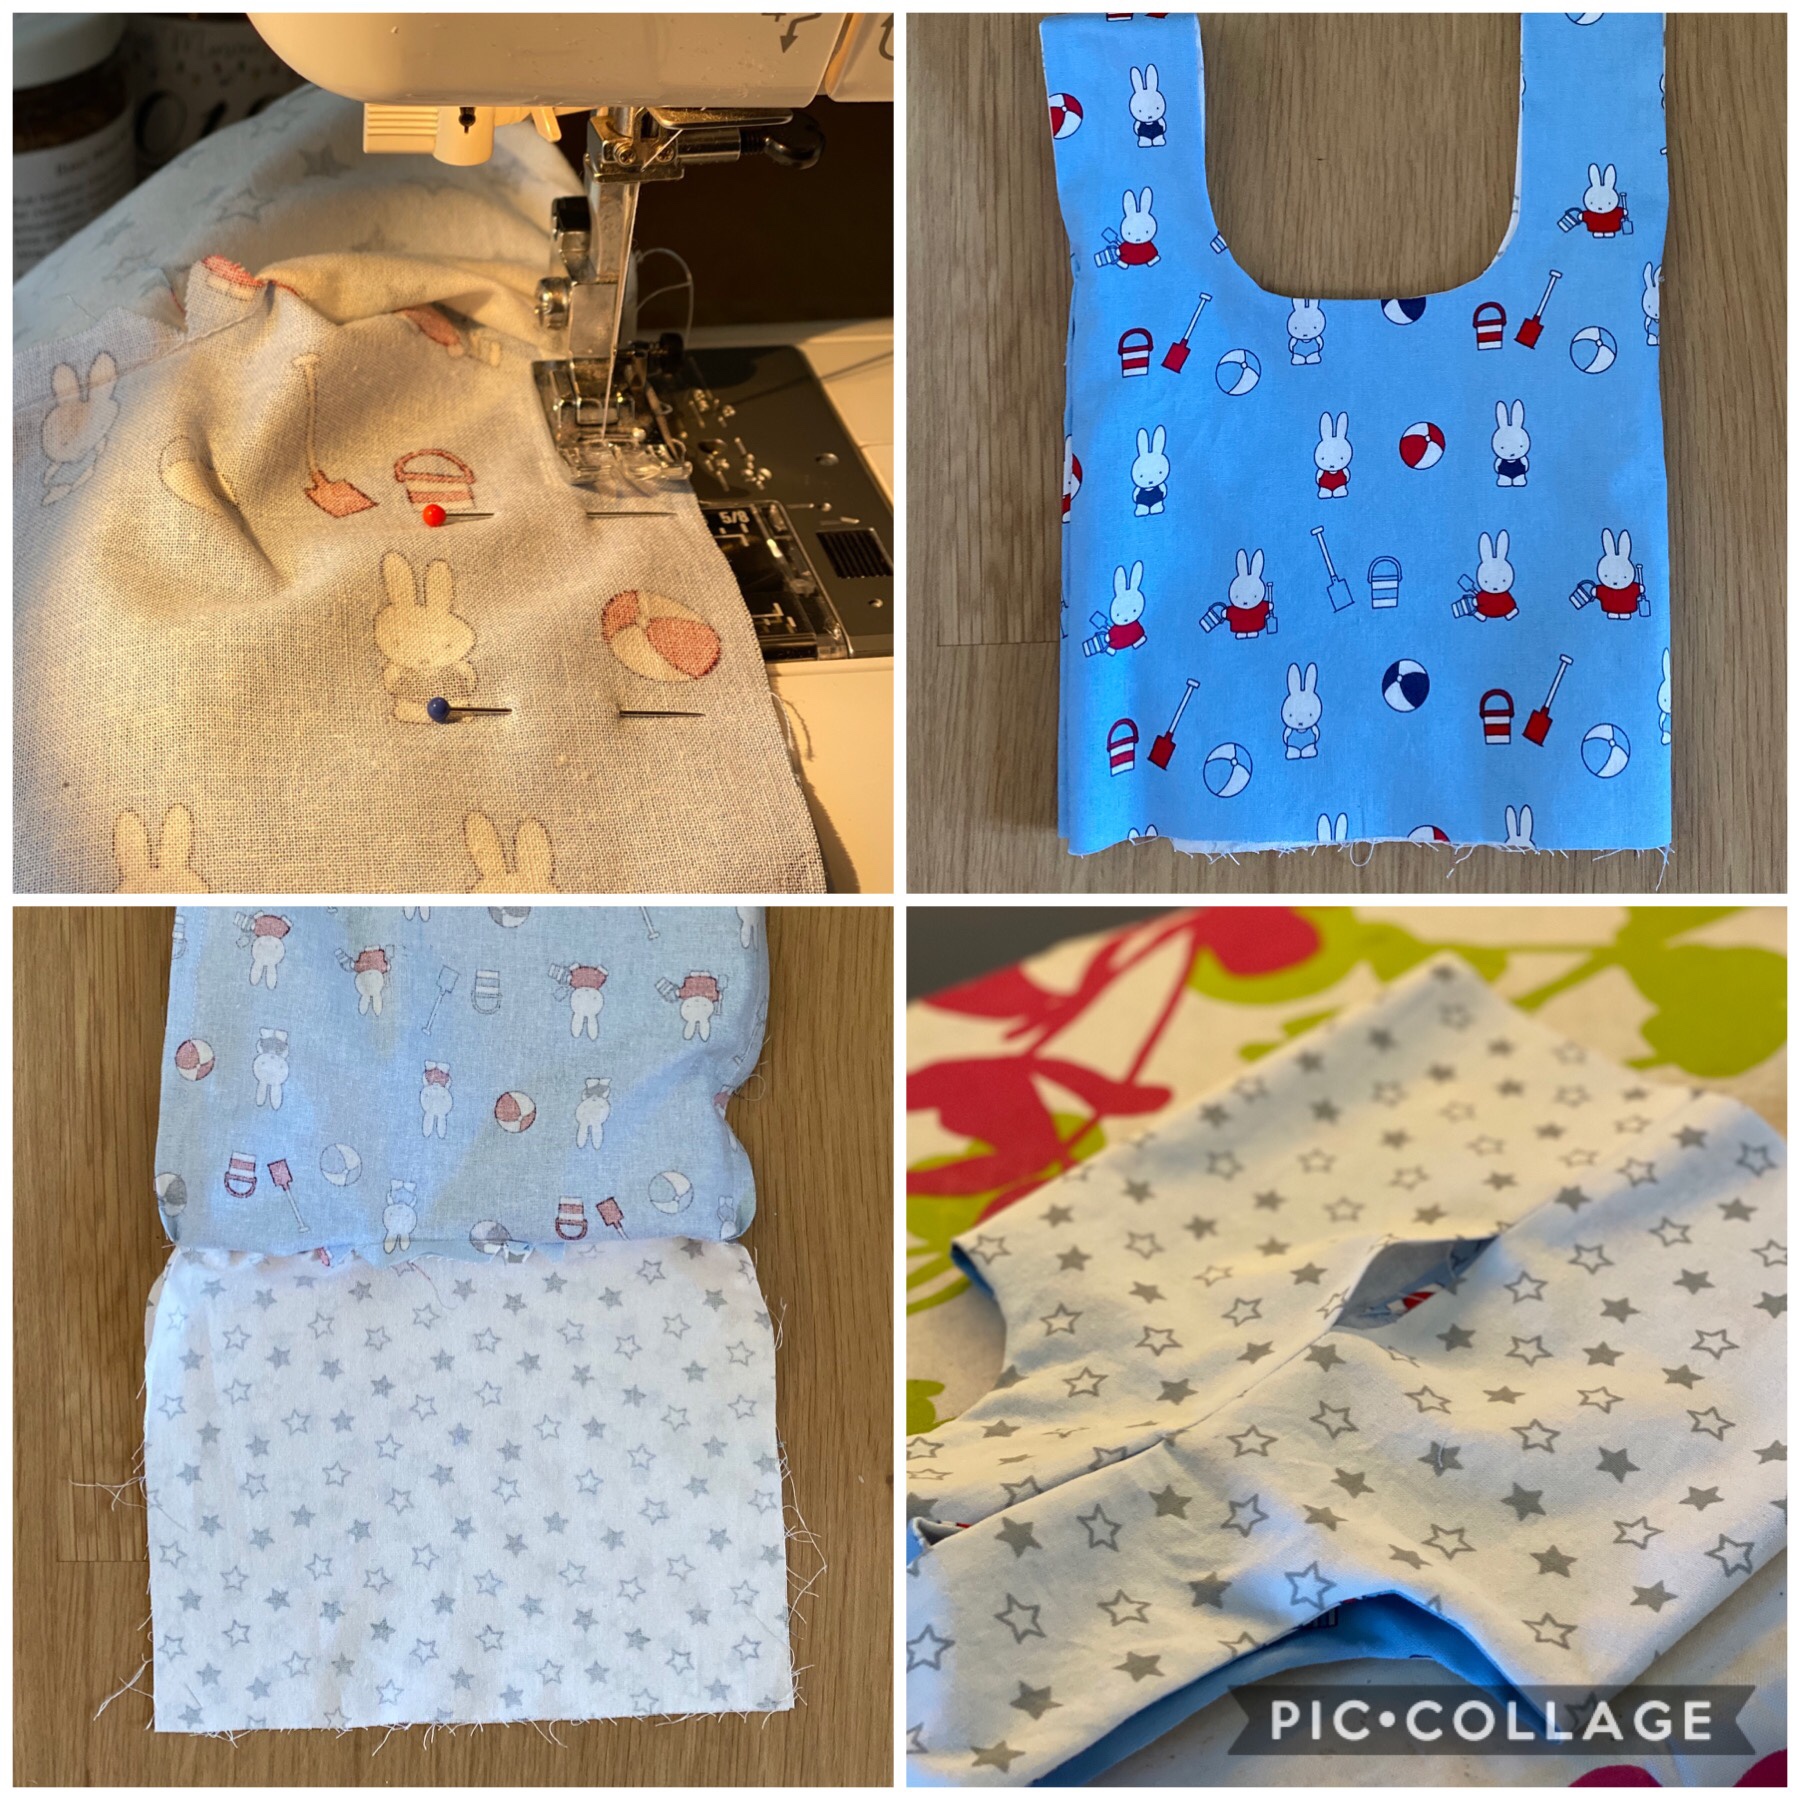
Do make sure, before you begin this stage,that you have clearly marked where the notches are on the sides of your fabric. You want to start and stop sewing at this point on either side of the handle.
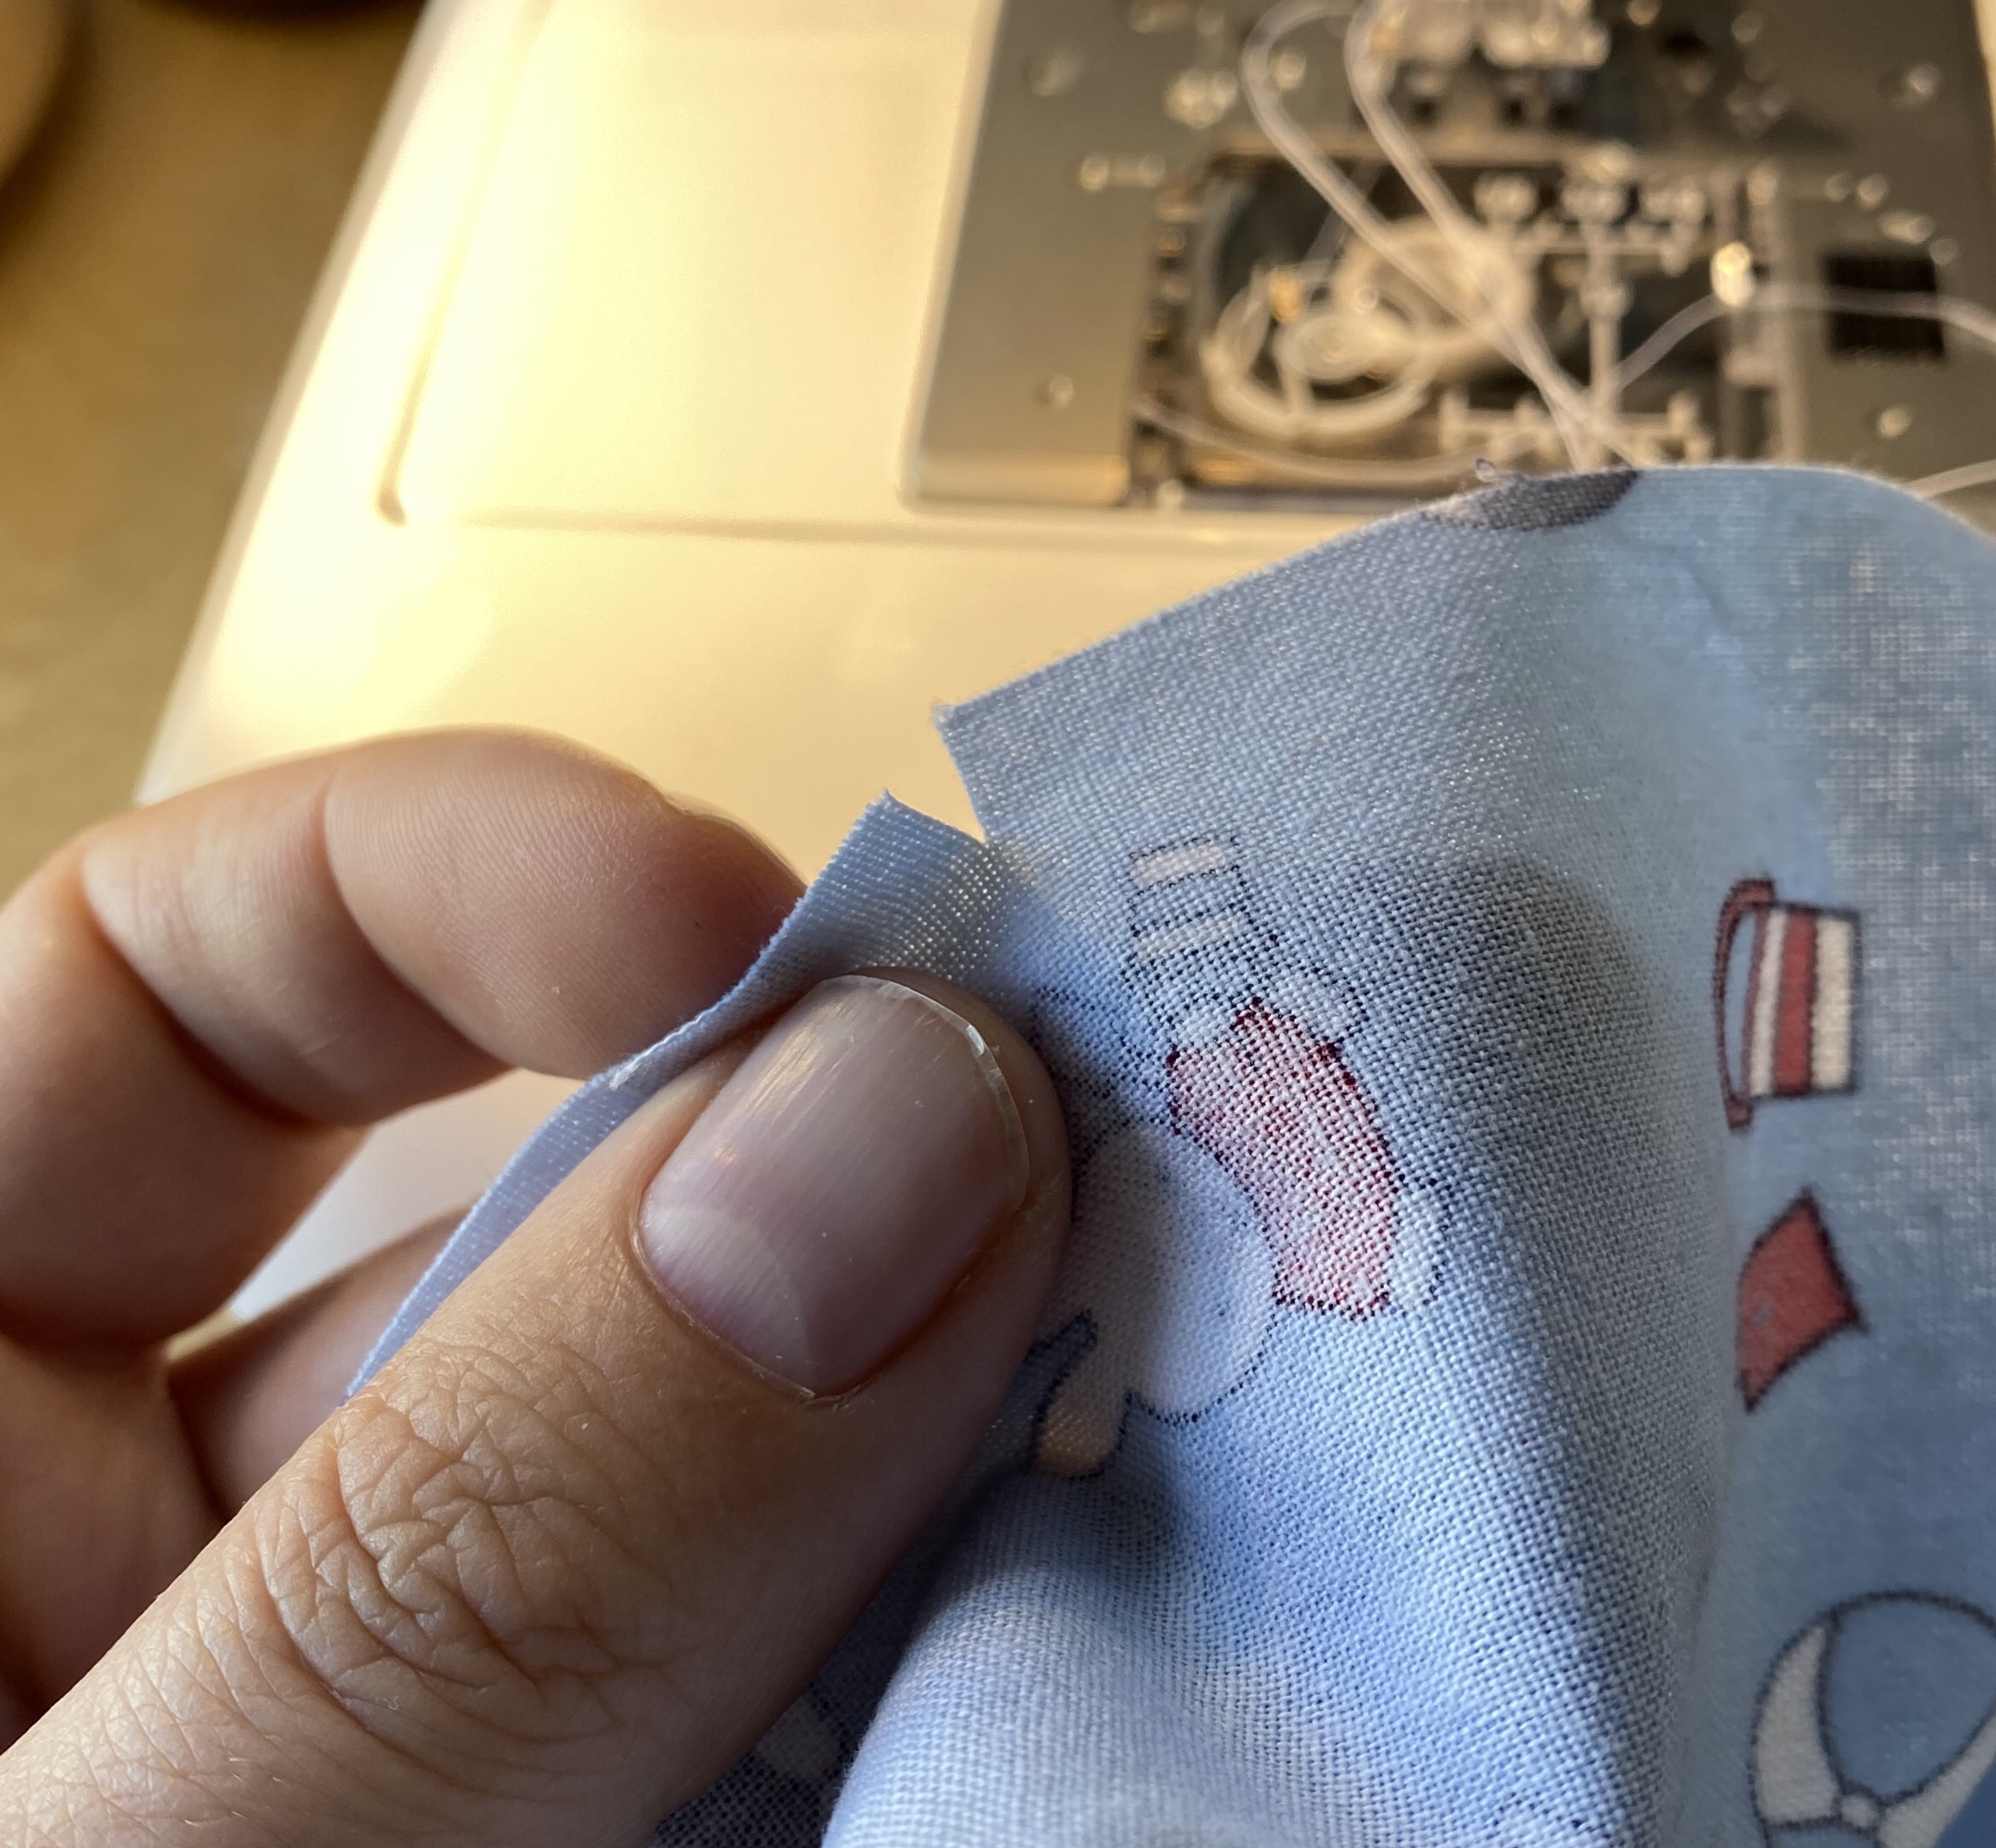
Then (and this is the tricky bit you need to watch the video for) you fold one half of the bag inside the handle, tucking it in quite well and carefully pin. Do this all the way down the handle until you have pinned between the two notches. Then sew from one notch to the other. Go slowly and make sure the rest of the bag is firmly away from the stitch line!
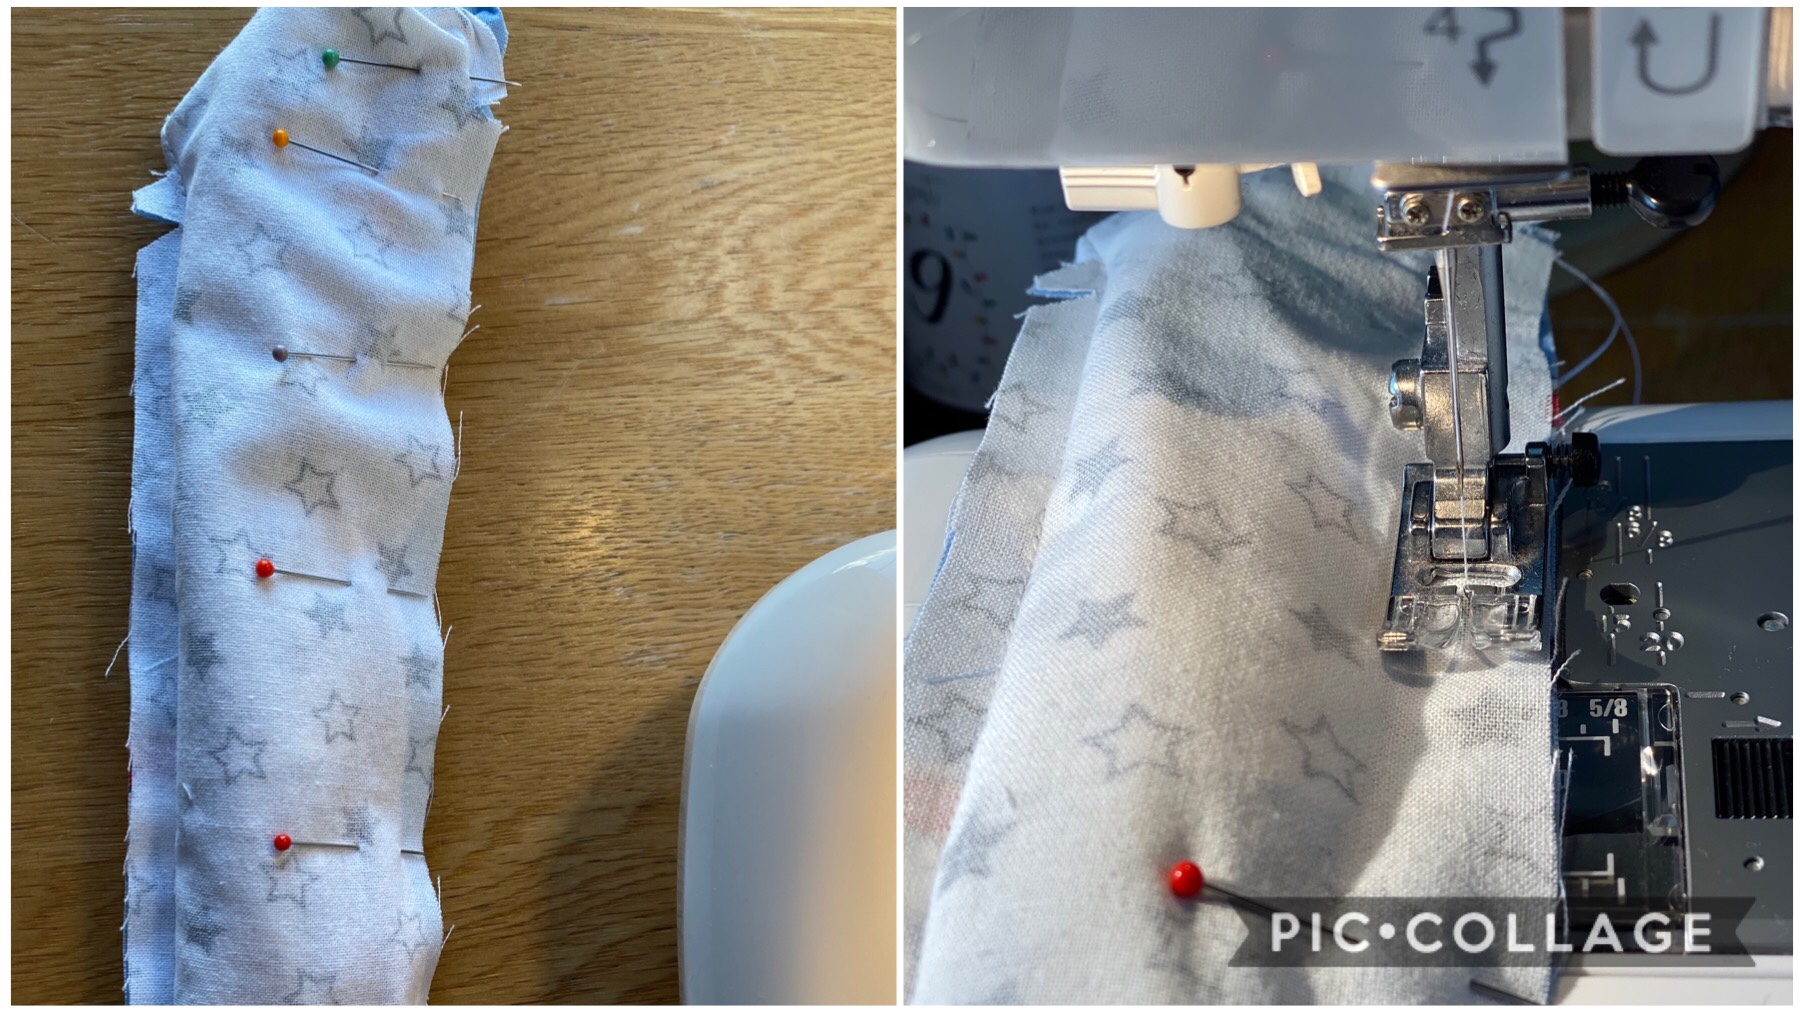
Now the satisfying bit, pull the bag through the handle, showing the final finished handle strap. Repeat for the other side and then press again.
Step 6
Now the (relatively) easy bit. Turn the outside of the bag inside out and pin the side seams. Sew and press. Then do the same for the lining but remember to leave a small gap in one of the sides so you can turn it right way round later!
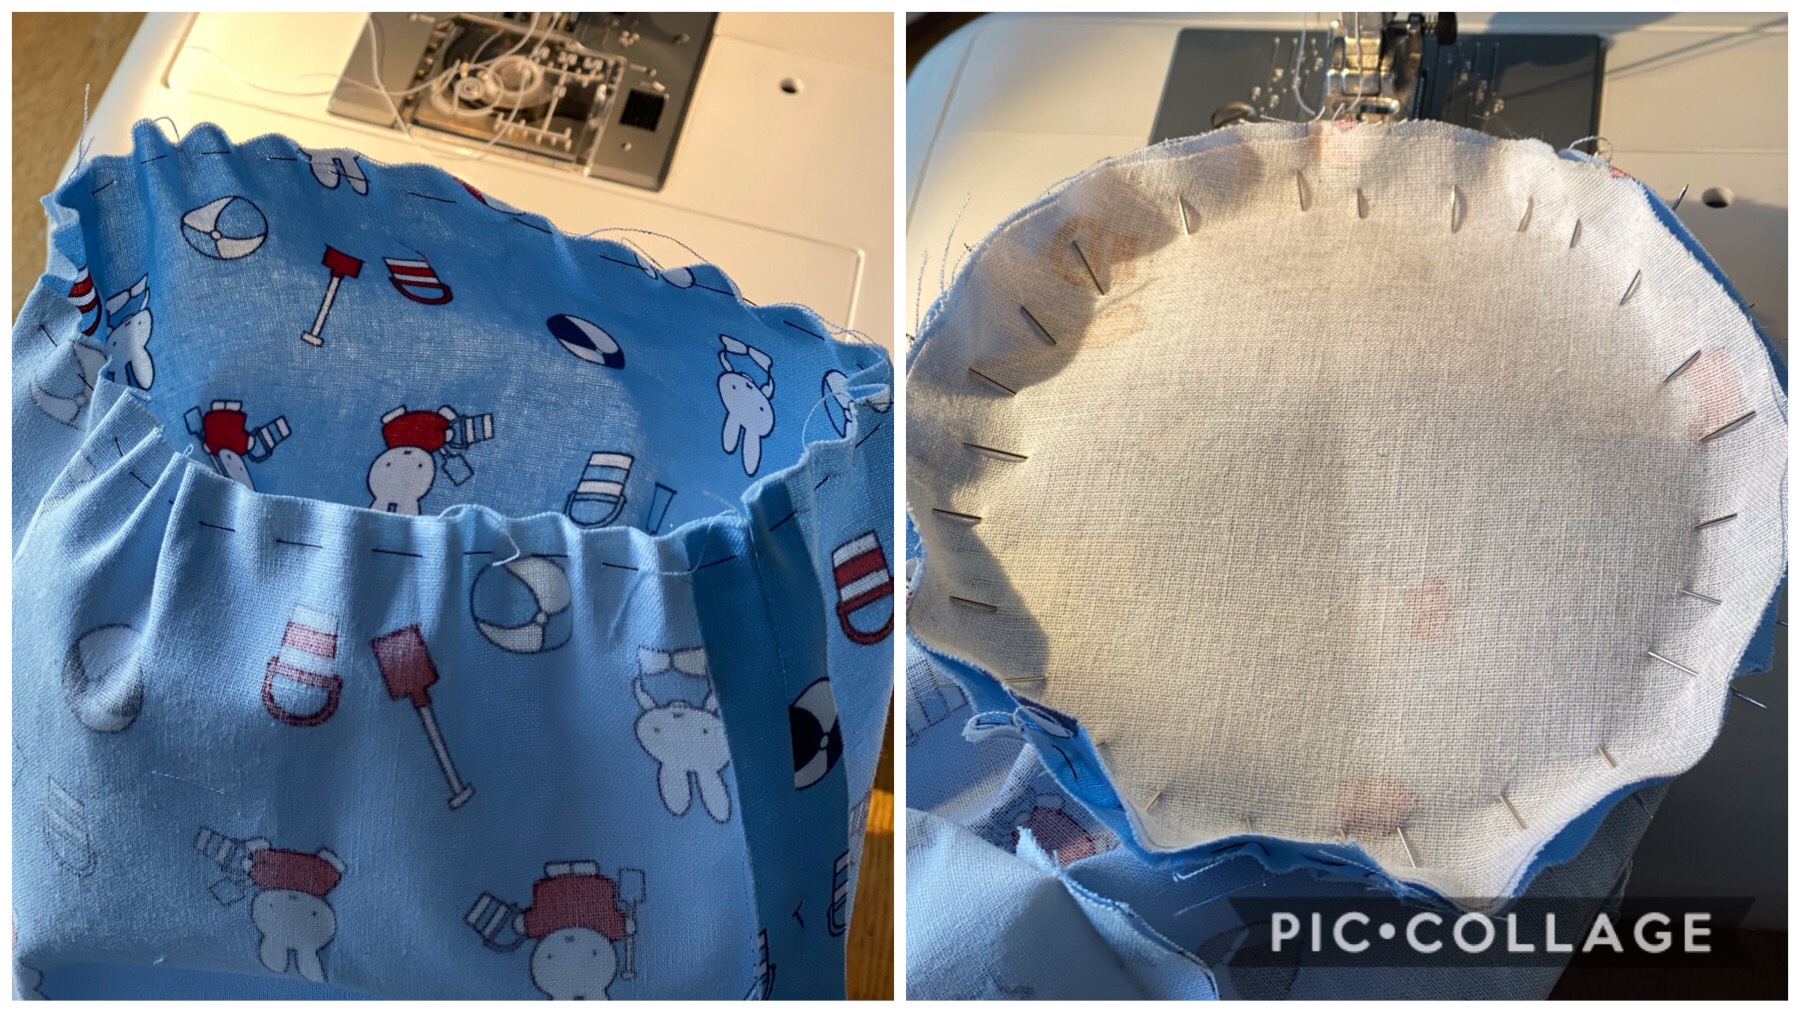
Step 7
I ran some gathering stitches around the base of the outside before pinning the base in place. This was so I could adjust the gathers so it looked nicer when I was done sewing. Use lots of pins and spaces out the gathers as best you can. Then slowly stitch the base on.
Then clip the curves and turn right side out.
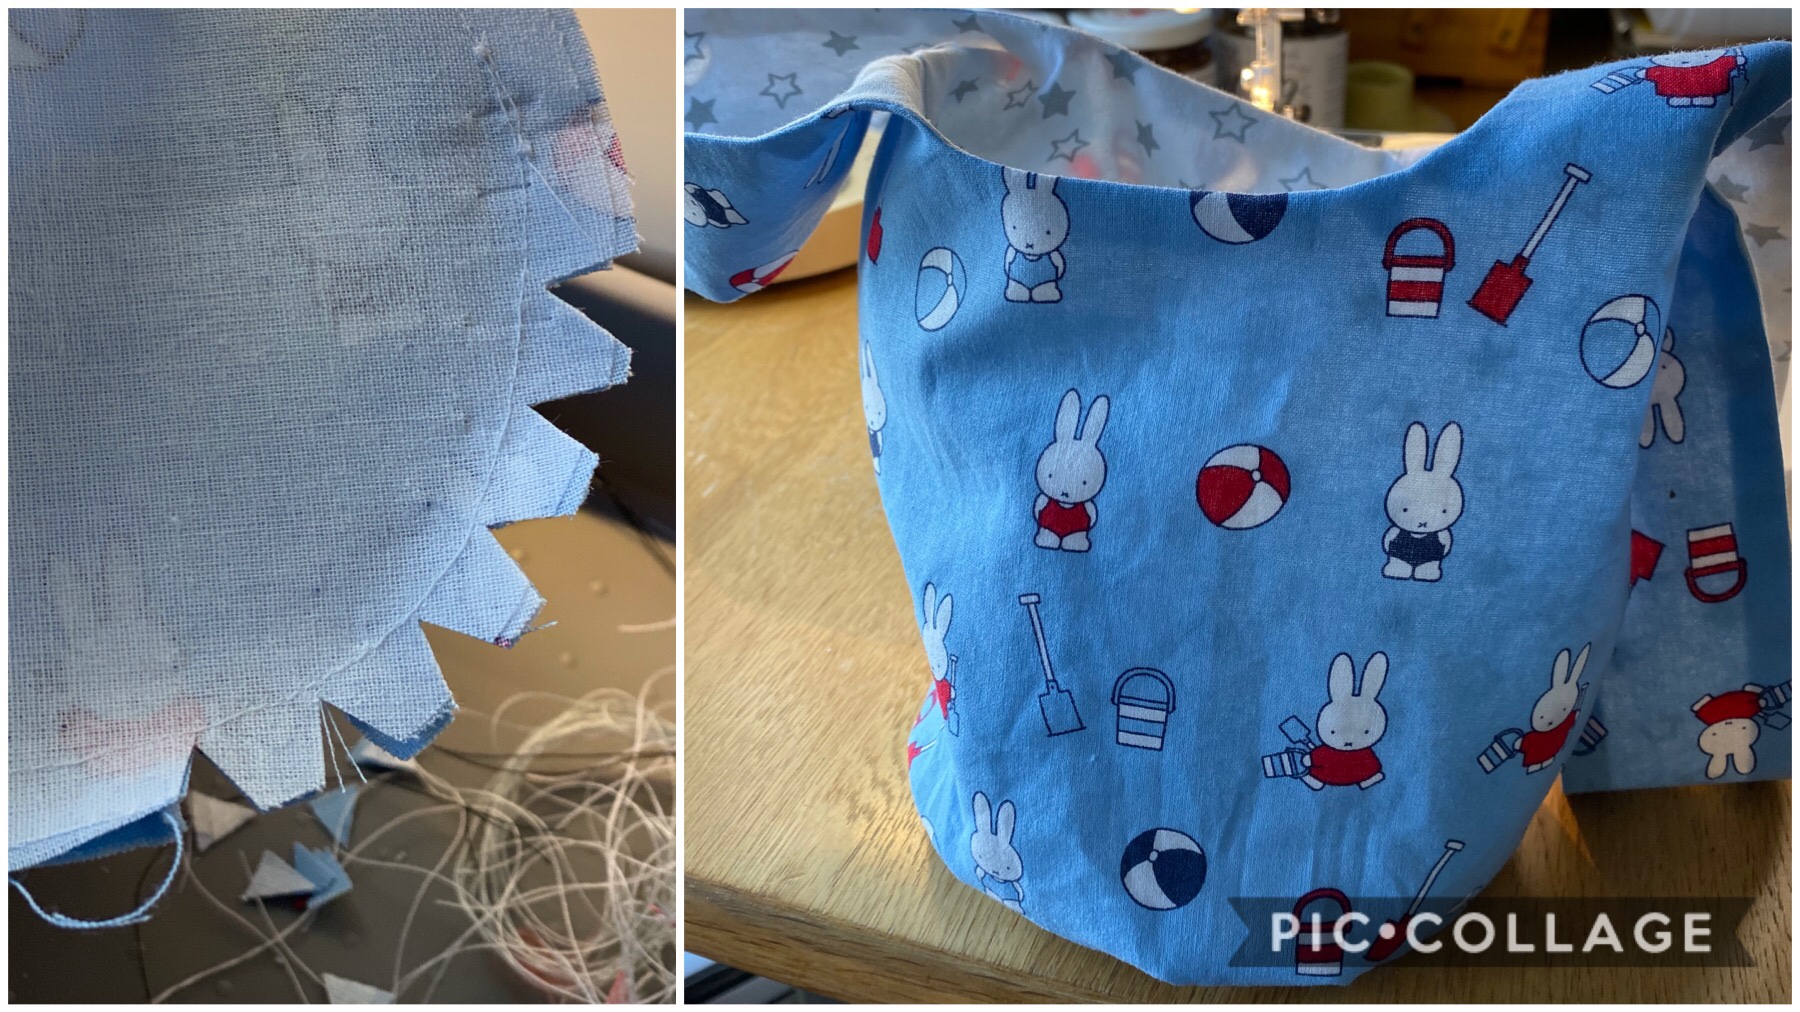
Step 8
Pull the lining bag out of the main bag. Remember that gap you left? Pull the inside of the bag through this gap and attach the base (as in step 7).
Pull the bag back through this gap once the base is attached and blind hem stitch the gap closed.
The finished result!
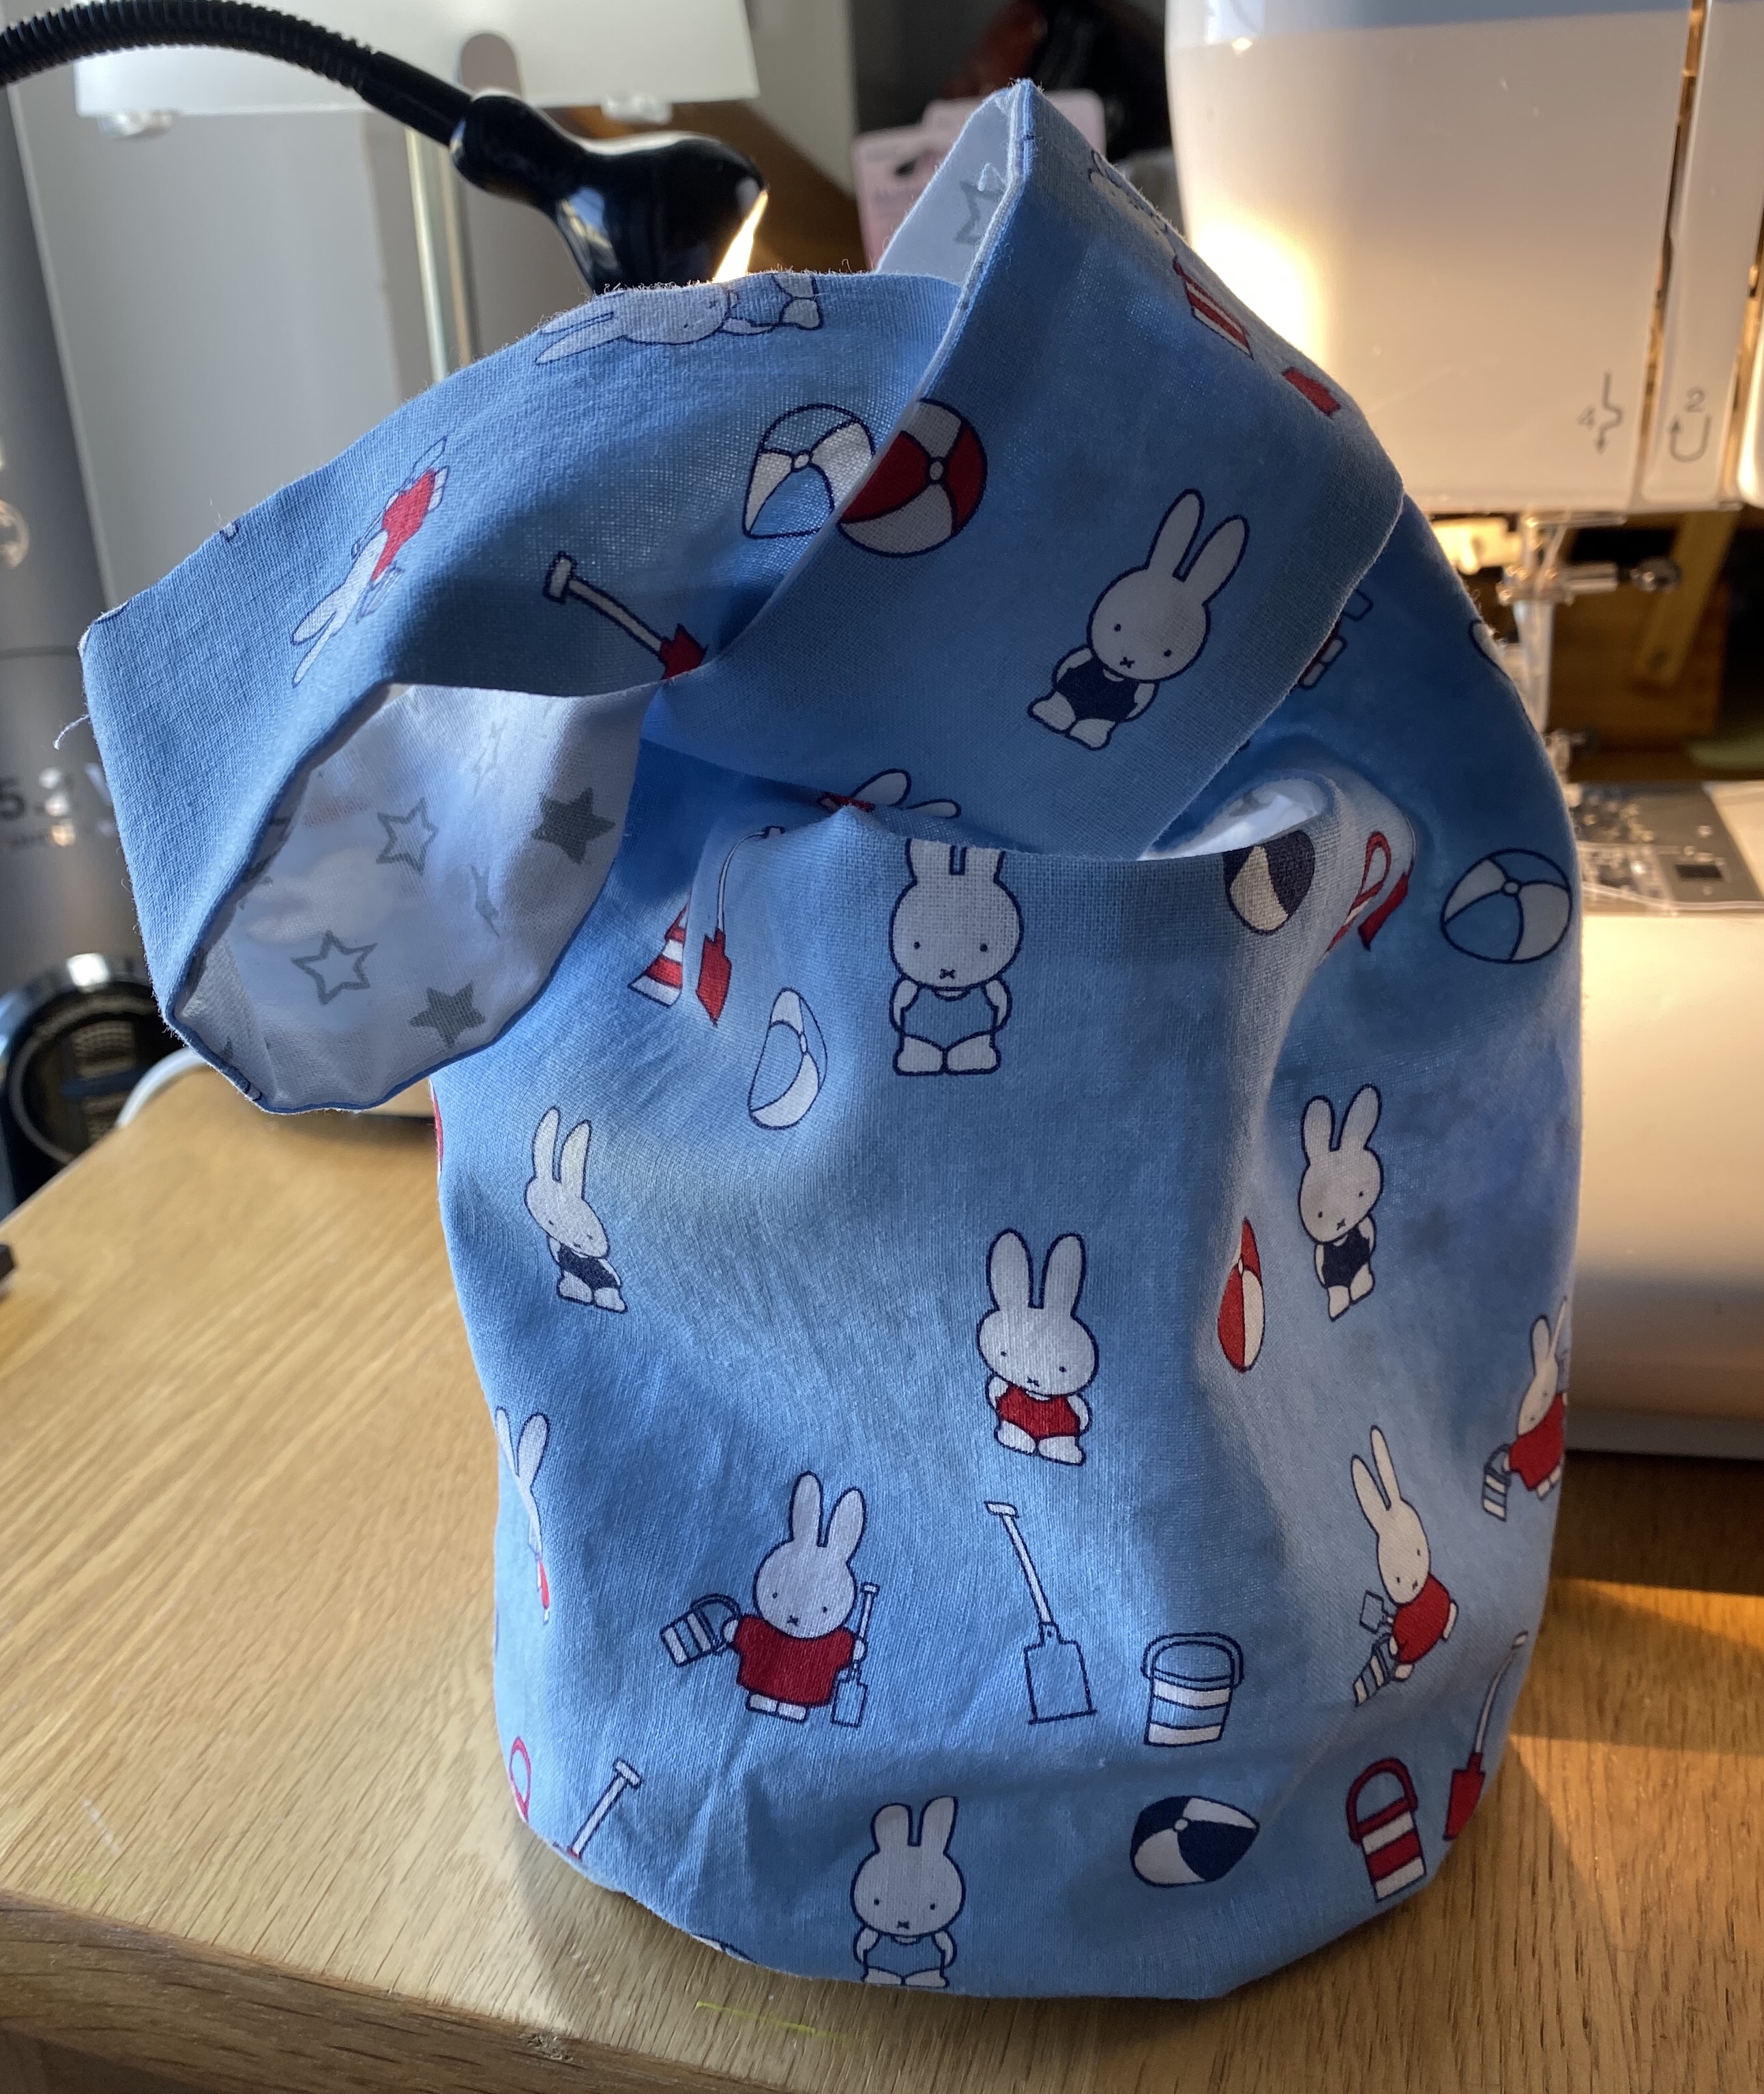
It is exactly what I wanted to make! And once I got my head around the handles, it was easy. So later that day I made the bag for my boyfriend’s mum (and as she doesn’t read this blog (- yet!) here is her finished Christmas present:
I hope she likes it!
My sister is pregnant. Something I am quite excited about. I had my daughter nearly 18 years ago, so there hasn’t been a new addition to the family for a very long time.
At the recent Knitting & Stitching show, I picked up some jersey and ribbing to make some baby leggings. I had found a pattern from Brindille & Twig which looked reasonably easy to make.

There were only 5 pieces to sew together.

Although the cuffs were tricky because they struggled to fit around my sewing machine arm.

It only took about 30 mins to cut and sew the trousers, and I had enough fabric to make 2 pairs!

Fingers crossed my sister likes them…
I had been hoping to sew the Eve Dress from SewOverIt for a while. But the pattern was only available through one of their classes. I was stalking the website, waiting for a class to be scheduled at the Clapham branch, when they released the Eve dress as a paper pattern.

I purchased the pattern from the Clapham branch, with this beautiful navy fabric. But as the fabric was quite expensive, I knew I needed to make a toile first. Especially as I usually need to adjust patterns to fit me. I also wanted to work out how I was going to finish the inside, as I don’t (yet!) have an overlocker.

I really liked version 1 of the dress, with its floaty sleeves and dipped hem. So I found some cheap fabric, which was unfortunately bright purple – a colour I can’t really wear, and made up version 1.

As you can probably see, my cheap fabric was a little too stiff (hence the sleeves sticking out, instead of draping). But it did show me some important things. My hand shows where my natural waist is, so the dress waist is too high.

This is more obvious here, so I’m going to lengthen the bodice by 1″. I also didn’t really like the cap/floaty sleeves.

They felt impractical for a work dress, so I decided to unpick them and make the longer sleeves to see if I preferred them.

I much preferred the longer sleeves, but they were a little too tight around my upper arm, so I am going to make the sleeve a bit wider. I also decided to change the skirt to version 2 as I don’t think the dipped hem suits me (so in summary, I should have just made version 2 to start with!).

One thing that worked perfectly was the finishing of the raw edges. I decided to go with Hong Kong finished seams, using bias binding.

So I’ve got some coral bias binding that will go really nicely with the pattern on the navy fabric.
So to summarise the changes needed:
- Change to version 2.
- Lengthen the bodice by 1″.
- Widen the sleeves.
I’m a teacher (something you may have picked up on this blog). I teach mainly woodwork, in a dusty messy workshop, while wearing a ‘suit’ and fancy shoes (I’ll put a picture of my shoes at the end of this post, so you can see what I’m talking about). I hate wearing lab coats, they get too hot and look really frumpy, so I’ve always made my own apron.
As my current apron is approaching its 6th birthday, and is looking very tired, ripped and covered in glue, I thought it was time to make a new one. I hunted through Etsy looking for a reasonably flattering apron pattern. I could have drafted my own, but I really couldn’t be bothered! I came across this Sweetheart apron from The Seasoned Homemaker and thought it could be what I was looking for.

I made it up in a basic polycotton to check the fit and unsurprisingly needed to make some minor adjustments. I had to extended the bodice by about 2″ to bring the waist to where my natural waistline is. I also extended the top edge of the neckline, because I wanted a bit more coverage to protect my clothes from dust and dirt. Finally, I made the skirt slightly more rectangular and added 4″ to the length as I felt the flared skirt could be a little dangerous and my legs needed more coverage.
A friend at school had designed me my own logo, so I used PrinFab to get some custom printed fabric. They were incredibly fast, and my new fabric looked lovely. I got it in a classic plain cotton, which feels quite sturdy.
 I bought some Navy Cotton Drill for the main apron and found some coral coloured bias binding that matched the flamingos. The finished apron is perfect. I added in an extra pocket, as you can never have enough storage as a teacher!

As you see, I used the bias binding to edge the whole apron, but I am particularly proud of my Hong Kong finished princess seams on the inside.
 The pattern was easy to follow, very clear instructions. Hopefully, this apron lasts another 6 years…..
Finally, as promised, a picture of my new school shoes (and yes, they are as sparkly as the picture suggests).

I’ve been admiring the Anderson Blouse from Sew Over It for a while. When I realised that one of their shops was in Clapham North (only a few tube stops from me) I decided to take a trip.
The ladies in the shop were lovely, but annoyingly they didn’t have any physical patterns for the Anderson Blouse. So I picked up some fabric and decided to buy the PDF version of the pattern when I got home.
I must admit that I had forgotten how much I hate PDF patterns, especially the faff I have to go through to print them out. You can’t customise the scale of the page when printing from an iPad, so I had to go and dig out my laptop. After a lot of trial and error (mainly my laptop refusing to recognise the printer), I ended up digging out my printer cable and connecting them together.

Remember to scale your pages to 100% to make sure the pattern prints out at the correct scale. 32 pages later, I had a pile of paper ready to be stuck together.

After a lot of sticky tape and patience (and possibly a little swearing), the pattern was stuck together. Now all I need to do is trace the pattern onto tracing paper, but I think that is a job for tomorrow.
The fabric I picked up is lovely and drapey, I think it is Crepe de Chine. I love the feathers and I hoping it will look nice as a finished blouse.

The next thing I am planning on making is the Mae Blouse from Blue Ginger Doll. I bought the pattern and fabric 2 weeks ago and have been gradually tracing it.
Unfortunately, I have also damaged my back (it has all the symptoms of sciatica). It has been getting worse in the last few weeks and I am currently waiting to be referred for an MRI.
It is now at the stage where I am taking incredibly powerful medication many times a day and am unable to sit on a chair for more than about 10mins (kind of makes sewing tricky).
So until I start improving, there won’t be many blog posts from me. Bear with me, I hope to be back in action soon…….
This pattern arrived at the start of the holidays. I’ve been looking forward to starting it for a while.

It’s from Simple Sew (and they have quite a few other patterns I have my eye on). I bought this fabric to make it from, a polka dot medium weight cotton and a turquoise skirt lining.

Normally I try and encase my seams, as I don’t have an overlocker and my sewing machine can only do straight stitch. When I make tops I tend to use French seams, but these are too bulky for skirts. Then I came across a flat felled seam (courtesy of this very helpful tutorial). So I thought I would do a test to see if it worked with my fabric.

It worked well on a straight seam, but I was unsure how easy it would be to do on curved seams (and this skirt has a lot of curved seams!).
I am quite pleased with the final finish of the skirt, it fits really well (and I am going to have to make some more with different patterns!)

When I added the lining (despite the skirt pattern not having a lining – I had to improvise) I was quite pleased to discover that the way I had made it meant that no raw seams are visible!

Sorry – just felt like showing off the fabulous fit of this skirt again!

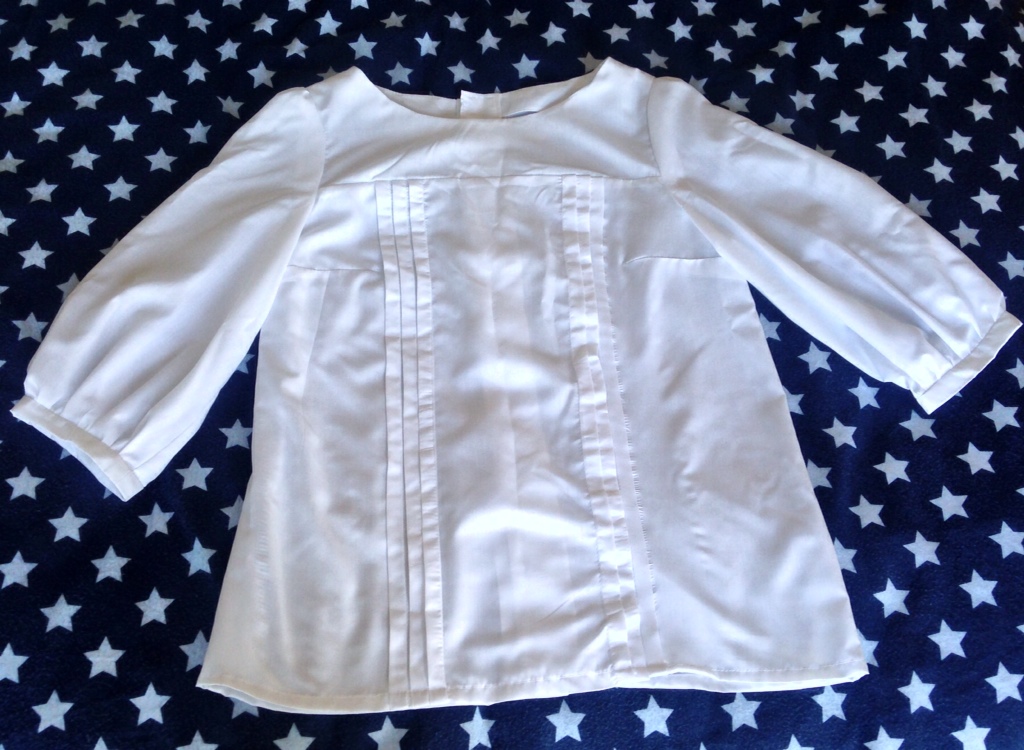
Yesterday was a busy day. I finished my Mathilde Blouse. The adaptations worked perfectly, so now the neckline sits in my collar bone and the blouse finishes just below my hips.
I mentioned before that I have a Singer sewing machine from 1934. Due to my eBay stalking, I also have a 1940’s buttonholer.
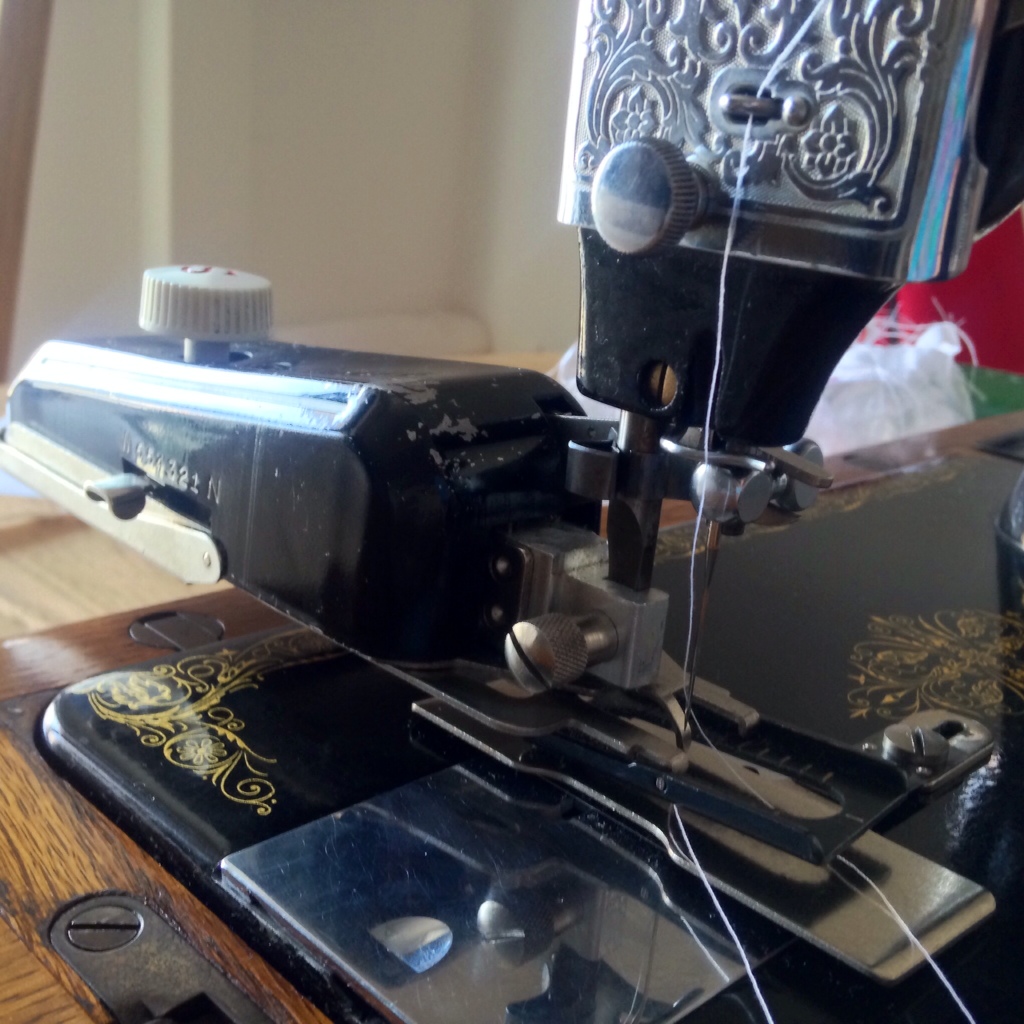
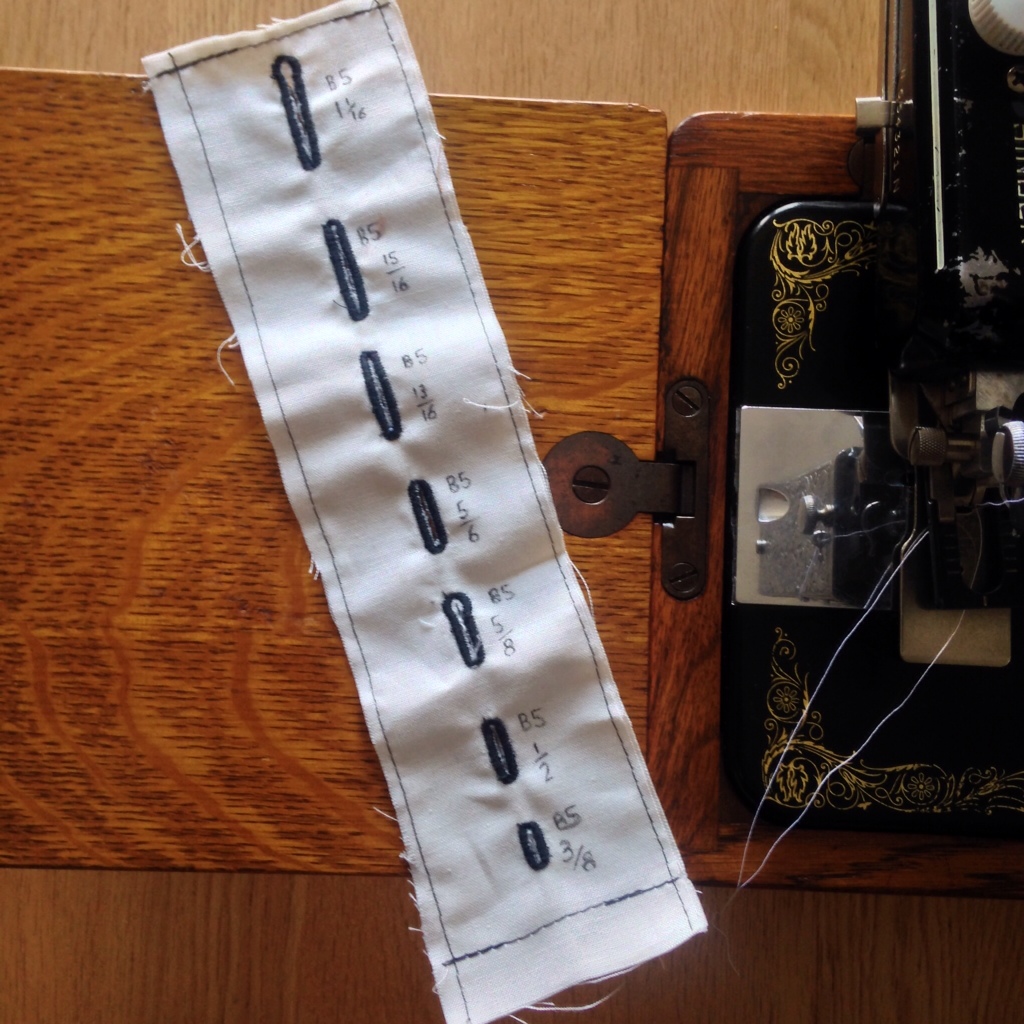
It comes with a series of cams that you put inside for different size buttonholes. The first things I did when I received it was to make a buttonhole sample strip. This means I can test buttons to check which cam I need to make the right size buttonhole.
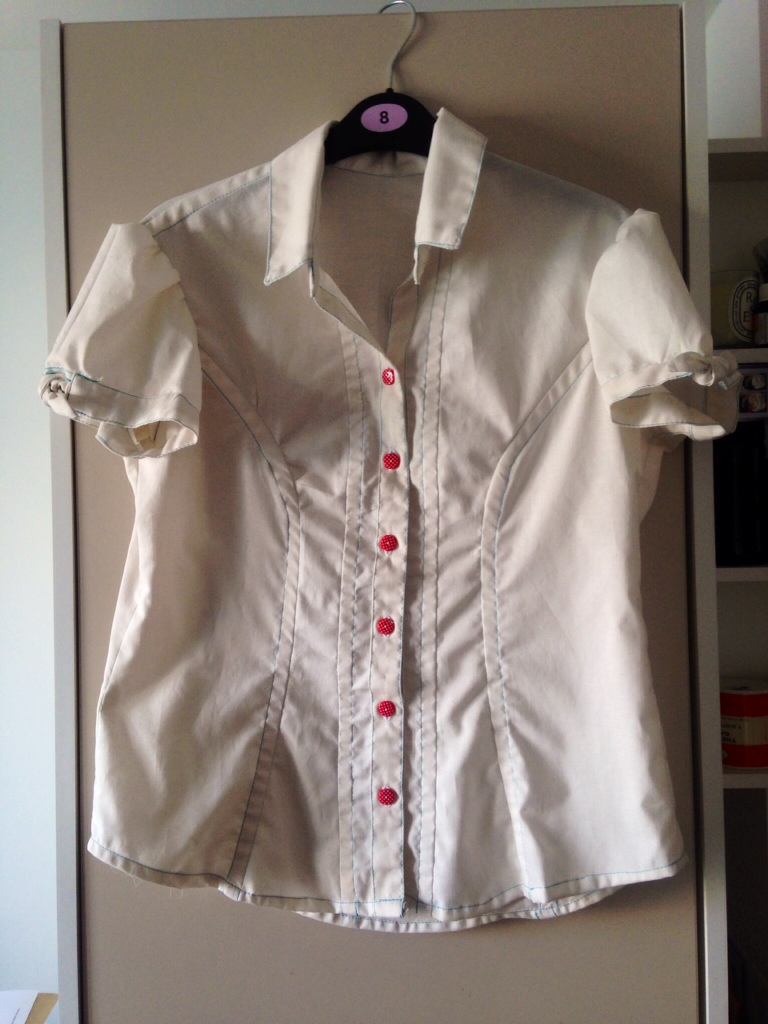
So with buttonholer attached I finished off Mathilde with its buttoned back.

While I had the buttonholer out I also made the buttonholes for a shirt I finished ages ago. I copied an existing shirt to make this, and I’ll post at some point about how I did this (basically brown paper and lots of patience!).
Onto the next project: The Mini Skirt.
My teenage daughter has asked to help me make a mini skirt for her. So I found a pattern on Burda Style for a sequinned pleated mini skirt.
I have spent the morning (while waiting for said teenage to wake up!) printing out and sticking together the pattern.

30 A4 pages that need to be patiently trimmed and tessellated together. I’ve still got to trace the pattern pieces (and add my own seam allowance, because the pattern doesn’t have them), but that will have to wait until I have an awake teenager to measure.
In the meantime here is the fabric she has chosen for her skirt:
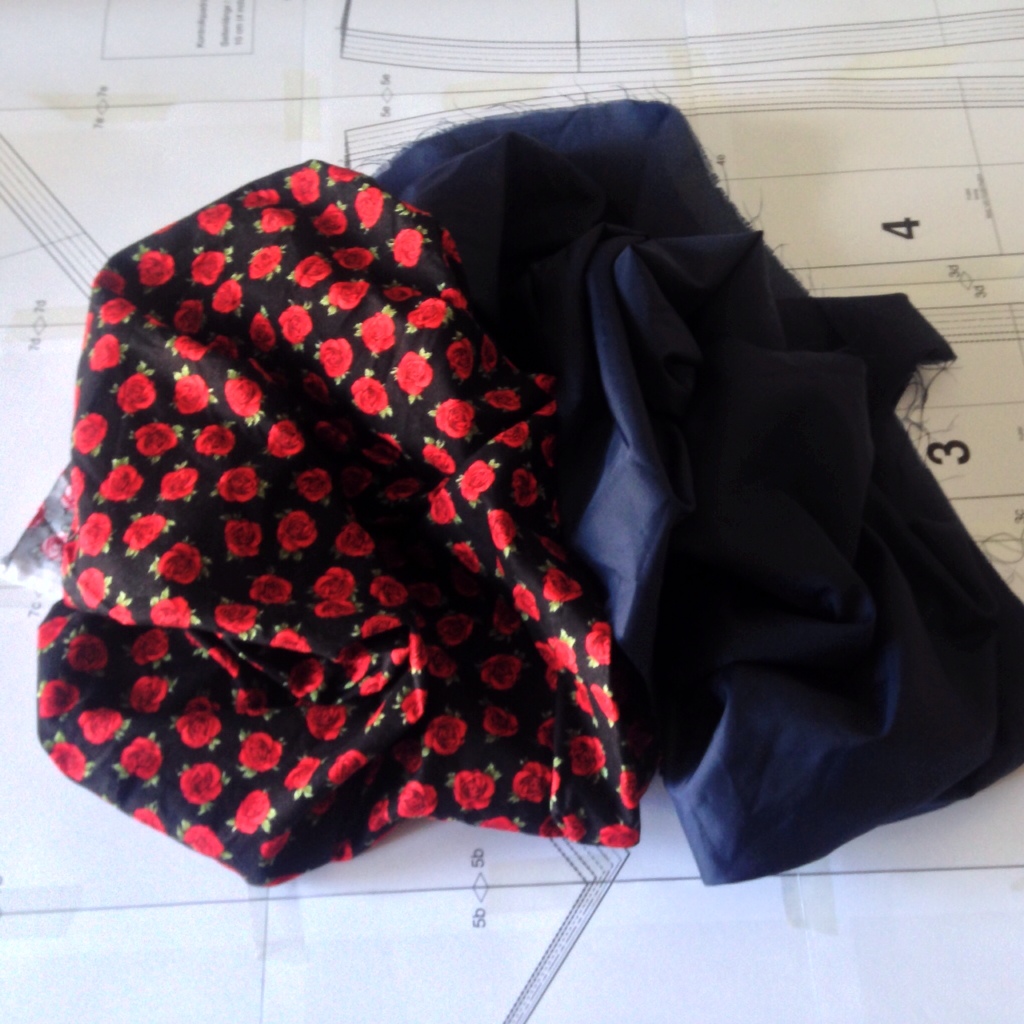
Red roses for the main skirt, very dark blue lining. She’s hoping to wear this skirt tomorrow – I think that means I’ll need to go and wake her up (again!).
Just before I started this blog, I made this blouse:

The pattern is the Mathilde Blouse from Tilly and the Buttons. It comes again with a wonderful set of tutorials. However, I am quite tall (and have a particularly long body, which is why shop bought dresses never have their waistline in the right place on me), so I decided to make another Mathilde blouse to go with the skirt I finished the other day.
I decided to modify the pattern slightly. Mainly to make the body longer, the neckline slightly lower (so it sits in my collar bone instead of above it) and the sleeves slightly narrower.

So I traced the pattern pieces, with my modifications, and am about to start cutting out my pieces from some plain white cotton poplin. I am planning on using some turquoise polka dot buttons for the back.

There are 1 1/2 weeks left of the Easter holidays and I am planning to make this blouse, another skirt and my teenage daughter has asked if I can help her make a skirt as well. It’s going to be busy!
As I am currently on my Easter holiday, I thought I would take advantage of the time to make some clothes to wear to school. I like wearing pencil skirts, especially high waisted ones. So I thought I would have a go at making the Charlotte Skirt from By Hand London. They have a fantastic set of tutorials on their website.
So I picked some bi stretch fabric (I’ll find out the specific type later) from my local haberdashery and some skirt lining. By making my own skirt, it means I can have any colour I like (instead of the sea of grey and black in the shops).

I spent the day preparing my pattern and fabric. So I washed the fabric and while it was drying I traced my pattern.

Although tracing takes longer than just cutting the pattern, I think it’s a good idea, as then I can always make another size later. So armed with a pencil, ruler and tinned spaghetti hoops I traced the 3 pieces.
I always iron my pattern paper first, that way it doesn’t have any creases that change the shape of the pattern. Plus there is something very satisfying about ironing huge sheets of tissue paper – and normally I hate ironing!

I pinned out and cut my pattern pieces from the fabric and transfered all the dart templates using tailors tacks.

So now I am ready to start sewing the skirt shell (but I might cut out the lining before I get out my machine, otherwise I won’t have any table space!).
-

A 2022 Embroidery Challenge
4 February 2023
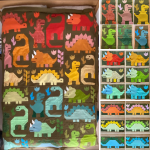
I’ve been watching people making temperature quilts on social media for a few years and really liked the idea of making one. But I knew I would struggle to carry such a large project through to the end, plus the idea of knitting a blanket in the heat of summer wasn’t that appealing. Then I […]
-
Little Life Update
3 February 2023
I finally caught COVID, and while I am curled up on my sofa feeling sorry for myself, I thought I would check through things. I realised that I haven’t written anything on this blog for ages (gulp April 2021) and so much has happened! The problem is that Instagram is so much quicker and easier […]
-

Alison Glass Lumen Quilt
19 April 2021
In which I attempt to make a giant quilt, for the first time!
-
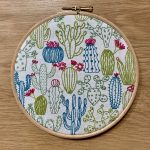
Cactus Embroidery – Slow Sewing
6 February 2021
It’s taken just over a year, but this embroidery is finally finished!
-

Mushroom Ragu – Vegan and Delicious!
1 January 2021
It's new year's day and I'm making Mushroom Ragu.
-
A 2022 Embroidery Challenge
4 February 2023
I’ve been watching people making temperature quilts on social media for a few years and really liked the idea of making one. But I knew I would struggle to carry such a large project through to the end, plus the idea of knitting a blanket in the heat of summer wasn’t that appealing. Then I […]
-
Little Life Update
3 February 2023
I finally caught COVID, and while I am curled up on my sofa feeling sorry for myself, I thought I would check through things. I realised that I haven’t written anything on this blog for ages (gulp April 2021) and so much has happened! The problem is that Instagram is so much quicker and easier […]
-
Alison Glass Lumen Quilt
19 April 2021
In which I attempt to make a giant quilt, for the first time!
-
Cactus Embroidery – Slow Sewing
6 February 2021
It’s taken just over a year, but this embroidery is finally finished!
-
Mushroom Ragu – Vegan and Delicious!
1 January 2021
It's new year's day and I'm making Mushroom Ragu.