Christmas Sewing | Japanese Knot Bag
This Christmas I wanted to make some project bags for my family, as I am (perhaps unsurprisingly) surrounded by crafty people. One bag I particularly wanted to make was a round base Japanese knot bag. My boyfriend’s mum had been very impressed by my own knot bag when I went to visit, so I wanted to make one for her. But as the one I owned had been given to me in a swap, I didn’t know how to make one!
I naively thought ‘how hard can it be’, as I knew how to make a basic two sided knot bag. This one only had the addition of a round panel at the bottom. It turned out to be very difficult, and two failed bags later I decided to search for some instructions!
It transpired that there were very few places with instructions. In fact the only complete set of instructions I could find was on a French site called DIY District. The obvious problem was it was in French, a language I only have rudimentary knowledge of. So Google Translate to the rescue!
So I don’t forget how to make this bag in future, I am going to write my own set of instructions below. But I would like to thank DIY District for their very clear instructions!
Step 1
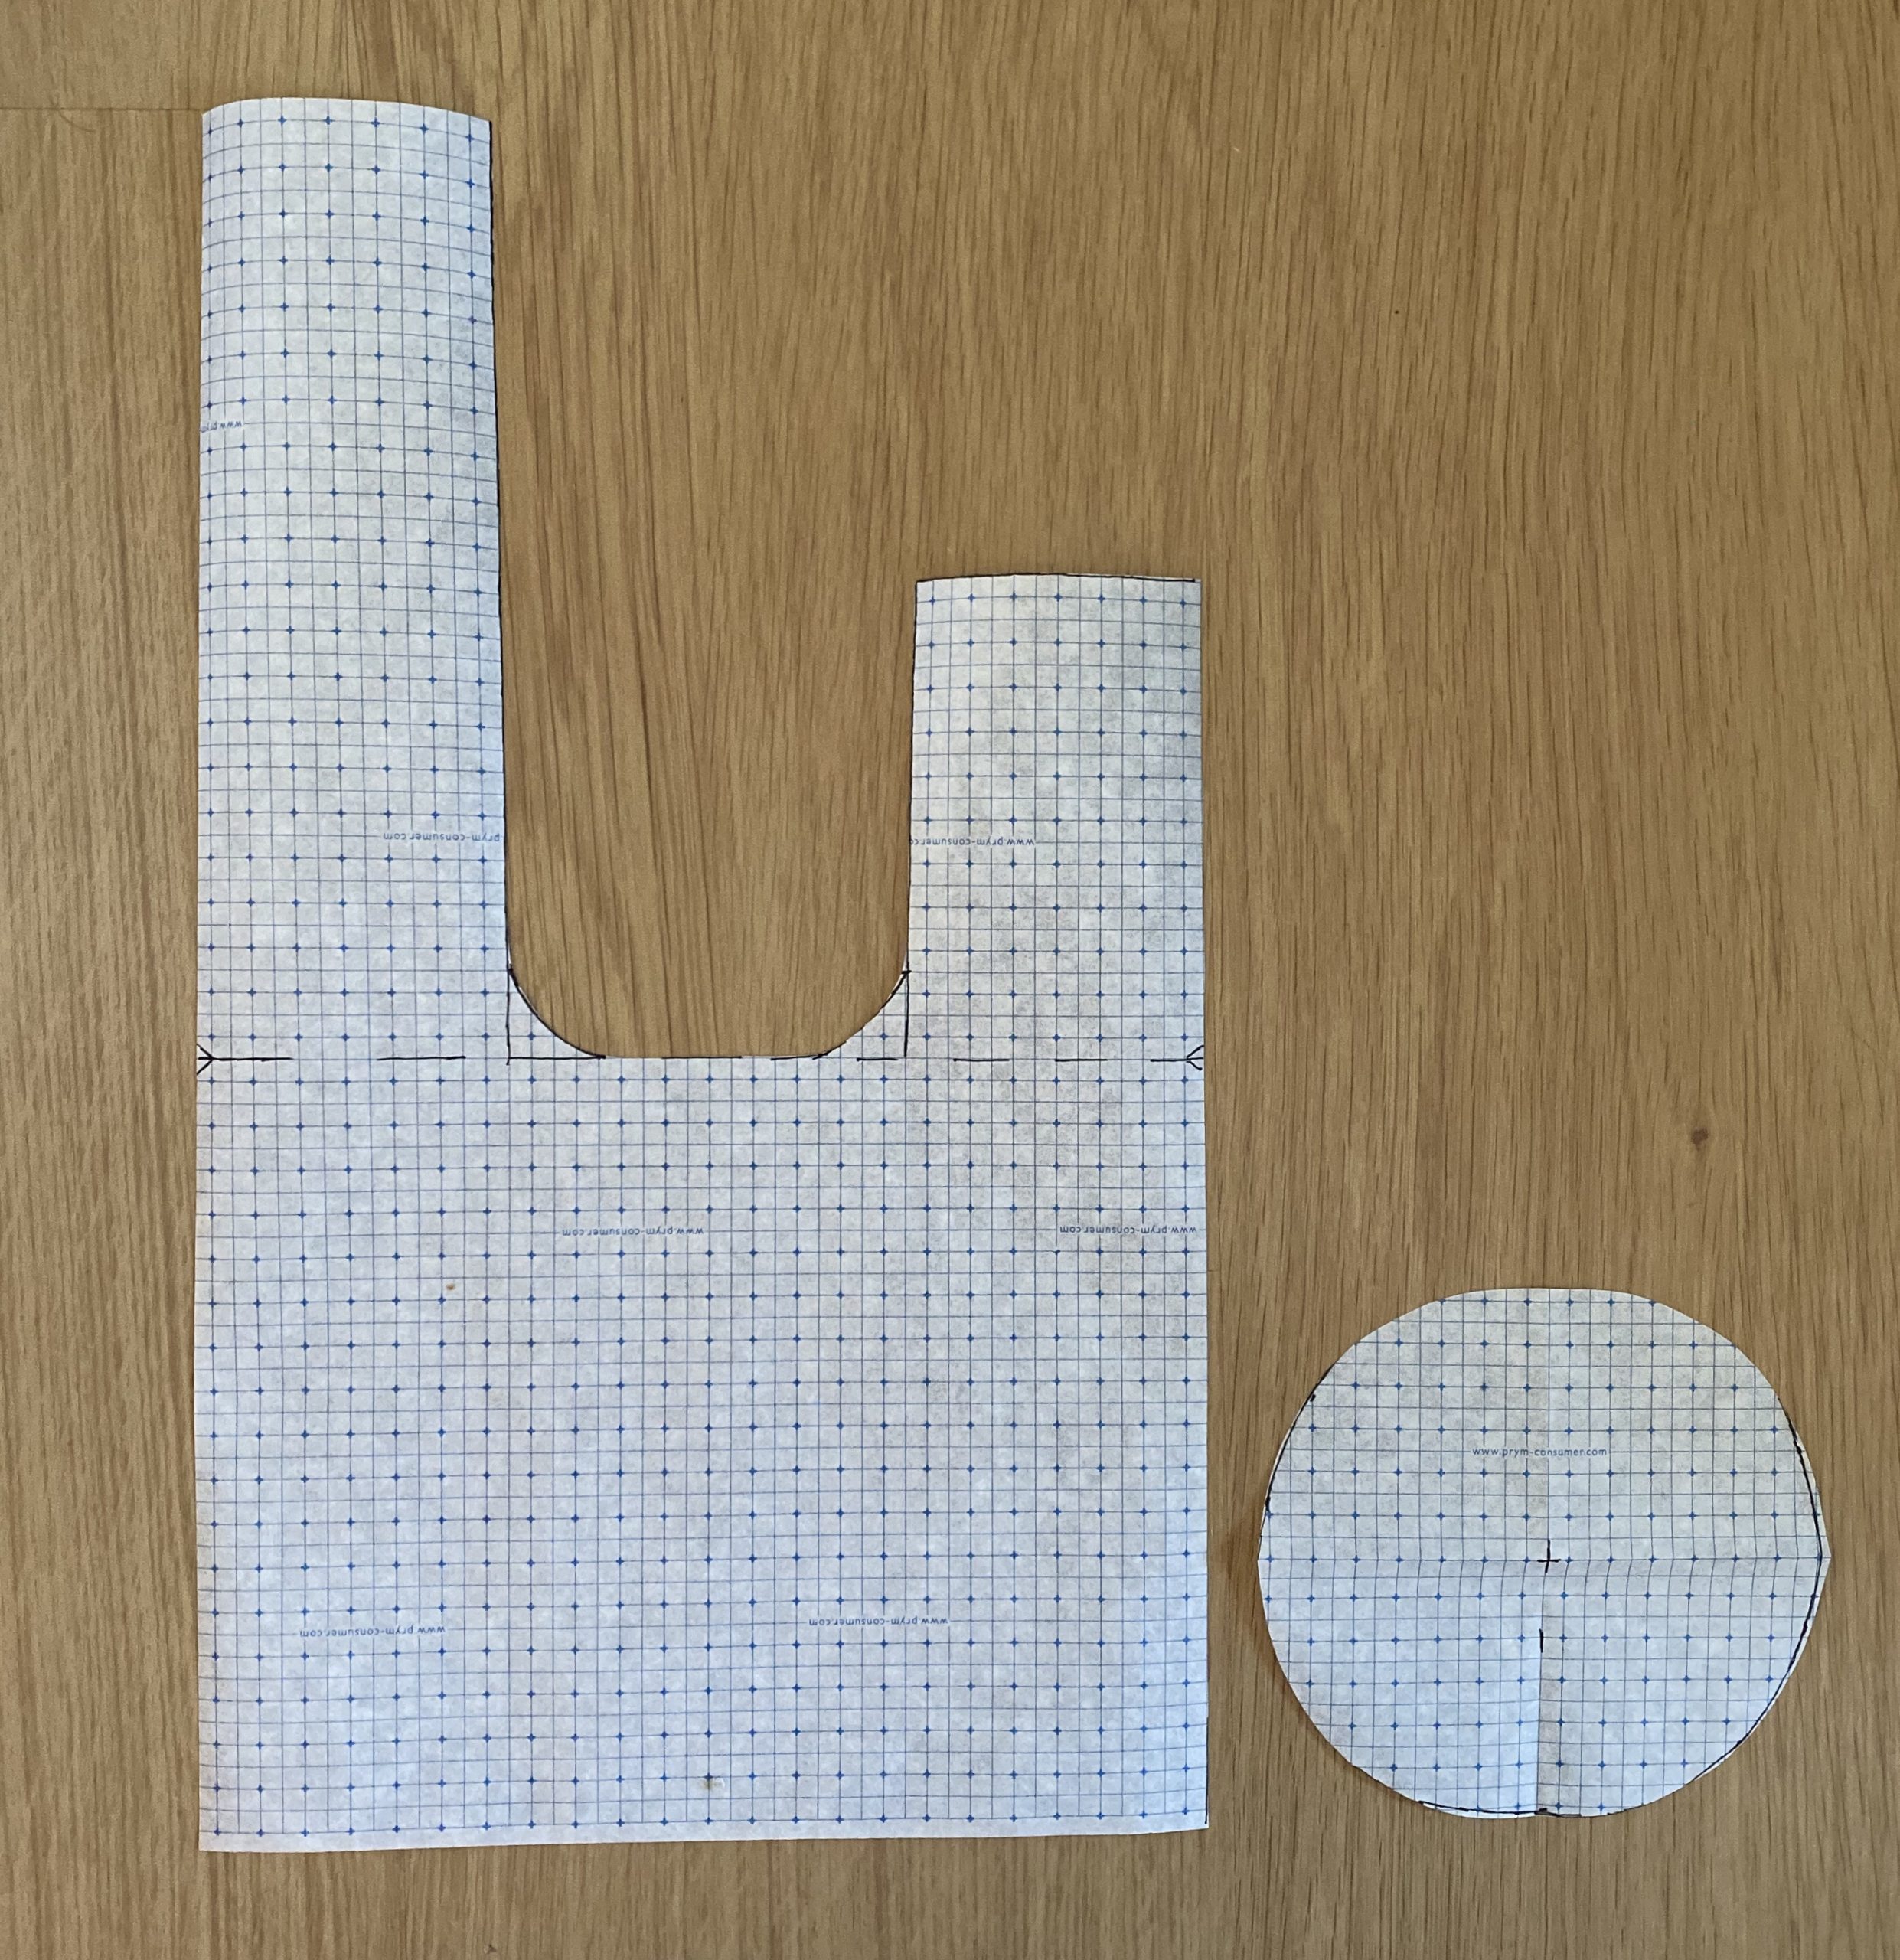
Draft a pattern. I used the measurements on DIY District. There is a minor maths equation error, but trust me – the circle does need to be 147mm diameter.
All seams are 10mm.
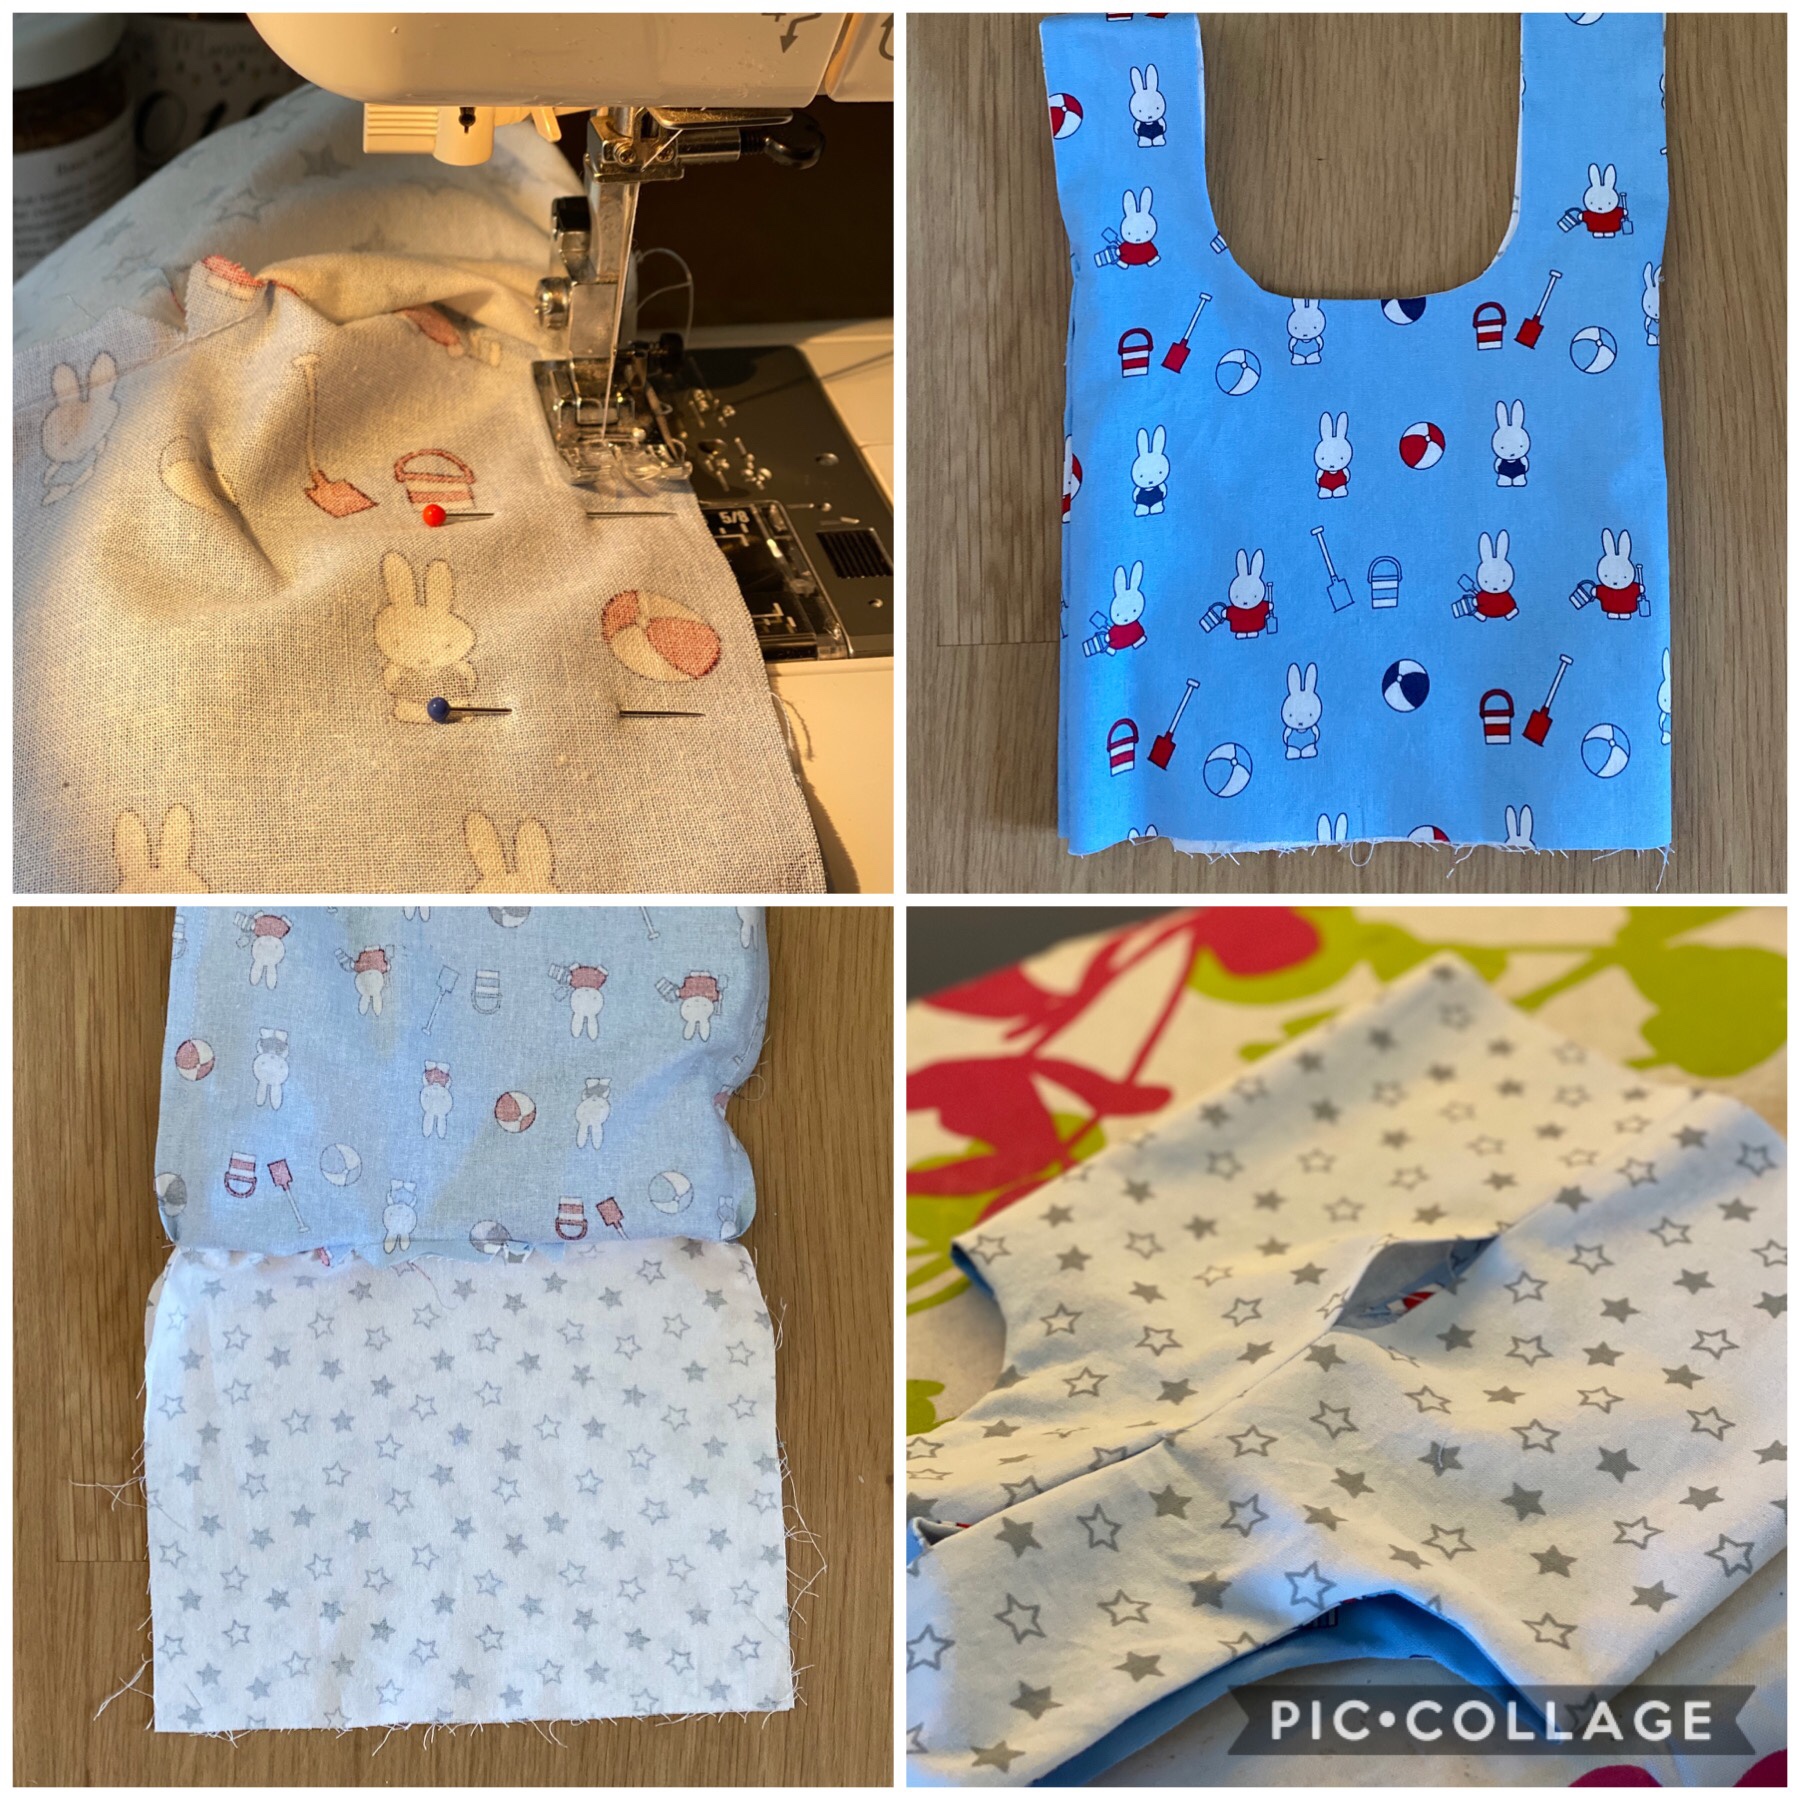
Step 2
Cut 2 bag pieces out of your outer fabric, 2 from your lining fabric and 1 circle from each.
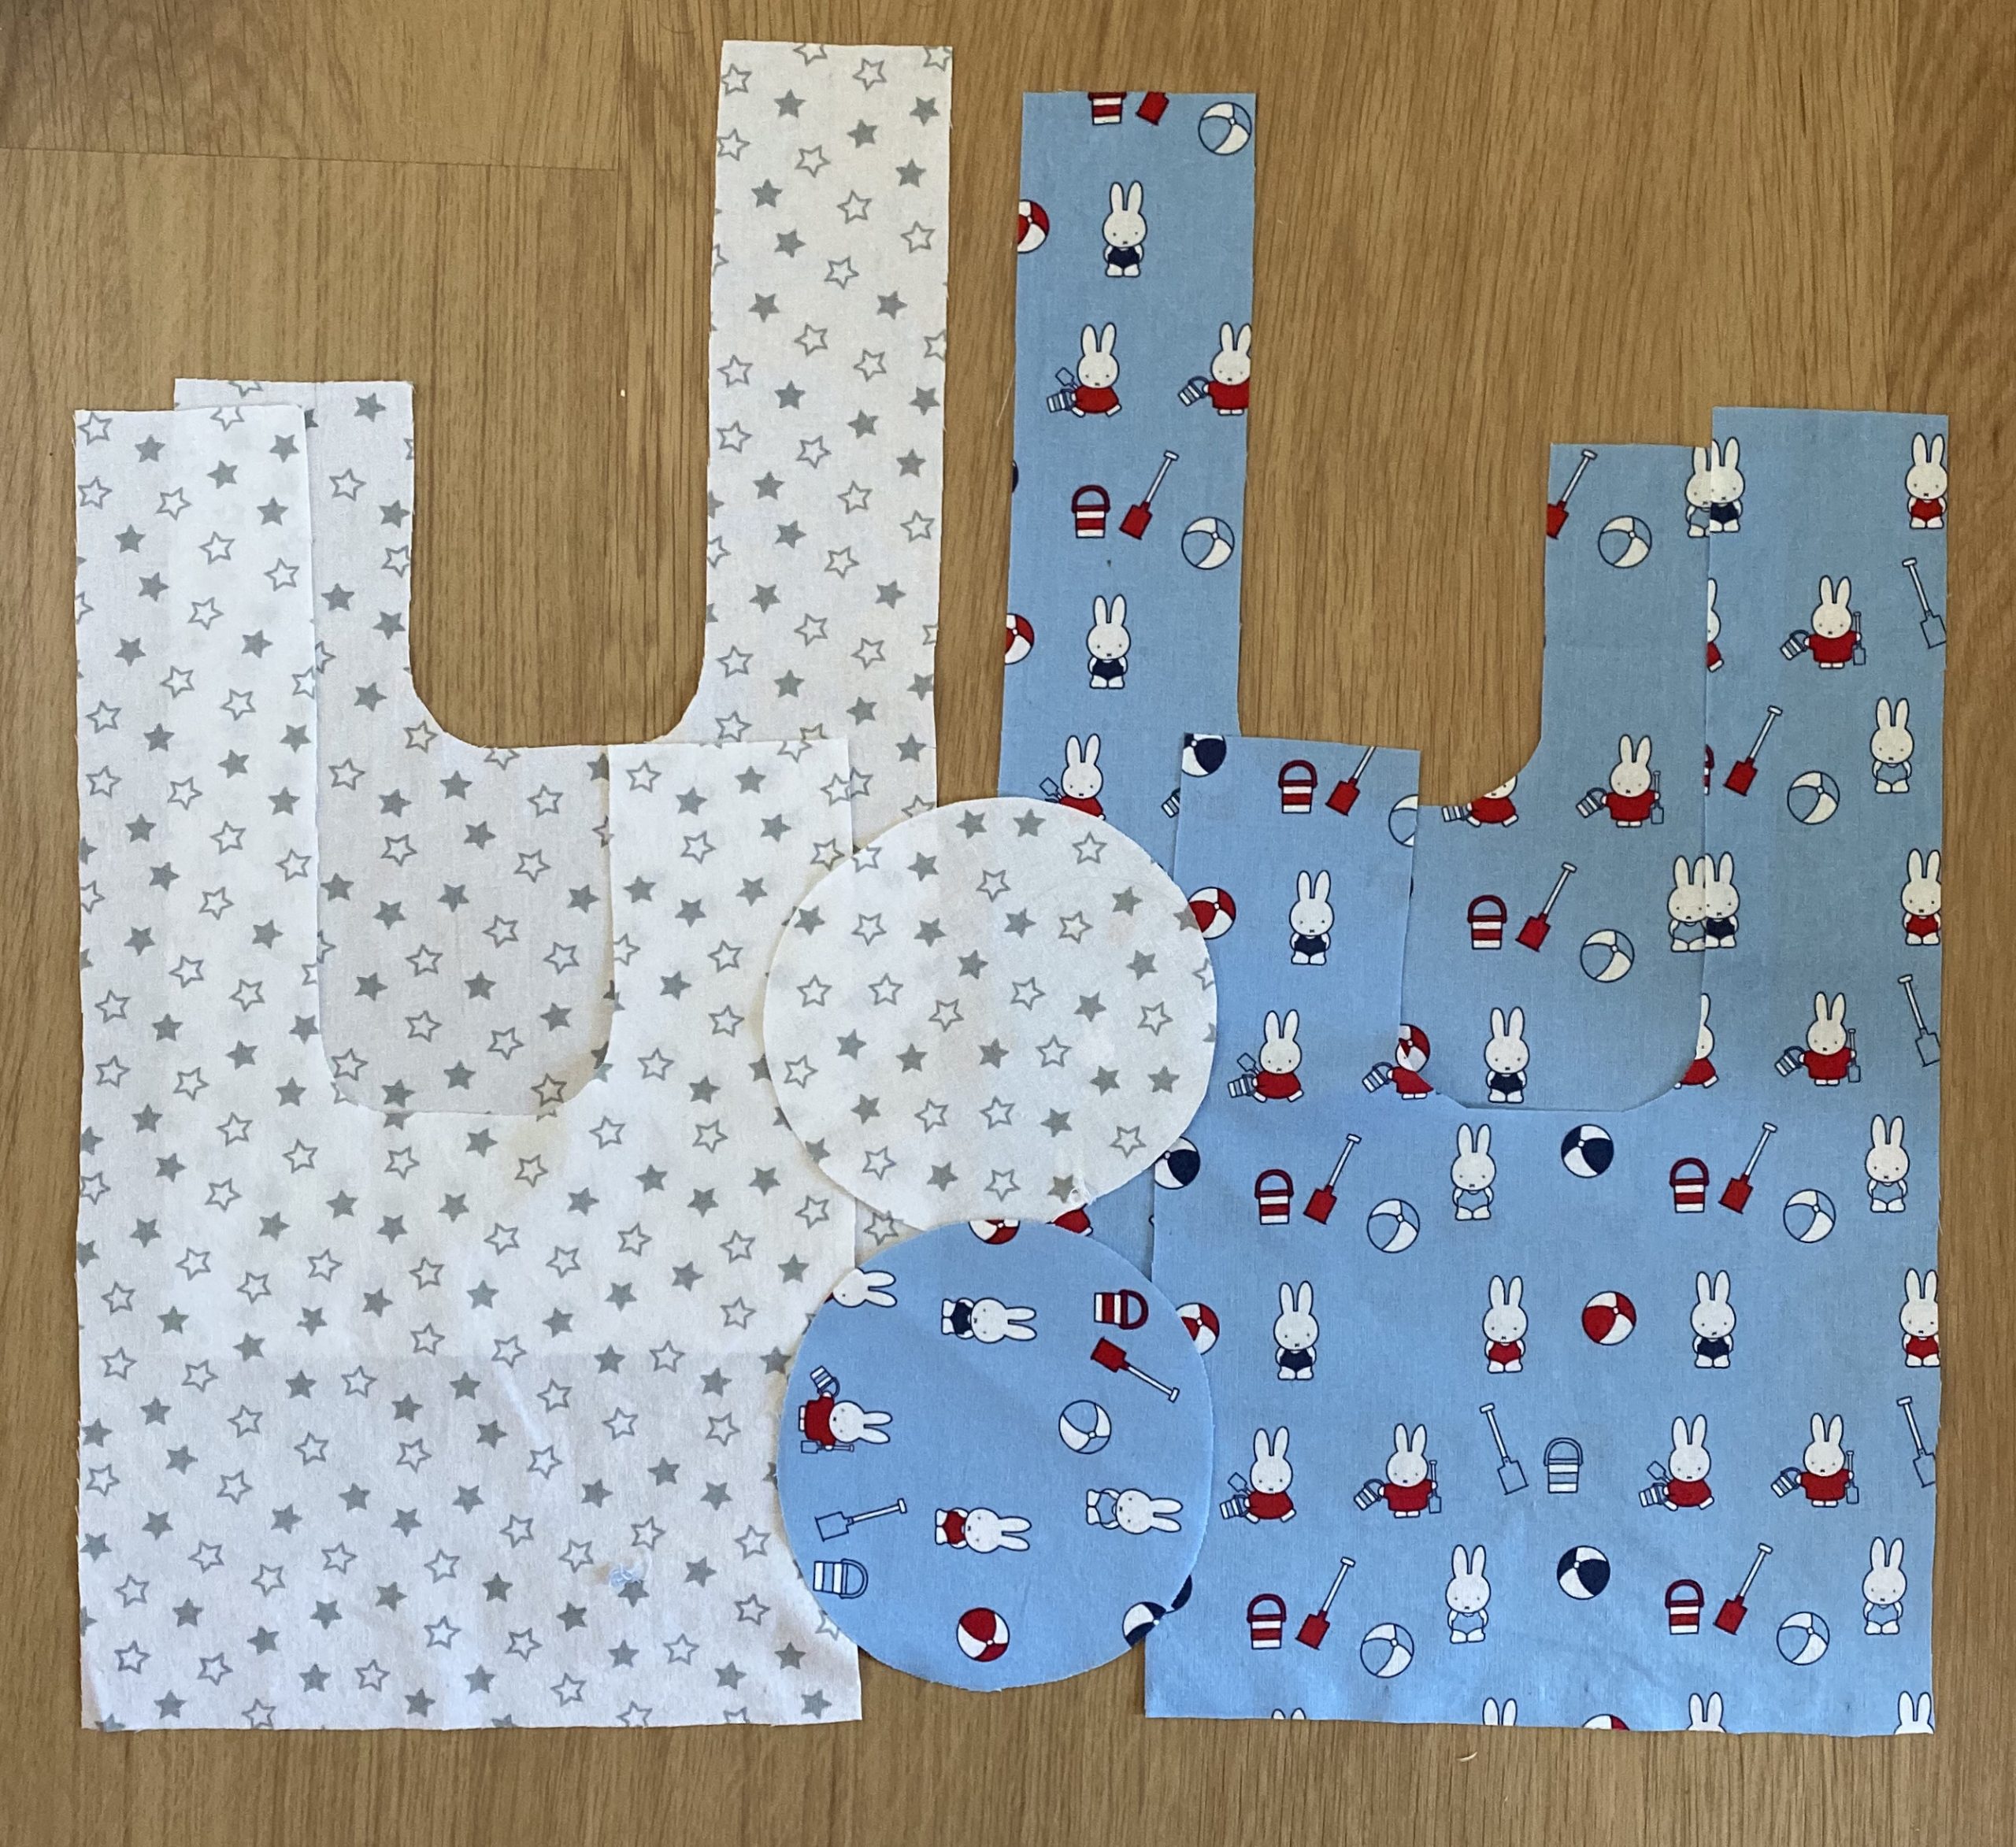
I interfaced my outer circle, but it works ok without.
Step 3
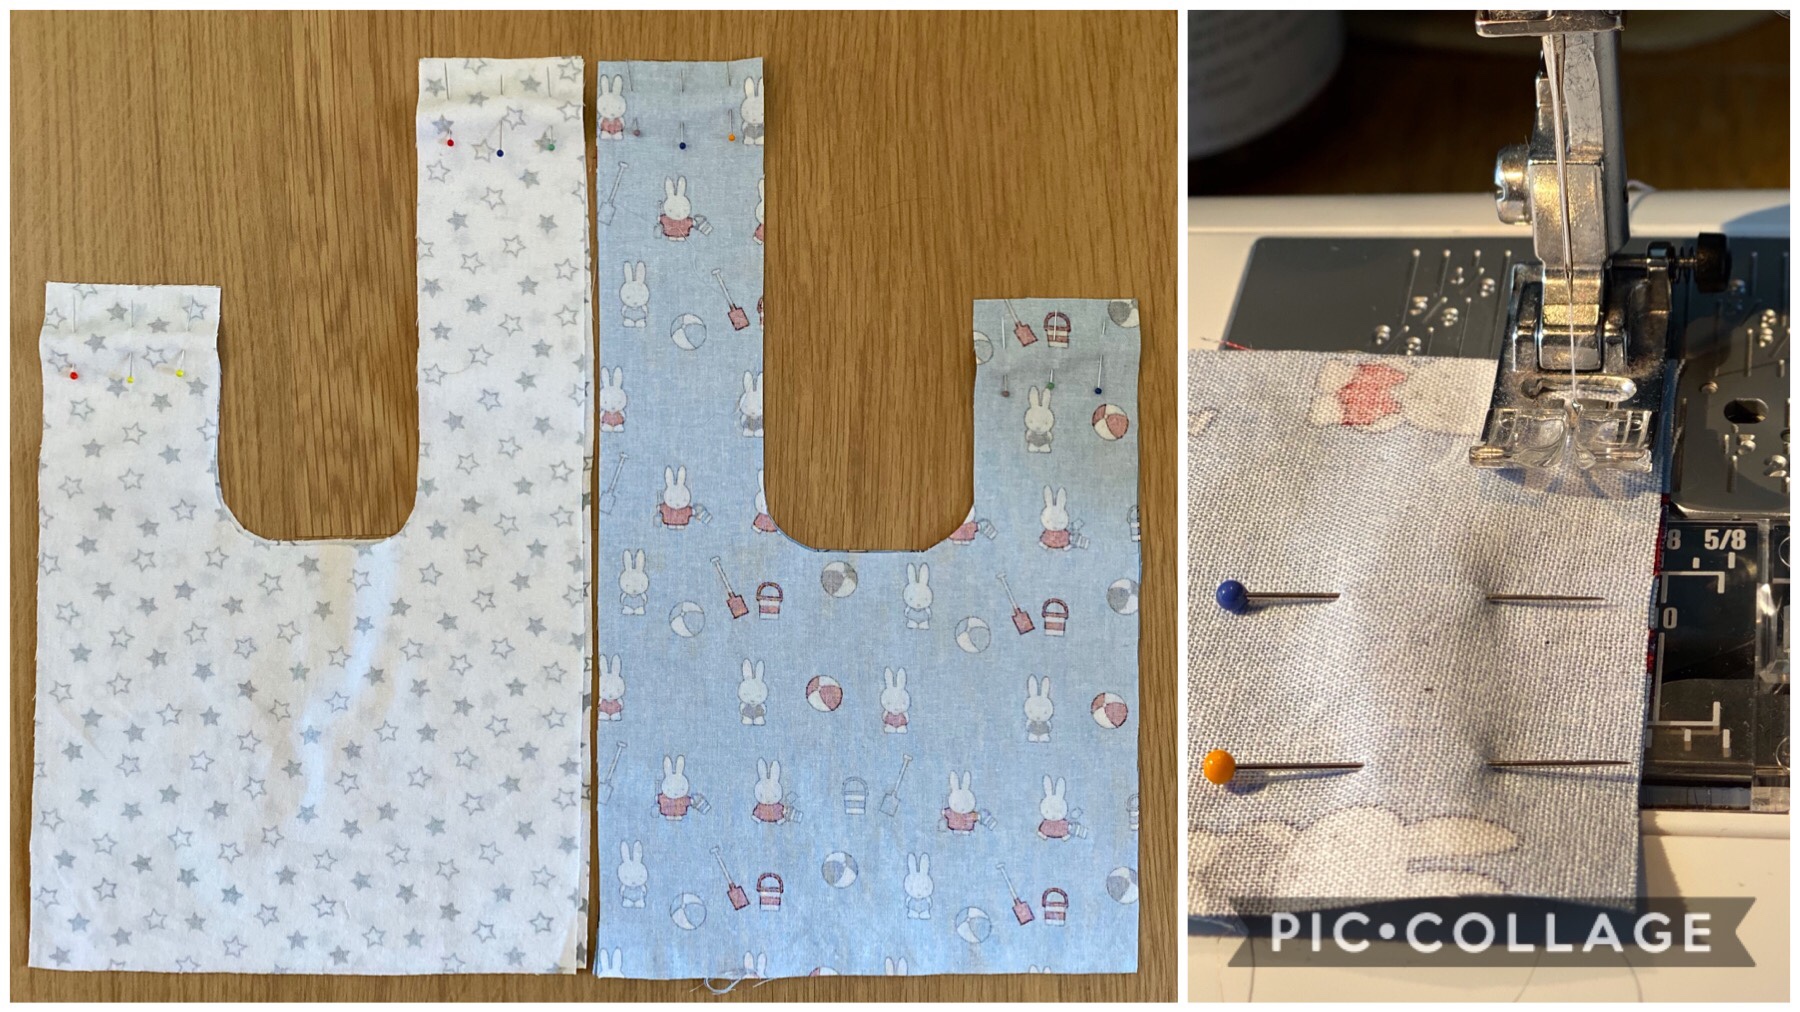
Pin and sew the shoulders of the bag straps (outer and lining). Press flat when done.
Step 4
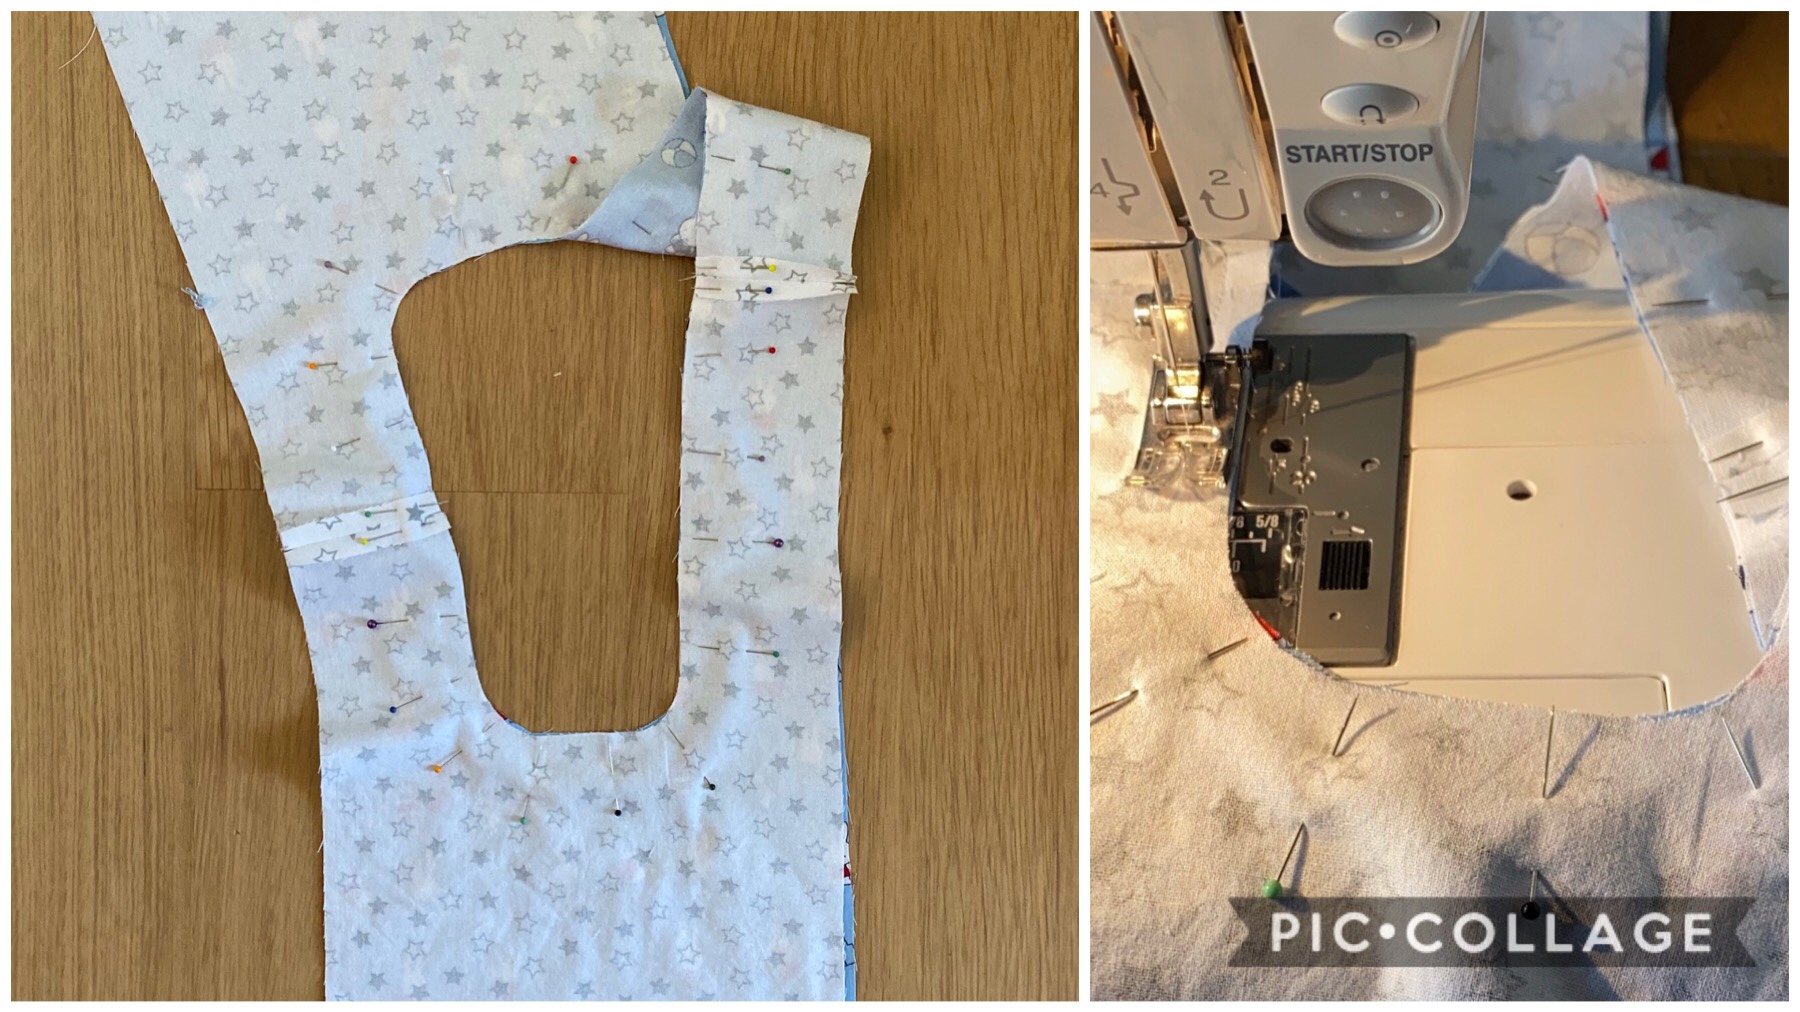
Place right sides together and pin the centre seams (around the oval) and sew together. Clip the curves, turn right way round and press flat.
Step 5
This bit is really tricky, so tricky in fact that DIY District made a video showing how it works. I would highly recommend going to their site to watch it!
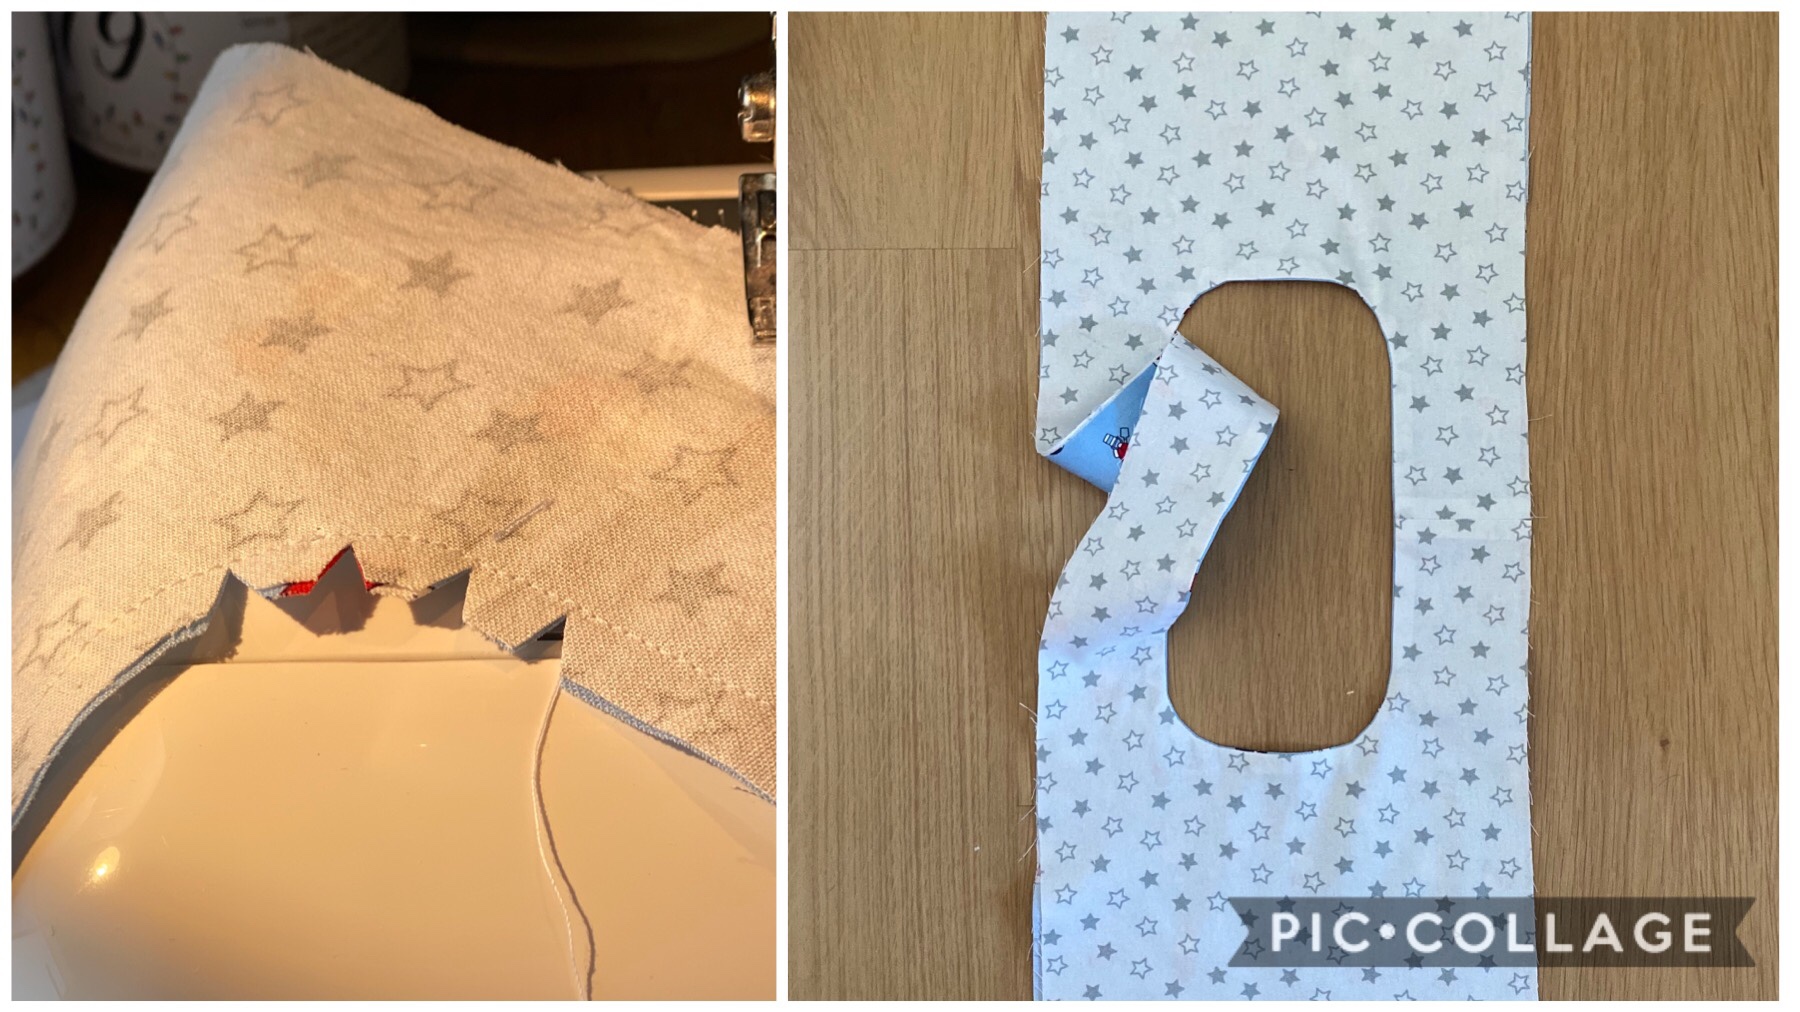
Do make sure, before you begin this stage,that you have clearly marked where the notches are on the sides of your fabric. You want to start and stop sewing at this point on either side of the handle.
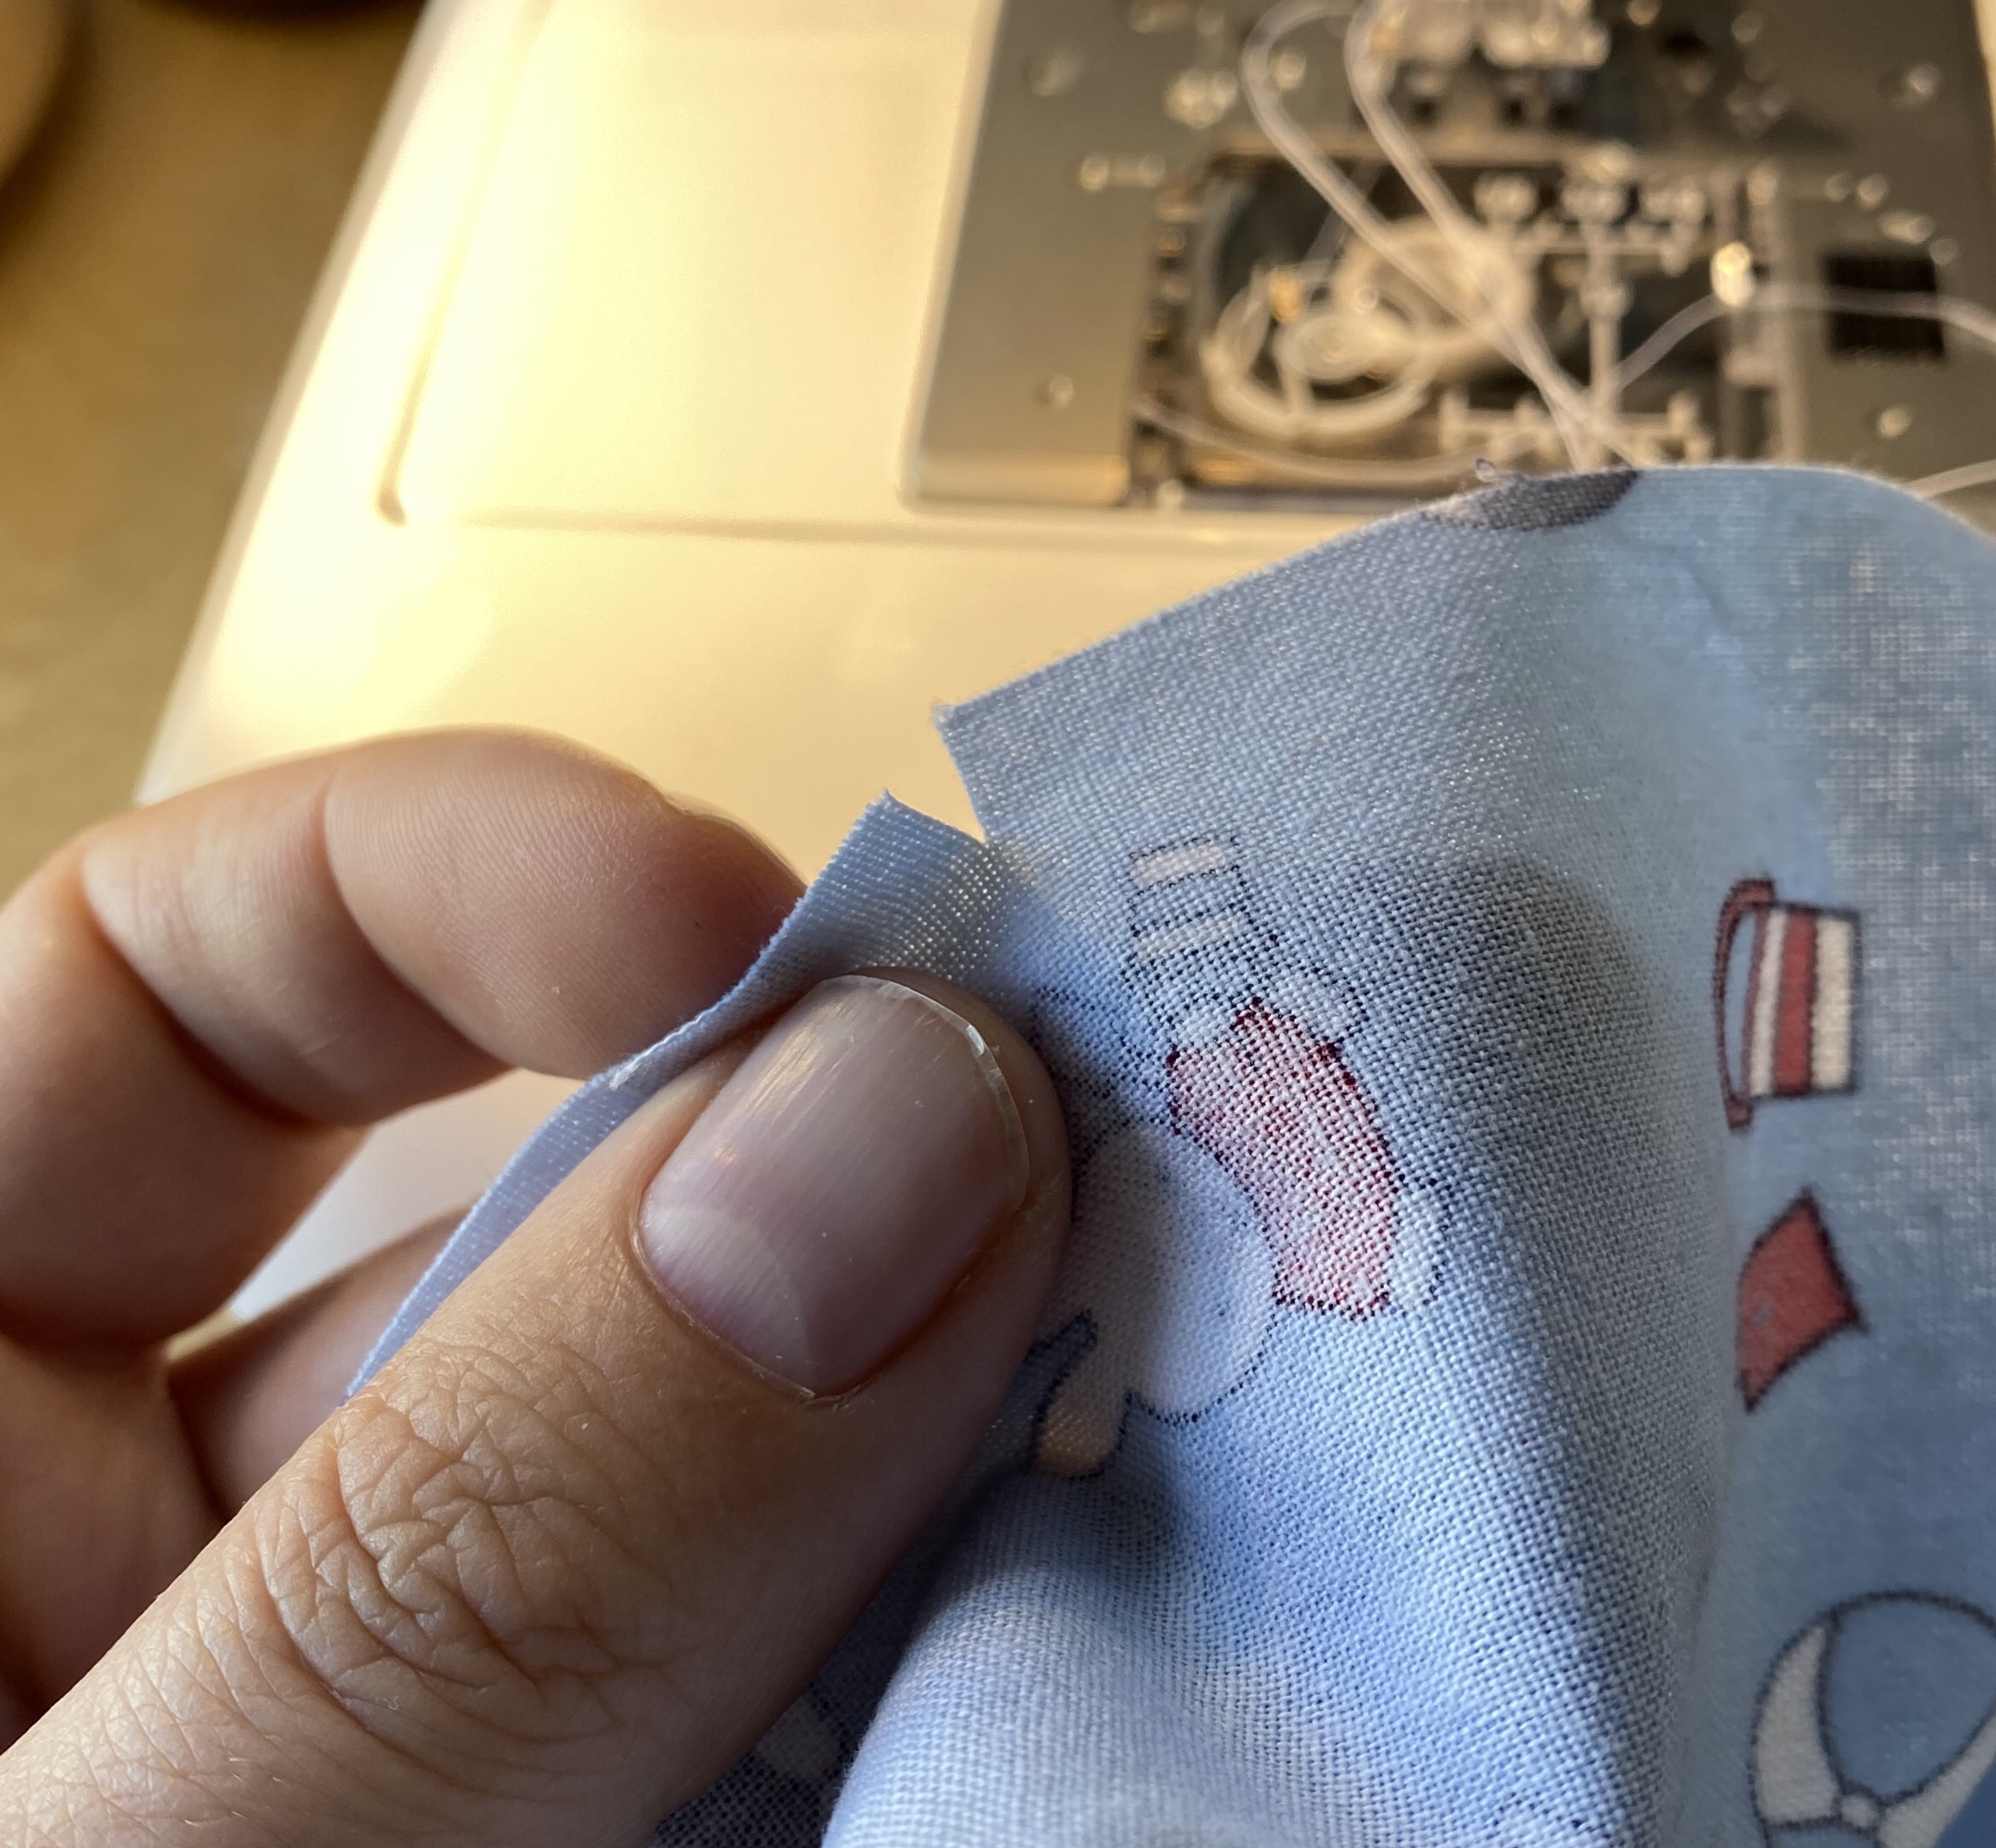
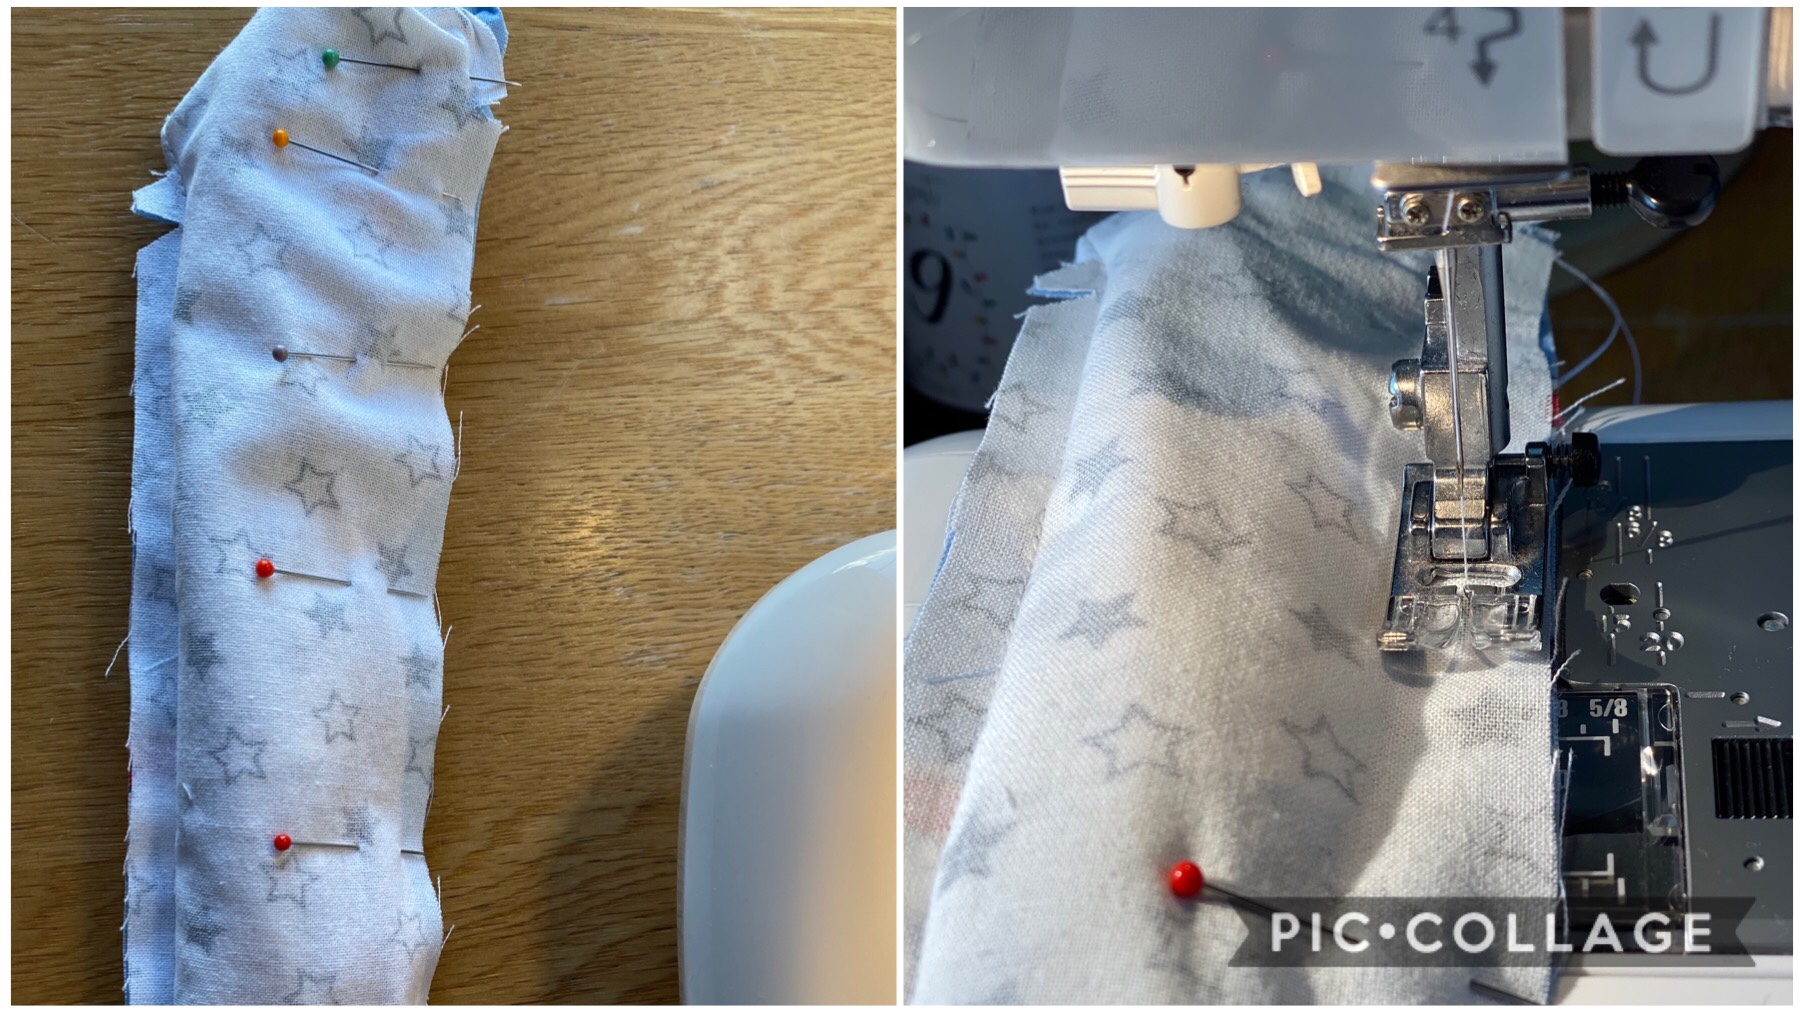
Then (and this is the tricky bit you need to watch the video for) you fold one half of the bag inside the handle, tucking it in quite well and carefully pin. Do this all the way down the handle until you have pinned between the two notches. Then sew from one notch to the other. Go slowly and make sure the rest of the bag is firmly away from the stitch line!
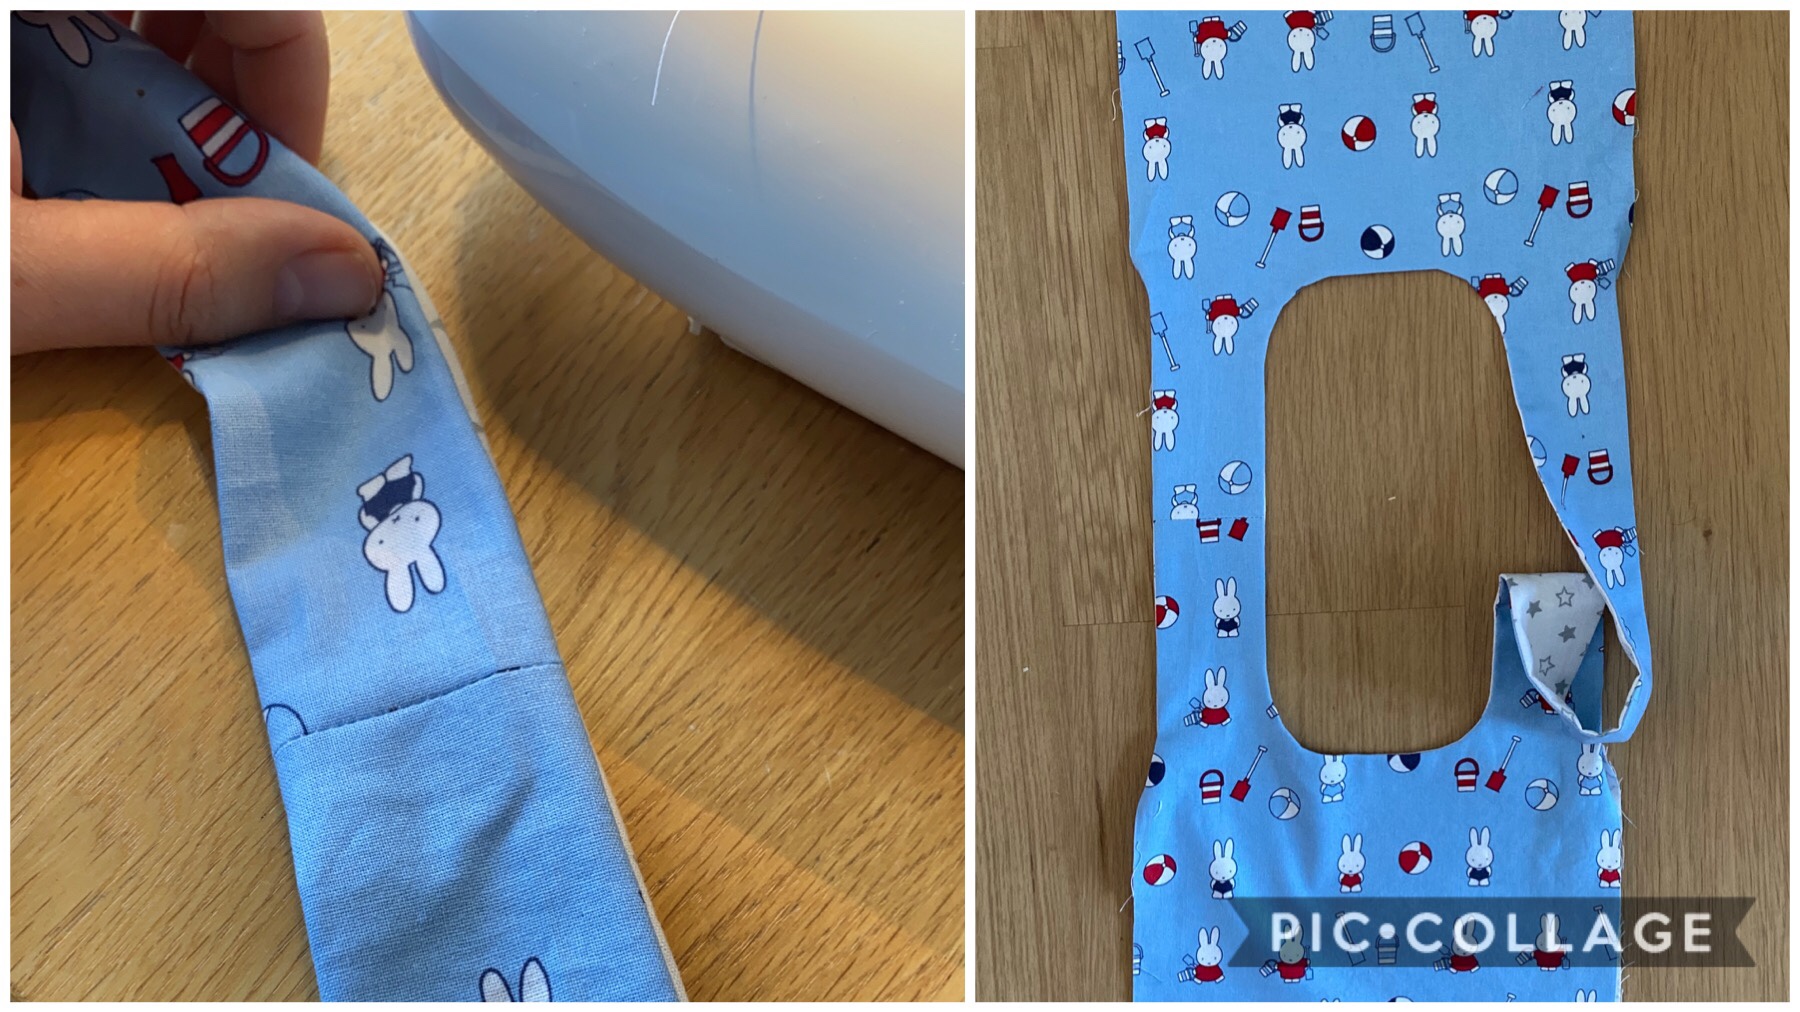
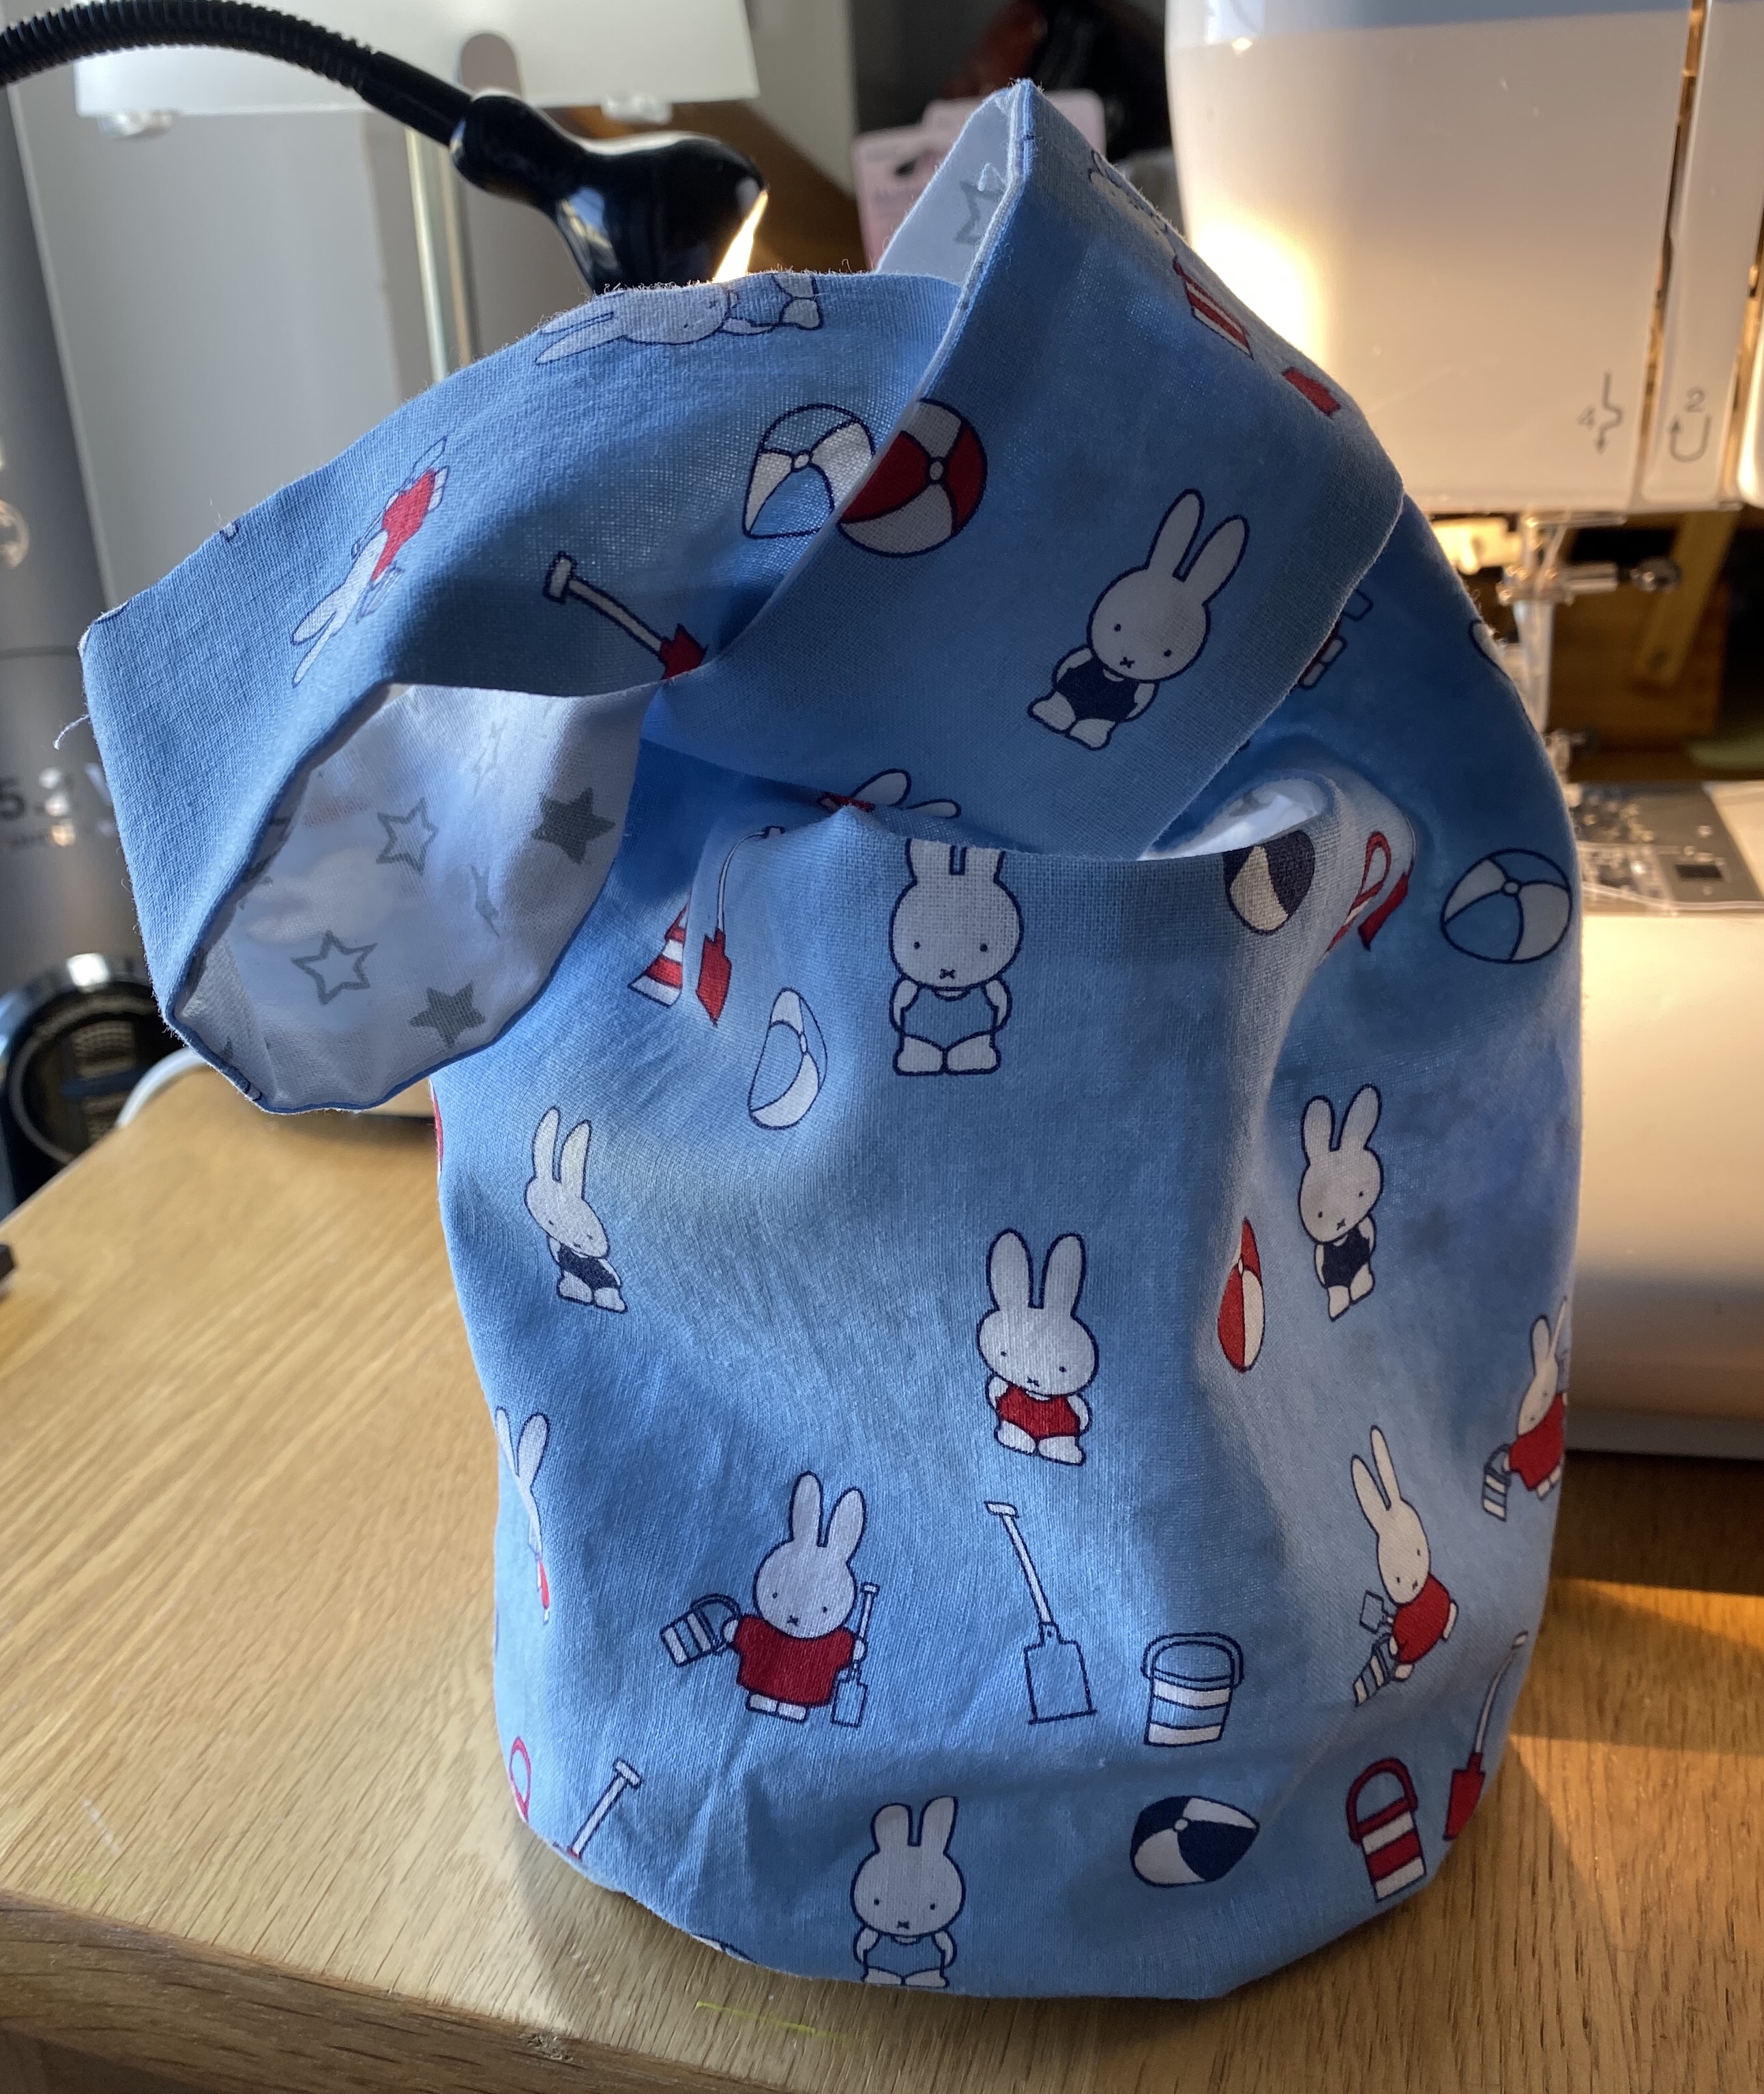
Now the satisfying bit, pull the bag through the handle, showing the final finished handle strap. Repeat for the other side and then press again.
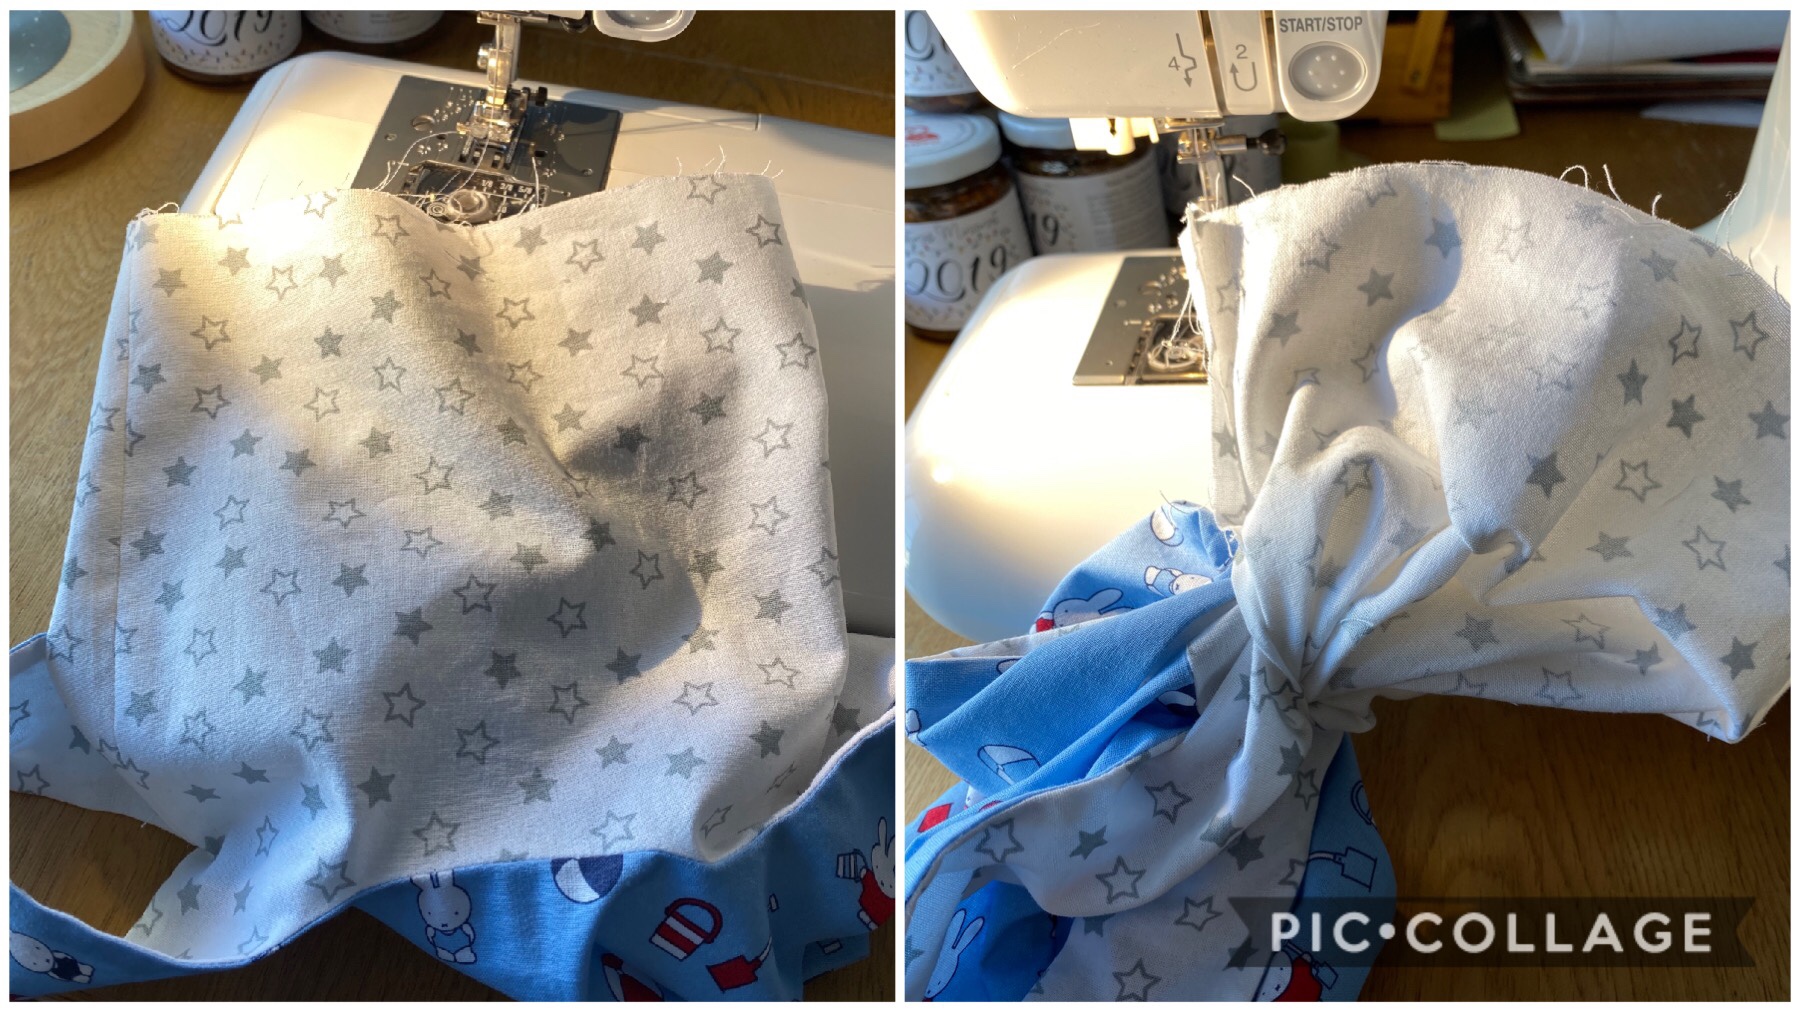
Step 6
Now the (relatively) easy bit. Turn the outside of the bag inside out and pin the side seams. Sew and press. Then do the same for the lining but remember to leave a small gap in one of the sides so you can turn it right way round later!
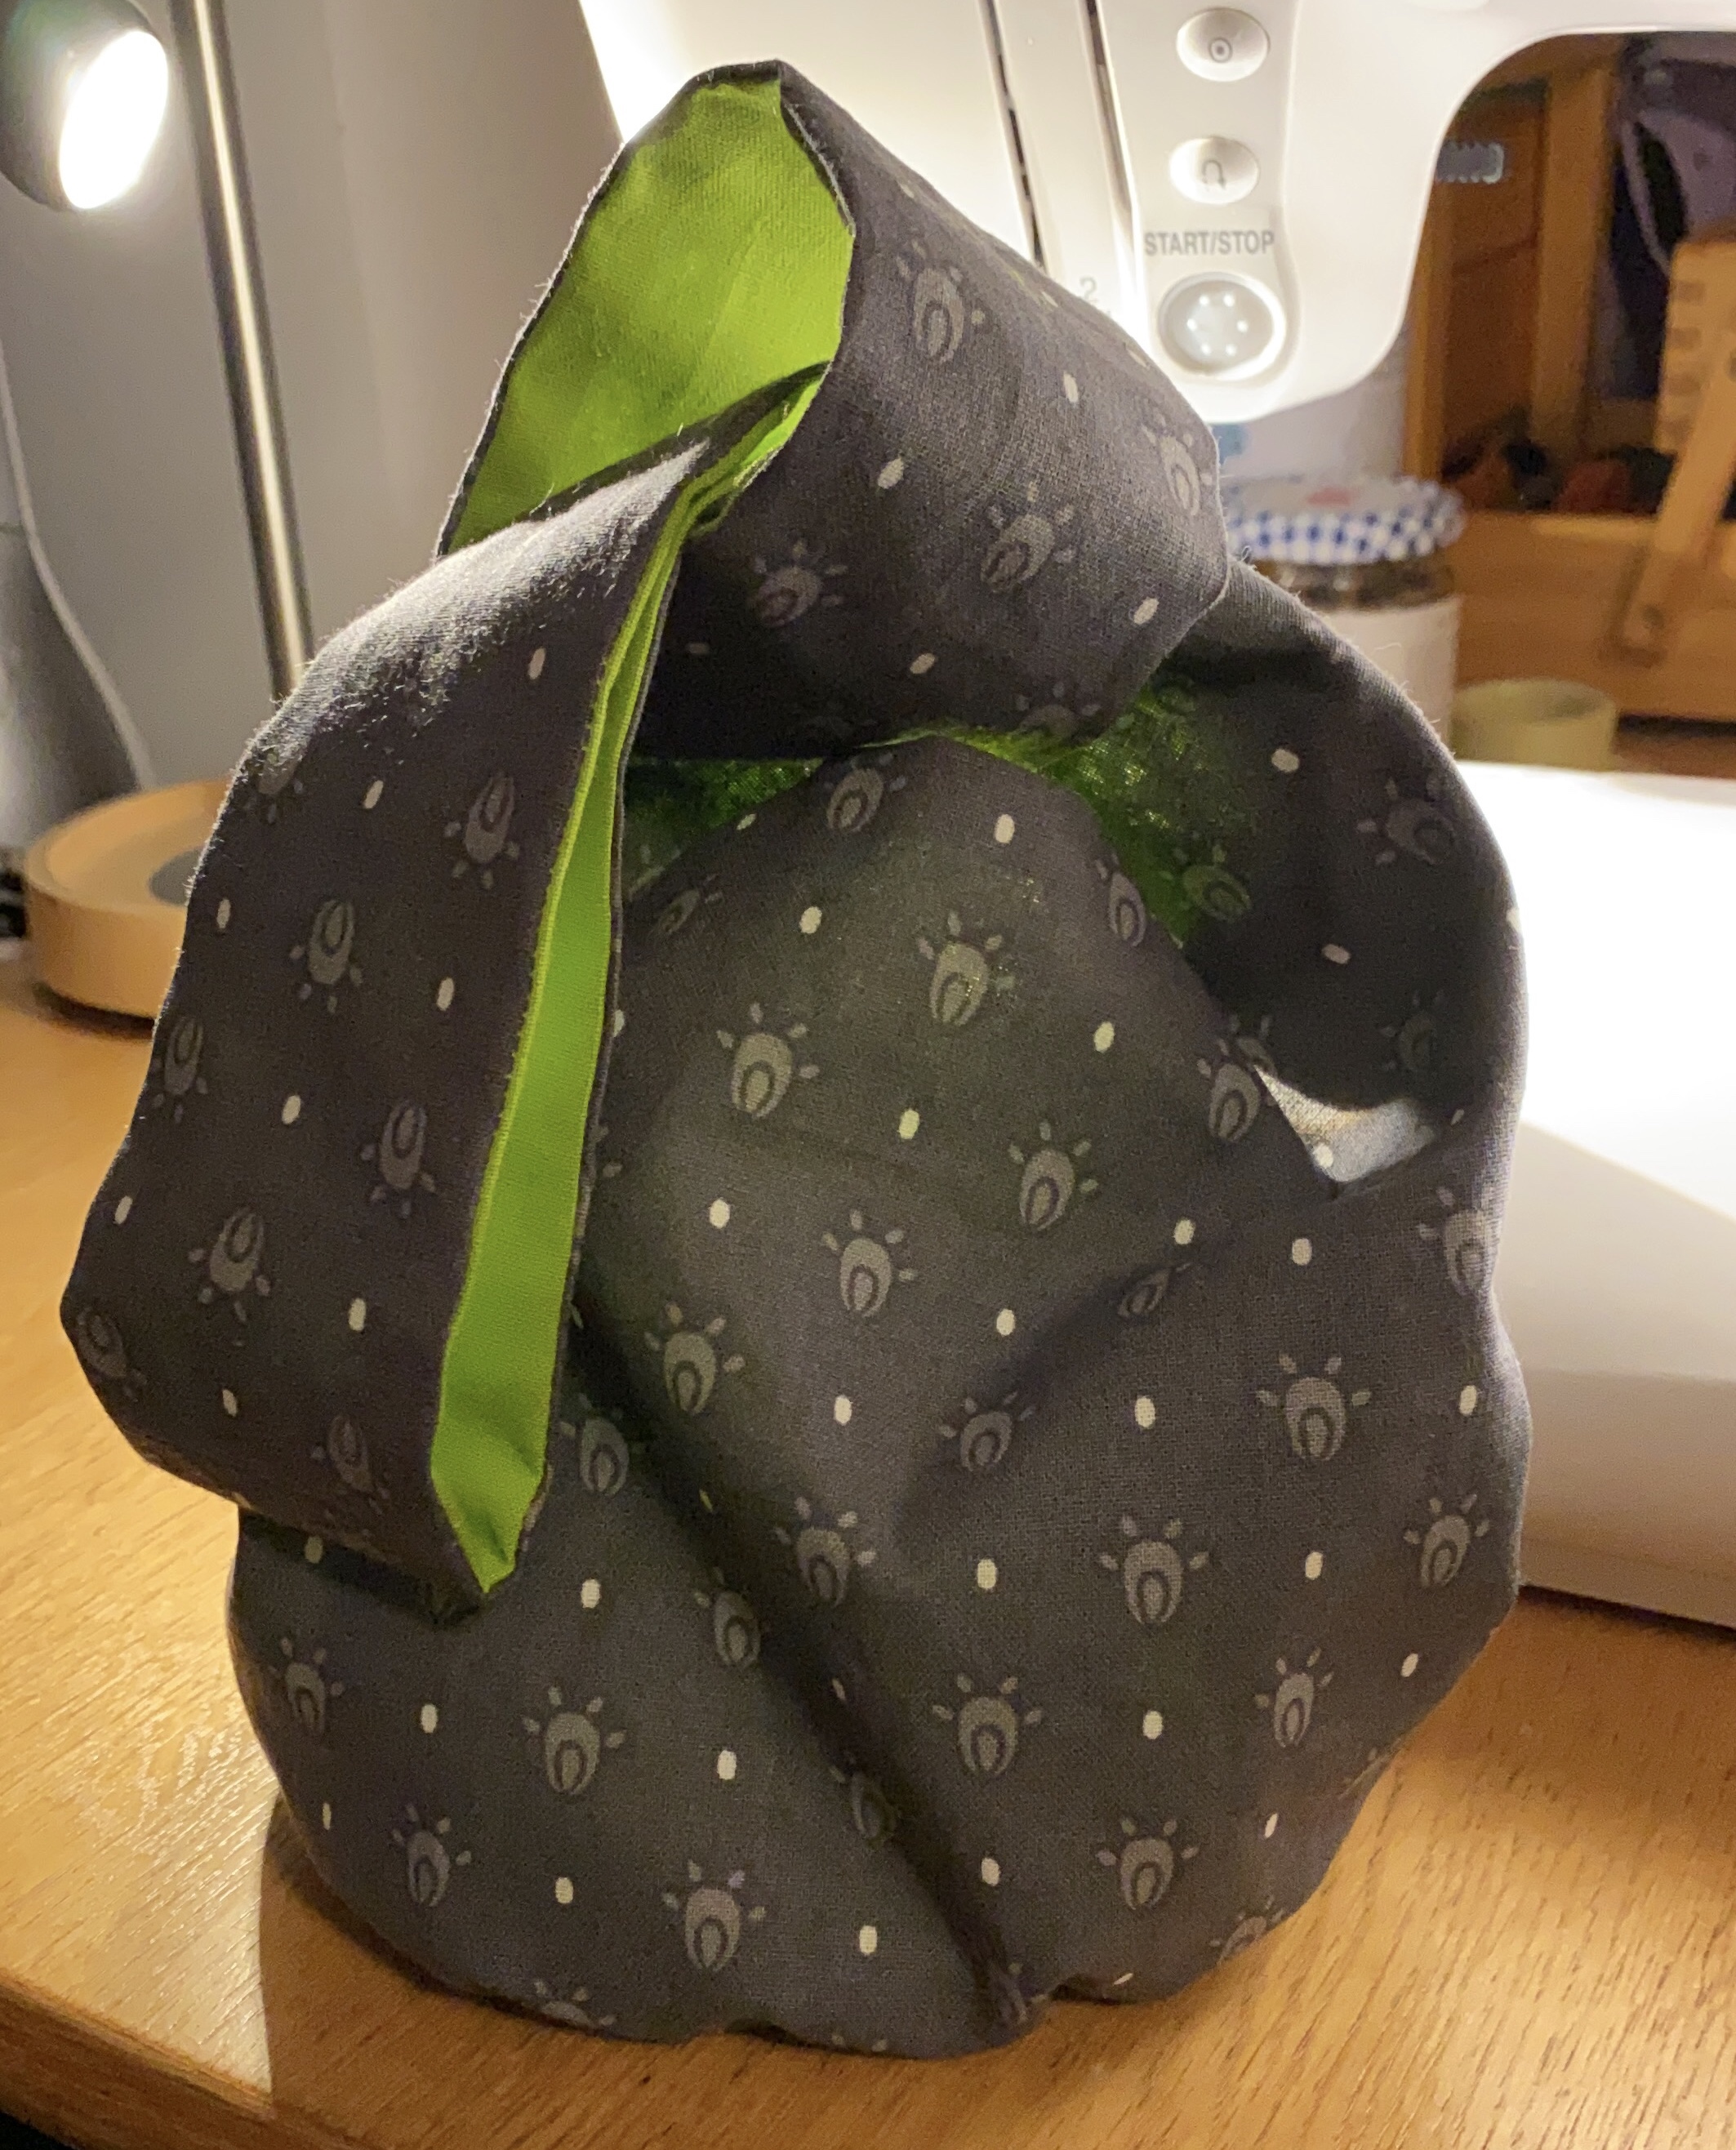
Step 7
I ran some gathering stitches around the base of the outside before pinning the base in place. This was so I could adjust the gathers so it looked nicer when I was done sewing. Use lots of pins and spaces out the gathers as best you can. Then slowly stitch the base on.
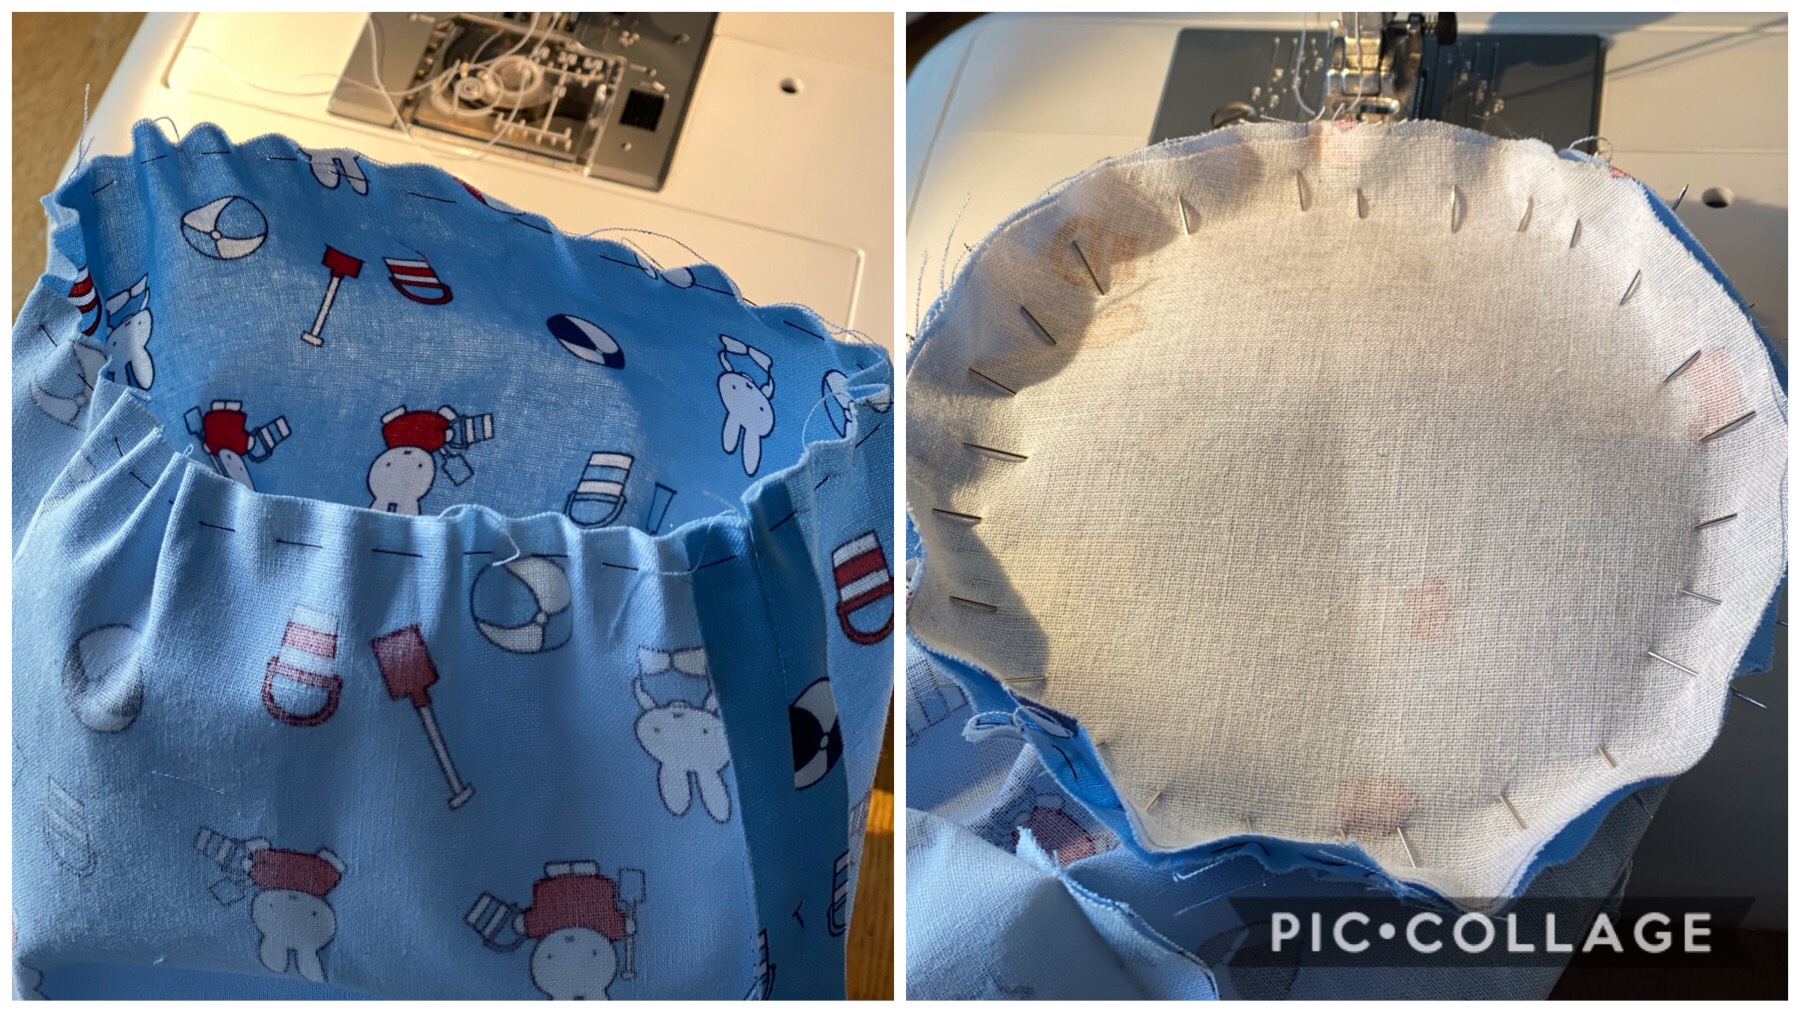
Then clip the curves and turn right side out.
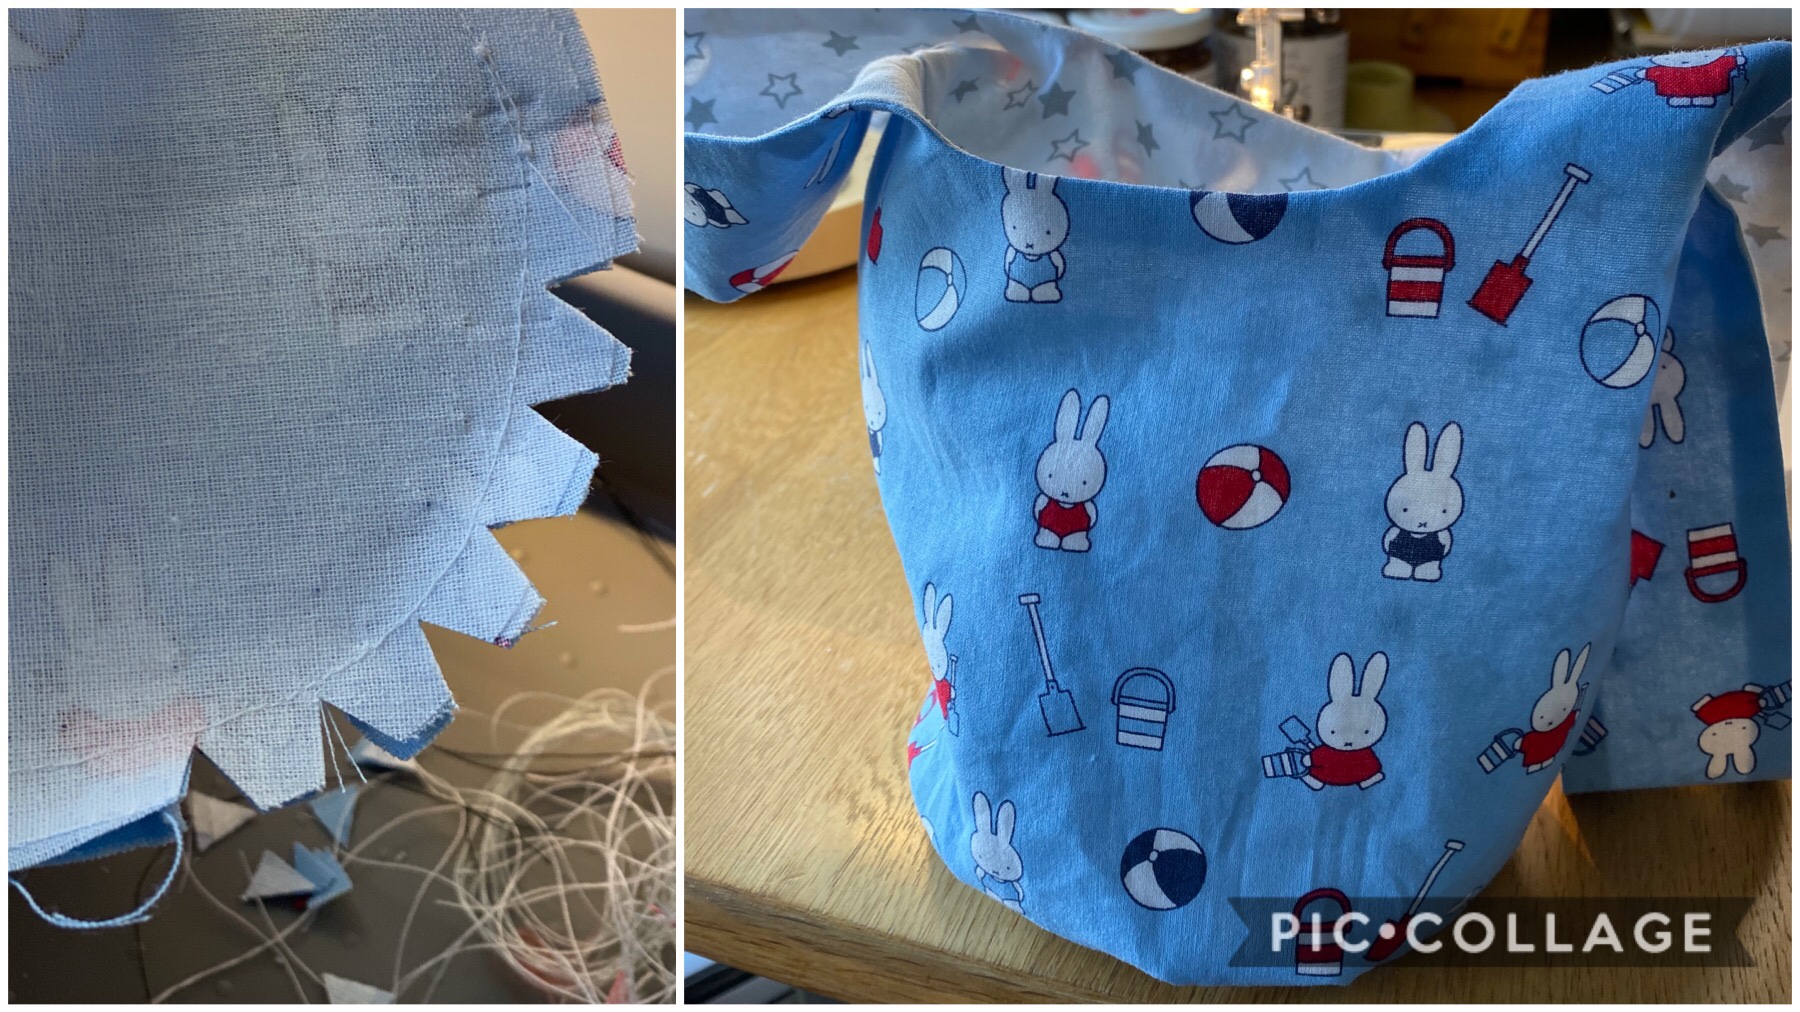
Step 8
Pull the lining bag out of the main bag. Remember that gap you left? Pull the inside of the bag through this gap and attach the base (as in step 7).
Pull the bag back through this gap once the base is attached and blind hem stitch the gap closed.
The finished result!
It is exactly what I wanted to make! And once I got my head around the handles, it was easy. So later that day I made the bag for my boyfriend’s mum (and as she doesn’t read this blog (- yet!) here is her finished Christmas present:
I hope she likes it!
After setting up my new machine, I finally got to sew together the pieces for my Ultimate Wrap Dress from Sew Over It.
It was very easy to put together, and being able to just press ‘start’ on a sewing machine and let it sew with a little steering from me was a pleasant surprise.
The finished dress was much shorter than I anticipated, so it’s ended up being a tunic dress (to be worn with leggings). I was quite surprised by this, as I’m only 5’10”.

Plus the tie strap hole is a little too high and doesn’t sit on my waist. But I absolutely love how this fabric looks. I may have to buy some more, especially as it comes in different colours!

So I am going to buy some more jersey and try again. Next time I will:
- Adjust the front slope so it ends on my waist, then the straps will be at the right point.
- Add a couple of darts in the back, so the front comes up a bit higher. This will also pull the shoulders seams up slightly, so it will sit better.
- Add about 4″ to the bottom, so it hopefully hits my knee.
-

A 2022 Embroidery Challenge
4 February 2023
I’ve been watching people making temperature quilts on social media for a few years and really liked the idea of making one. But I knew I would struggle to carry such a large project through to the end, plus the idea of knitting a blanket in the heat of summer wasn’t that appealing. Then I […]
-
Little Life Update
3 February 2023
I finally caught COVID, and while I am curled up on my sofa feeling sorry for myself, I thought I would check through things. I realised that I haven’t written anything on this blog for ages (gulp April 2021) and so much has happened! The problem is that Instagram is so much quicker and easier […]
-

Alison Glass Lumen Quilt
19 April 2021
In which I attempt to make a giant quilt, for the first time!
-

Cactus Embroidery – Slow Sewing
6 February 2021
It’s taken just over a year, but this embroidery is finally finished!
-

Mushroom Ragu – Vegan and Delicious!
1 January 2021
It's new year's day and I'm making Mushroom Ragu.
-
A 2022 Embroidery Challenge
4 February 2023
I’ve been watching people making temperature quilts on social media for a few years and really liked the idea of making one. But I knew I would struggle to carry such a large project through to the end, plus the idea of knitting a blanket in the heat of summer wasn’t that appealing. Then I […]
-
Little Life Update
3 February 2023
I finally caught COVID, and while I am curled up on my sofa feeling sorry for myself, I thought I would check through things. I realised that I haven’t written anything on this blog for ages (gulp April 2021) and so much has happened! The problem is that Instagram is so much quicker and easier […]
-
Alison Glass Lumen Quilt
19 April 2021
In which I attempt to make a giant quilt, for the first time!
-
Cactus Embroidery – Slow Sewing
6 February 2021
It’s taken just over a year, but this embroidery is finally finished!
-
Mushroom Ragu – Vegan and Delicious!
1 January 2021
It's new year's day and I'm making Mushroom Ragu.