Cactus Embroidery – Slow Sewing
Christmas 2019, I was going to spend the festive season with my boyfriend’s family for the first time. So I wanted to take something crafty, but compact, to do. Embroidery! I thought – so went to Etsy to find a kit to challenge my stitching skills.
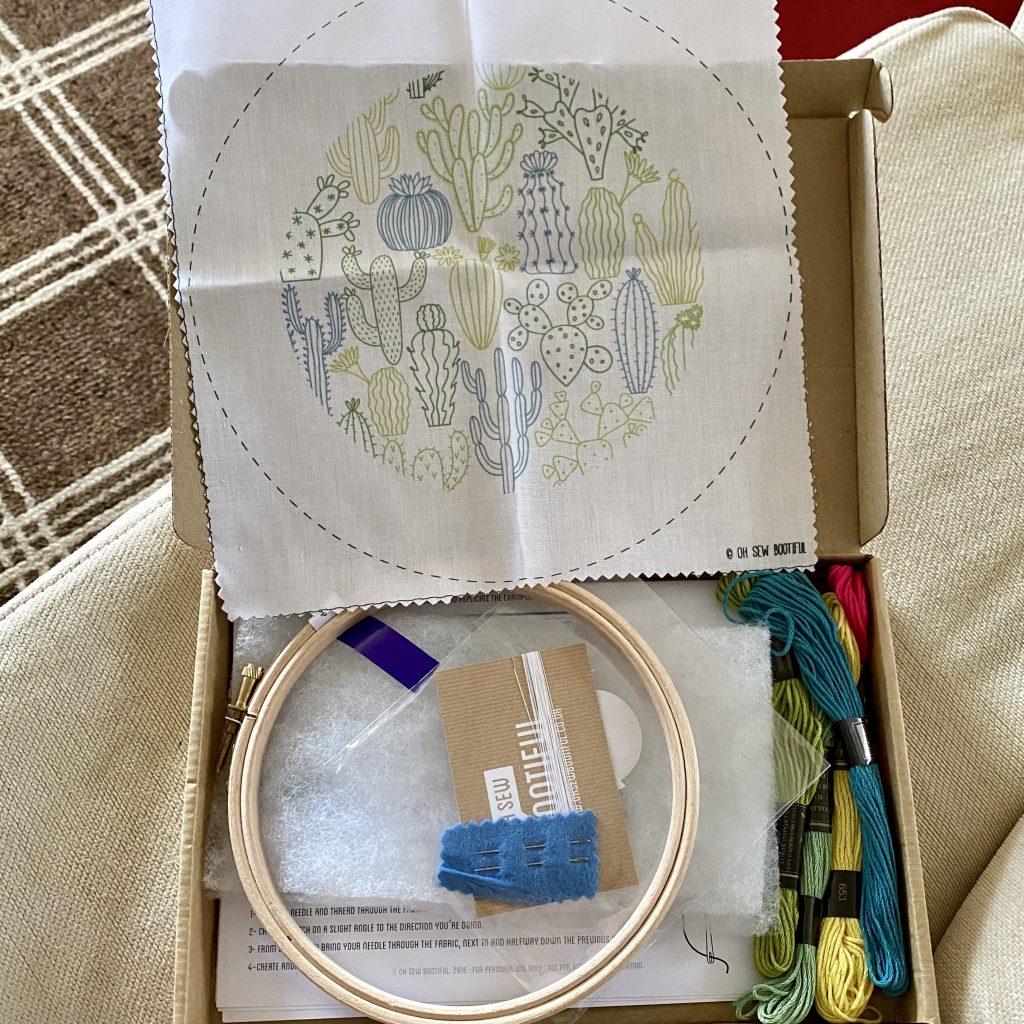
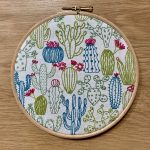
After much browsing I found this cactus kit from Oh Sew Bootiful, which came with everything I needed. Including a comprehensive guide to the stitches I would need to master.
One of the stitches I found the most challenging, which involved watching a few YouTube tutorials, was the French Knot. I still need to practice it, because my knots are still a bit hit and miss. But this cactus ended up with a series of very good knots!
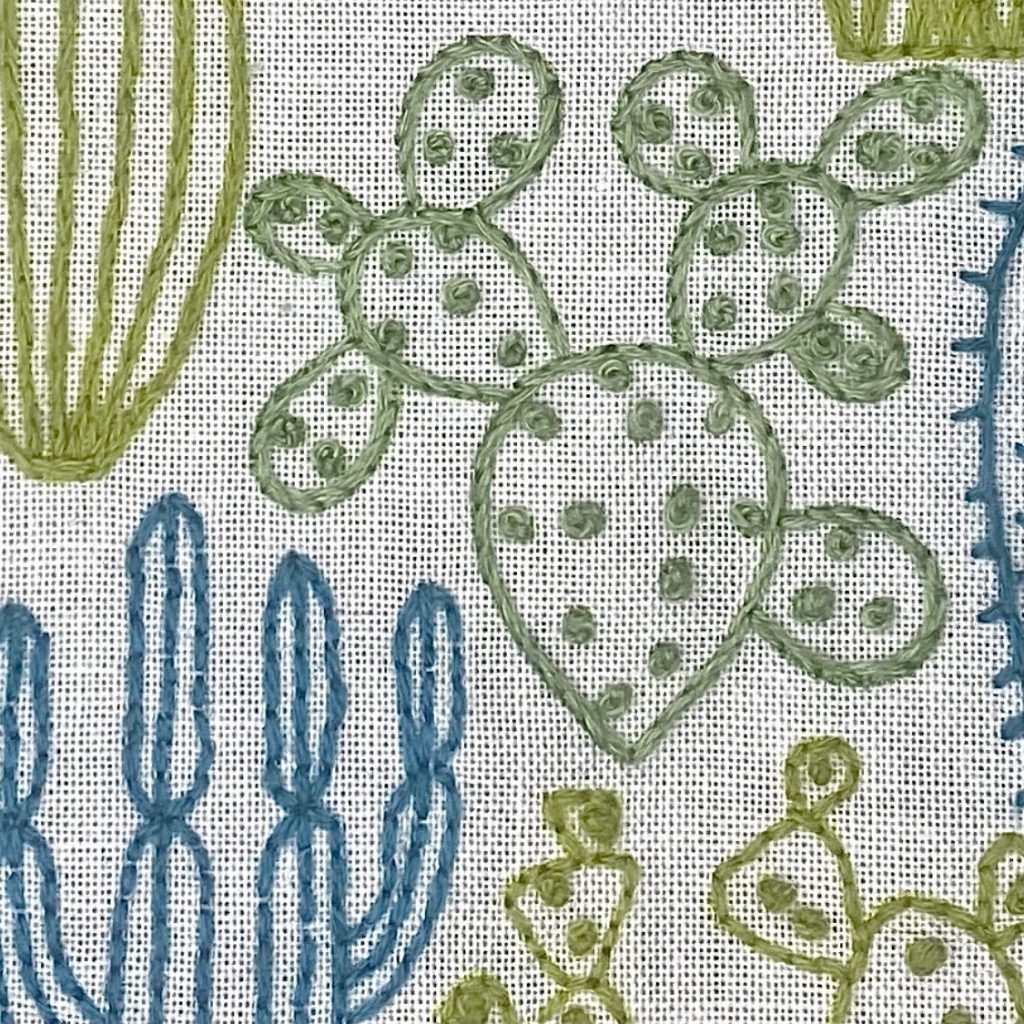
I particularly liked how there was a variety of stitches recommended in the kit. But you could decide which stitch worked best on which cactus. Although I did largely stay true to the cover illustration, there were some cacti that I went “off script”.
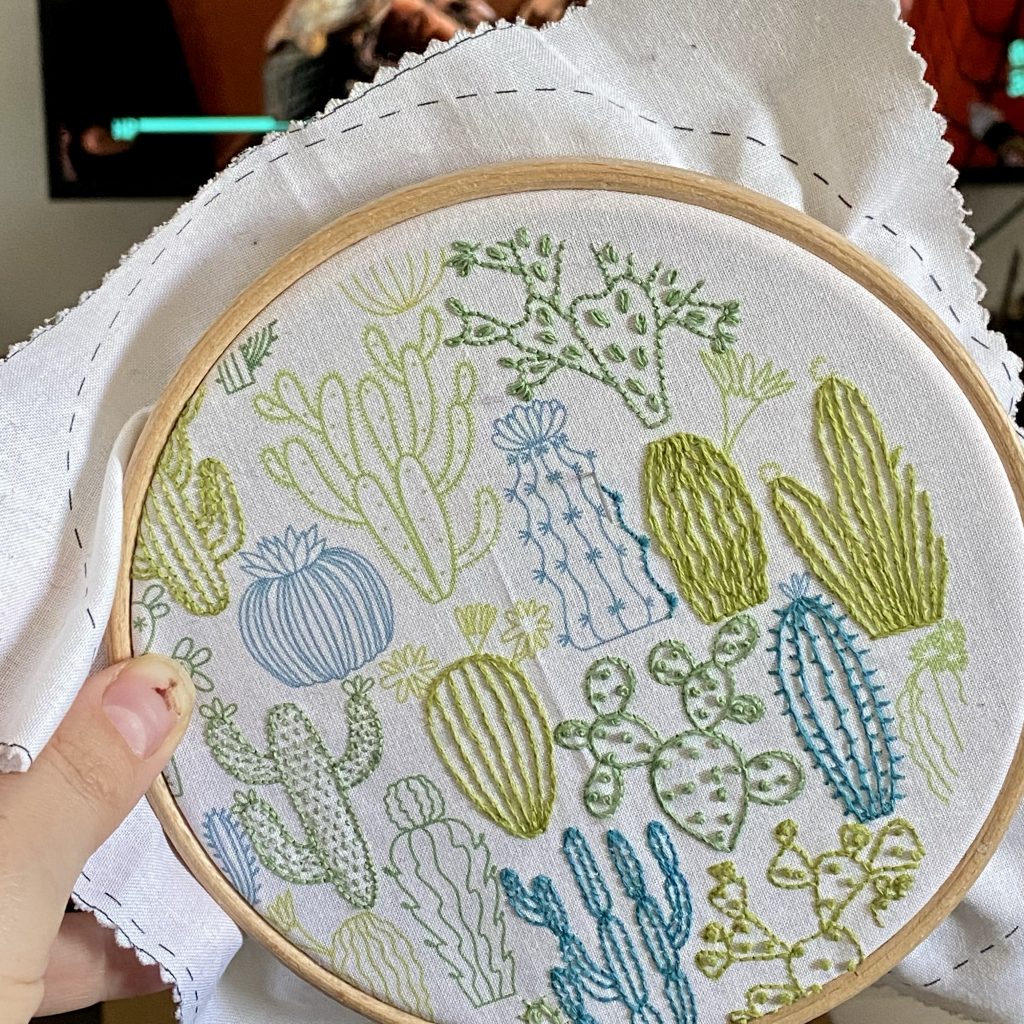
By the start of the first lockdown, I had completed a decent amount of the kit, but then the distractions of baking bread and making scrubs meant that the kit was relegated to a shelf.
However, by the start of lockdown 3, most of my crafting materials had been packed up (we are in the process of trying to move). I left myself 3 unfinished projects, one of which was the cactus embroidery.
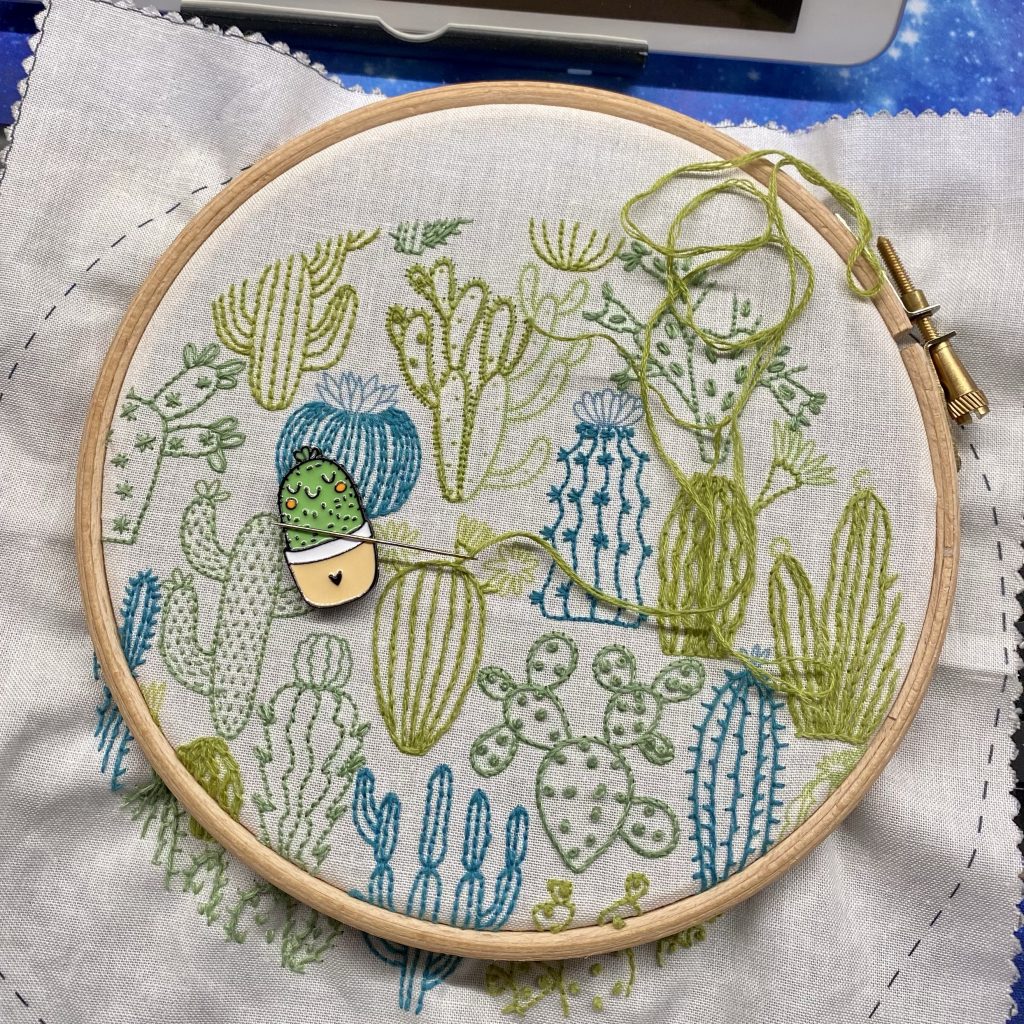
So with fewer distractions, and the addition of a fabulous needle holder from the Dinky Trinket Co on Etsy, I finally completed it.
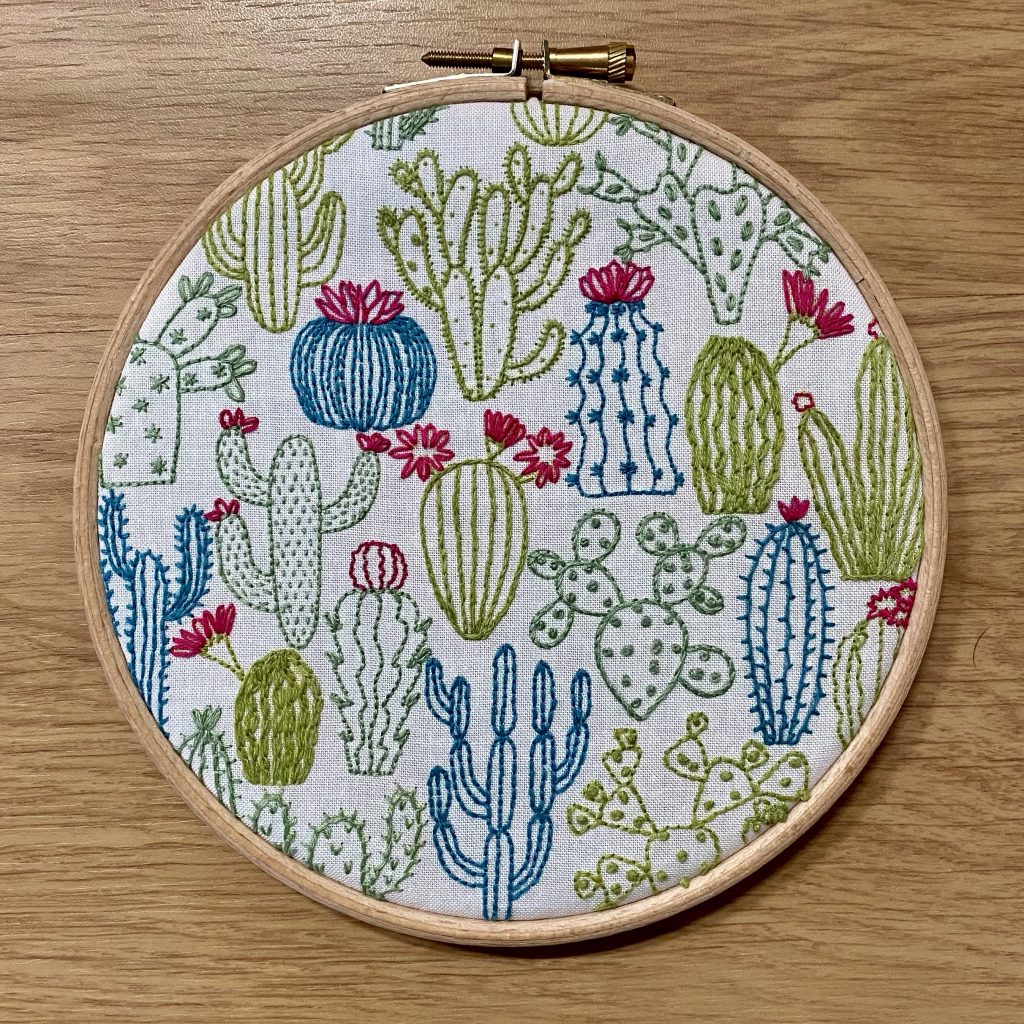
The next challenge is to find a way of protecting it in a frame. When I am back in school I might have a go at making one on the laser cutter. I would like it to have a glass front with a wide wooden frame and a way of hanging in on the wall. But that is a challenge for the future!
For now, I’ve started my next embroidery. This time it’s blackwork and I’m learning how to do Holbein stitch…
It’s week 12 of lockdown, but this weekend I got to take part in something really fun! Due to the current COVID-19 crisis, this year the annual Sewing Weekender became an online event! There have been a series of videos with interviews, tutorials and fun chit chat and Zoom webinars, where everyone taking part can show what they have been up to.
I decided that I wanted to spend this weekend sewing up another Kielo Wrap Dress, with sleeves. I will post pictures of the other one I made, once I have some pictures of it on (the lack of outside space, or indeed inside space, is making fashion shoots tricky!).

I managed to cut all the pieces out and sew it together (with the exception of hemming) on Saturday. Annoyingly my self drafted neckline needs some work – because it is too low.
So on Sunday I decided to spend the time drafting a pattern for my favourite pairs of dungarees. I found them in Uniqlo last year and sadly they are no longer for sale. They fit perfectly and have become my lockdown staple.
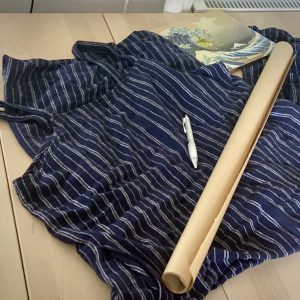
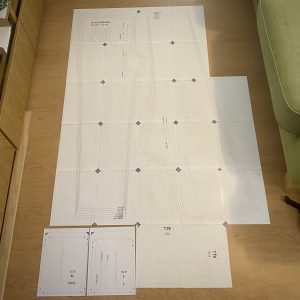
So I dug out some brown paper, a decent pen and set to copying all the elements of the dungarees. It took an afternoon, and quite a bit of maths (to work out how much fabric I will need). Unlike the first time I copied an item of clothing, this time I remembered to add the seam allowance!

But I have now ordered some linen from The Drapers Daughter (using a handy Sewing Weekender discount code to get 15% off my order!). Hopefully, I’ll be able to start sewing them together next weekend.
As I write this, we have been in quarantine for 42 days. That means (apart from 2 very short trips to the local pharmacy to collect a prescription) I haven’t left my tiny flat for 6 weeks. It feels strange how this new normal just feels “normal”. My days and weeks now have a semblance of structure. During the week I teach. Although teaching Product Design over Google Meets and via Classroom is challenging, my teenage pupils have embraced learning how to draw and modelling architecture out of loo rolls and other cardboard packaging they find around their homes.
My weekends are spent making scrubs for the NHS. I found out about the Scrub Hub initiative on social media and waited to see if a local hub would be set up in my area. I knew I wouldn’t have time to run one myself (planning online lessons takes a long time). But as soon as a Wandsworth one was set up I joined. I was amazed by how the local community came together, fundraising on GoFundMe so that the hub could buy fabric.
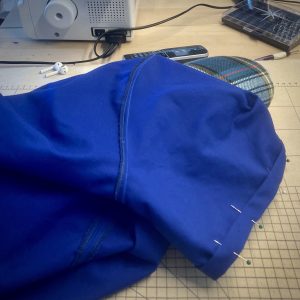
Within a few days of signing up, I had a delivery of Gabardine fabric in royal blue and an order to make 2 sets of large scrubs. We have a network of volunteers who make deliveries and collections between members of the hub. I hit a bit of a problem when I didn’t have a printer to print out the pattern, but one of my neighbours offered to print all 68 pages of it for me.
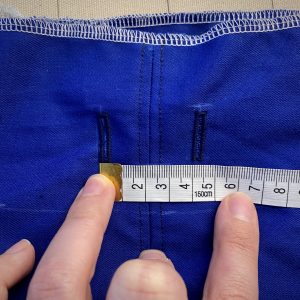
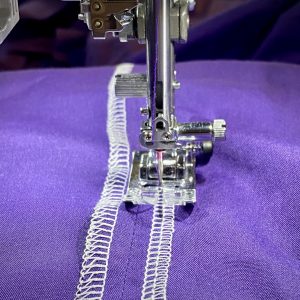
Taping and cutting out the pattern took an evening, while the fabric had a wash and tumble dry. The first set of scrubs took me 3 days to make (I made the 2 sets at the same time). All the seams had to be overlocked and topstitched down, as the finished clothing would be washed a lot and had to be sturdy.
I finally had a reason to use all the sewing equipment the boyfriend had bought me for Christmas. The tailors ham proved to be very useful for pressing all the seams!
I also finally learnt how to use the automatic buttonhole foot on my sewing machine, to make a sturdy entry point for the waistband tape.
The second weekend I was asked to make scrubs again, but this time I tried out a different style neckline I had found online.
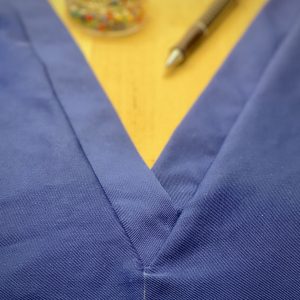
It has on overlapping v-neckband, so it is easier to take on and off. I found this tutorial on YouTube very useful when making the adjustments.
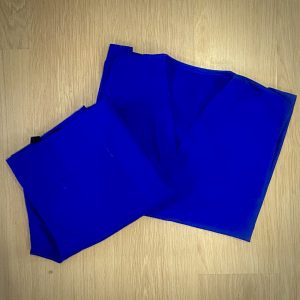
I also got a lot faster at making the scrubs, perhaps unsurprisingly! Although this shade of royal blue is very hard to photograph.
This weekend I am making purple scrubs, requested by a nurse. This time they are out of polycotton, so not as sturdy at the gabardine. But they are sewing up well.
I may not be producing scrubs at the rate that some of the other people in the hubs are, but I feel like I’m helping. I just hope that these scrubs last – and help to make the NHS workers who wear them feel able to do their job in comfy well made clothes.
I am in a lucky position, I don’t have to worry about not being able to refill my cupboards with food. But that doesn’t mean that buying food regularly isn’t a challenge. I’m doing everything I can not to leave the flat and that includes going out to buy supplies. So we have to try and judge our food deliveries carefully. As we approach the end of a food delivery cycle, some of our dishes have to get “creative”.
This week we had some minced beef, an aubergine and some potatoes left. So I thought I would attempt to make a sort of Moussaka. I have a well-stocked drawer with what seems like random spices and herbs, so I had a dig to pull out things that felt like it would go in a Moussaka.
A cinnamon stick, some bay leaves, oregano, rosemary, ground cumin and barberries later, I felt up for the task. Side note, I have no idea where the barberries came from, but they looked interesting!
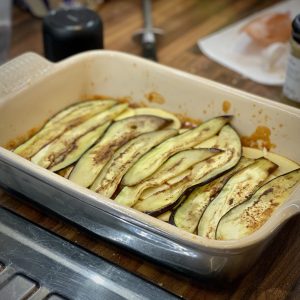
So I set to making a tinned tomato-based sauce with minced beef, onions and garlic. Fried up some aubergine slices and prepared some potato slices as well. Then I started to layer them in a ceramic dish, sort of like a lasagne.
I asked the boyfriend to make his cow’s milk-free white sauce (it’s a little unconventional, but absolutely delicious) and used it to top the Moussaka.
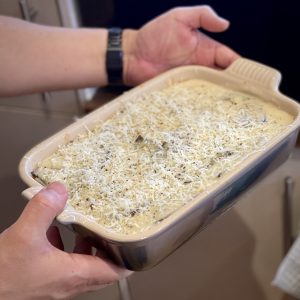
Yes, that is a dusting of pecorino cheese (it’s made from sheep’s milk, so my cow’s milk allergy boyfriend is fine!). And yes, that is the boyfriend, beautifully posing with said moussaka.
Finally, after 40mins in the oven, it was ready!
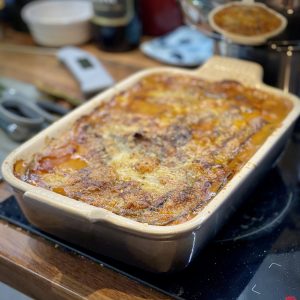
It was delicious, but next time I need to add more flavours and possibly some heat (chilli?). Also, if you have a second aubergine then I would recommend using it as well.
Beef Almost Moussaka
Ingredients
Meat Sauce
- Olive Oil
- 500 g Minced Beef
- 2 Echalion Onions the pointy onions - sliced
- 3 cloves Garlic crushed
- 2 tsp Cumin
- 1 Cinnamon Stick
- 4 Bay Leaves
- 2 tsp Oregano
- 2 tsp Rosemary
- 200 ml Red Wine
- 2 tbsp Tomato Puree
- 400 g Pulped Tomatoes (tinned)
- 1 tbsp Barberries Optional
Layers
- 1 Aubergine Sliced finely
- 6 Charlotte Potatoes Sliced finely
White Sauce
- 80 g Pure Margarine
- 80 g Plain Flour
- Hot Water
- Salt
- Pepper
- 100 g Goats Cheese grated
- 50 g Pecorino Cheese grated
Instructions
Meat Sauce
- Gently fry the onions and garlic in oil until the onions are translucent.
- Add the minced beef and continue to fry until the meat is cooked.
- Add cumin and tomato puree and stir until well combined and fragrant.
- Add red wine and cook until you can't smell the alcohol anymore.
- Add the bay leaves, cinnamon stick, oregano, rosemary and barberries and mix well.
- Pour over the tin of pulped tomatoes, the fill the tin with water and add to the pan.
- Season to taste and simmer until the sauce is thick (stirring occasionally).
Layers
- Meanwhile, fry the slices of aubergine until they have some colour, put aside on a plate.
White Sauce
- Over a medium heat, combine the margarine and flour together to form a paste.
- Add a drop of hot water to bring it together into a ball.
- Keep stirring and continue cooking until the raw flour taste has gone.
- Add hot water a little at a time, stirring well, until you have a thick sauce.
- Add the goat's cheese and melt through.
Cooking the Moussaka
- Preheat the oven to 200°c
- Put half of the meat sauce in a ceramic baking dish.
- Layer on half the sliced potatoes and top with half the aubergine.
- Repeat with the other half of the meat sauce, potatoes and aubergine.
- Top with the white sauce and cover the top with pecorino cheese.
- Bake in the oven for 40mins, or until the potatoes are cooked through and the top is golden brown.
Like everyone else in COVID-19 lockdown, getting basic food is challenging. My teenager is fragile (both emotionally and physically) and so to protect them we are trying not to leave the flat. As my teenager is also autistic, they also have a limited diet (due to sensory issues) and, as if life wasn’t fun already, is also lactose intolerant.
One of the things that is a staple part of my teenager’s diet is basic white bread with a soft, non-floury, crust. But getting bread is difficult. Especially when you can’t get weekly food deliveries and you are trying really hard not to leave the flat (17 days and counting).
So I’ve taken to trying to bake my own bread. The first one I made didn’t work, it “tasted weird”. But the second one got a thumbs up. So here is my recipe for the most basic of white bread. With a (hopefully) soft crust and absolutely no floury top!
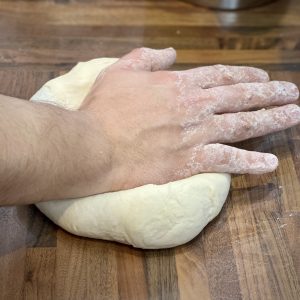
It helps to have an (optional) boyfriend on hand, who really enjoys kneading!
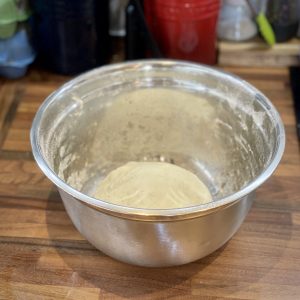
The bread is simply strong flour, salt, sugar, yeast and water (specific quantities below) and a lot of patience and time – something I seem to have a lot of at the moment.
After your ingredients are mixed well and you have a dough, you need to knead it. This works the gluten in the bread making it soft, warm and stretchy. You are aiming for dough you can stretch until it is translucent without breaking (the windowpane test).
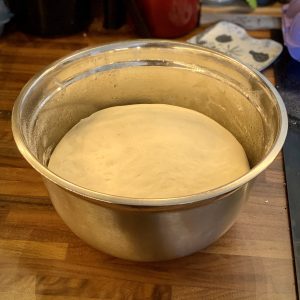
Once it is soft, warm and stretchy, scoop it into a ball and place in an oiled bowl. Cover with a tea towel and leave for 2 hours to double in size (this is called proving). Don’t do what I did and mix up your proving times and leave it only to prove for 1 hour before working it.
After the first proving, it will have doubled in size. Knock it back, something that is very satisfying, and knead again. For the uninitiated, knocking back is when you gently punch the air out of your dough before scooping the now floppy dough out of the bowl again.
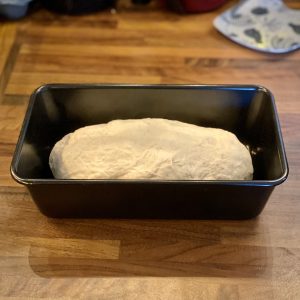
Then roll it into a sausage shape and pop into a loaf tin (you don’t have to use a loaf tin, but I am aiming for as uniform and simple a bread as possible – remember I have a teenager who needs to eat this!). Cover it with the tea towel again and leave for an hour (not 2 hours as I did – sigh!).
Once again it will have doubled in size. Now you just need to slash the top of the bread with a serrated knife and pop it in the oven.
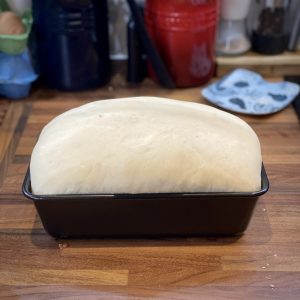
All being well, after 30mins in the oven you’ll have a lovely, incredibly simple-looking, loaf of bread. Due to my ahem tiny proving error, mine collapsed in the oven a bit. But it is still bread and still tastes good.
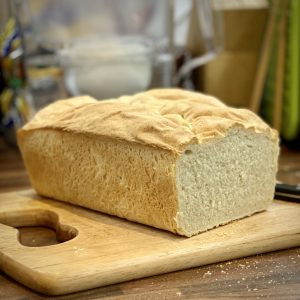
Most importantly, my teenager has just devoured 3 slices of marmite on toast – courtesy of my homemade bread! Success!
Basic White Bread
Ingredients
- 500 g Strong White Bread Flour
- 1 ½ tsp Salt
- 1 tsp Caster Sugar
- 1 sachet Fast Action Yeast 7g
- 300 ml Warm Water
Instructions
- Put the flour, sugar, salt and yeast in a bowl. Make sure the yeast and salt are on opposite sides of the bowl!
- Mix the dry ingredients together.
- Add the warm water (make sure this is not from the hot tap, but is a mix of water from your kettle and cold water, should be between 40°c and 50°c, or warm to the touch).
- Mix the water into the dry ingredients until you have a dough. It might be a bit sticky, but don't worry.
- Turn the dough onto a clean table and knead. Keep kneading until the dough feels warm, soft and not sticky. This might take about 10 mins.
- Lightly oil the bowl and place the dough back in. Cover with a tea towel and leave for 2 hours.
- When the dough has doubled in size, knock it back and turn out onto the table surface again.
- Knead again, but only for a couple of minutes this time. Shape into a sausage, trying to keep a smooth surface on the top. Place into a loaf tin.
- Cover and leave for 1 hour.
- Heat your oven to 190°c.
- When the dough has again doubled in size, slash the top with a serrated knife and put in the oven.
- Bake for 25-30 mins. You can take the bread out of the tin with a clean tea towel and tap the bottom. If it sounds hollow, then it's done.
- Take your bread out of the oven and out of the tin and leave to cool.
- The finished bread keeps well, I keep mine in an old loaf's plastic bag.
It seems like a lifetime ago, but on the 1st March, we went to the Stitch Festival. I remember joking at the time that we would be surrounded by 100’s of people and we should watch out for people who were coughing. Now it doesn’t seem so funny.
But let’s think back to those happier times, so I can share with how wonderful it was!
We’d bought the tickets ages ago, even splashing out for VIP tickets so we could have somewhere nice to go for lunch. This, by the way, is a brilliant idea! Not only did we get a gift bag with all sorts of crafty things in and priority entrance we also had a nice room to escape to when it got really busy. It was more than worth the extra cost! And I will definitely do it again next time. The VIP lounge was lovely and quiet and had comfy chairs, something my fragile back was very grateful for!

We went on the last day of the show, so it was very busy and lots of the stalls were running low on supplies. However, I did manage to find the stalls I wanted to see.
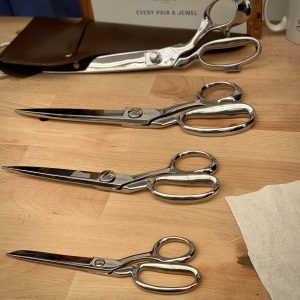
Top of my list was Ernest Wright, as I wanted to look at their dressmaking scissors. The guys running the stall were very knowledgeable (and hilarious). My boyfriend spent an enjoyable time chatting manufacturing and F1 with them. Meanwhile, I checked out the dressmaking scissors. I can confirm they are as amazing as I’d been led to believe and I bought a pair of 8.25″ dressmaking shears.
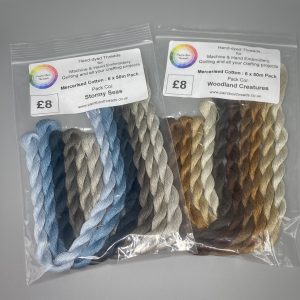
We also stopped by lots of stalls that caught my eye. Like Paintbox Threads who had a gorgeous range of embroidery threads (a set of which has also been purchased, probably now for some quarantine crafting!)

Knowing how easy it is to spend lots of money on things that just end up in a cupboard, I was careful. I had a specific budget and I had planned what I wanted to try and get. Looking back now, I managed to get the materials for quite a few complete projects – perfect for the situation I now find myself in.
A quick summary of the project supplies I picked up (you may see these appearing in future posts):
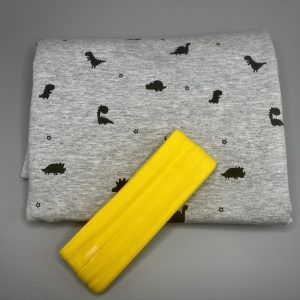
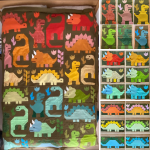
Fabric and stretchy binding to make a t-shirt for a soon to be 2 year old.
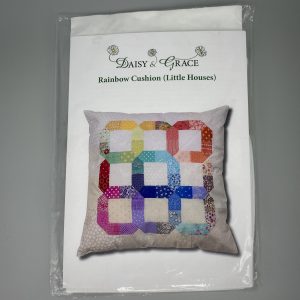
A patchwork cushion kit (disclaimer: I hadn’t done any patchwork before, so I didn’t know if I was going to like it – but I did!) from Daisy & Grace.
Embroidery thread from PaintBox Threads (I already have a pattern I want to do with these).
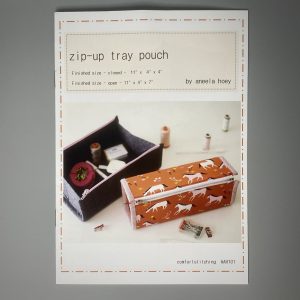
A pencil case pattern from Beyond Measure (it uses Fat Quarters, and I seem to have quite a few of those in the stash).
Will I go back to the Stitch Festival next year? Absolutely yes! If it’s on that is.
But for now, I will continue staying home and staying safe – while getting on with my quarantine crafting.
It’s been a while since I posted. January and February passed by in a blur, it was the busiest term at school. The term when we have to get all the Year 11 pupils to finish the coursework they’ve been working on for a year. The coursework that is worth 50% of their GSCE grade. It was lots of late nights and feeling stressed.
Then March arrived, we all started becoming more and more worried about this new virus that was starting to spread. Before we knew its, pupils and staff were self-isolating and then in a blur school was closed down and we were working from home.
It’s been a very strange spring term. By now I’ve already taught remotely for a week and started my Easter holidays. I also haven’t left my flat for 2 weeks.
My days are now filled with creating tutorials for stressed teachers trying to teach online (for many a new scary place), crafting (I’ll do a post about my quarantine quilt), keeping my autistic, depressed teenager calm and fed (more stressful than you think it’s going to be) and baking basics.
So far in my basic food baking adventure, I have made:
- Bread (white, with a soft crust – very specific instructions from said teenager)
- Pitta Bread (which I will try and post about at some point)
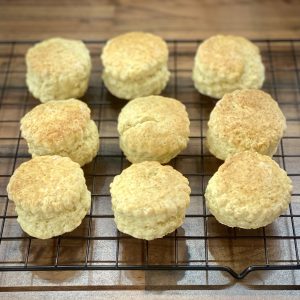
- Scones
Today I thought I would share my very basic completely dairy-free scone recipe.
Now the trick to a good scone is to touch it as little as possible and to eat them as soon as possible!
It has 3 basic stages:
- Rub together the flour and fat, using the tips of your fingers until it resembles bread crumbs. If you have naturally hot hands (which I do not!) then you might want to wash them in cold water first, just make sure you dry them really well.
- Mix in cold milk, using a table knife – so you don’t touch it with your warm hands!
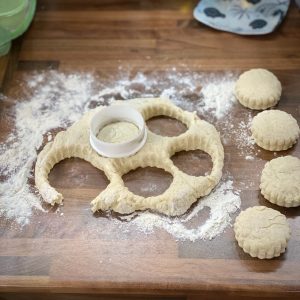
- Very briefly knead it before gently squishing it and then cutting out rounds with a cutter.
By minimising touching and keeping things cool, you should end up with crumbly soft scones.
Back when I taught Food Technology (a very, very long time ago), I used to teach 13 yr olds how to make scones. They would invariably end up squishing the dough around before finally cutting it out and then say the scones didn’t taste nice, as they were dense and chewy. So when I say handle as little as possible, I mean it!
Scones (Dairy-Free)
Ingredients
- 225 g Self Raising Flour
- 1 pinch Salt
- 55 g Stork Margarine
- 25 g Caster Sugar
- 150 ml Oat Milk
Instructions
- Preheat the oven to 220°c (200°c fan)
- Rub the flour, salt and margarine together using the tips of your fingers, until it resembles breadcrumbs.
- Stir in the sugar with a table knife.
- Mix in the oat milk, a little at a time, with the table knife until the dough has come together. It should be a soft dough, not sticky. You'll probably have some leftover milk.
- Turn out the dough onto a lightly floured surface. Gently knead it.
- Gently squish the dough until it forms a slab about 2cm thick. Cut out rounds of dough with a 5cm cutter.
- Gently squish the leftover dough together and repeat, until you have no dough left.
- Places the rounds on a baking tray and brush some leftover milk on the top of each scone.
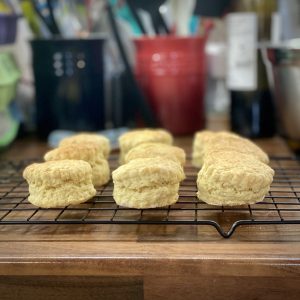
- Bake in the oven for 10-15mins. Until the scones have risen and are golden brown.
- Take them out of the oven and leave them on a wire rack to cool.
I like to split my scones in half and slather them in raspberry jam when I eat them. I know that a scone purist would be cross with me, but what can I say – I like what I like!
-

A 2022 Embroidery Challenge
4 February 2023
I’ve been watching people making temperature quilts on social media for a few years and really liked the idea of making one. But I knew I would struggle to carry such a large project through to the end, plus the idea of knitting a blanket in the heat of summer wasn’t that appealing. Then I […]
-
Little Life Update
3 February 2023
I finally caught COVID, and while I am curled up on my sofa feeling sorry for myself, I thought I would check through things. I realised that I haven’t written anything on this blog for ages (gulp April 2021) and so much has happened! The problem is that Instagram is so much quicker and easier […]
-

Alison Glass Lumen Quilt
19 April 2021
In which I attempt to make a giant quilt, for the first time!
-
Cactus Embroidery – Slow Sewing
6 February 2021
It’s taken just over a year, but this embroidery is finally finished!
-

Mushroom Ragu – Vegan and Delicious!
1 January 2021
It's new year's day and I'm making Mushroom Ragu.
-
A 2022 Embroidery Challenge
4 February 2023
I’ve been watching people making temperature quilts on social media for a few years and really liked the idea of making one. But I knew I would struggle to carry such a large project through to the end, plus the idea of knitting a blanket in the heat of summer wasn’t that appealing. Then I […]
-
Little Life Update
3 February 2023
I finally caught COVID, and while I am curled up on my sofa feeling sorry for myself, I thought I would check through things. I realised that I haven’t written anything on this blog for ages (gulp April 2021) and so much has happened! The problem is that Instagram is so much quicker and easier […]
-
Alison Glass Lumen Quilt
19 April 2021
In which I attempt to make a giant quilt, for the first time!
-
Cactus Embroidery – Slow Sewing
6 February 2021
It’s taken just over a year, but this embroidery is finally finished!
-
Mushroom Ragu – Vegan and Delicious!
1 January 2021
It's new year's day and I'm making Mushroom Ragu.