Cactus Embroidery – Slow Sewing
Christmas 2019, I was going to spend the festive season with my boyfriend’s family for the first time. So I wanted to take something crafty, but compact, to do. Embroidery! I thought – so went to Etsy to find a kit to challenge my stitching skills.
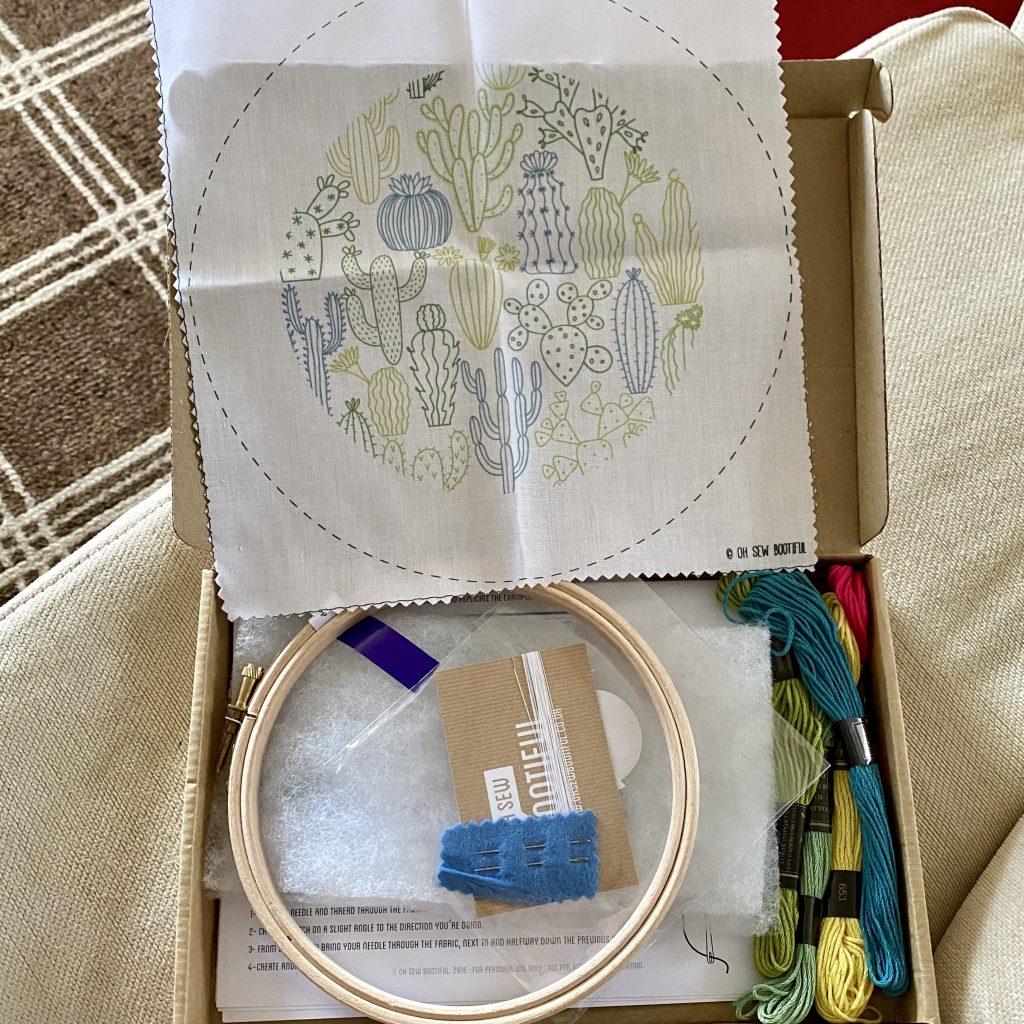
After much browsing I found this cactus kit from Oh Sew Bootiful, which came with everything I needed. Including a comprehensive guide to the stitches I would need to master.
One of the stitches I found the most challenging, which involved watching a few YouTube tutorials, was the French Knot. I still need to practice it, because my knots are still a bit hit and miss. But this cactus ended up with a series of very good knots!
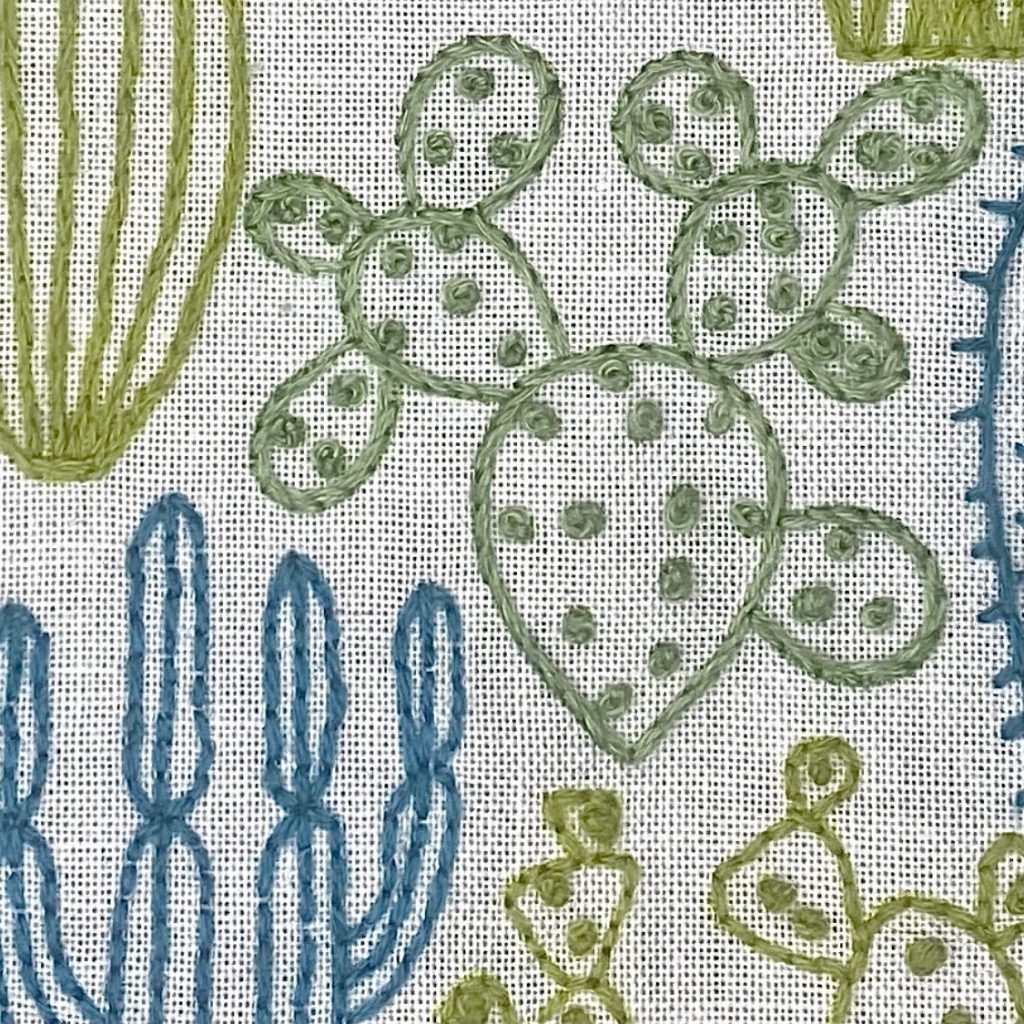
I particularly liked how there was a variety of stitches recommended in the kit. But you could decide which stitch worked best on which cactus. Although I did largely stay true to the cover illustration, there were some cacti that I went “off script”.
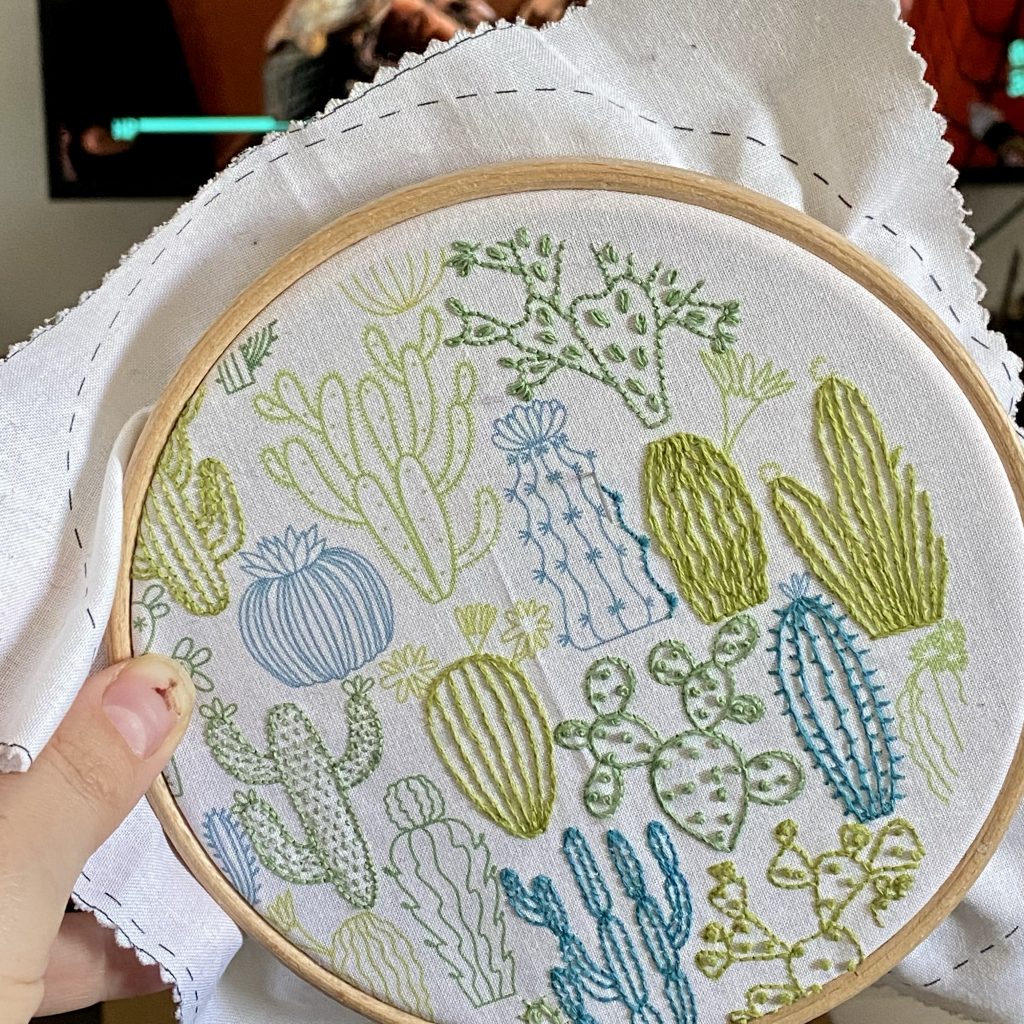
By the start of the first lockdown, I had completed a decent amount of the kit, but then the distractions of baking bread and making scrubs meant that the kit was relegated to a shelf.
However, by the start of lockdown 3, most of my crafting materials had been packed up (we are in the process of trying to move). I left myself 3 unfinished projects, one of which was the cactus embroidery.
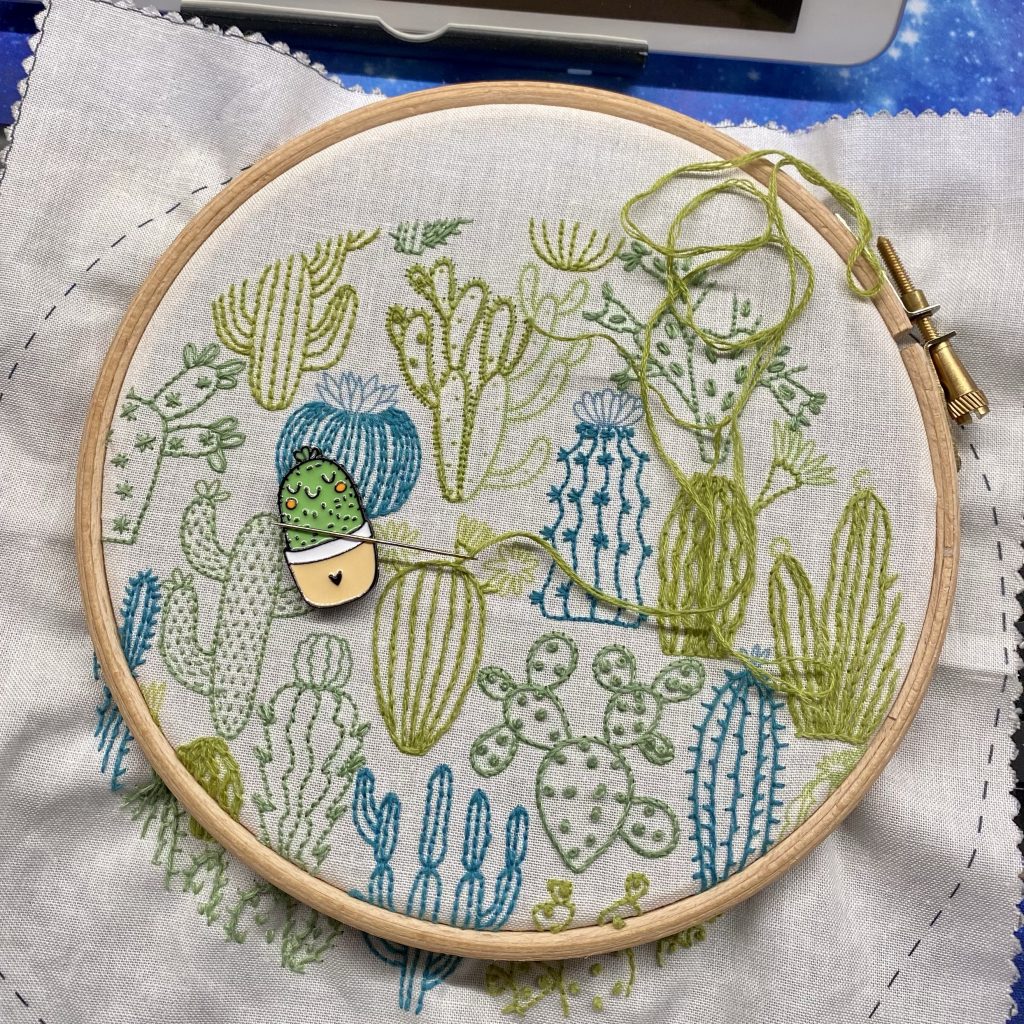
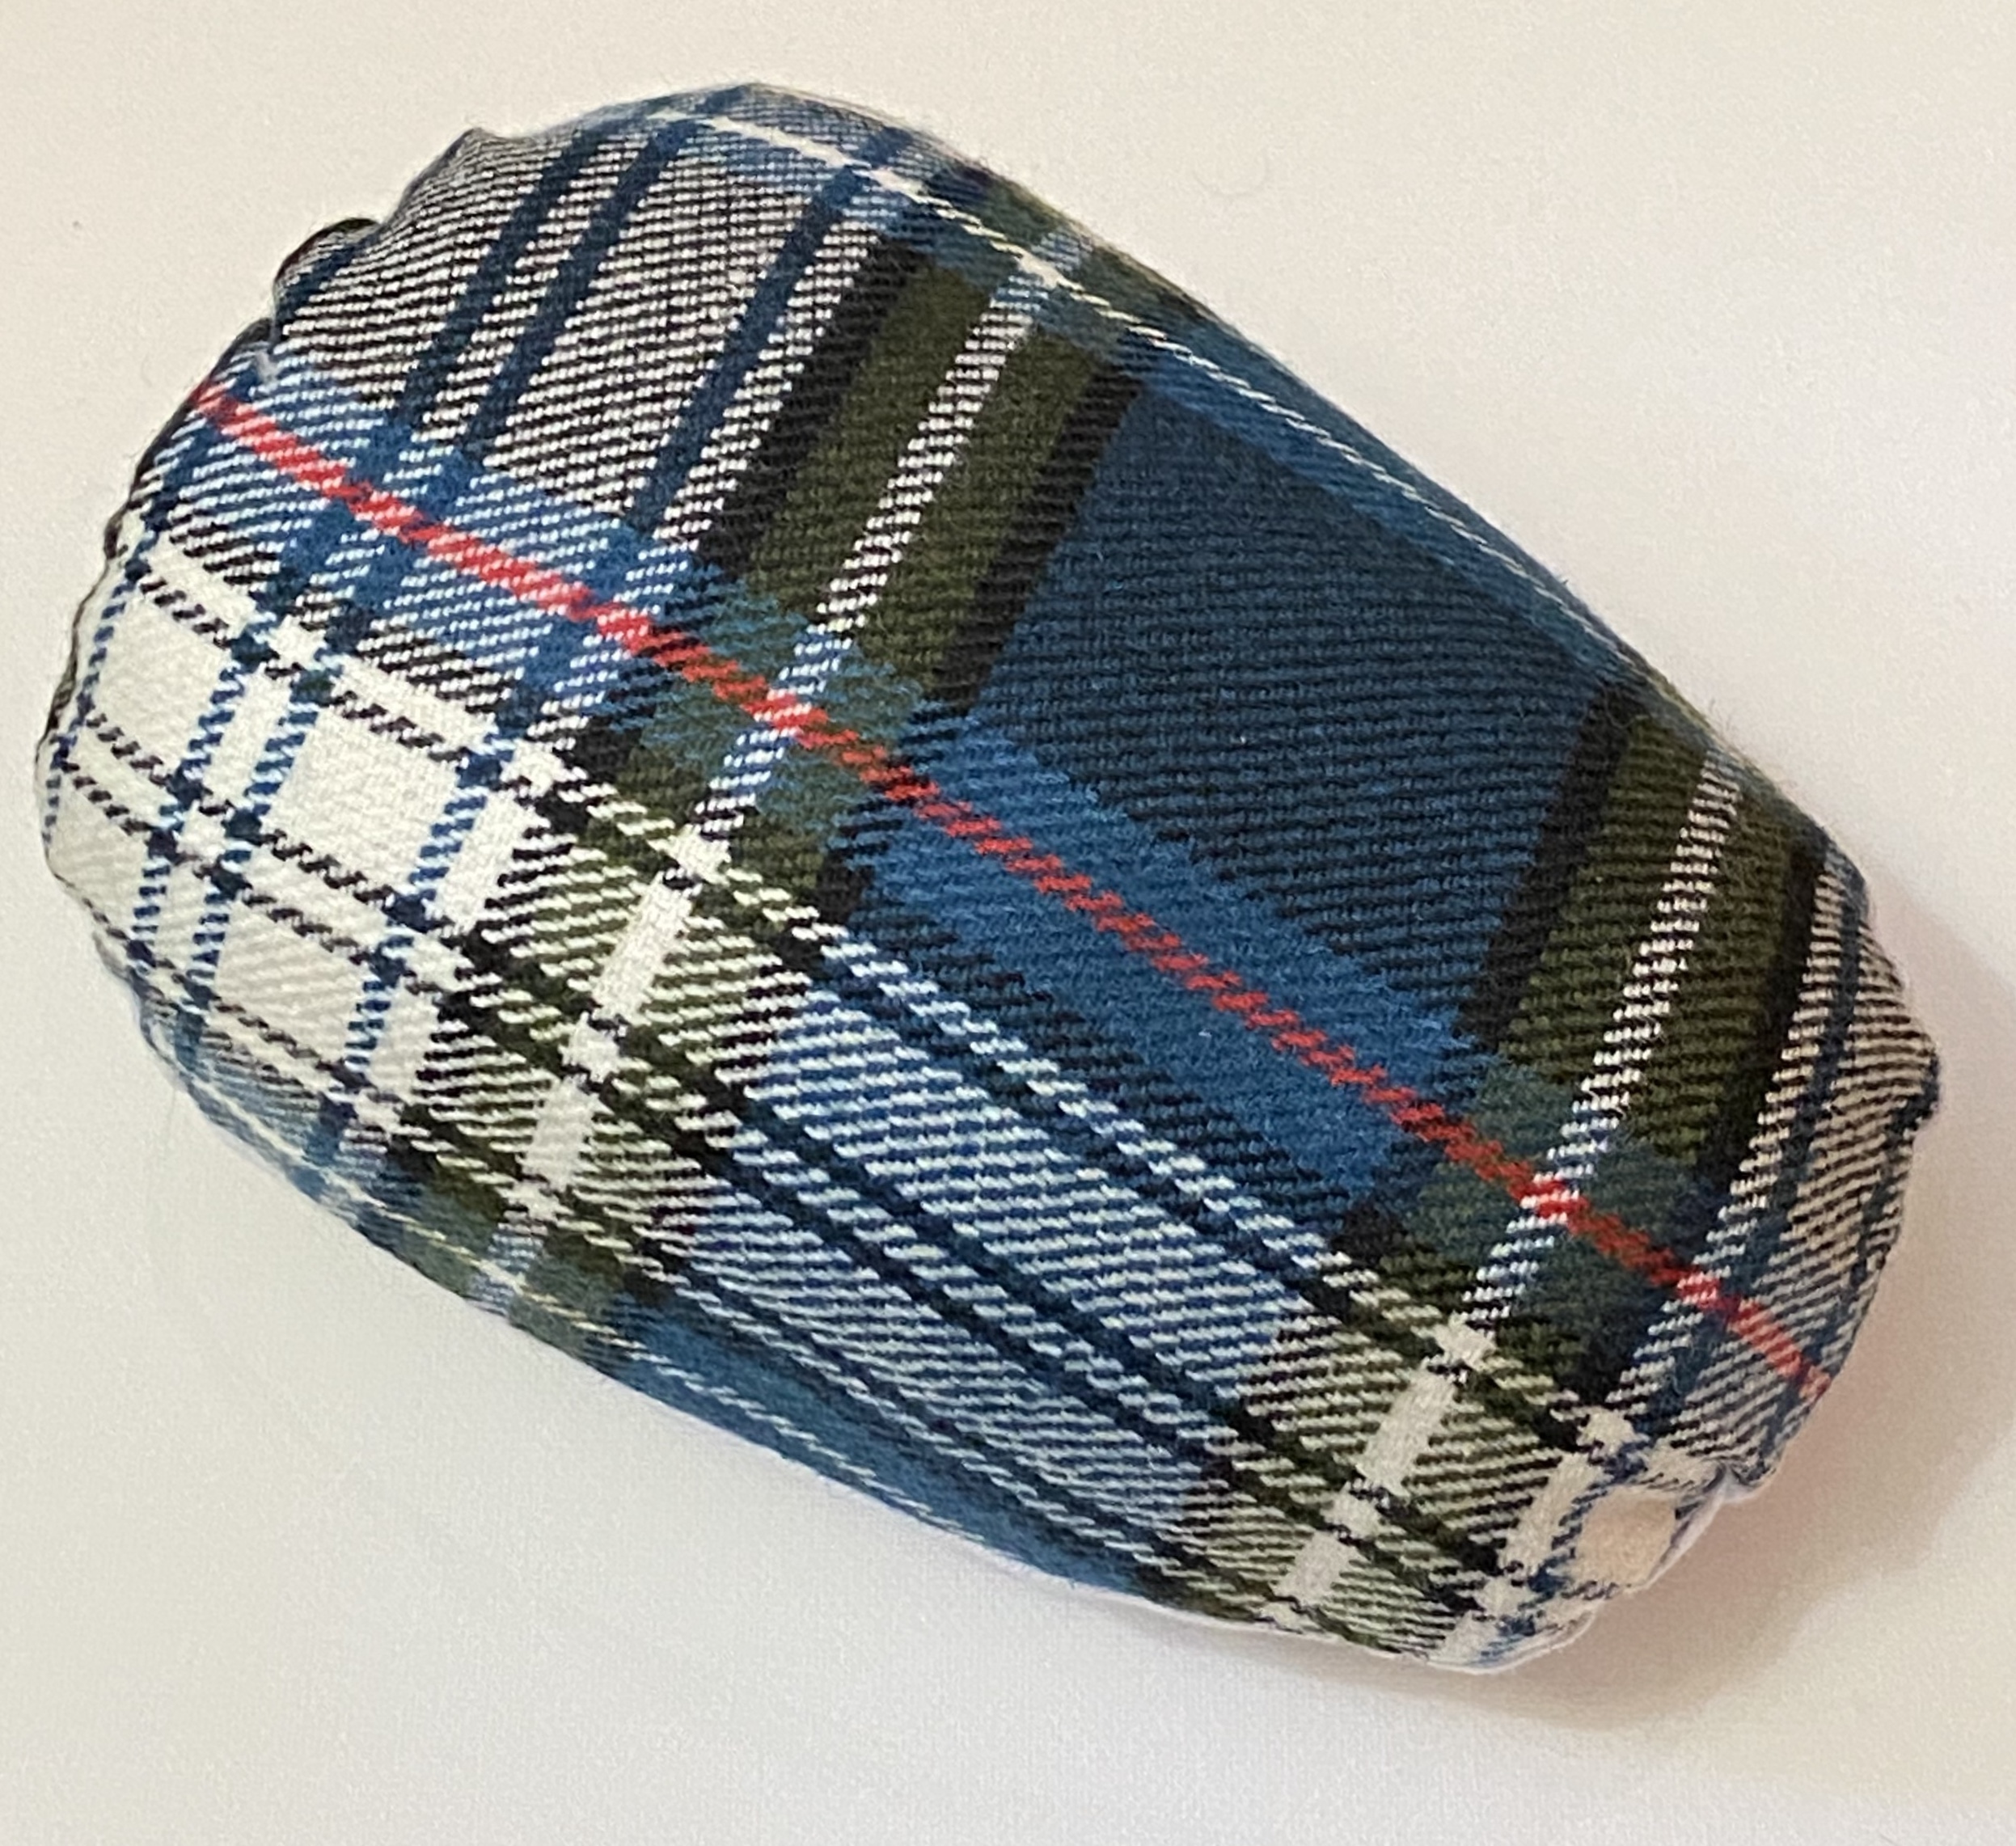
So with fewer distractions, and the addition of a fabulous needle holder from the Dinky Trinket Co on Etsy, I finally completed it.
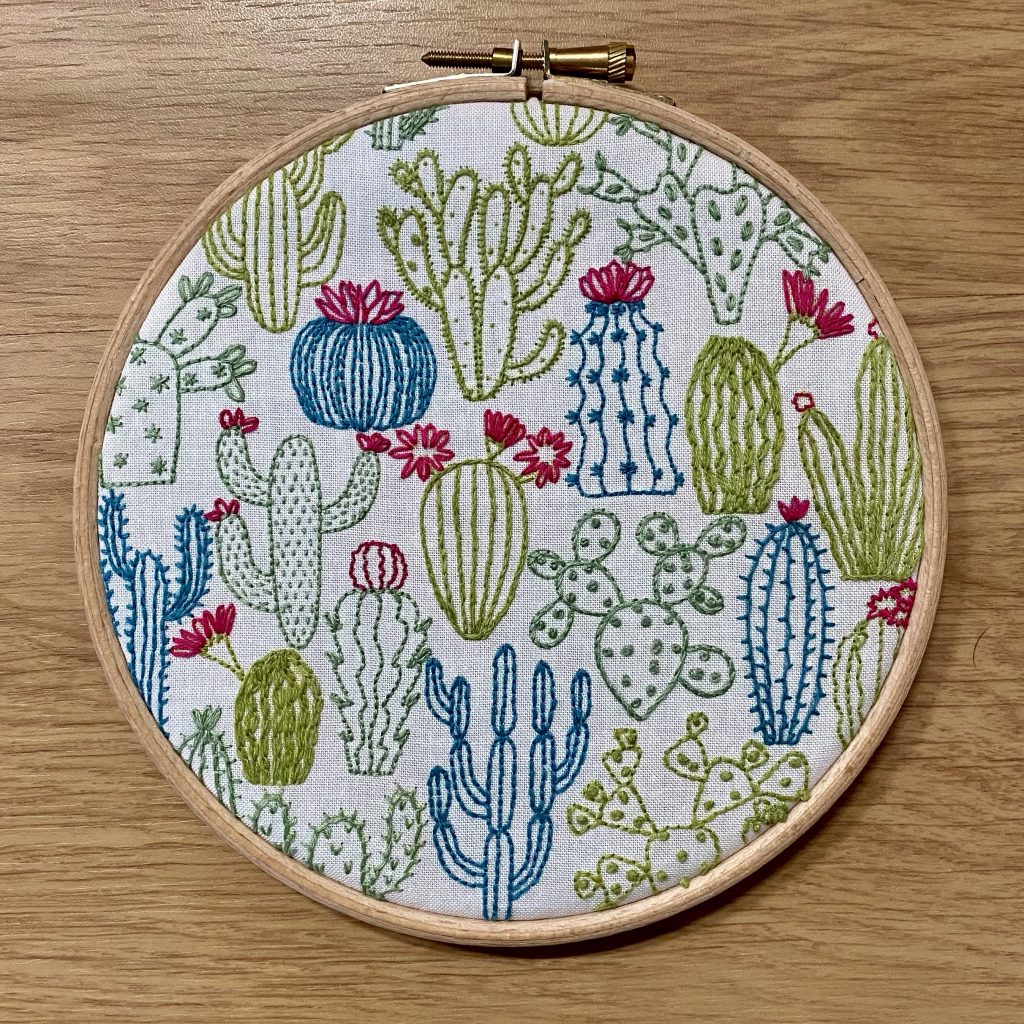
The next challenge is to find a way of protecting it in a frame. When I am back in school I might have a go at making one on the laser cutter. I would like it to have a glass front with a wide wooden frame and a way of hanging in on the wall. But that is a challenge for the future!
For now, I’ve started my next embroidery. This time it’s blackwork and I’m learning how to do Holbein stitch…
It’s been a long Autumn term. In fact, I’ve been back in school since August – preparing for a COVID safe teaching experience. But that’s not what this post is about. Fast forward to December, when I started to think about how I was going to wrap presents this year.
We have a Cricut Maker at school (something I covet and also got for Christmas this year). I wanted to use the Cricut to make custom stickers to make wrapping presents faster, and also fit within a set aesthetic (we have already established how extra I can be). So I decided to use Procreate to create everyone’s names, then turn them into stickers.
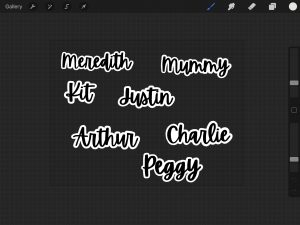
This was challenging, as my handwriting is frankly appaling and my inability to do any kind of fancy letting was going to seriously hinder this. So I went to Creative Market to find a font I liked that could do the job for me. After much searching, I chose one called Apricots.

Now I could enter the text into Procreate and create a white border around each word. I then exported this as a Jpeg, so I could upload it into Design Space.
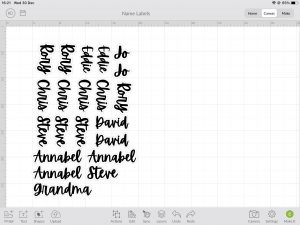
Now I love using the Cricut, I’ve been using digital cutting machines for a long time and the Cricut is one of the most versatile and easy machines I have used. However, Design Space is not in the same league. It is fiddly and annoying to use. I try to avoid using it until the last possible moment, instead using Illustrator or Procreate to prepare files first. So to arrange these name stickers, I created a rectangle the size of an A4 piece of paper and manually arranged the names inside. This enabled me to get a lot more stickers on a sheet, instead of letting Design Space do the arranging for me.
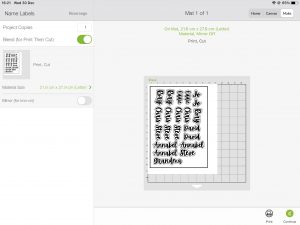
I then printed out the sticker sheets onto plain white sticker paper. I turned bleed off because the outside border was white, so it wasn’t needed. Once the sheets were printed, I loaded them into the Cricut and let the machine perform its magic. (Ok, so I let the machine detect the edge of the black box, and then cut out the different names).
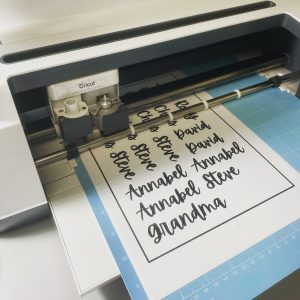
Once all the stickers were printed and cut, they could be applied to the presents as they were wrapped.
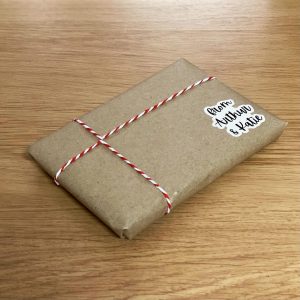
I went for a “brown paper packages tied up with string” aesthetic again, which I really like. Partly because I accidentally bought a much larger roll of brown paper last year (there is enough paper there for several years!) and partly because it’s all completely recyclable.
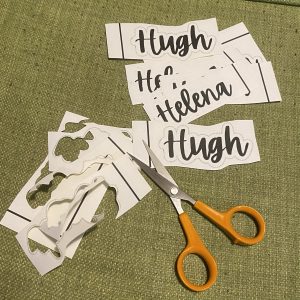
Unfortunately, I forgot to make one set of stickers, and as I didn’t have a Cricut at home (yet) I had to resort to good old fashioned scissors
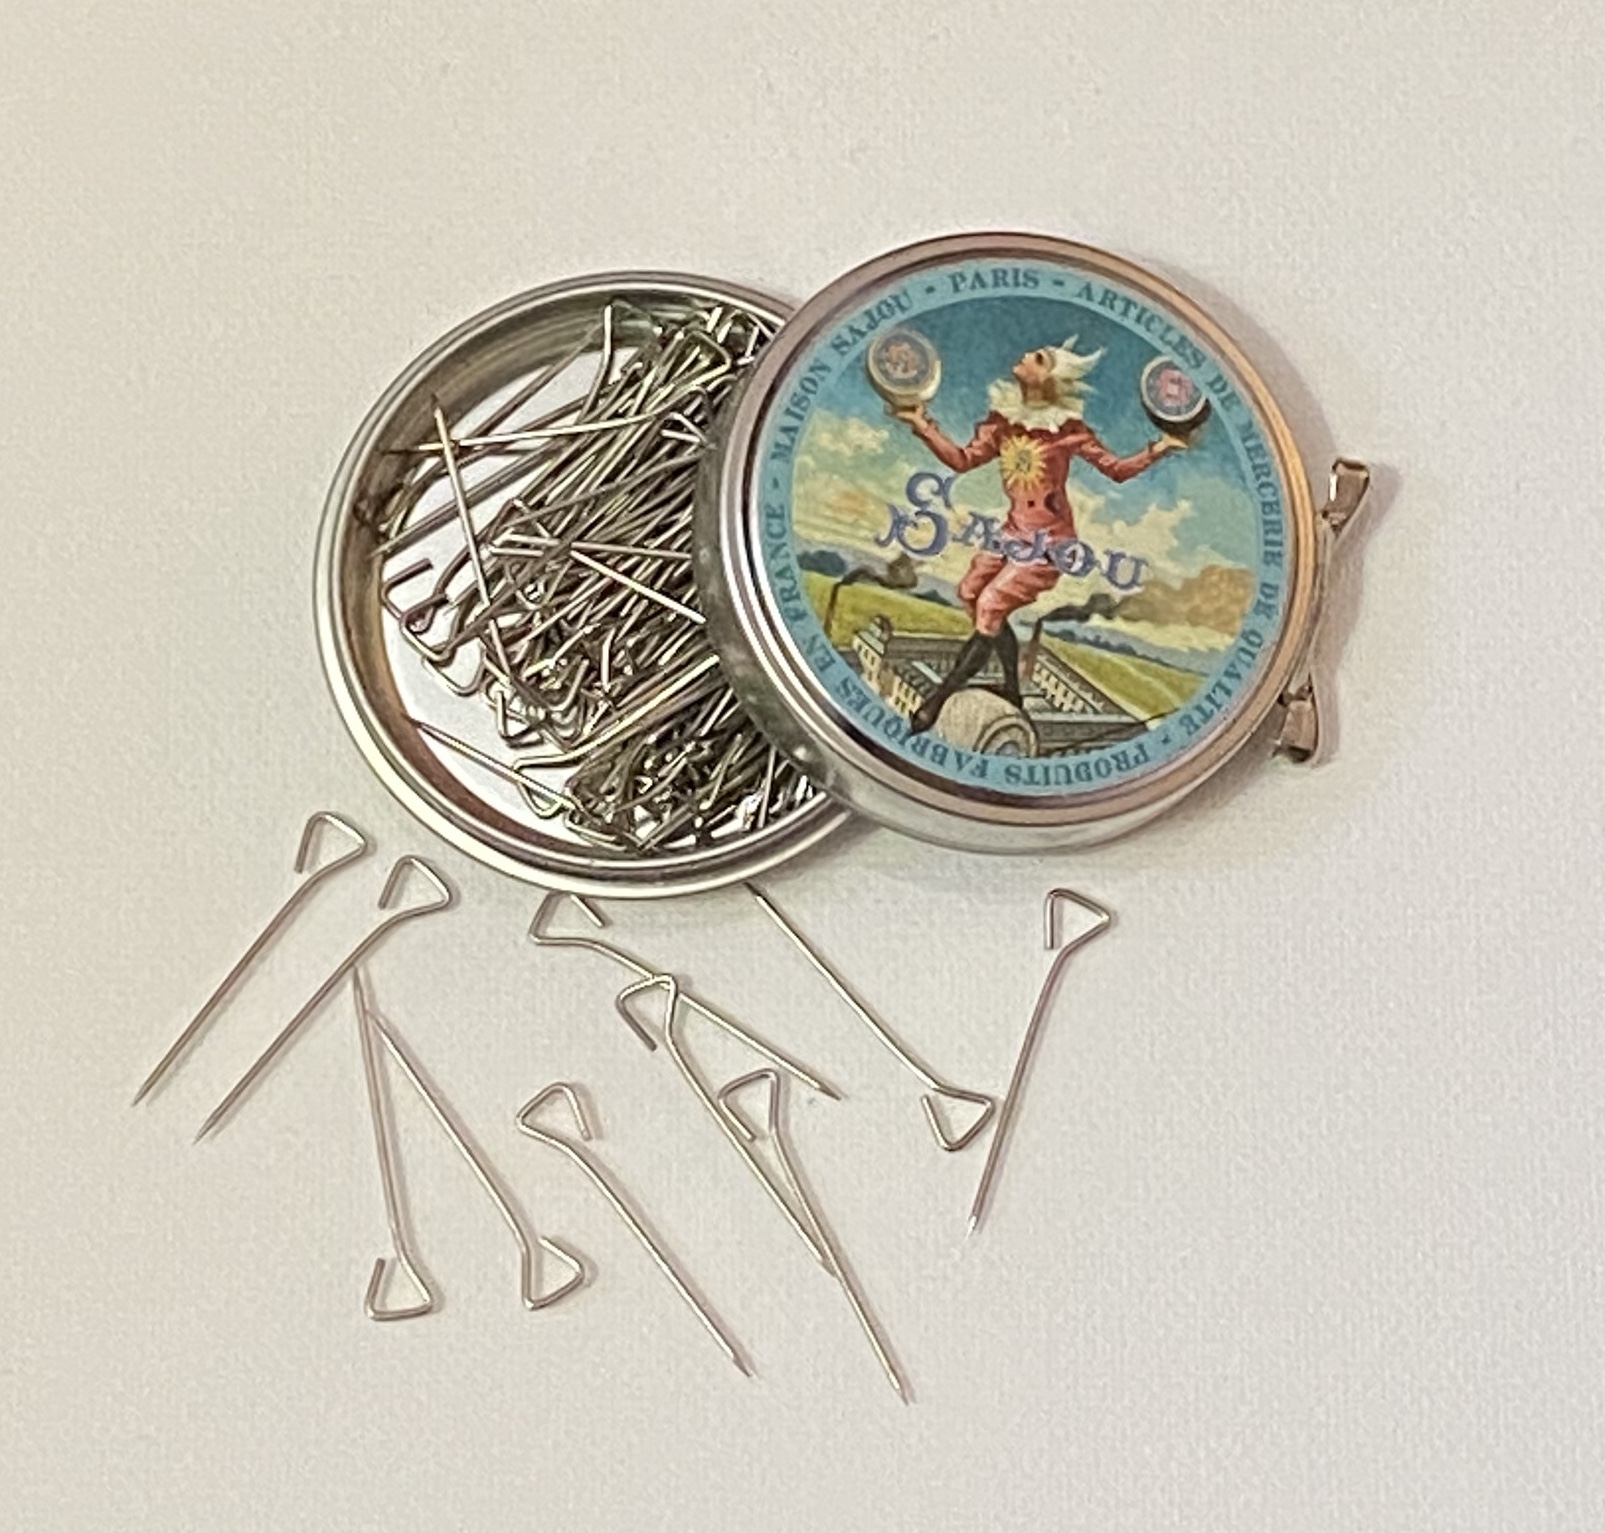
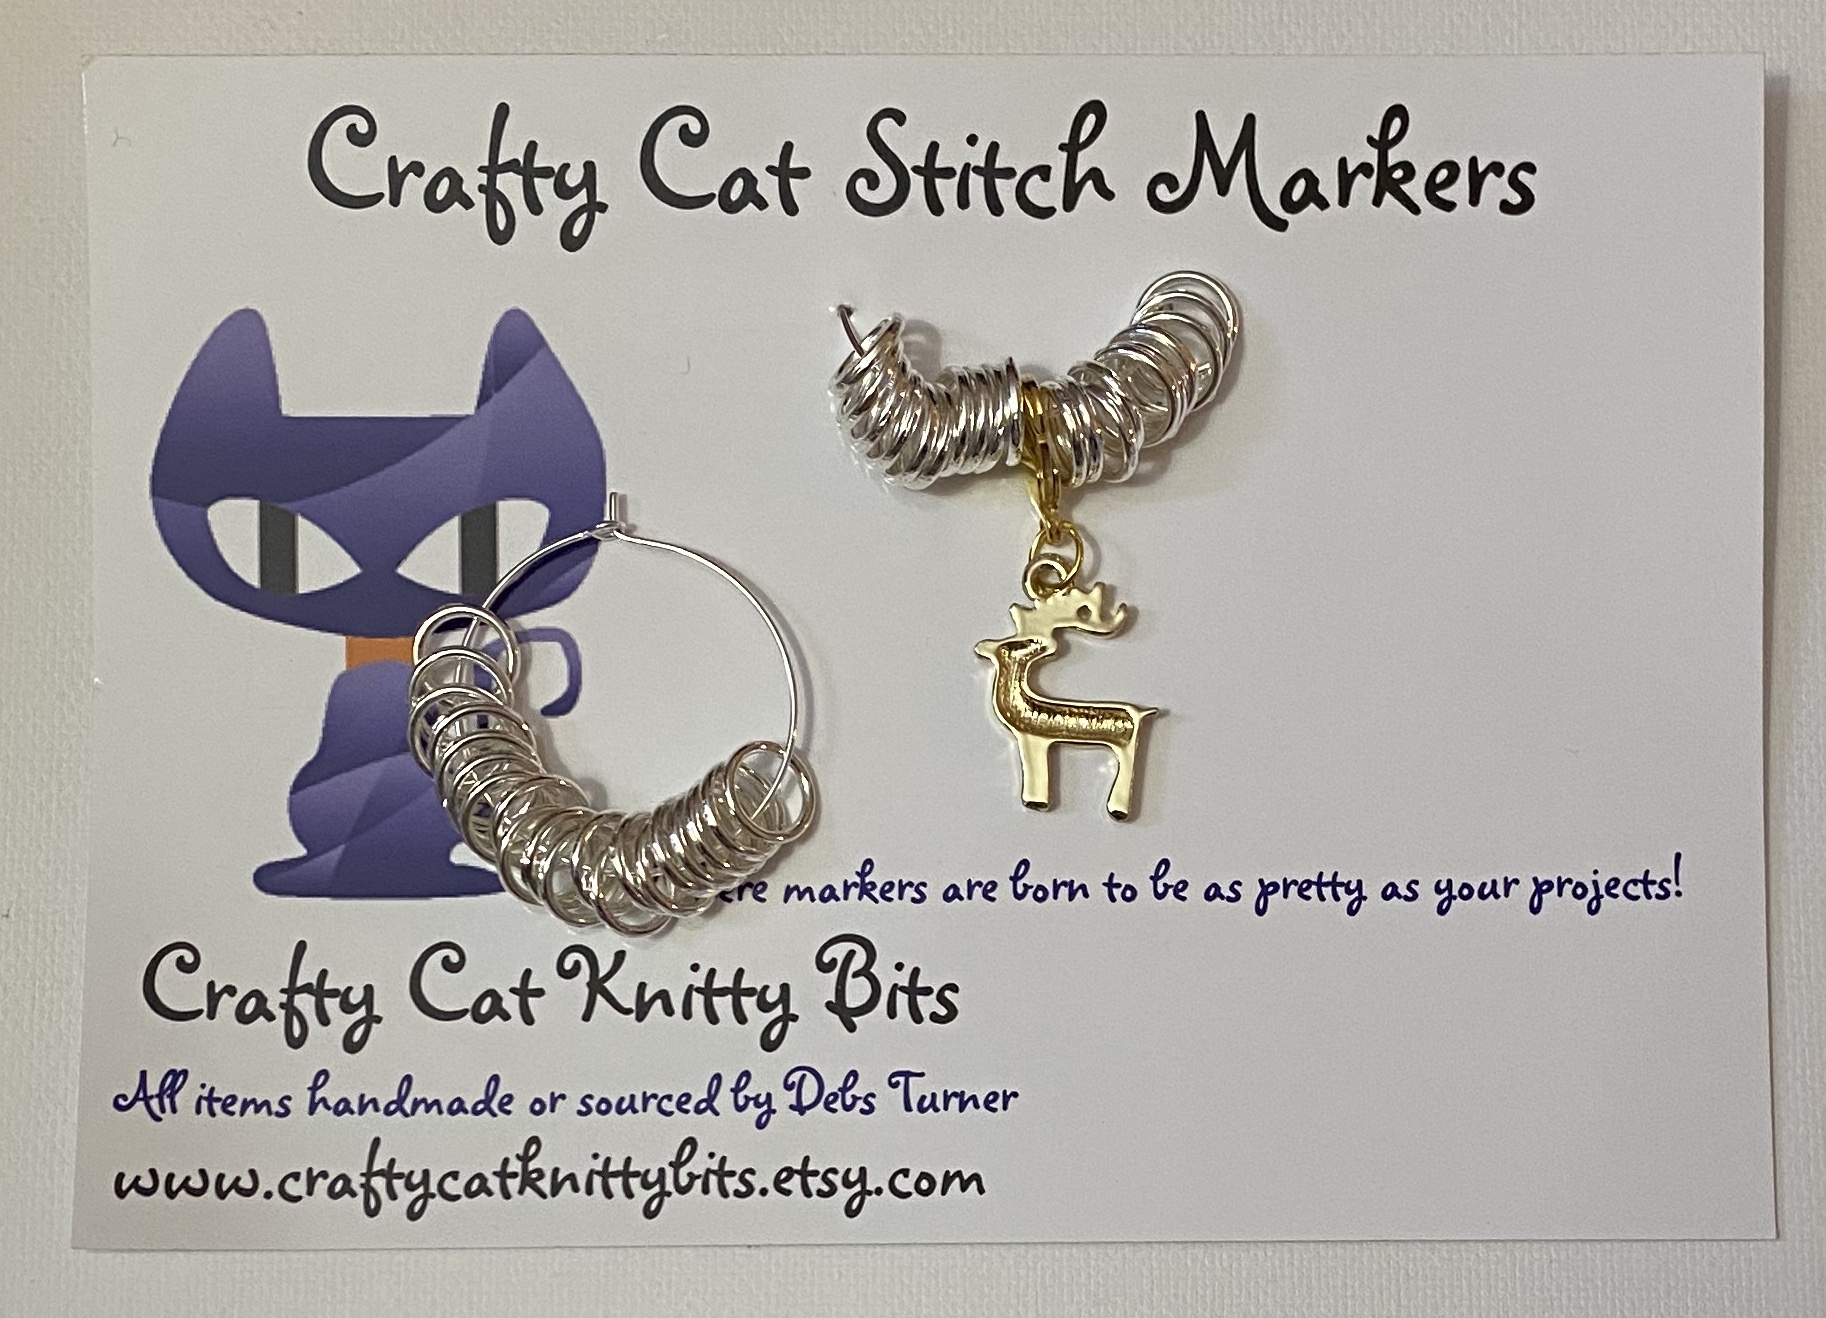
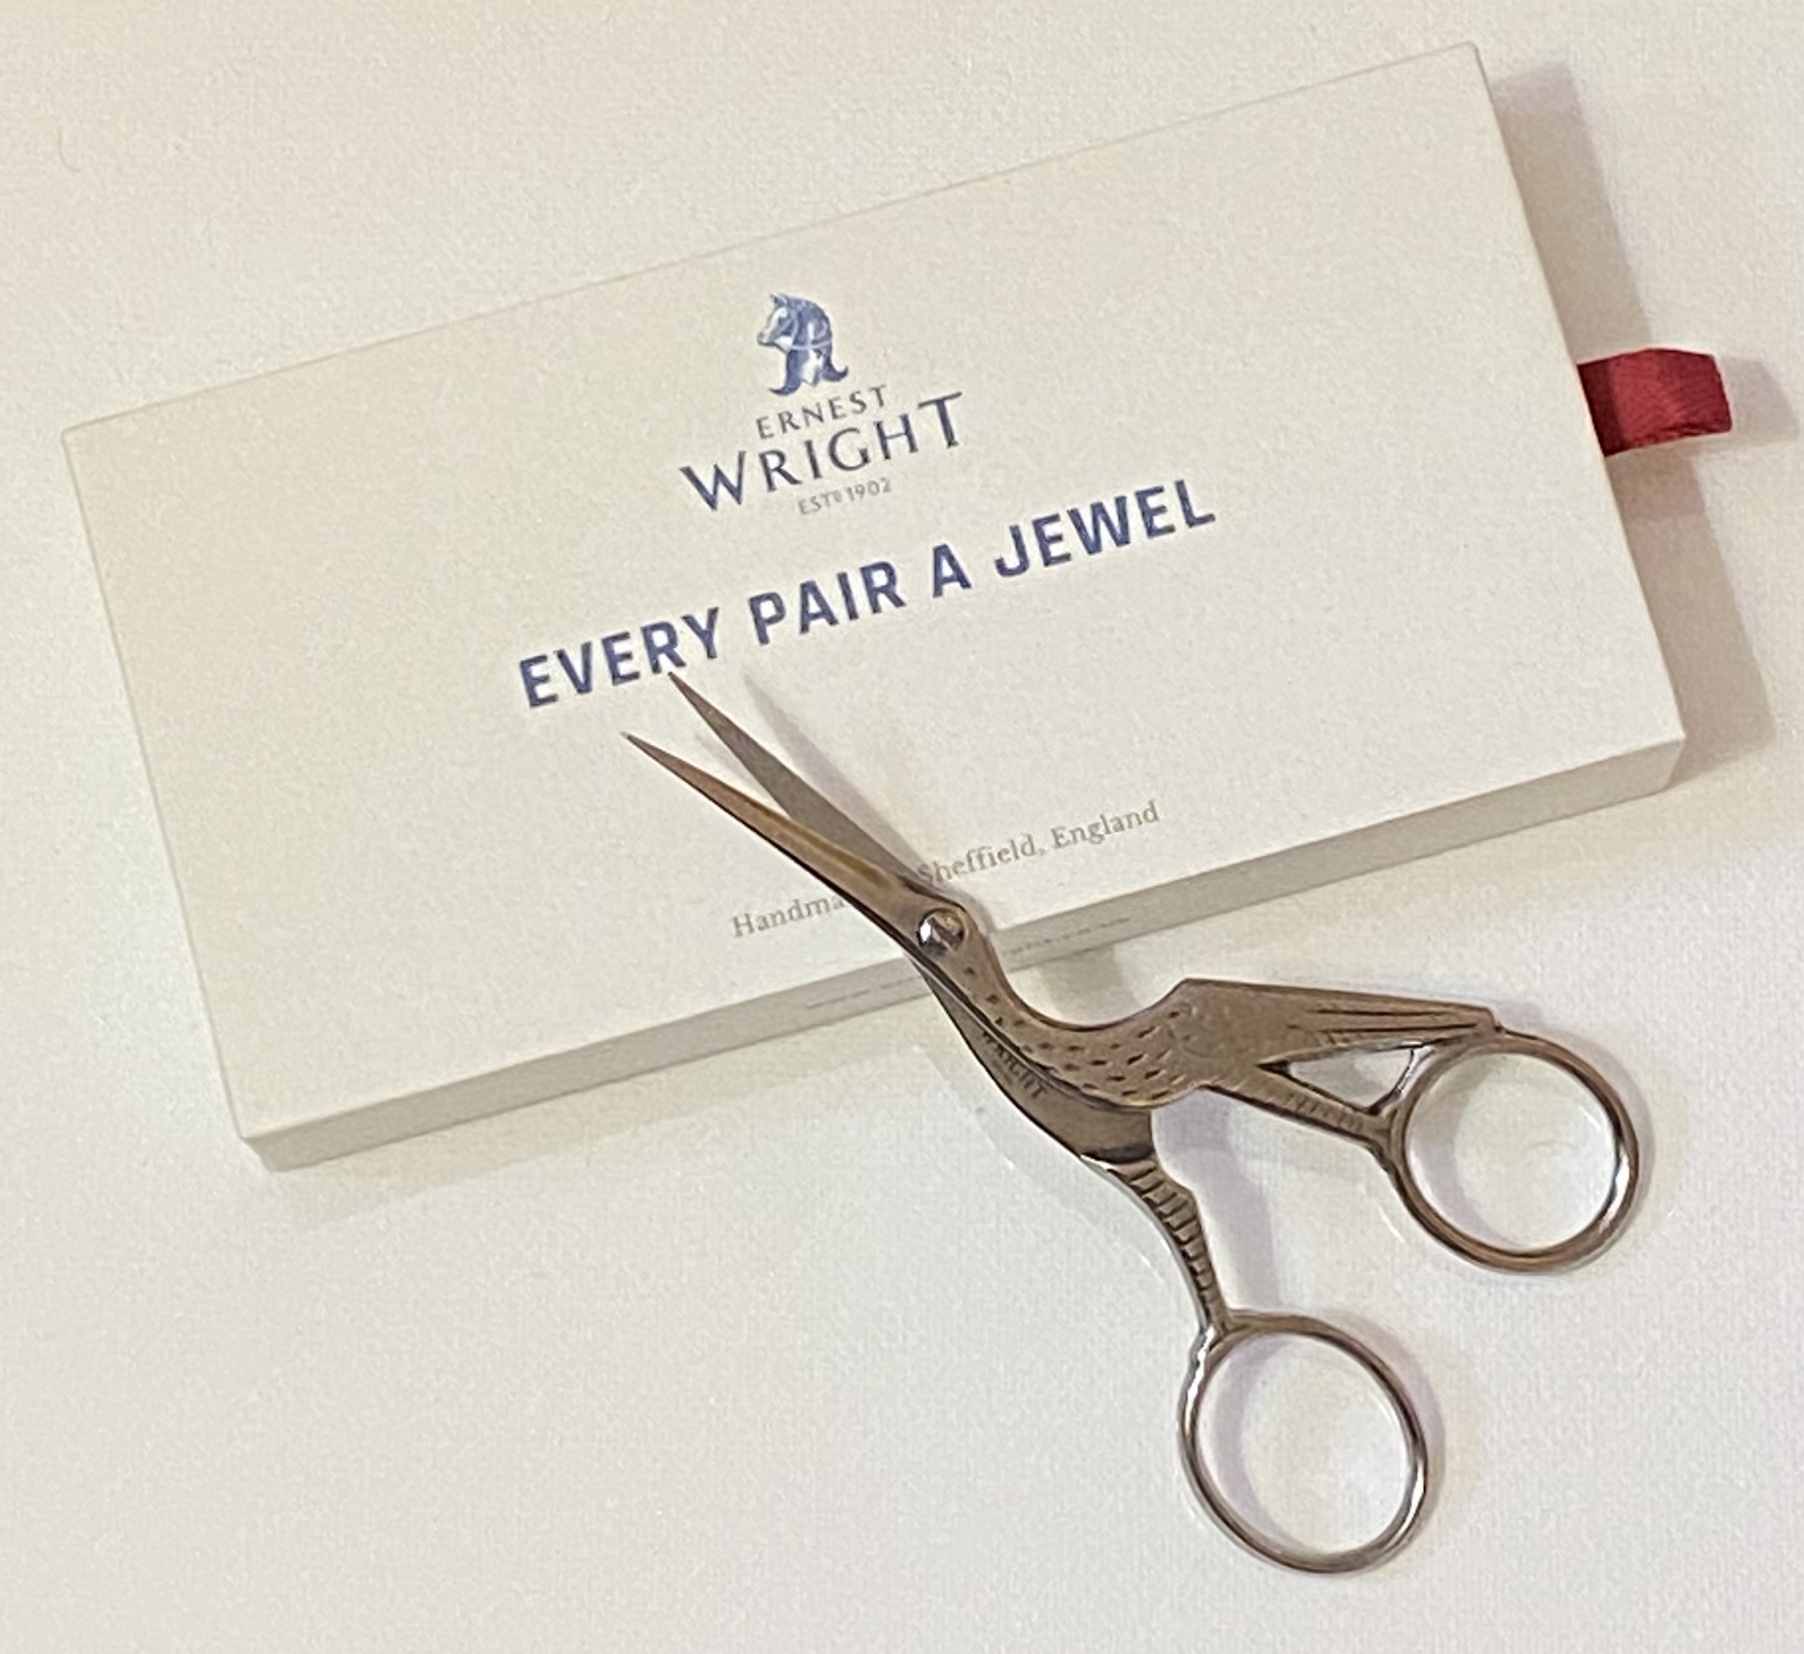
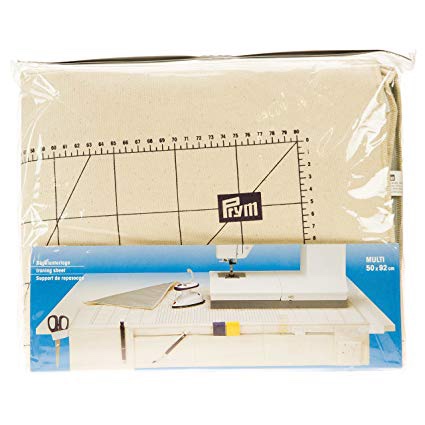
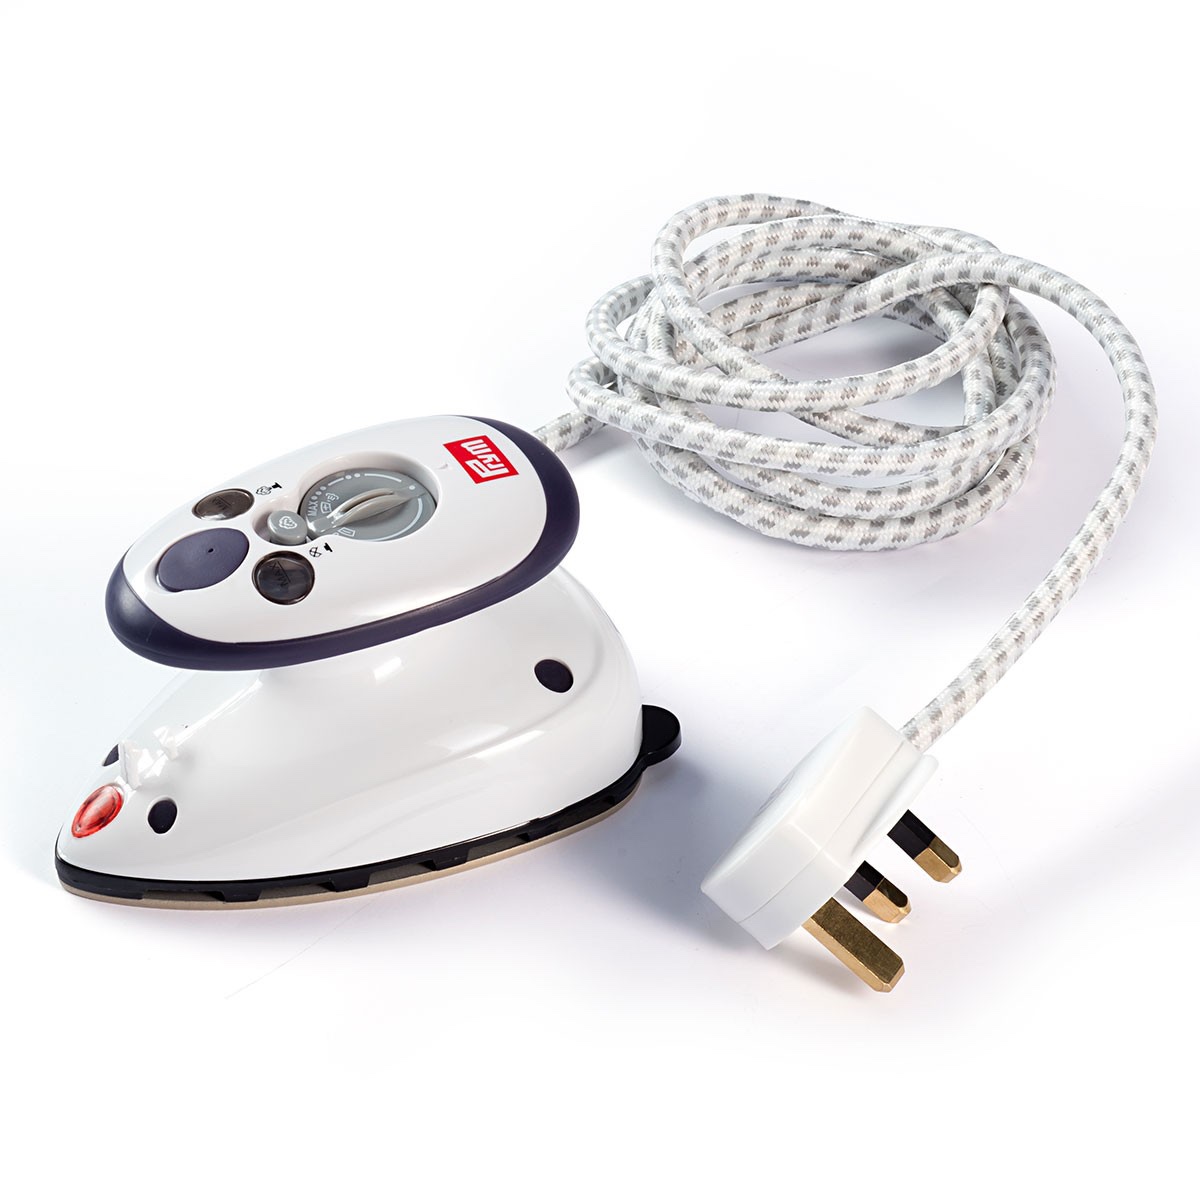
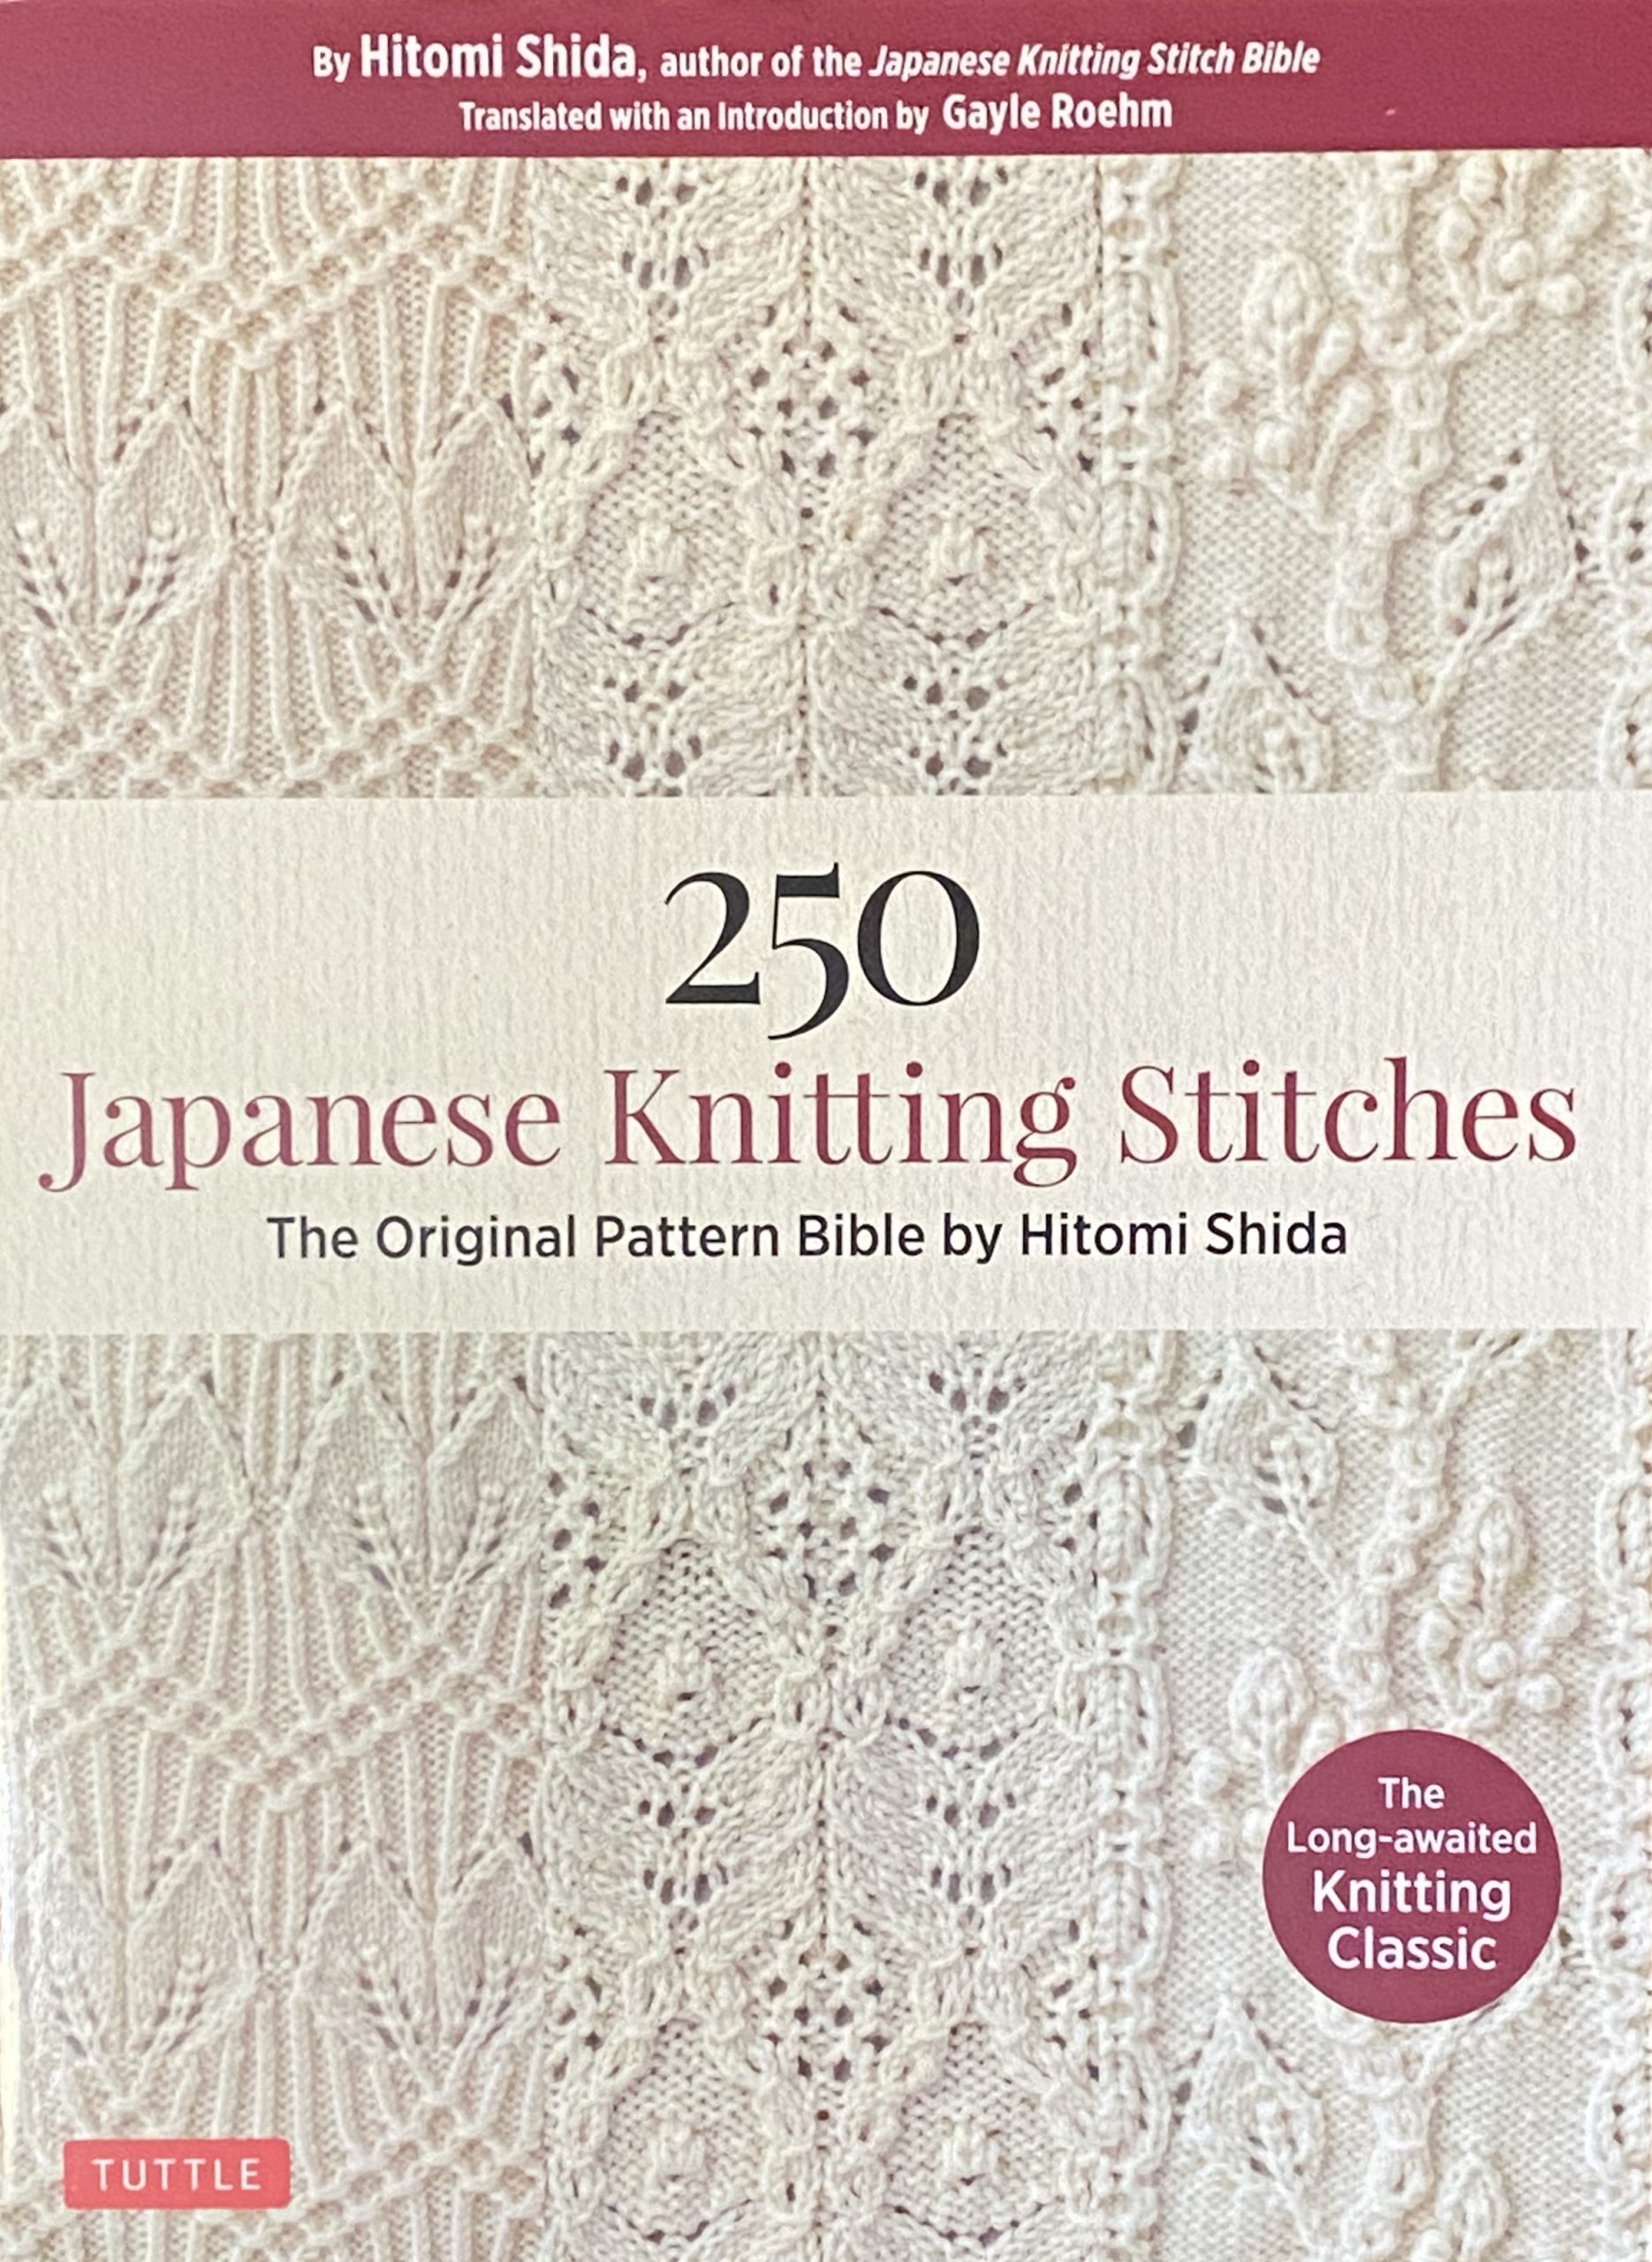
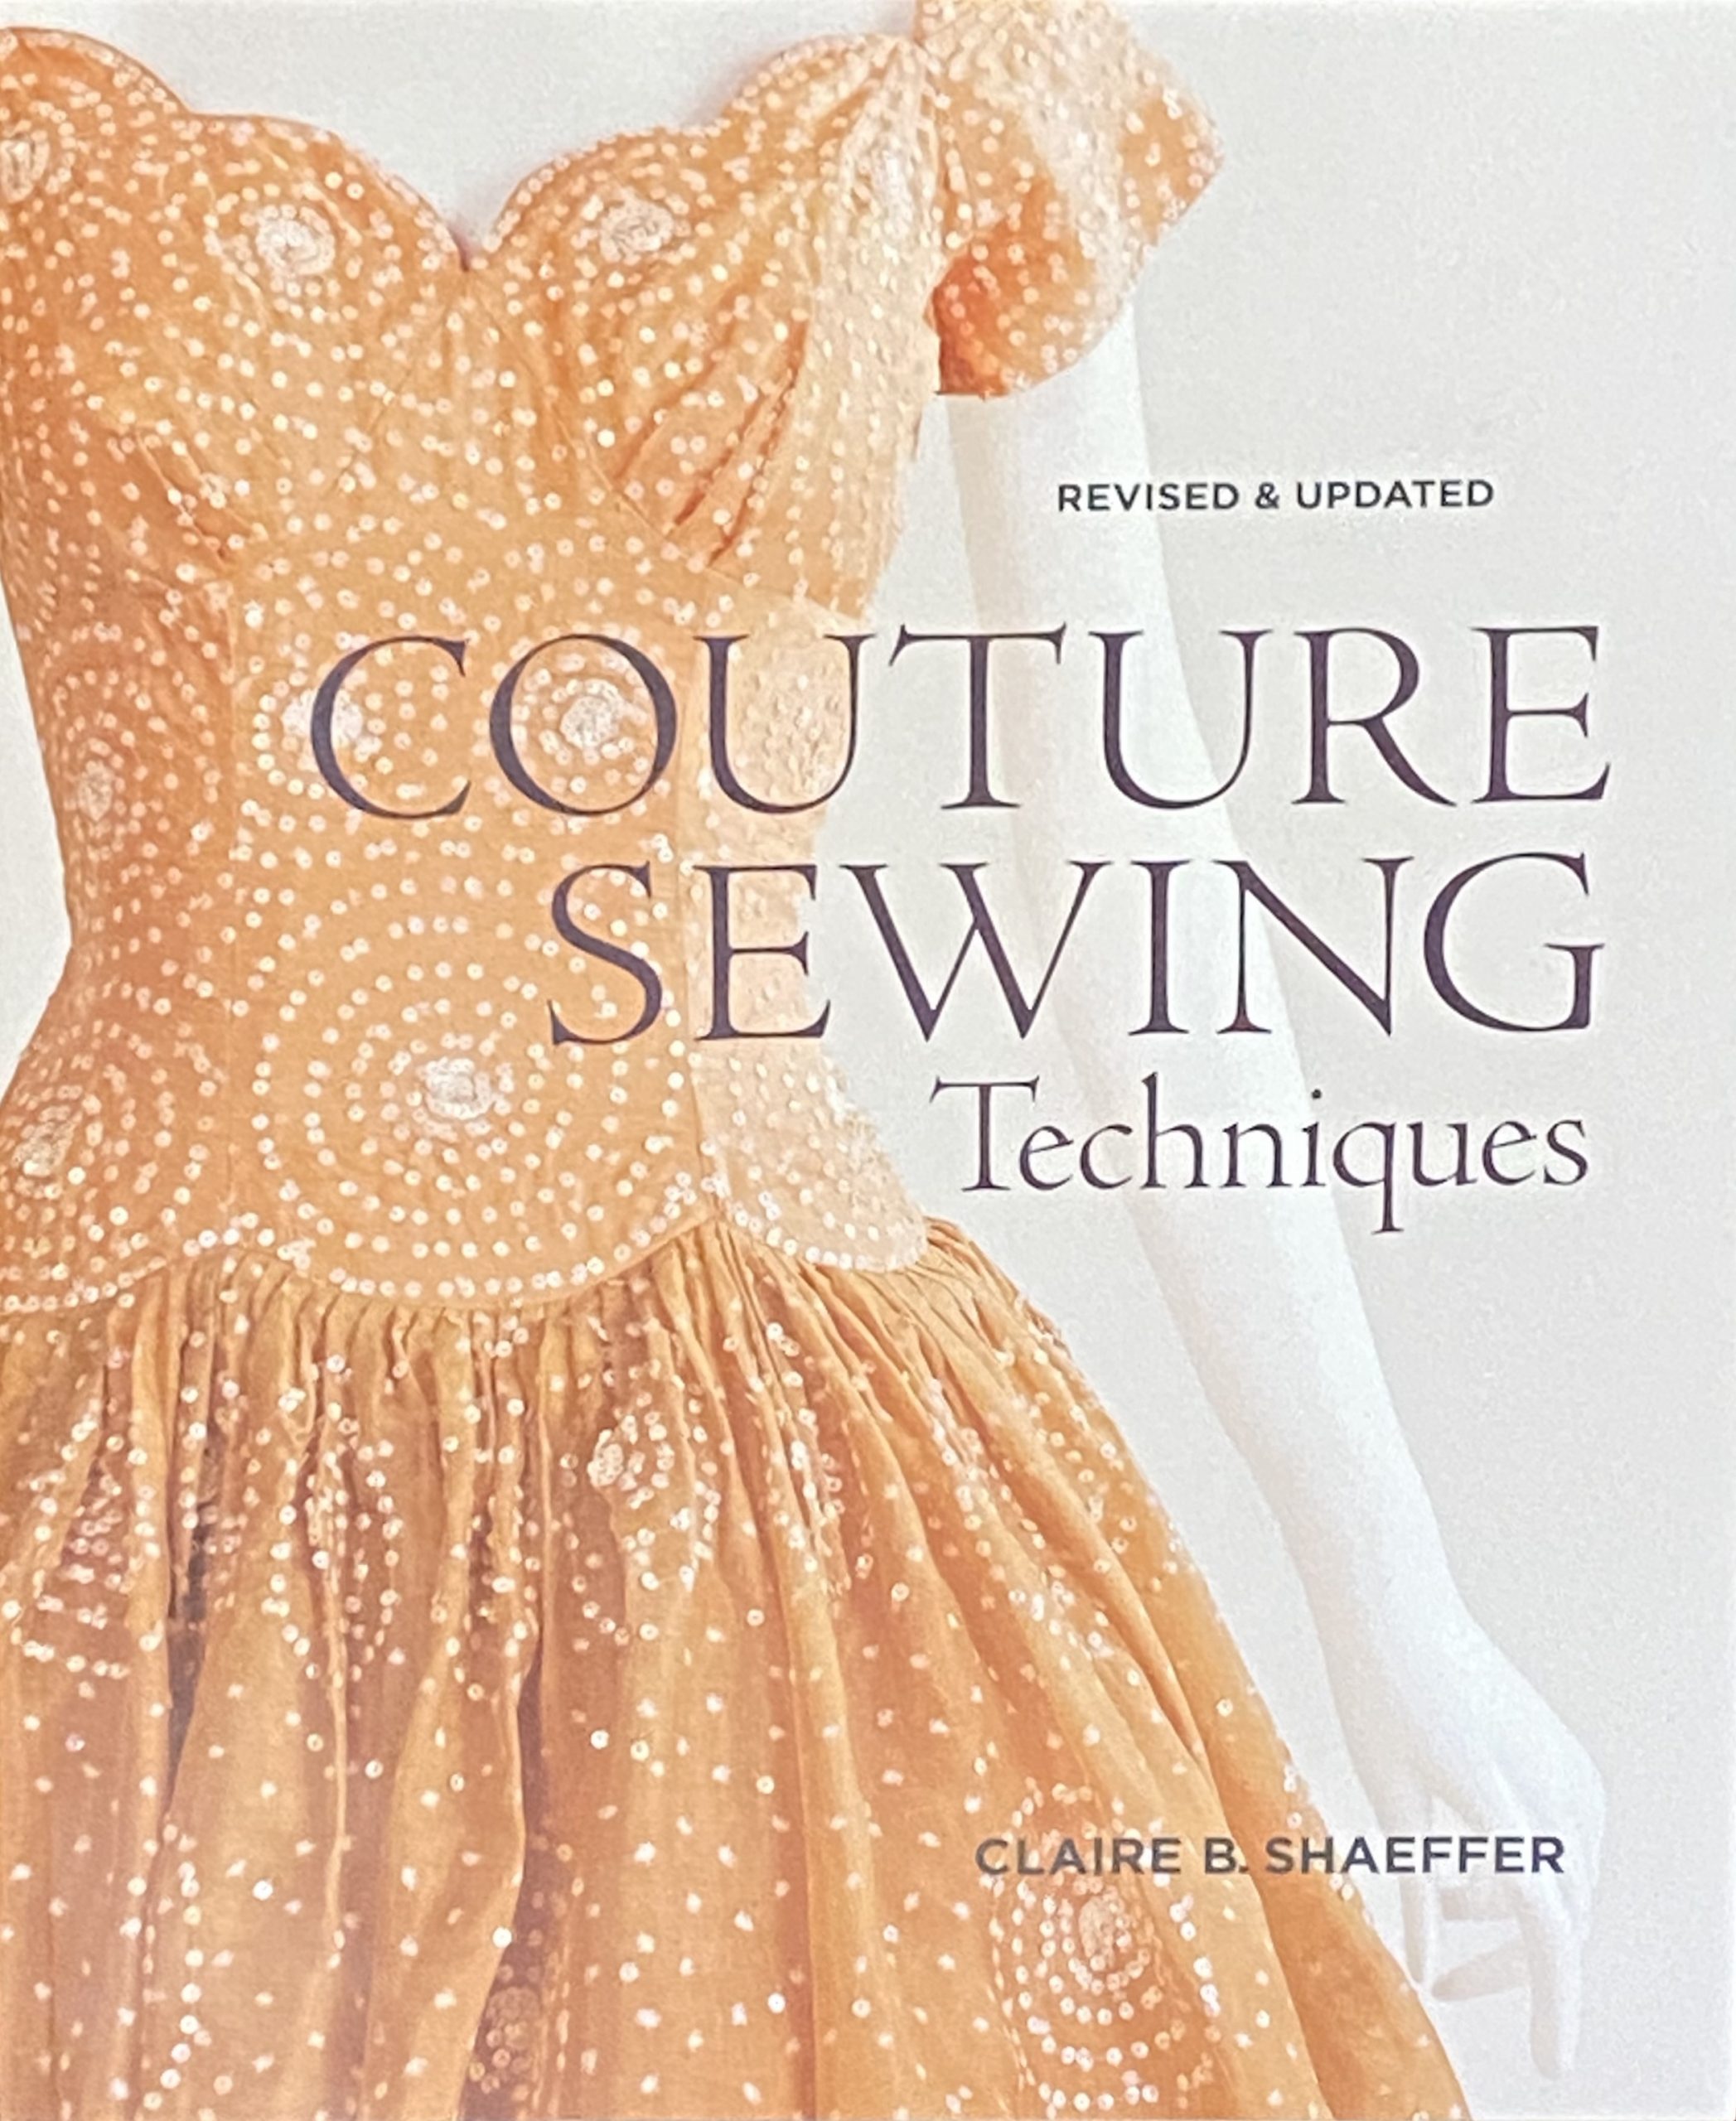
This year I received lots of useful sewing tools and crafty books. I am incredibly thankful to the lovely people in my life who clearly know me so well. (I’ve linked each picture to the shop in case you want to get one).
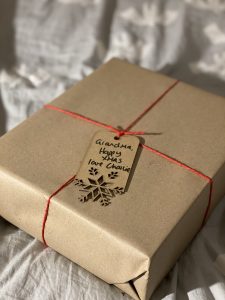
This year, the boyfriend and I decided to try and use completely compostable wrapping paper and present decorations. We decided to use brown paper to wrap the presents, held together with jute string (which is biodegradable) and I managed to find some that were red and green. If you aren’t humming “brown paper packages tied up with string” by now, then your brain doesn’t go where mine does!
We wanted to make some gift tags for the presents, but we needed to batch produce them. Fortunately, as a Product Design teacher, I have access to a laser cutter.
I purchased a snowflake gift tag design on the Cricut Design Space (it was the end of term and I didn’t have time to design anything myself).

I then converted the file to be readable by the laser cutter software and cut it out of kraft board. I set the machine to cut as many as would fit, so I ended up with 71 gift tags.
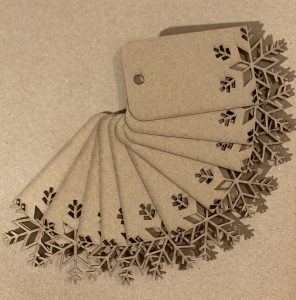
I think they look quite smart!
While I’m still getting the hang of wrapping presents without any tape or glue, I think they are coming out quite well. I just hope the recipients like them.
About a month ago I made a Delia Christmas cake (yes, I know, I am obsessed with Delia’s Christmas recipes – but they just work!). If you want to make your own next year, then you can see her recipe here. I need my house to be dairy-free (due to an allergic boyfriend and an intolerant child) so I replace the butter with Pure Dairy Free Spread, or as my mother would say “marg”.
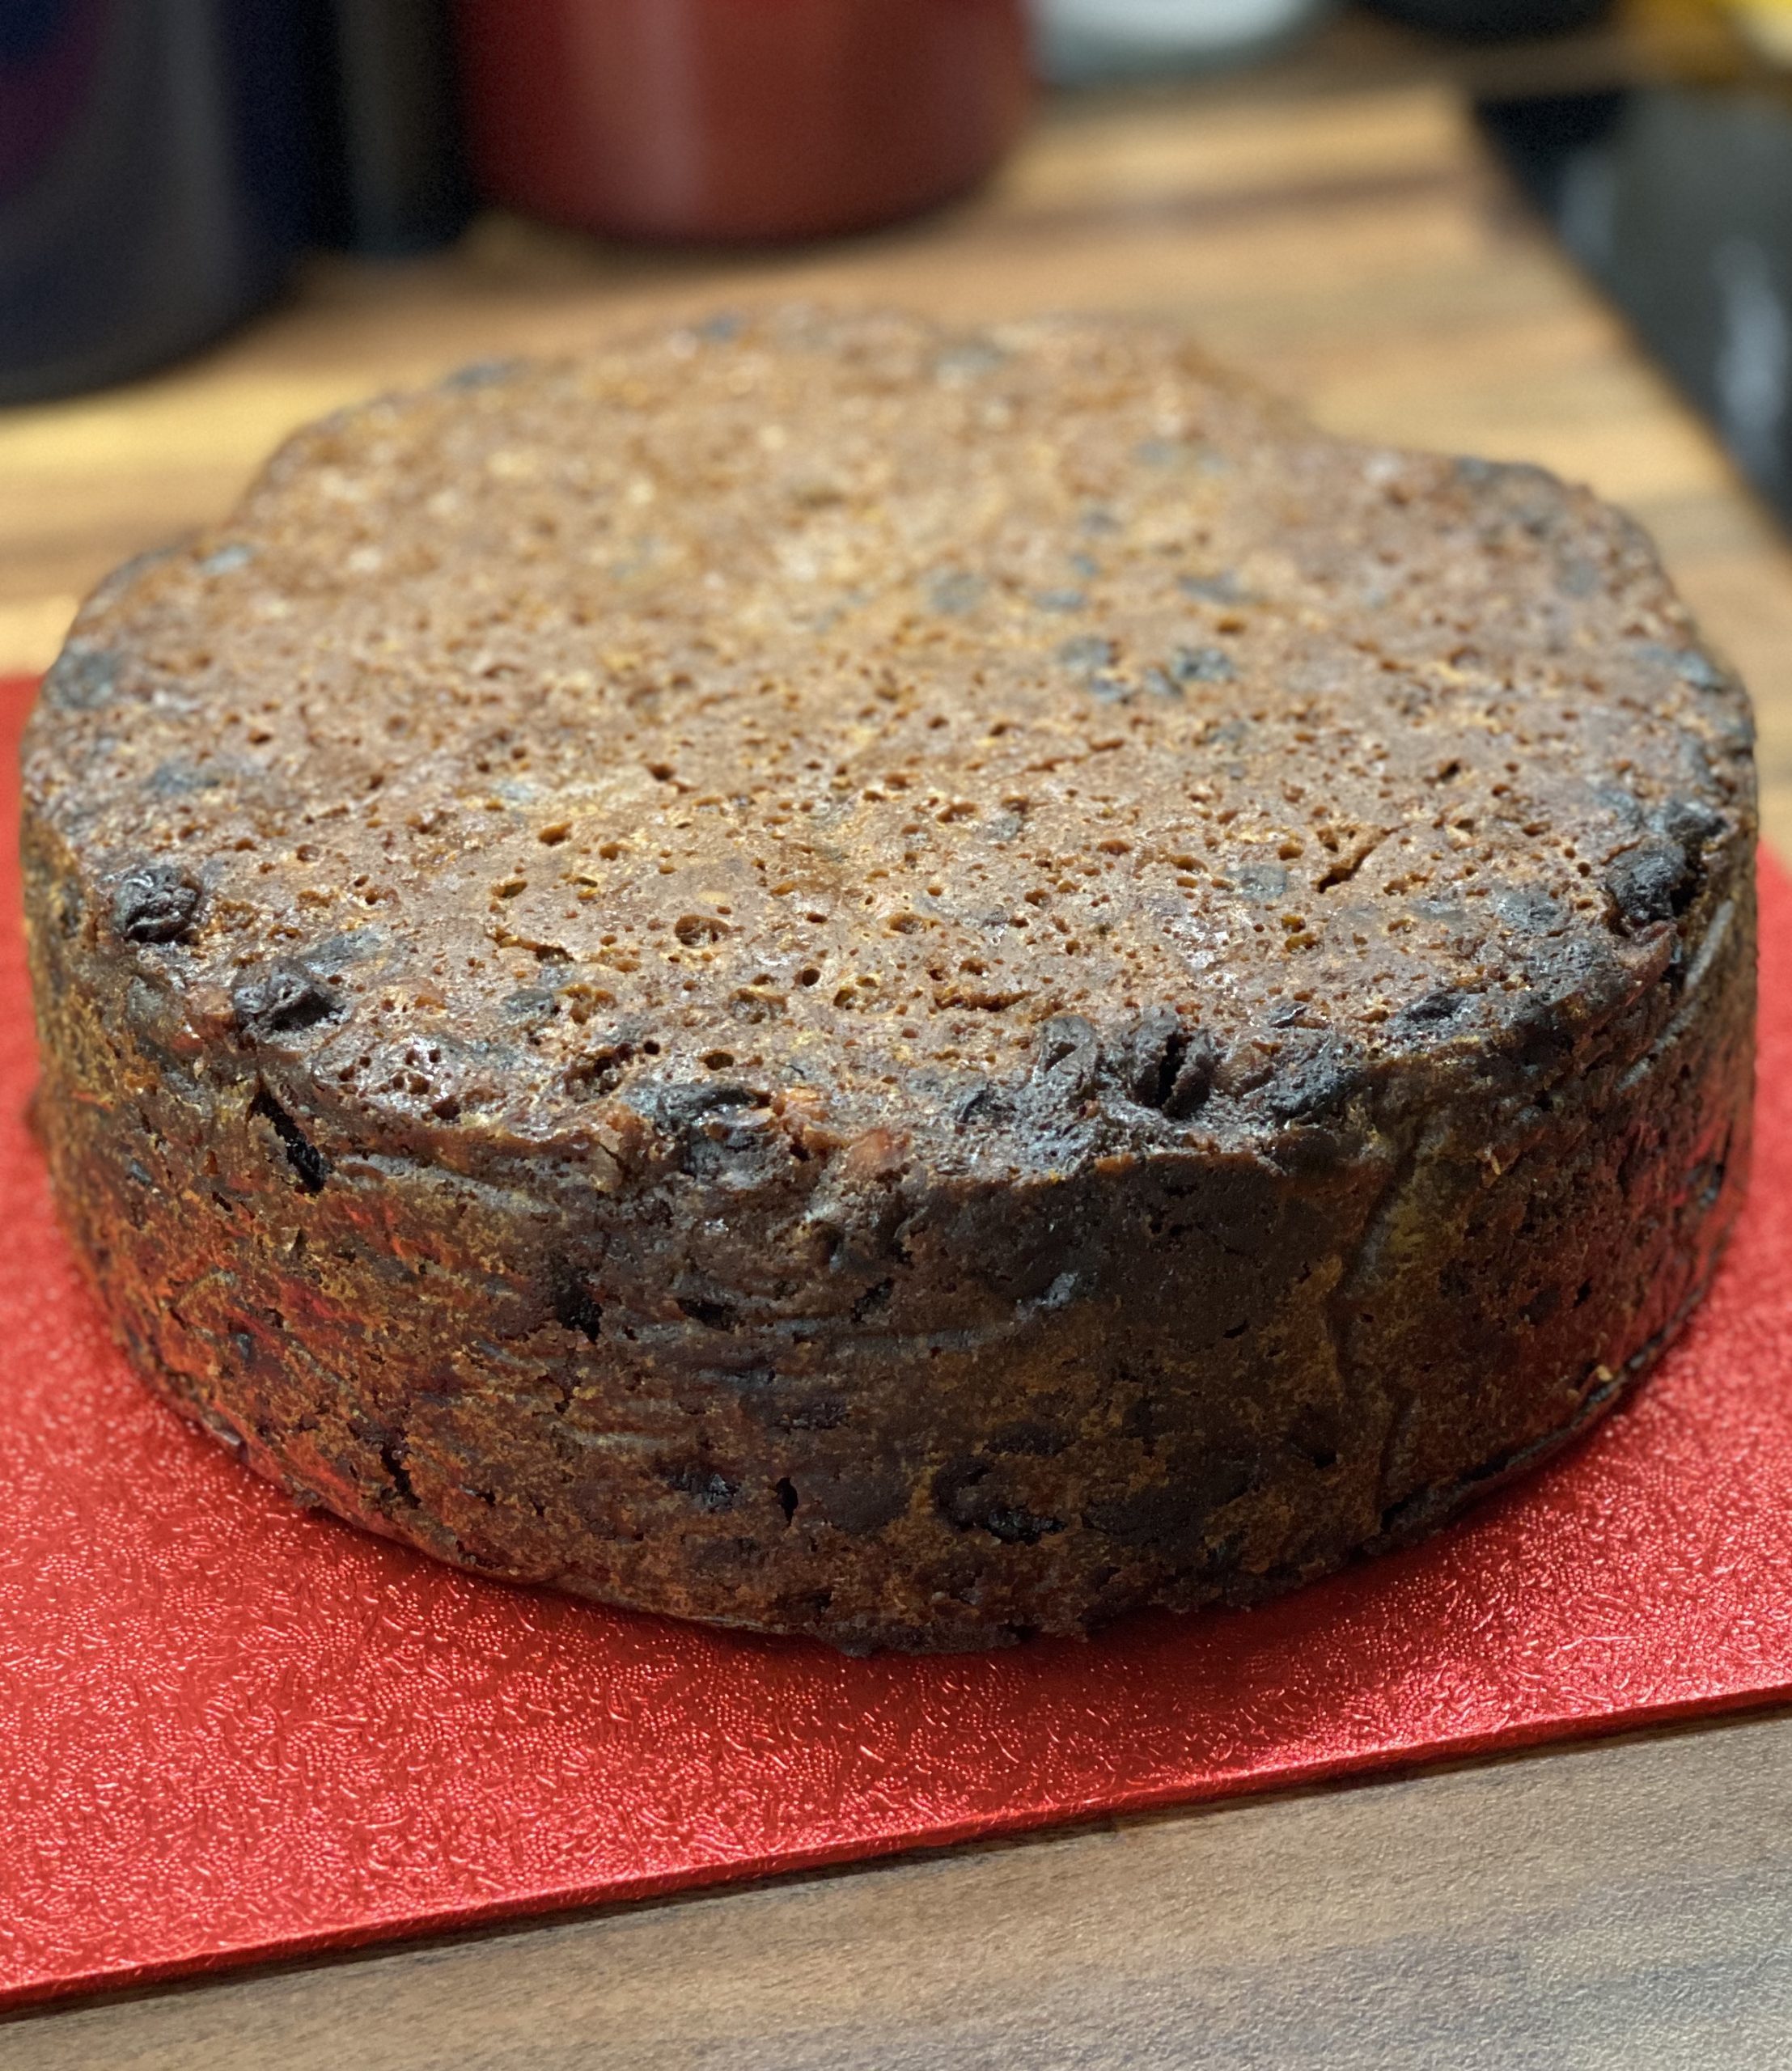
Once a week since making it, I have been feeding the cake with brandy. This involves spooning copious amount of brandy over the top of the cake and let it soak through some carefully placed holes (or in my case, spaces where I stabbed the cake with a knife).
But today was the day to decorate it. I have a tiny kitchen and a limited range of kitchen equipment. So my decorating methods are a little unorthodox. First I gathered my equipment.
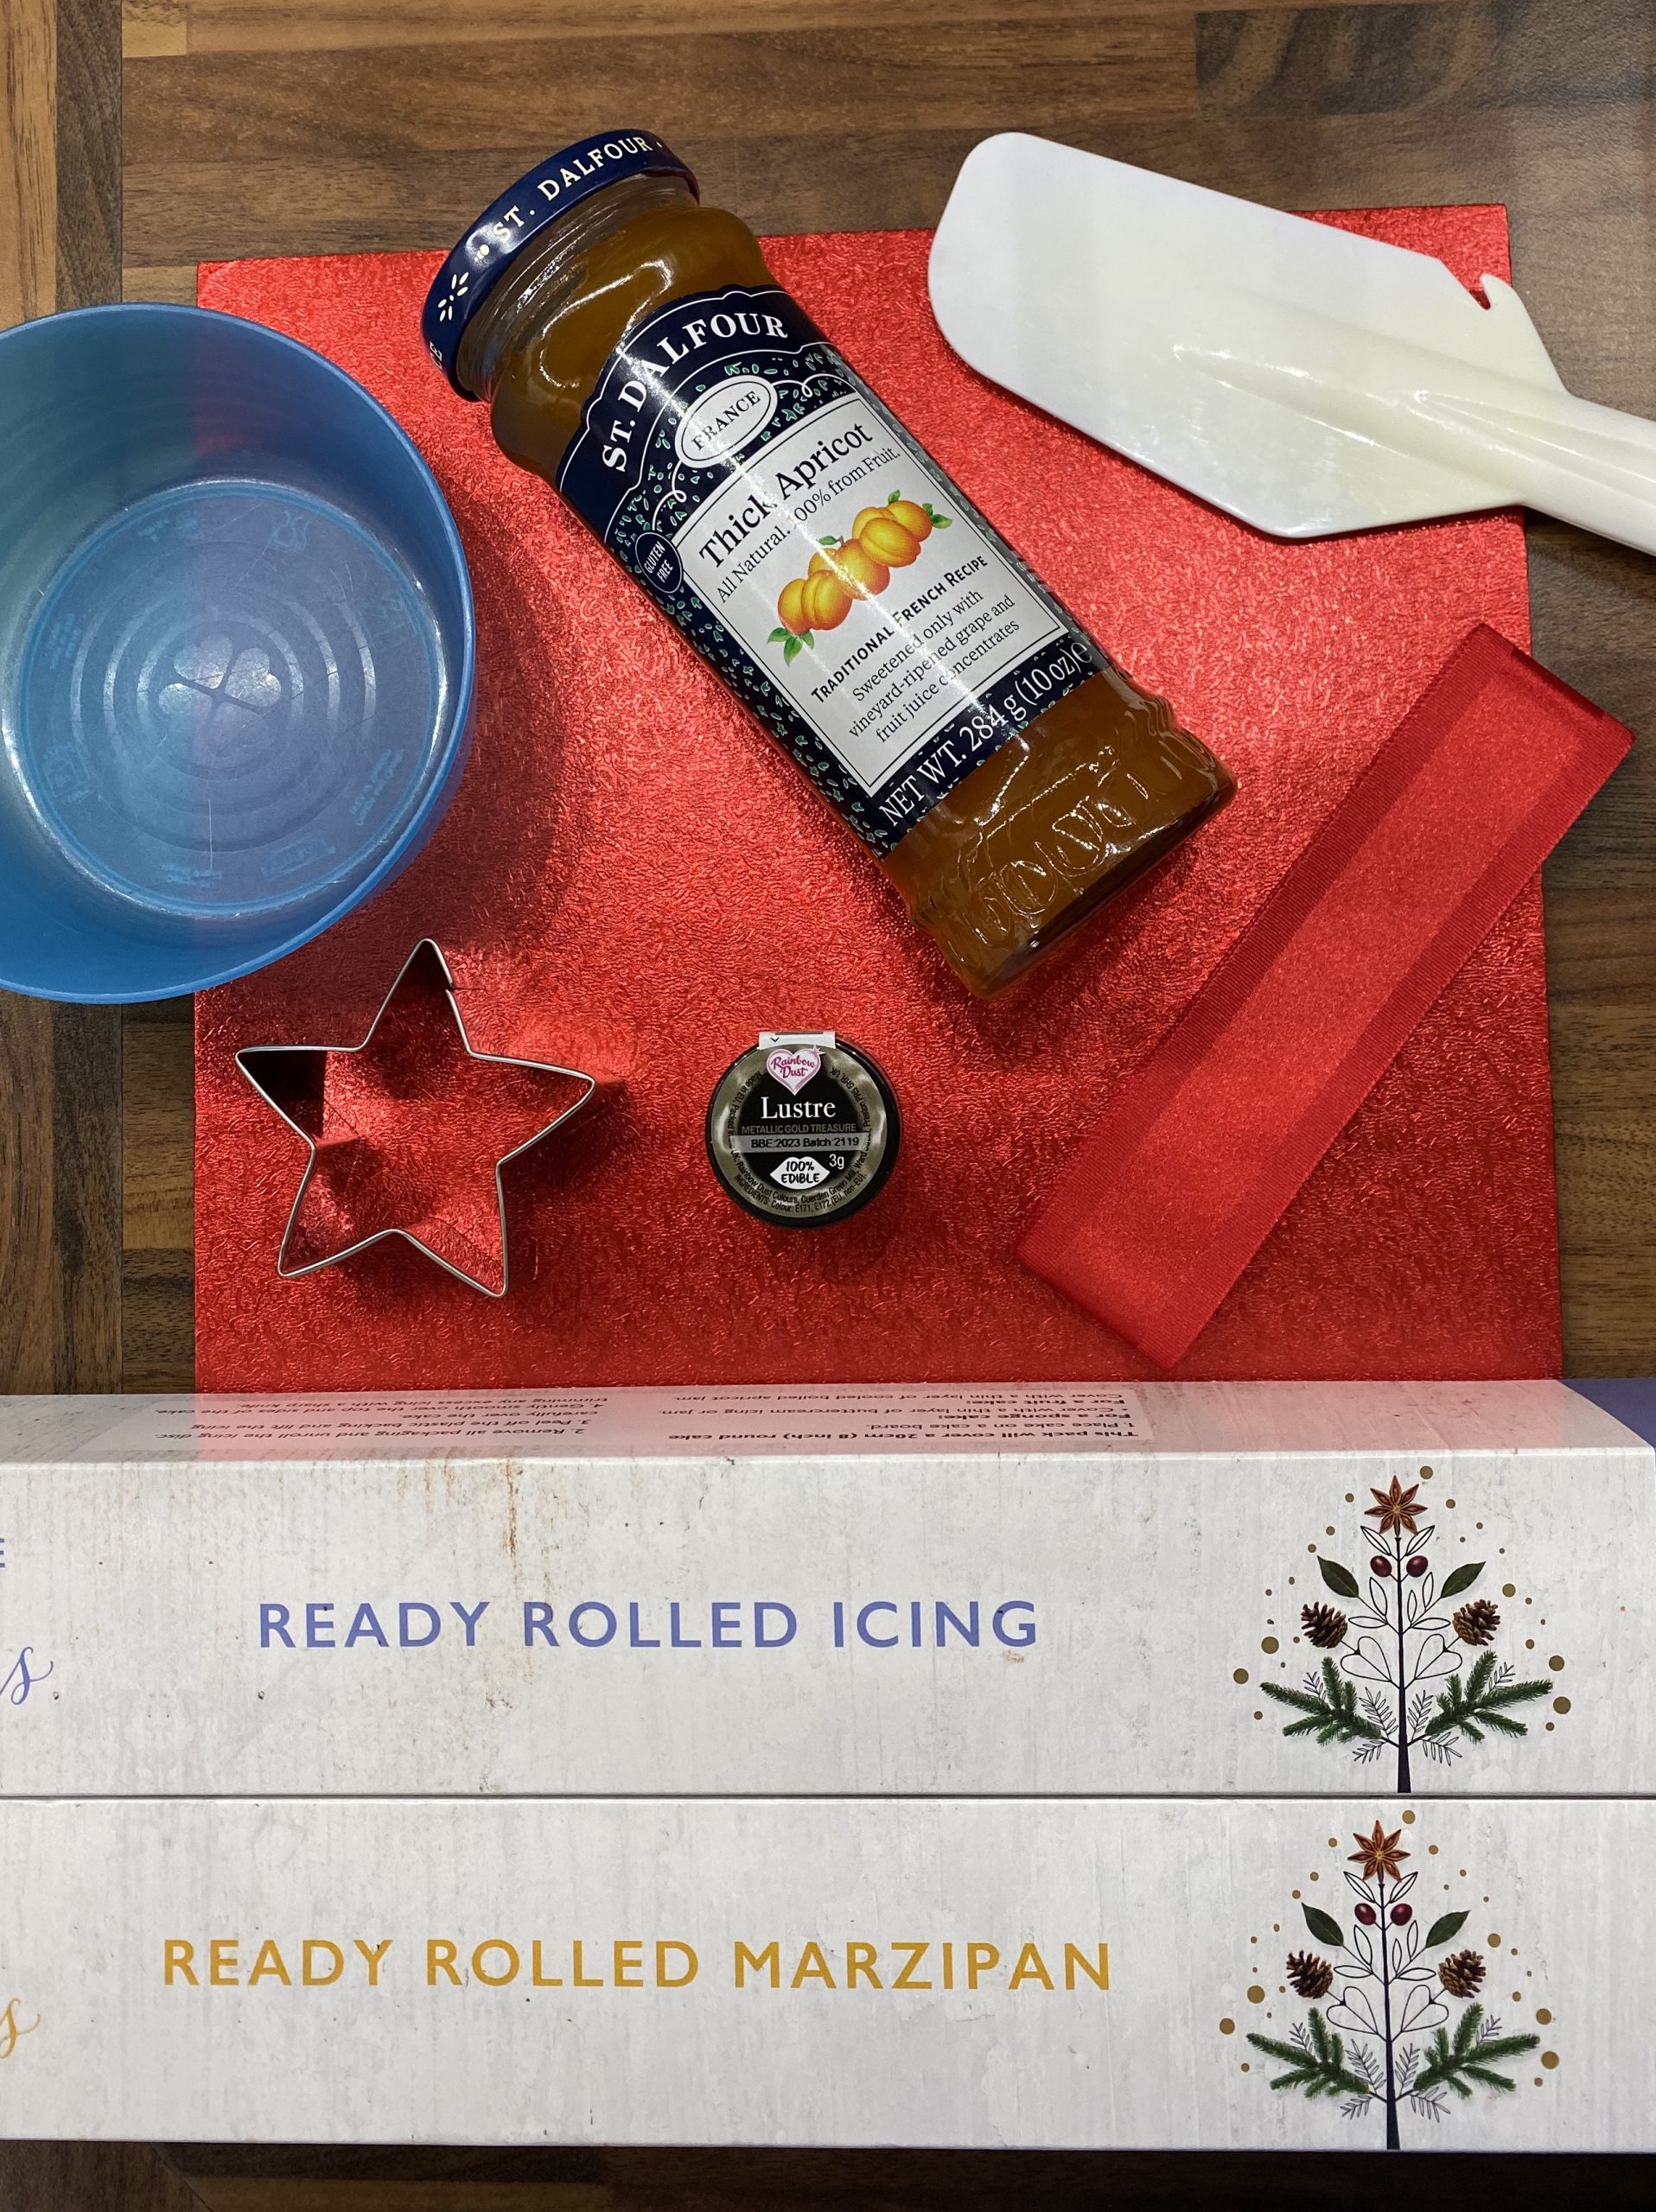
- A cake board (I got mine from Waitrose and it came with a ribbon to go round the cake)
- Good quality apricot jam, with a microwavable bowl and something to spread it with.
- Ready rolled icing and marzipan (my kitchen counter has limited space, and from previous experience trying to roll out my own is usually a bit of a disaster).
- A star-shaped cutter.
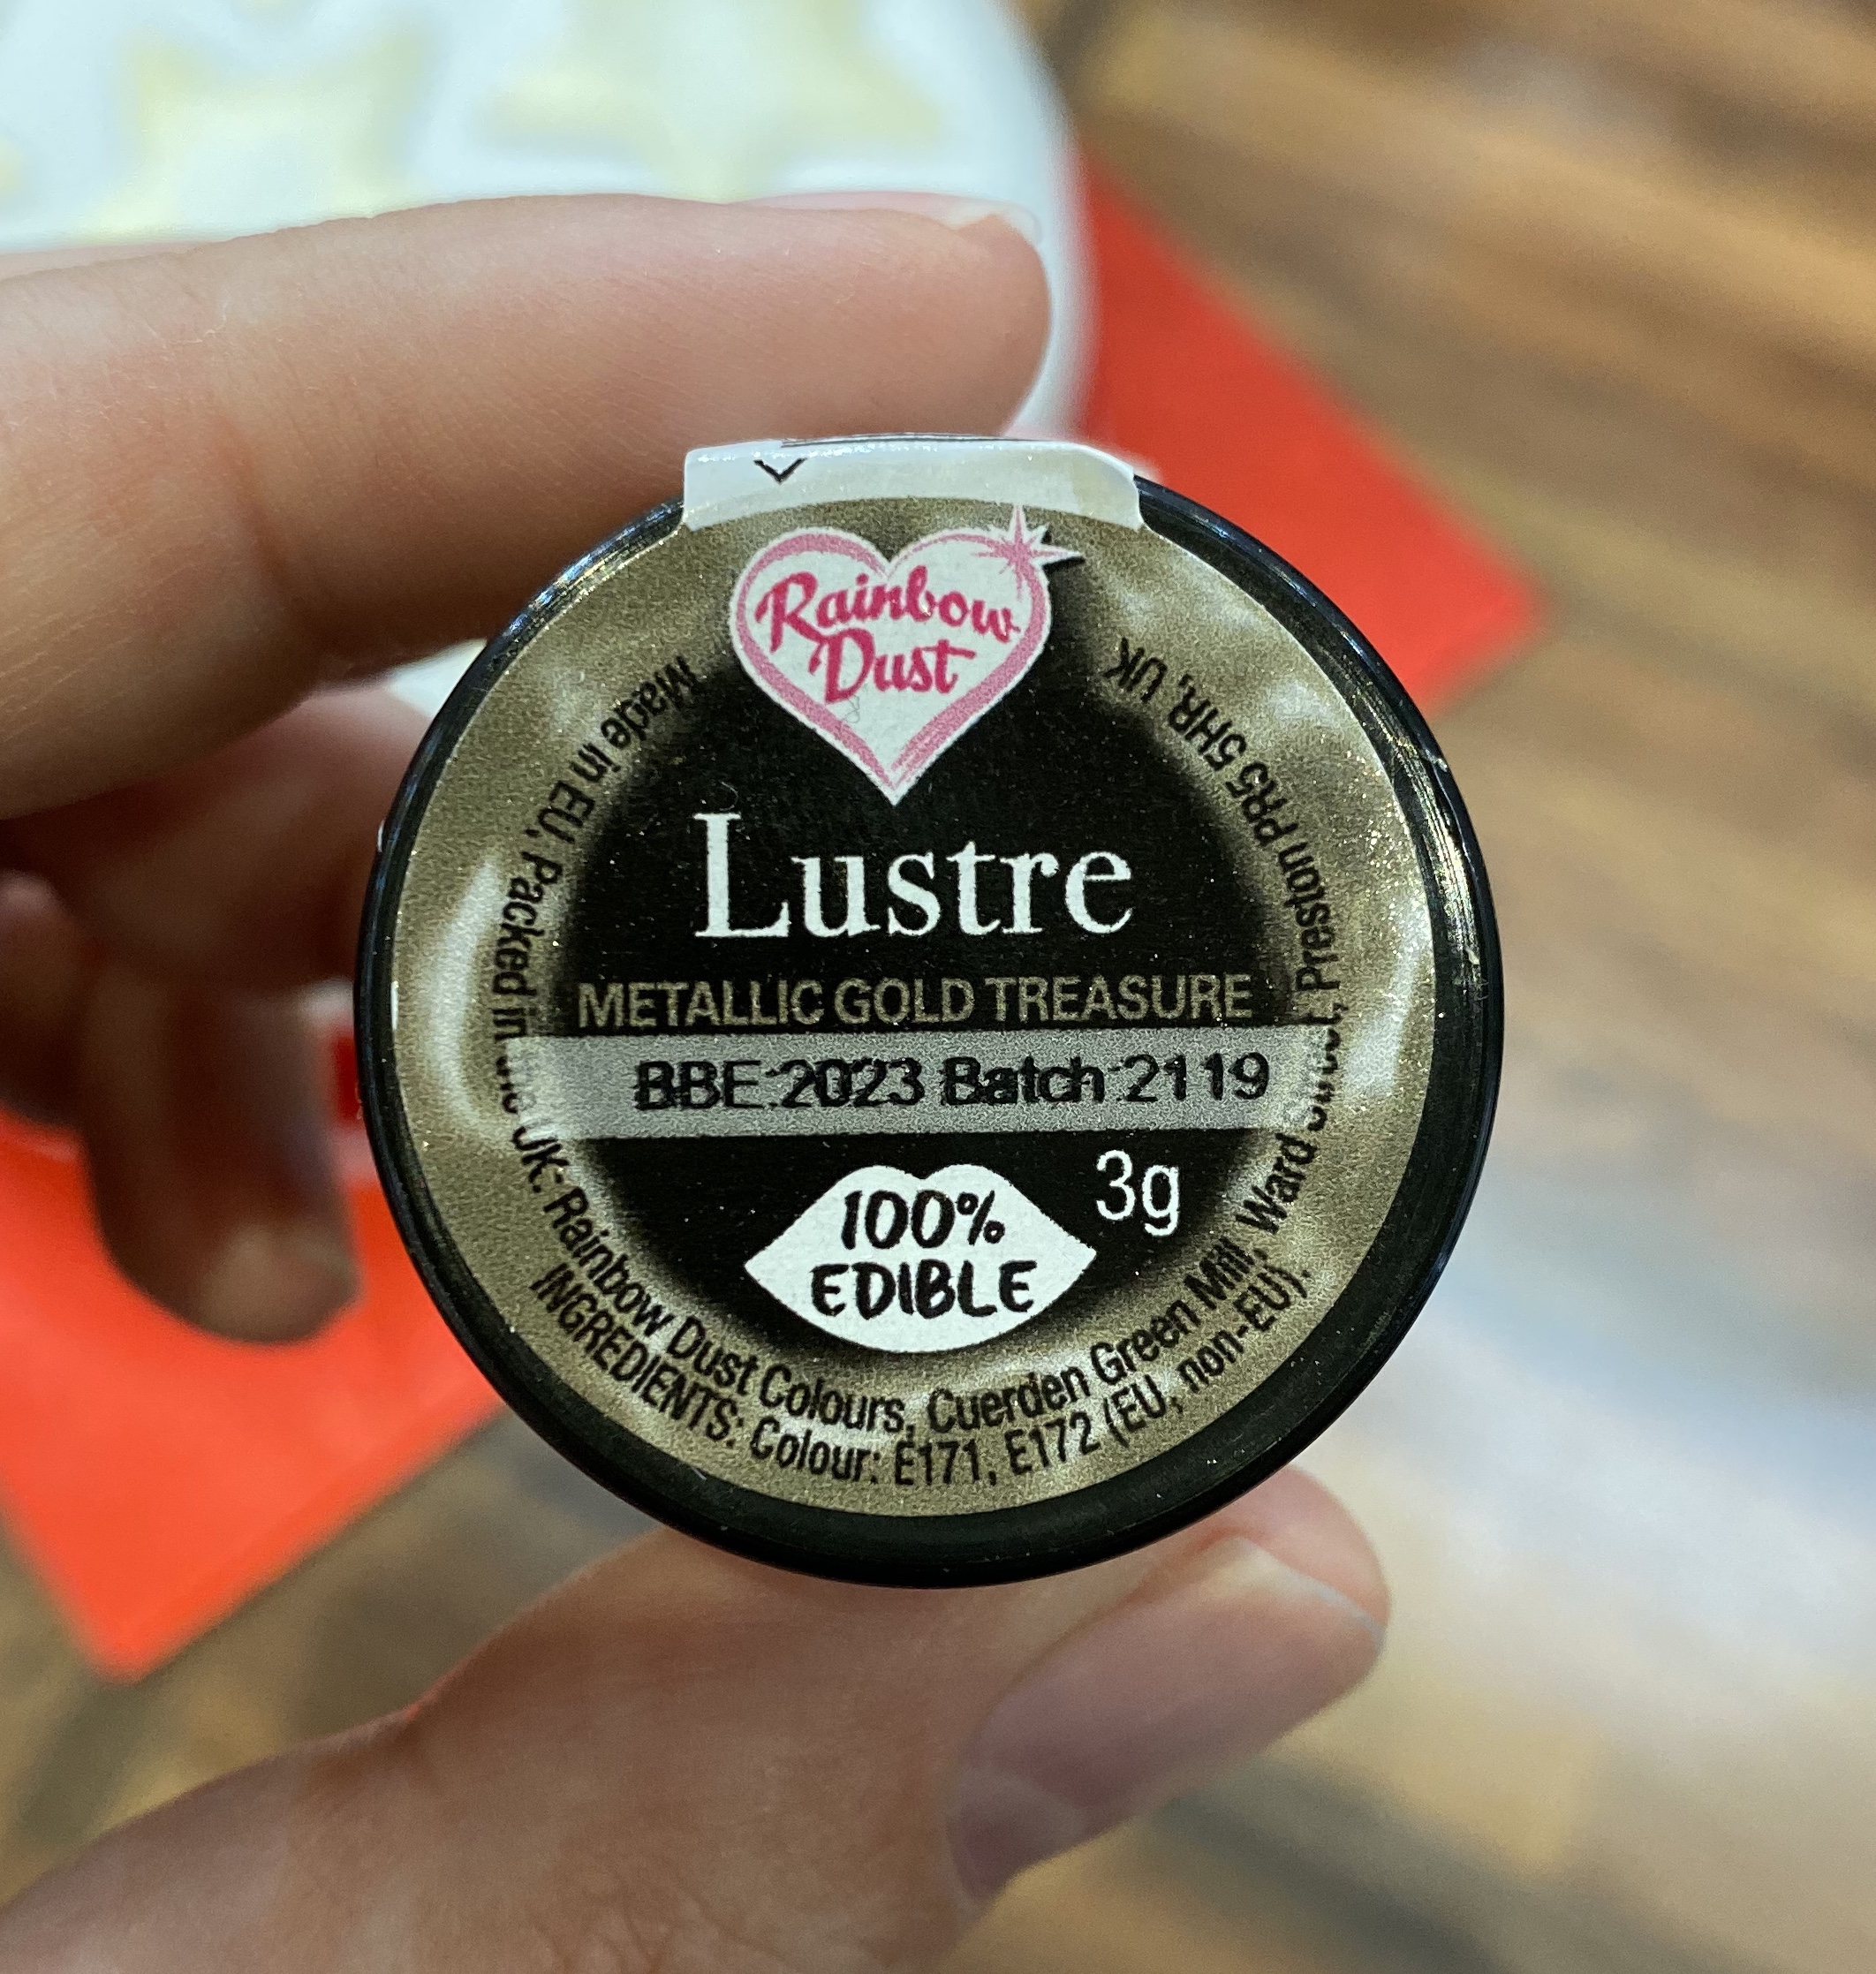
- And new for this year, some gold edible dusting powder (I got mine from Hobbycraft).
Now to start icing. After having placed the cake on the cake board, microwave a decent amount of jam for about 10 seconds (to warm it up so it spreads more easily). Try to avoid any chunks of actual apricot! Then carefully coat the cake in a thin layer of jam. This smooths out the surface a bit and helps the marzipan stick.
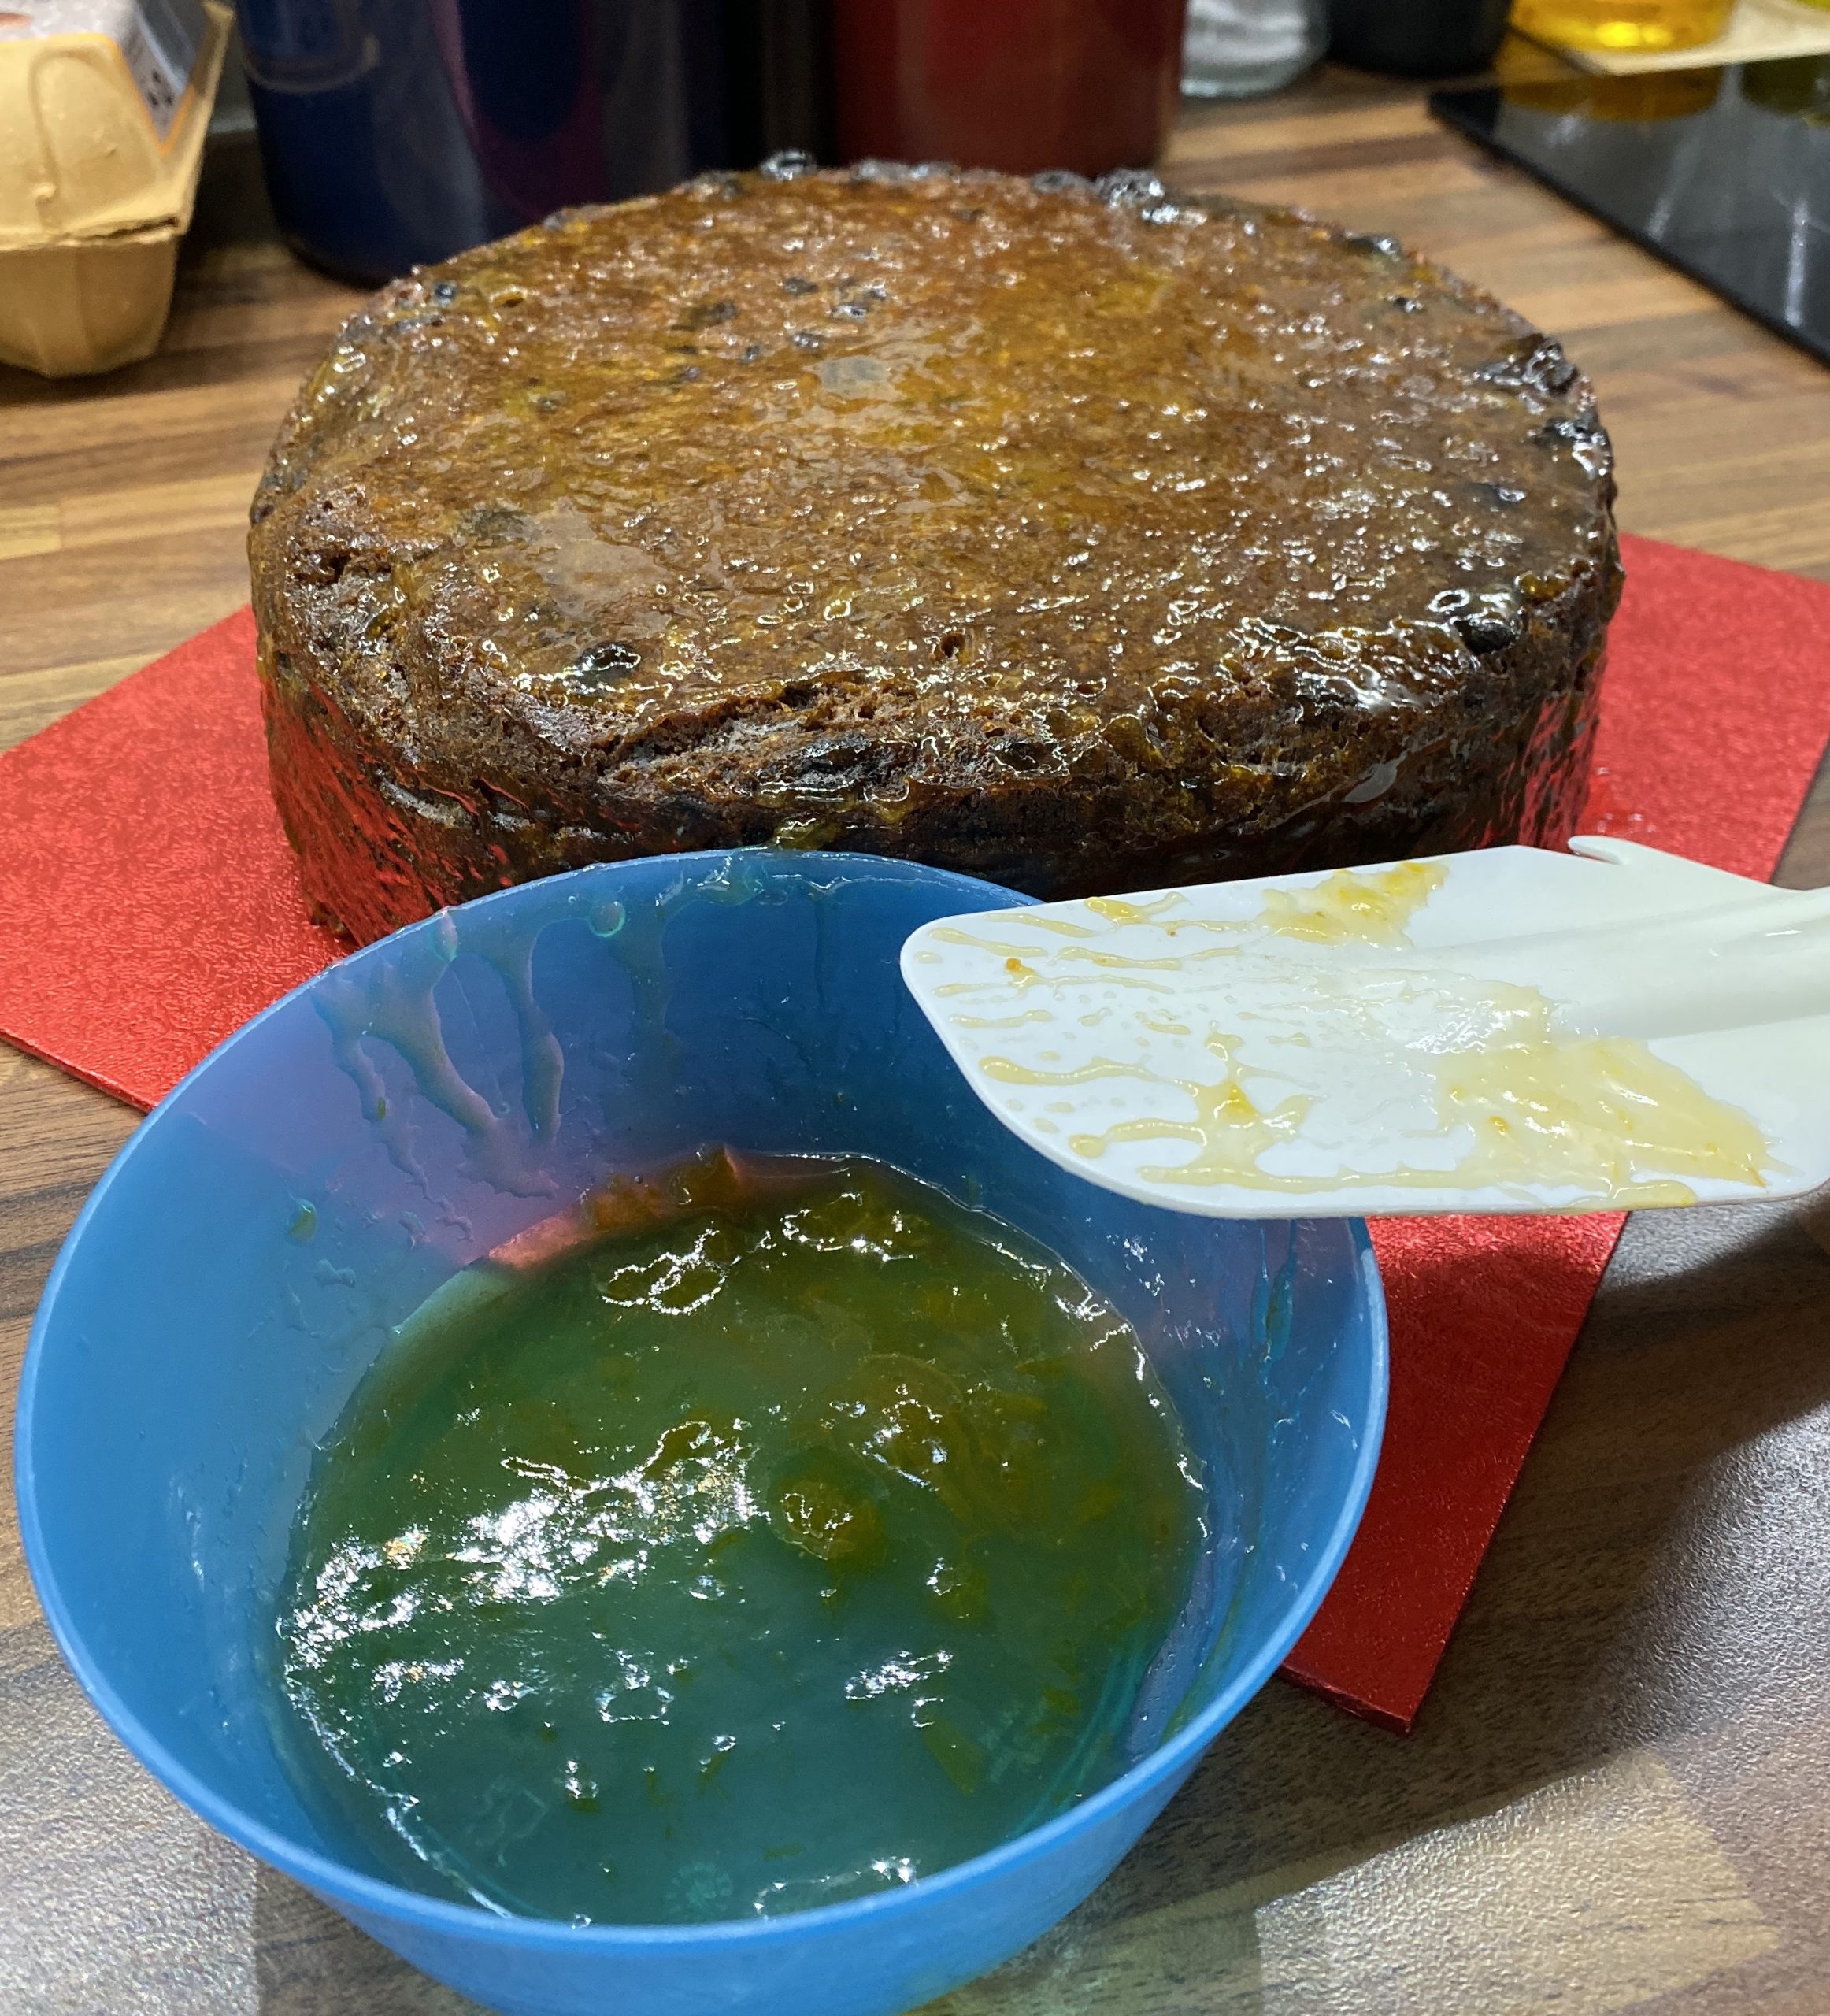
Next, you need to extract the marzipan from all the packaging – keep the plastic sheet for later. It’s quite useful. Drape the marzipan over the cake, trying to get it centred. Then using your hand smooth the marzipan over the edge and around the sides. My marzipan was quite sticky, so I wet my hand with cold water, so it slid round better.
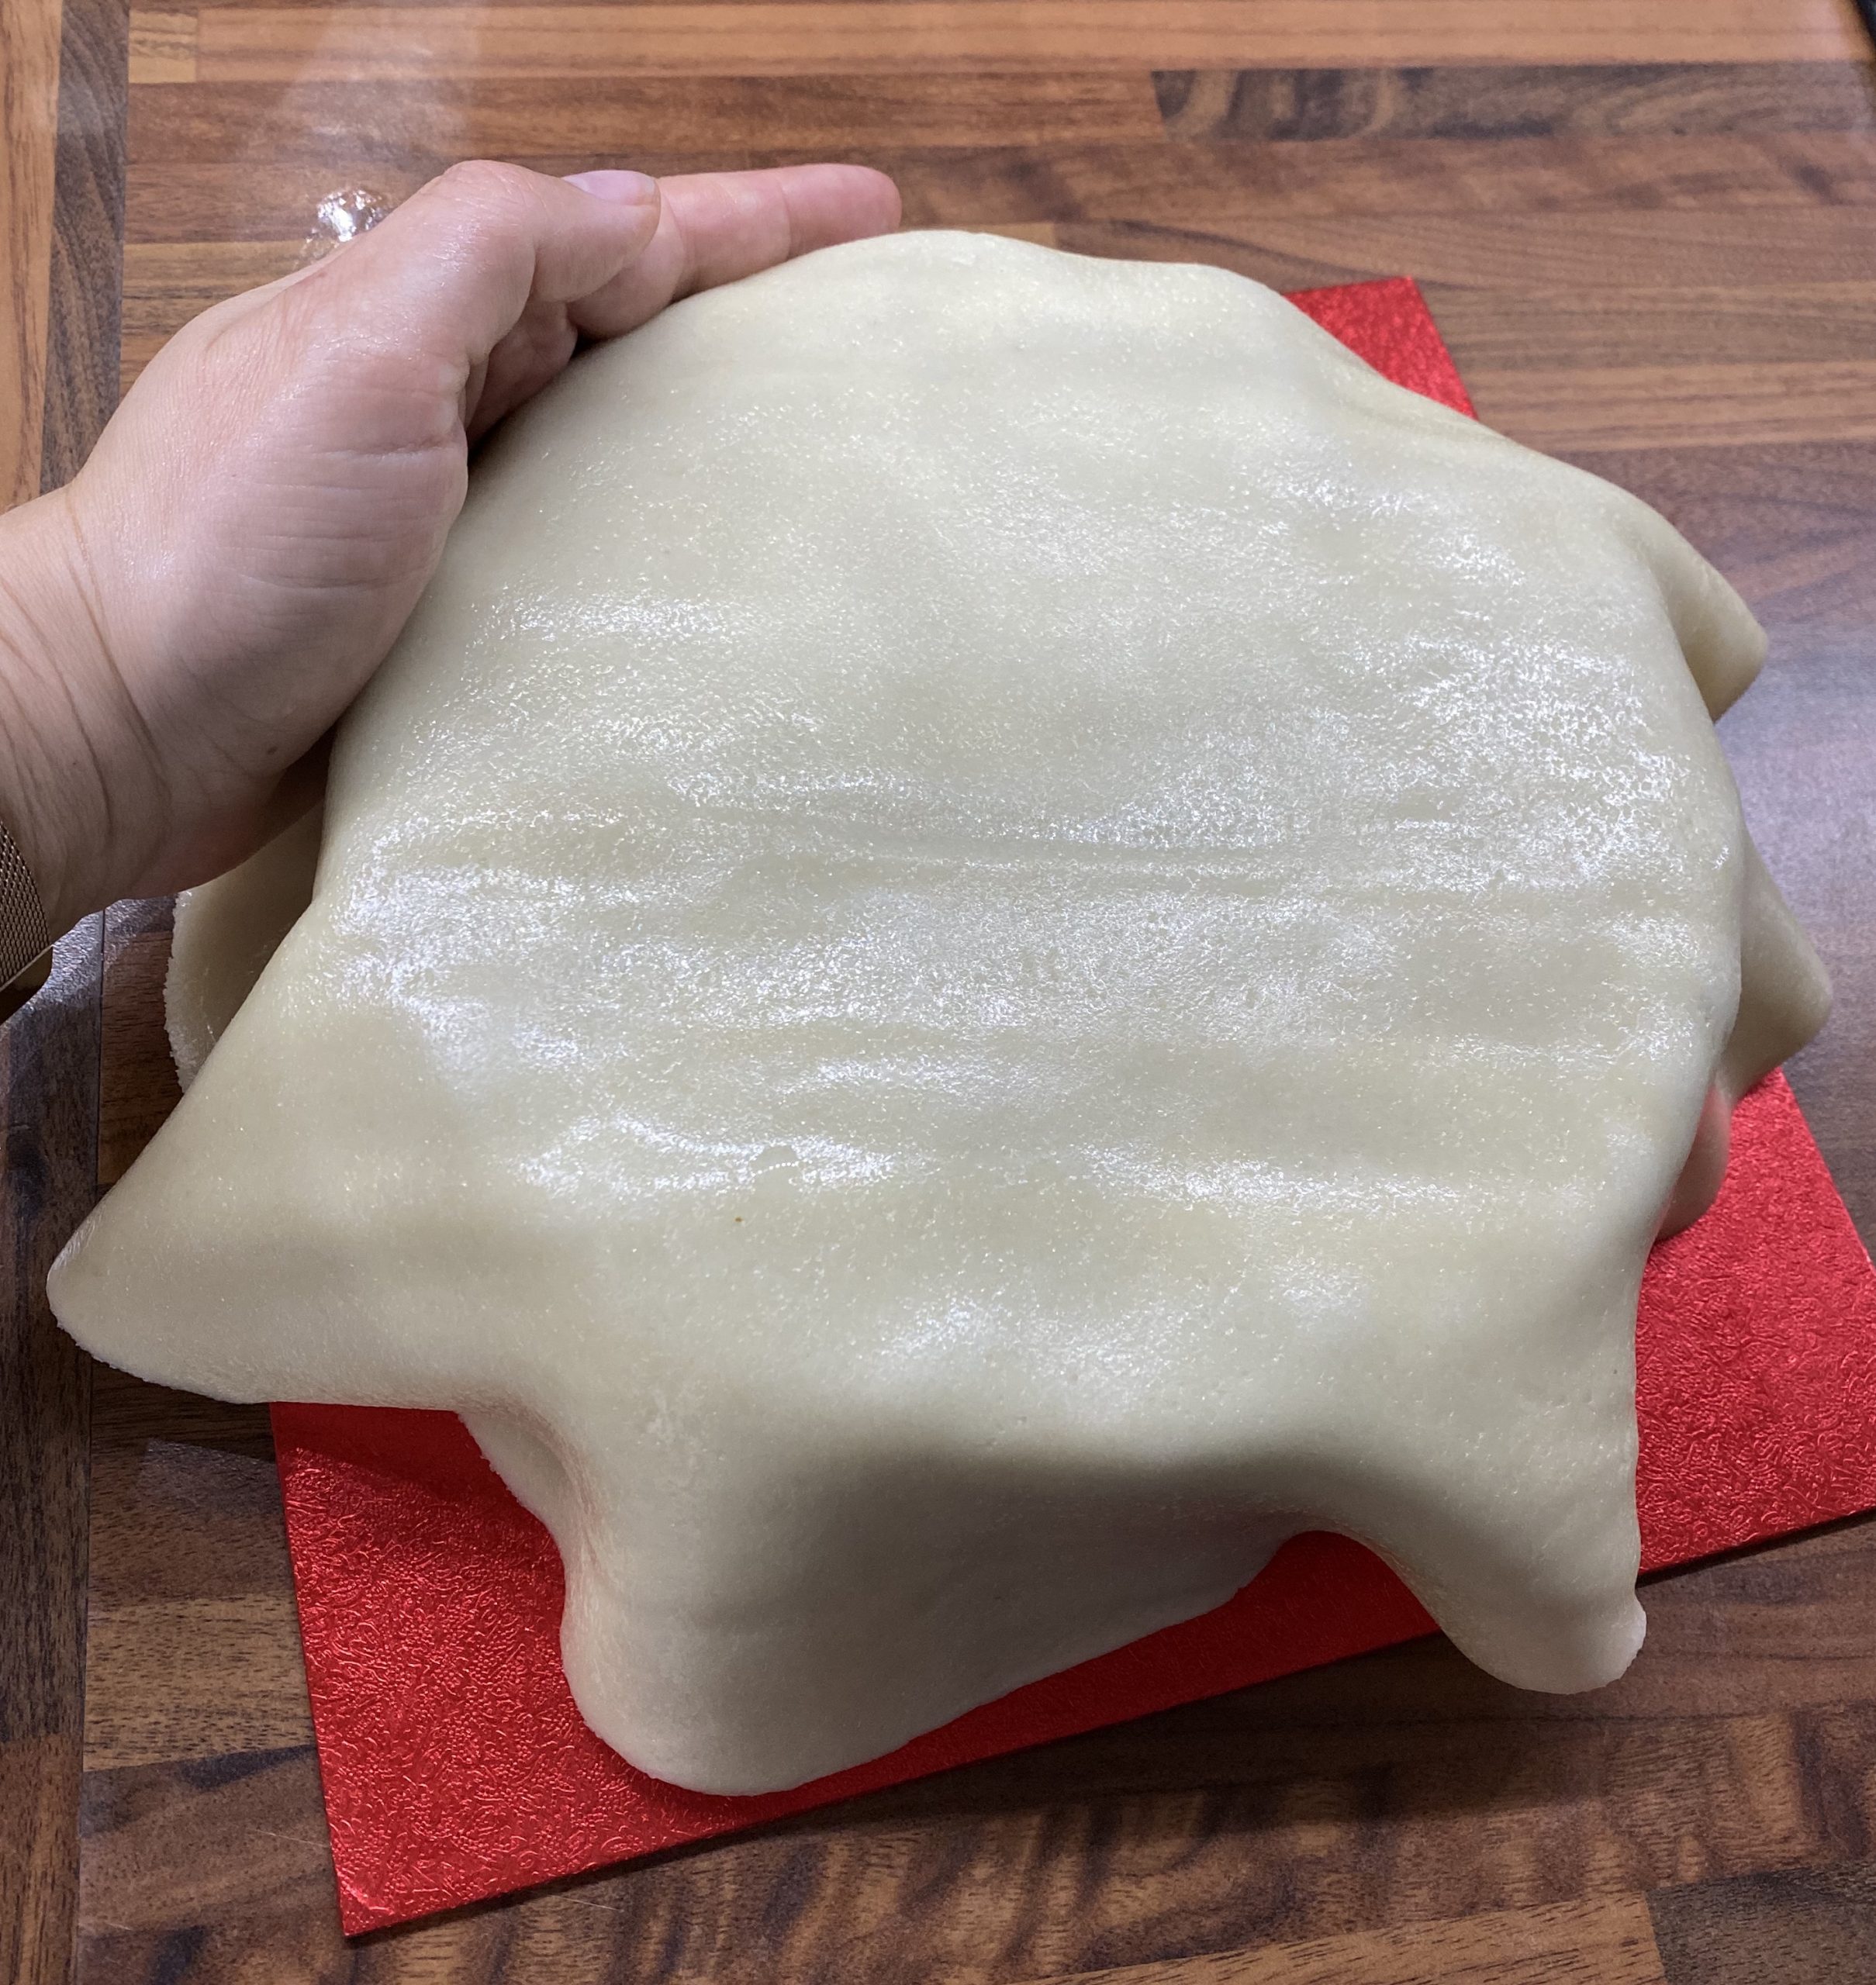
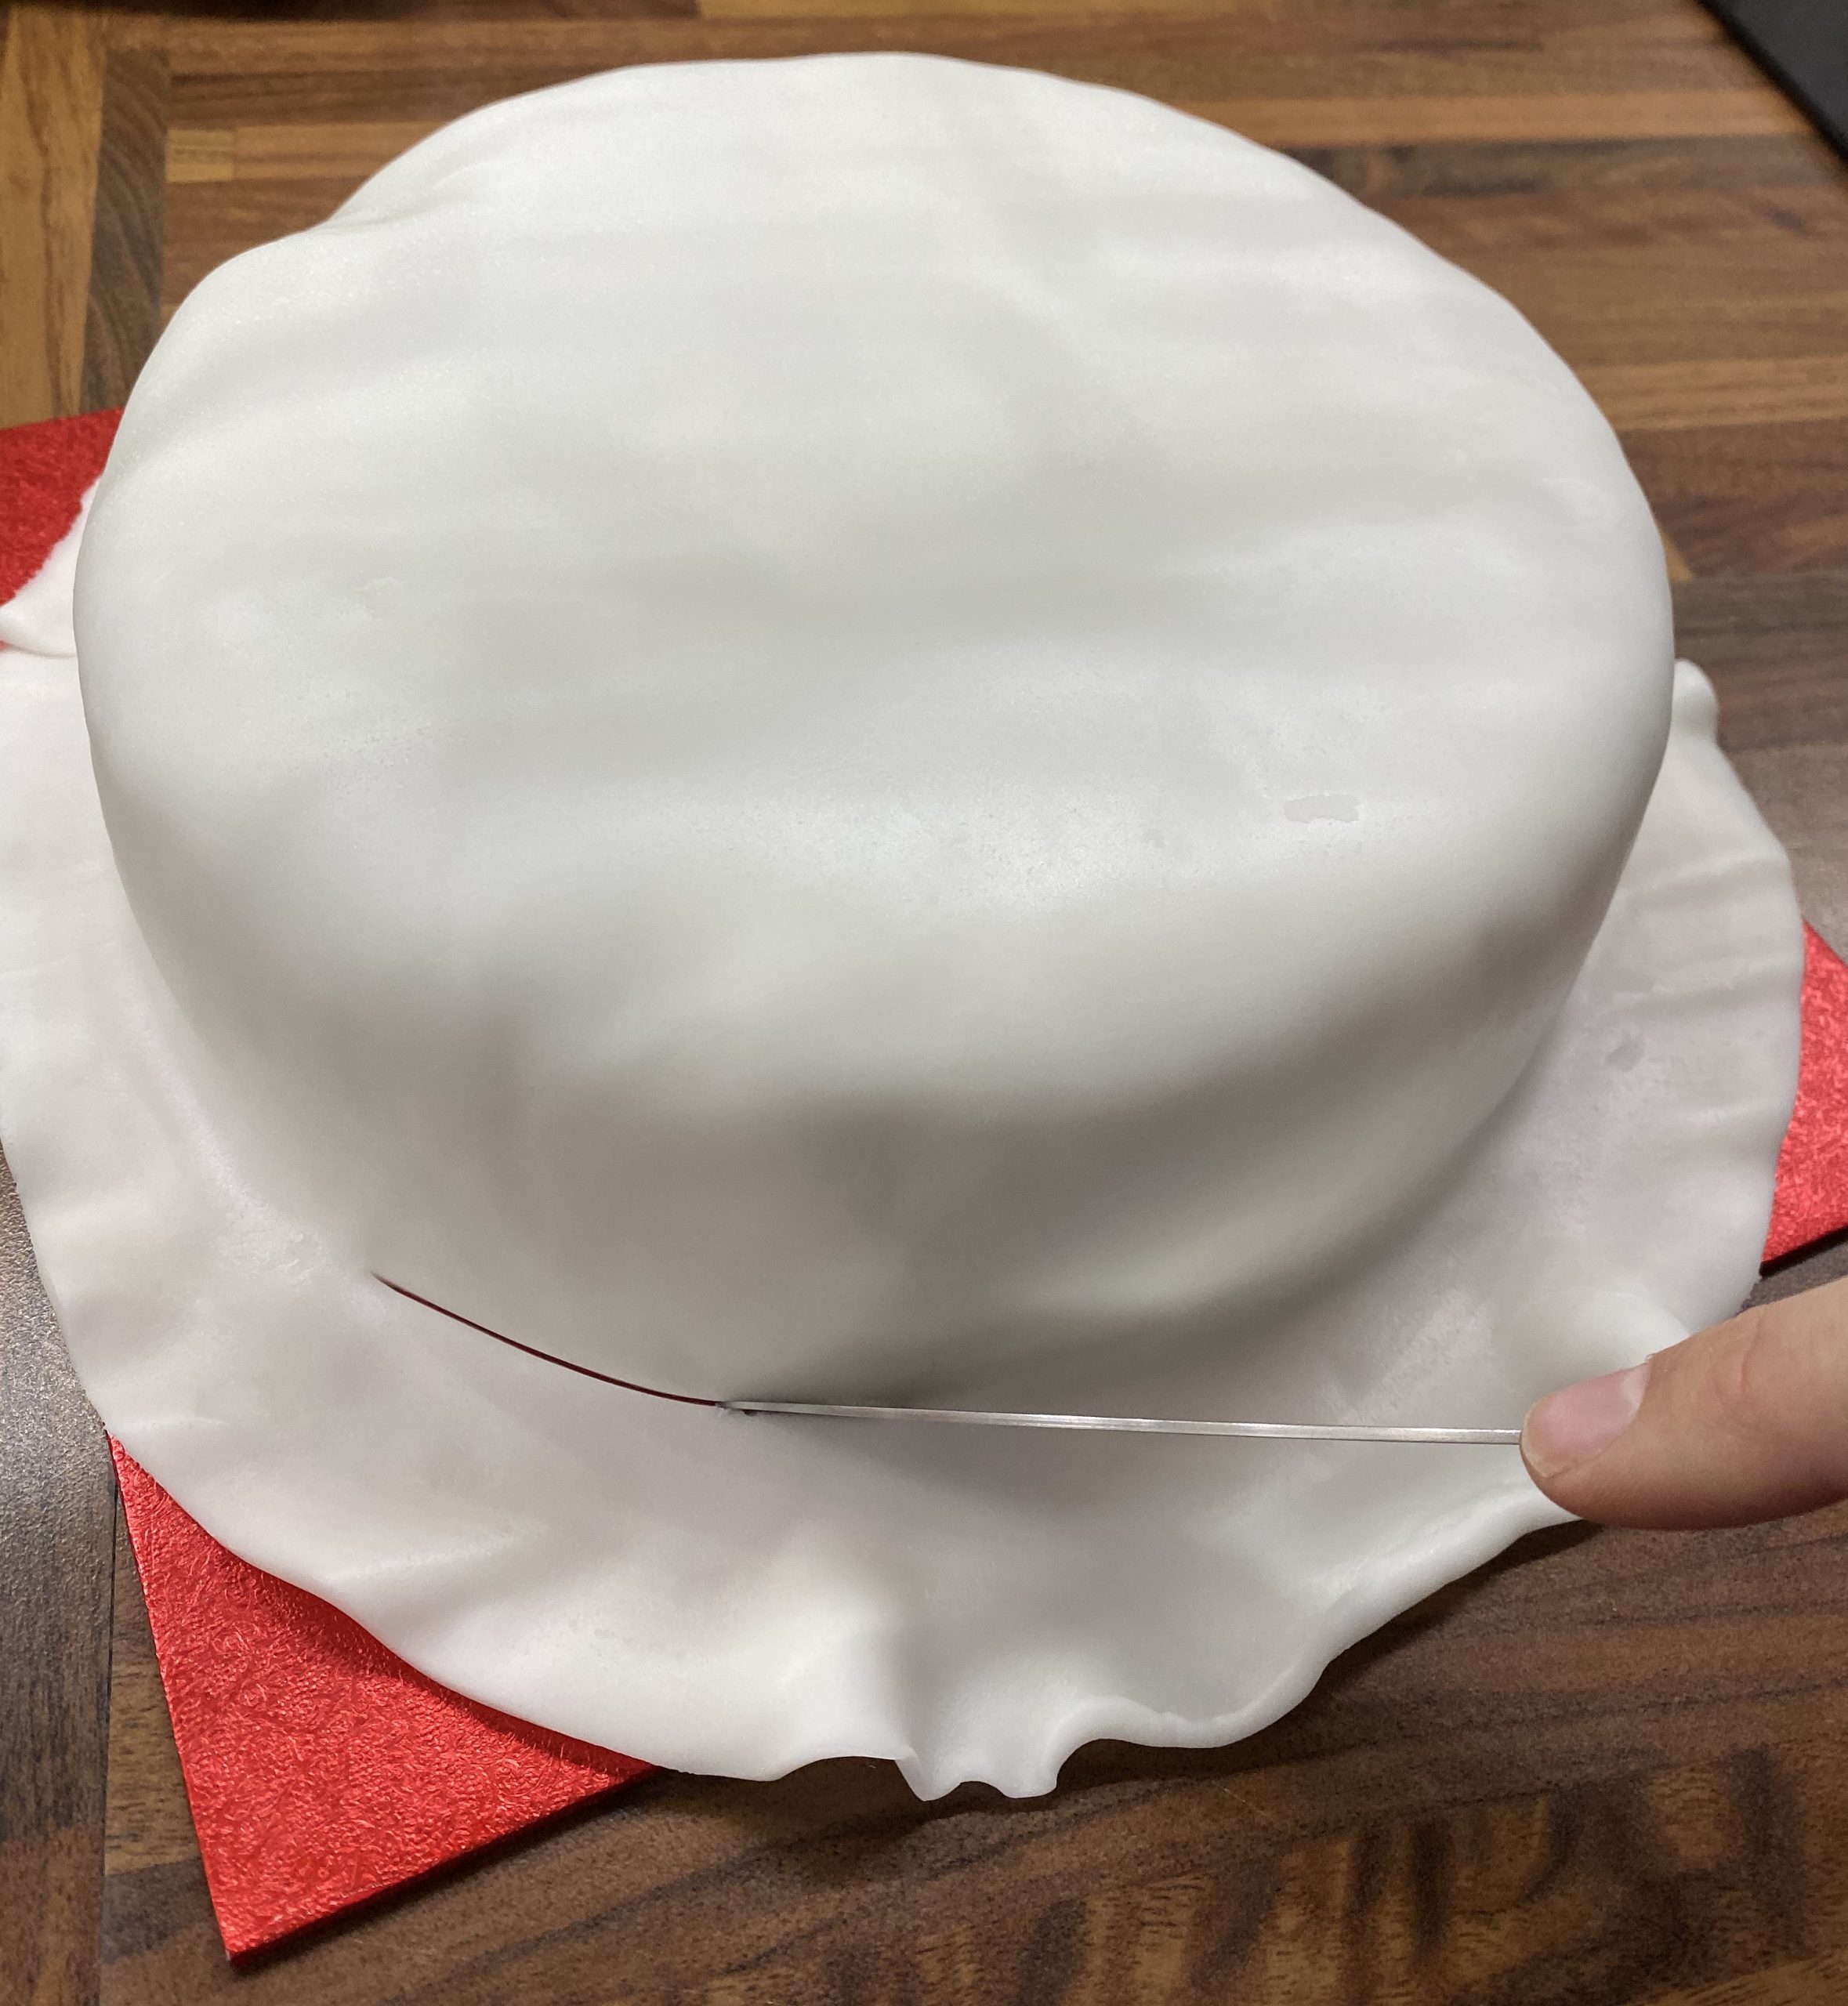
Trim away the excess with a sharp knife. I like to run a table knife around the bottom because it smooths out any rough bits.
Now repeat with the icing, no need for jam this time (as the marzipan is quite sticky!). Don’t wet your hand this time, or you will have a sticky icing disaster. Trim and smooth as before. Keep the leftover bits of icing, as you will need them.
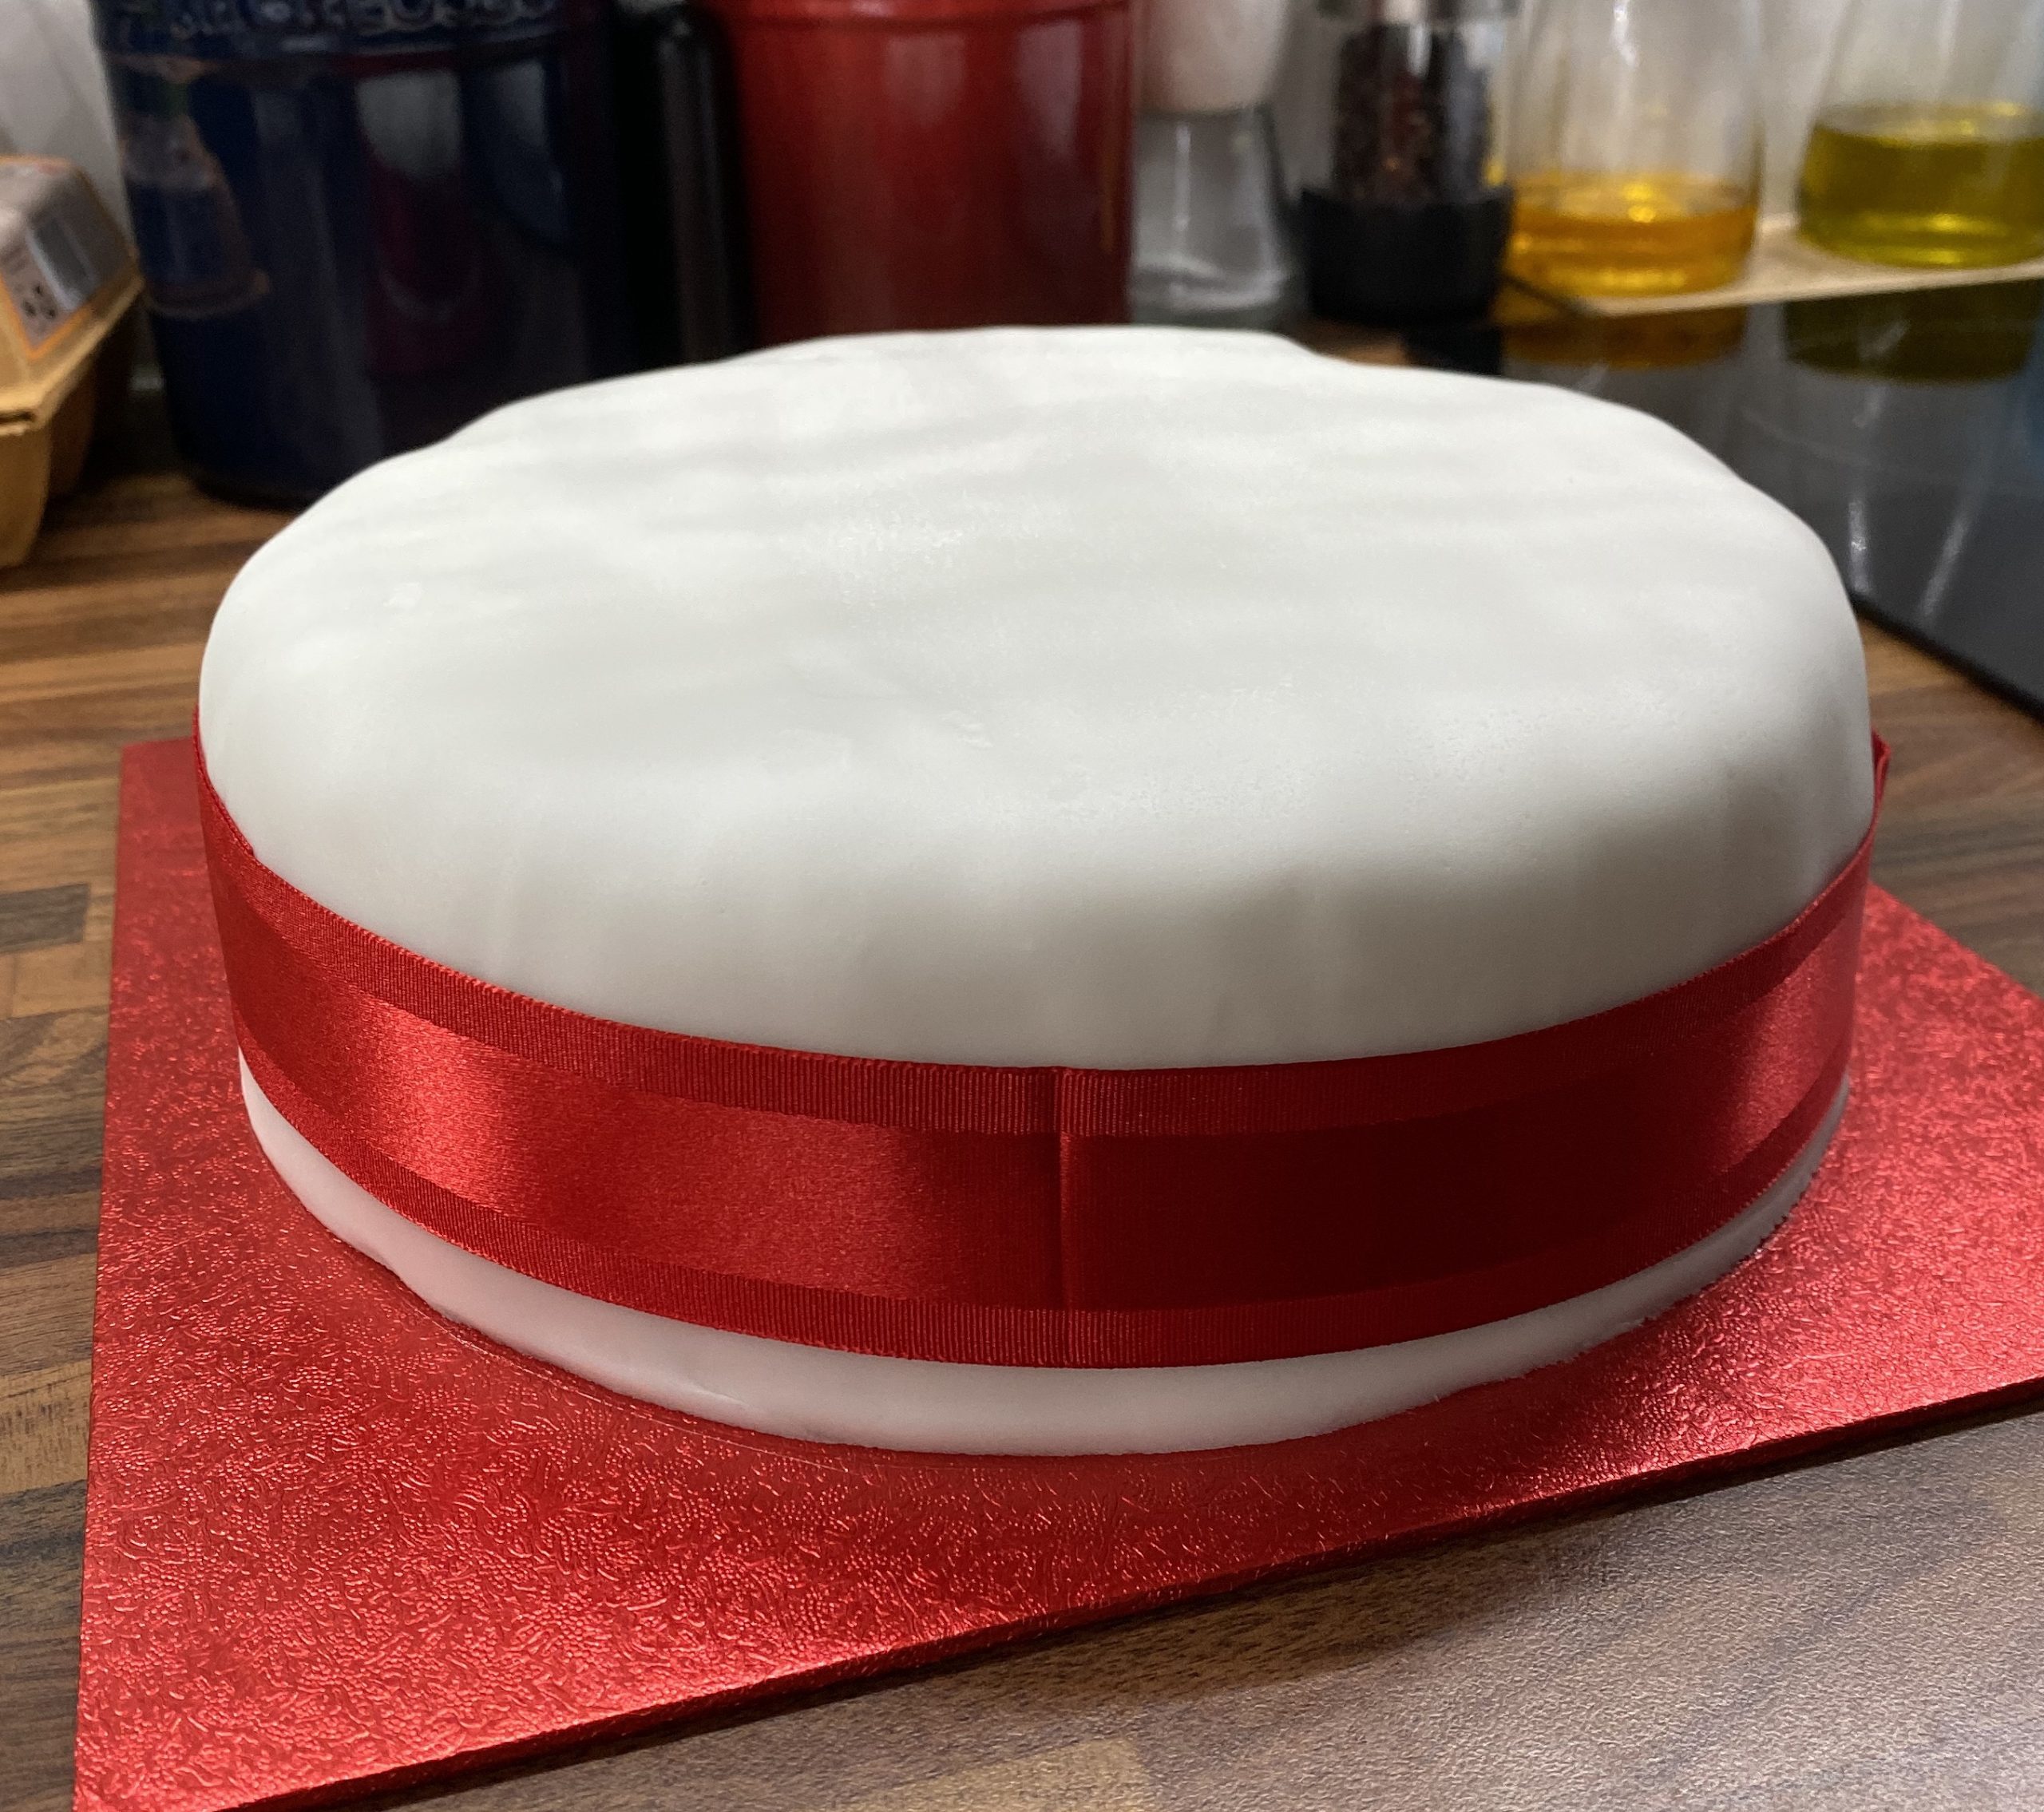
Then I added the fabulous ribbon that came with the base. I was very impressed that it had food-safe sticky tape on, so I could stick it on the cake! If you don’t have a fancy ribbon, then you can just stick extra stars round the edge.
Squish the leftover icing into a ball and flatten. Put it onto the plastic sheet the icing came in (see I told you it would useful later), fold the plastic sheet over and roll the icing flat. I used a rolling pin, but a wine bottle works just as well.
Using a star cutter, cut out 6 stars (or more if you want to overlap them).
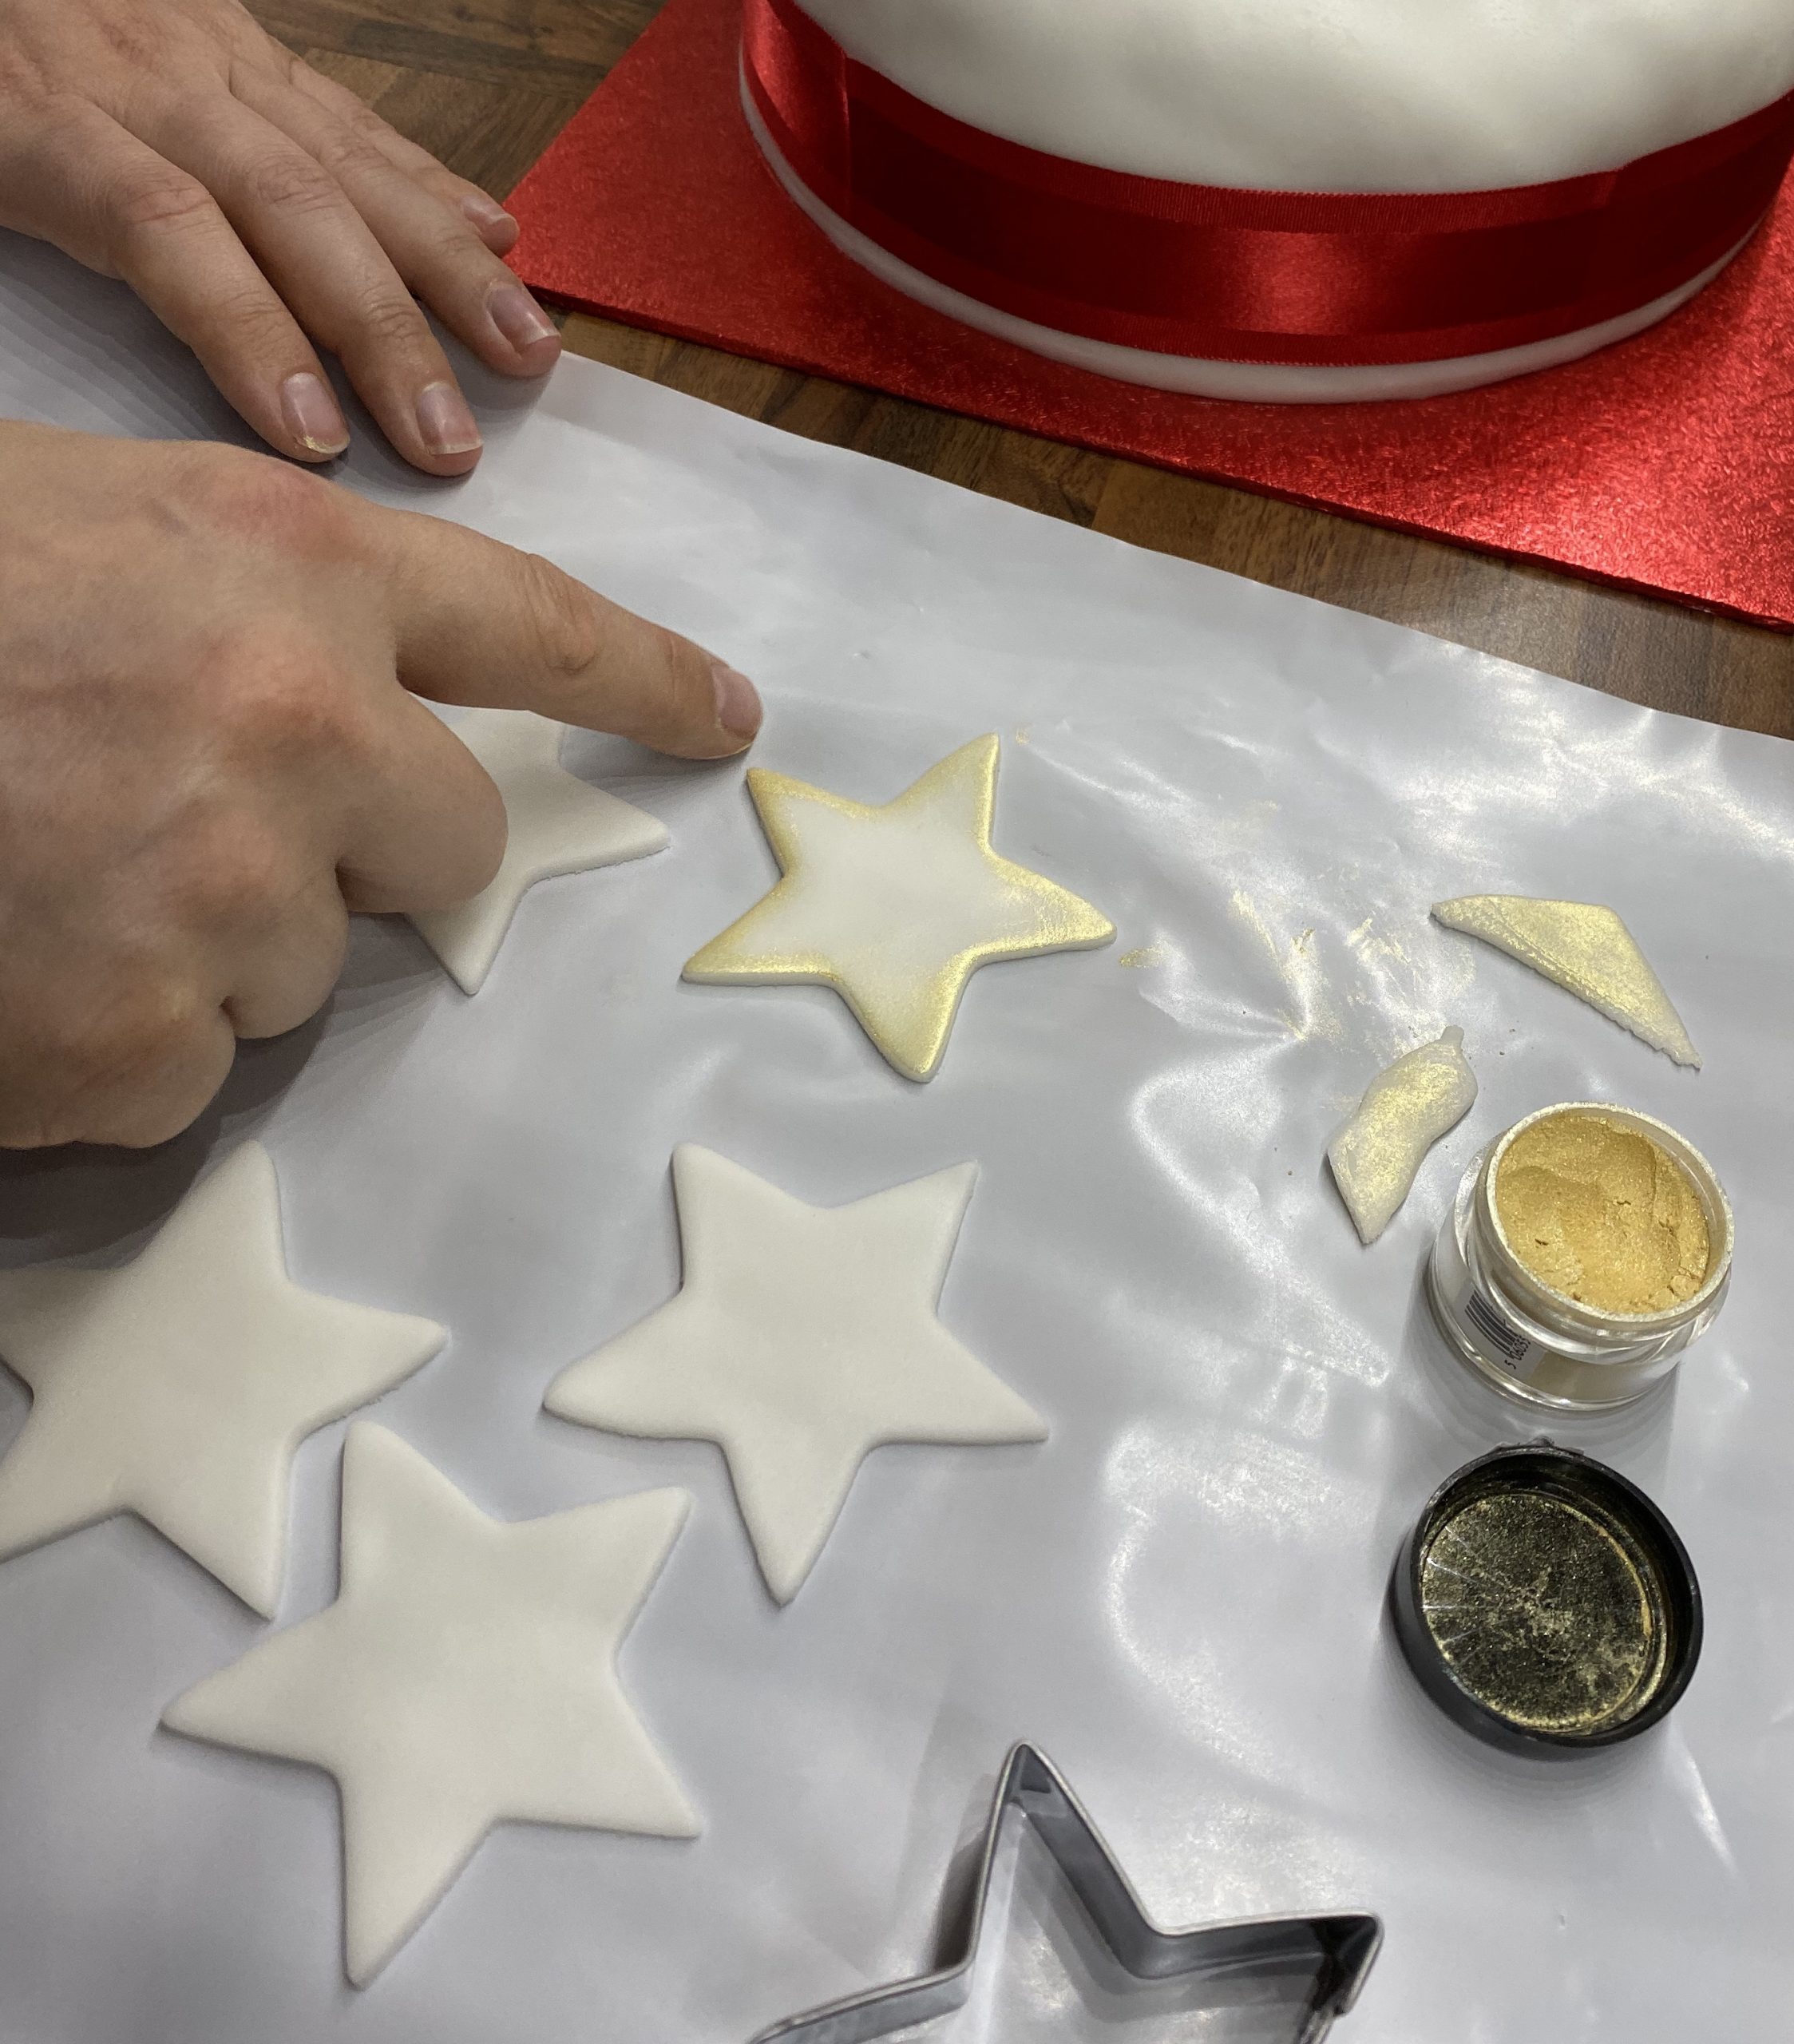
I used my finger to rub some of the gold powder into the stars, but this isn’t essential! Then place the stars onto the top of the cake.
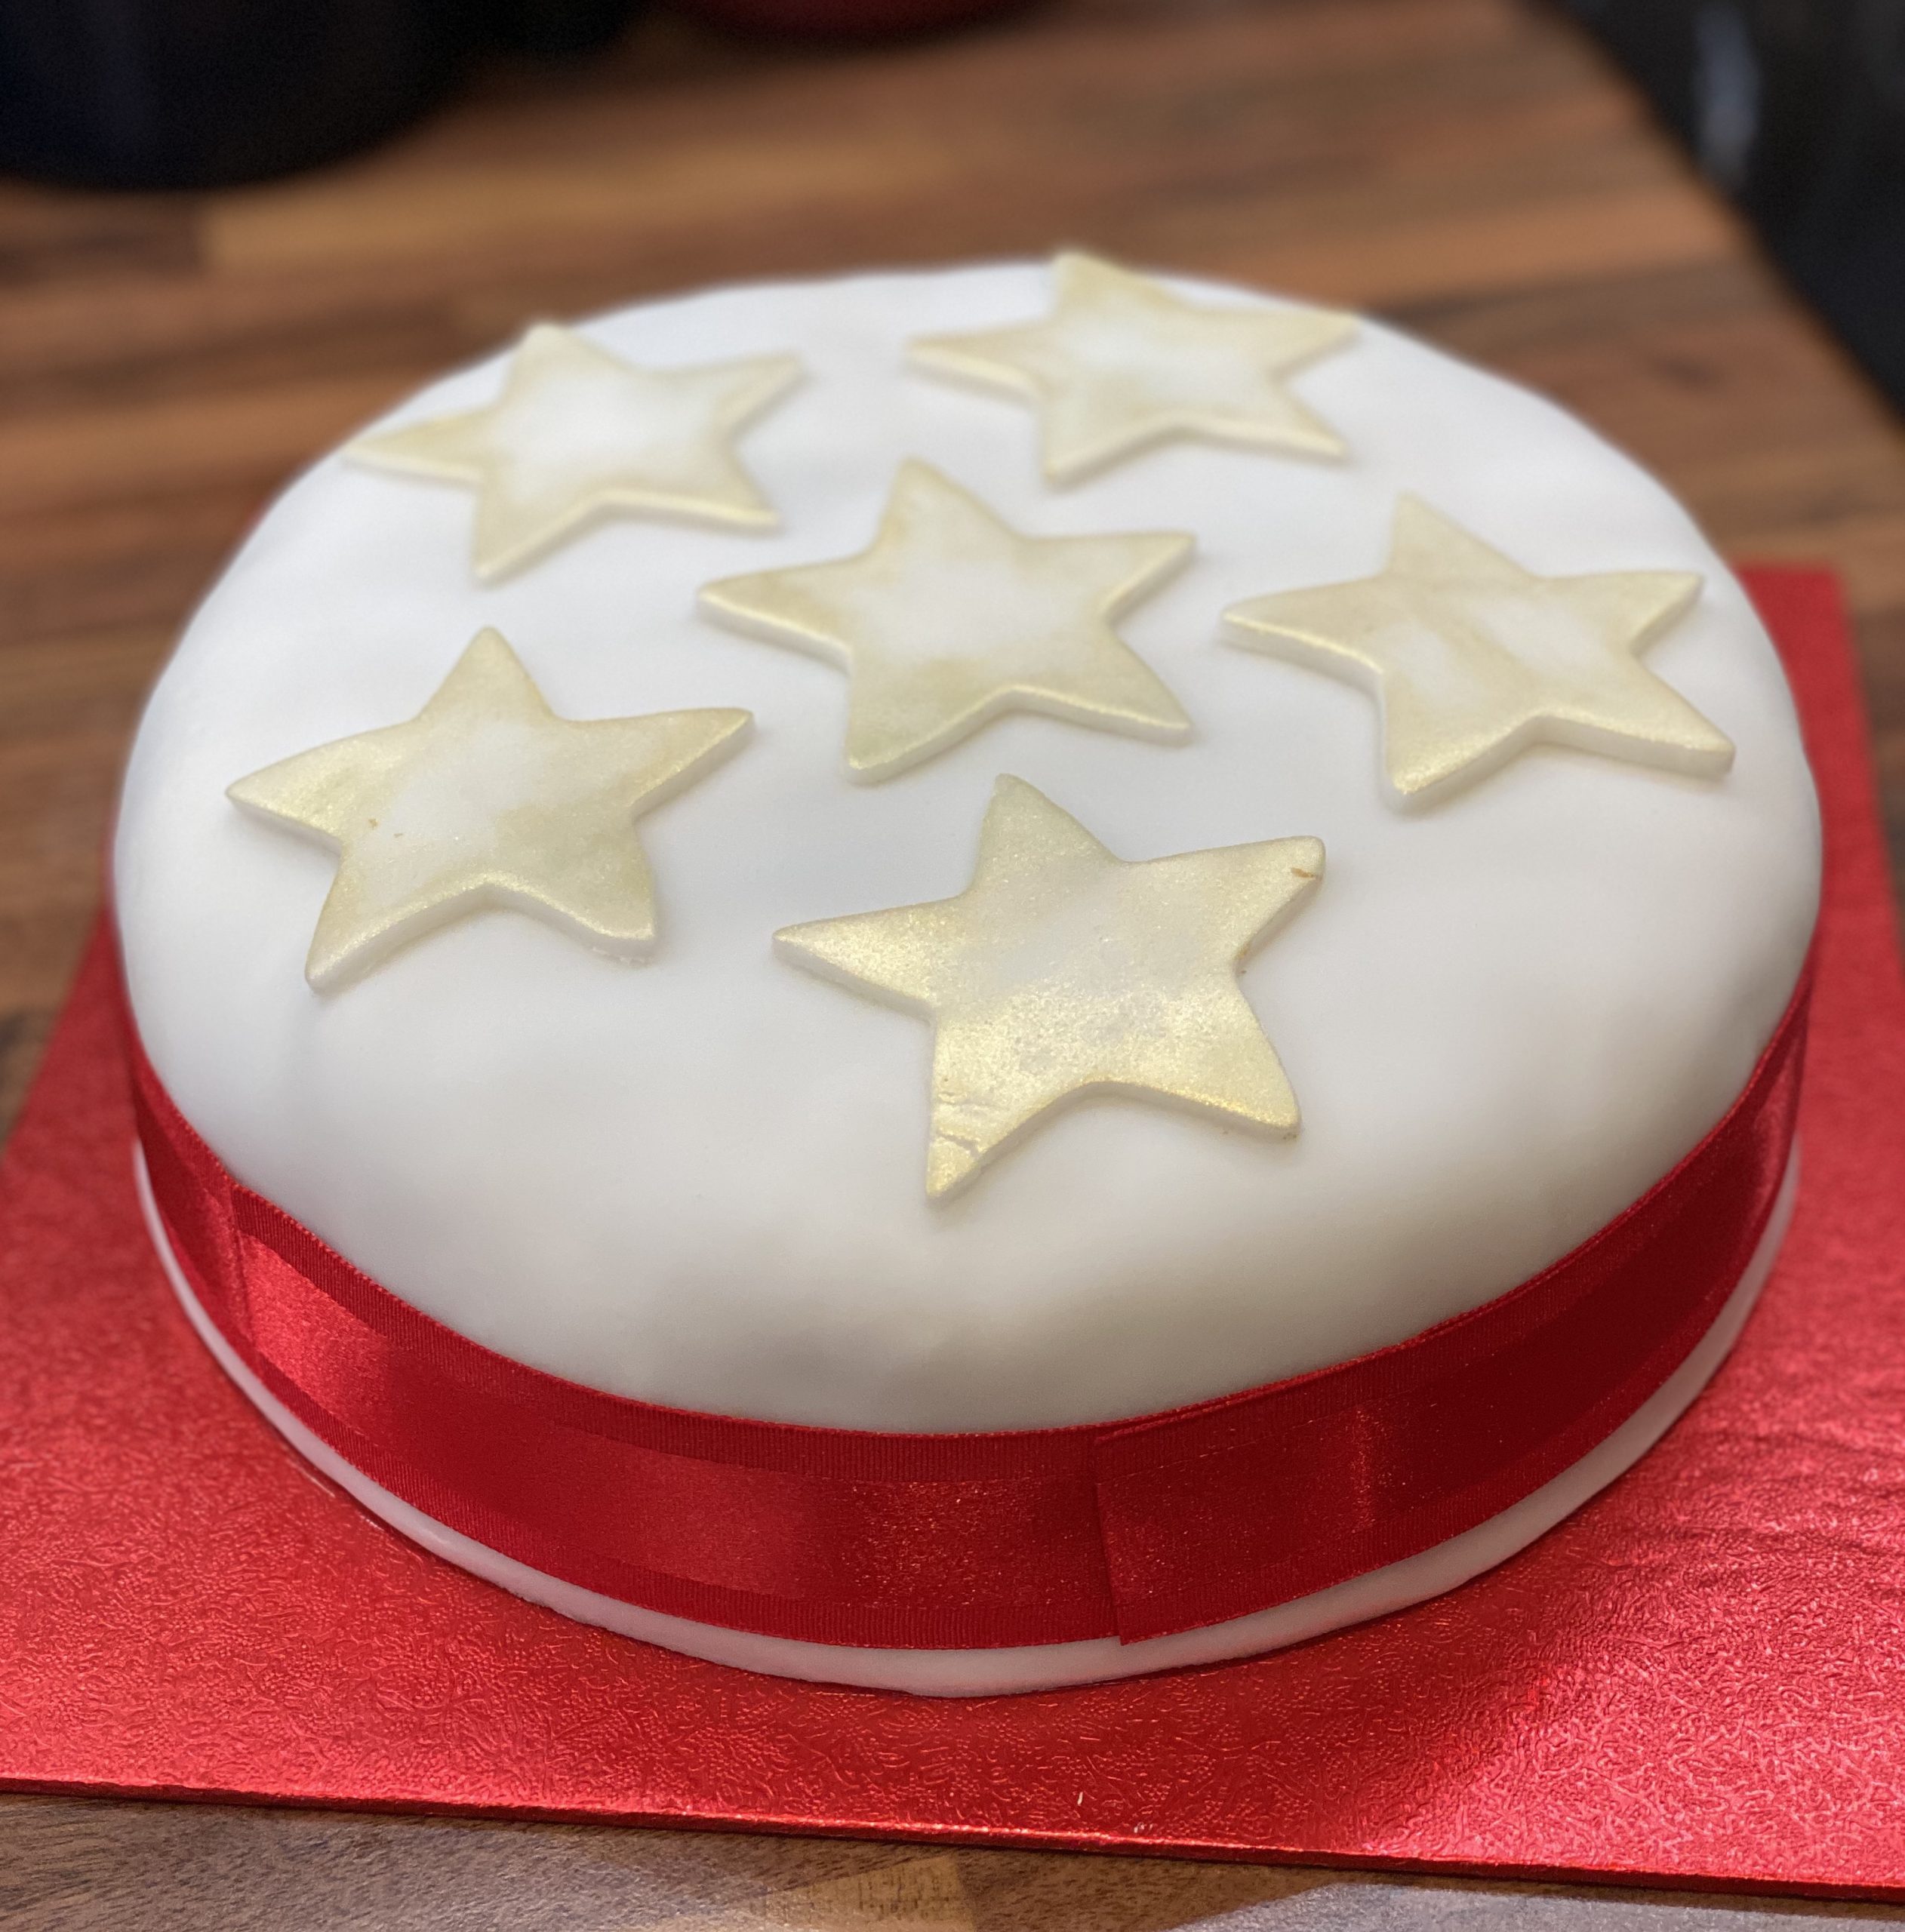
Et voila! Elegant Christmas cake, with hardly any equipment.
Every Christmas I make mincemeat. Normally I make about 10 jars and give most of them away to friends and family. This year, I felt like being a little bit extra. I have been learning how to use the Adobe Suite of software this year. Mainly Illustrator and Premiere Pro. So I thought this would be the ideal opportunity to work on my Illustrator skills (or lack thereof!) and make fancy labels for my jars!
First the mincemeat recipe! I always use a Delia recipe, which has never failed me. The quantity perfectly fits 10 mini jars from Lakeland. They are 8oz jars, and Kilner does some nice ones as well. Conveniently, each mini jars holds enough mincemeat to make 12 mince pies (made in a standard fairy cake tin). It takes a weekend to make. I prep the ingredients on Saturday evening and leave them overnight, then Sunday the bowl is in the oven for a few hours. So make sure you factor in enough time!
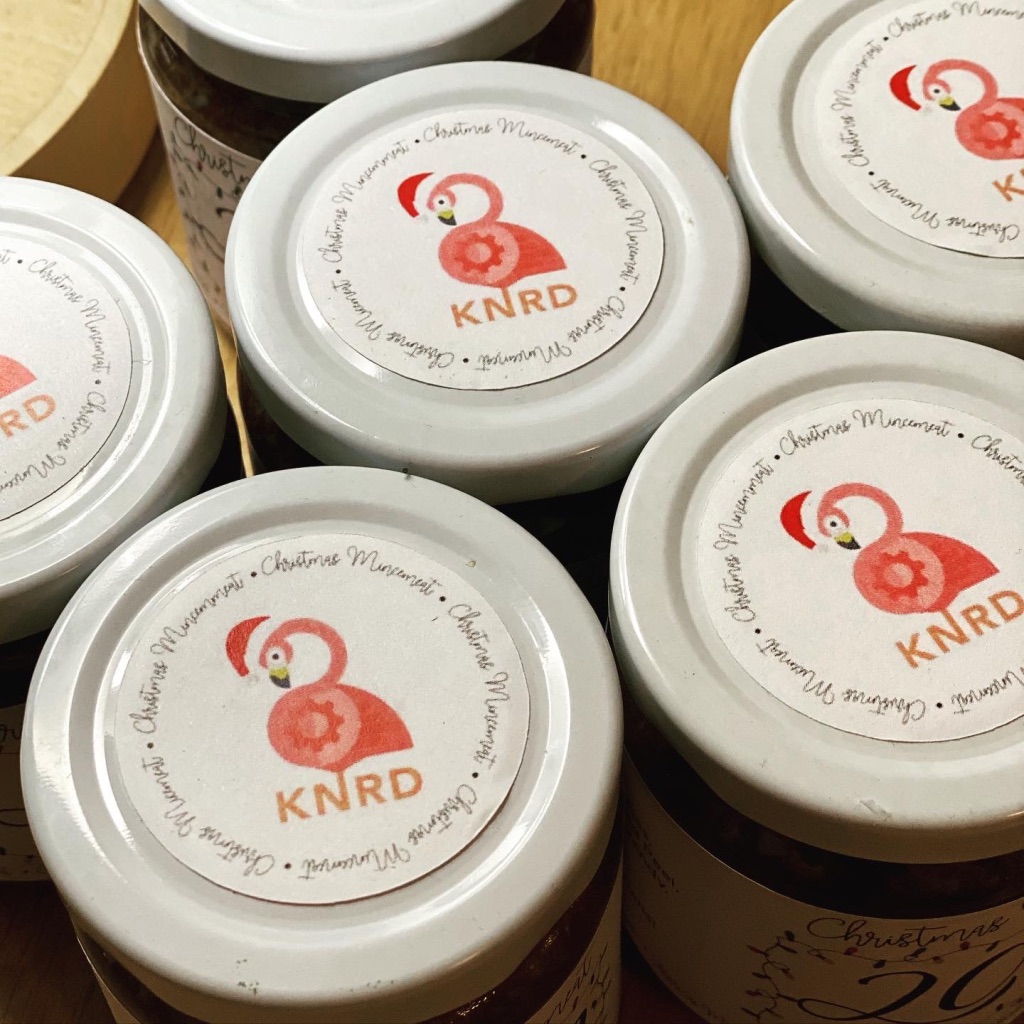
I wanted to create a label for the top of the jar with a Christmassy version of my Flamingo Logo.
After a bit of fiddling with adding text in a circle, the label for the lid was complete. The wrap-around label for the jar was much more complicated, as I wanted to add fairy lights and a mince pie recipe. So I decided to use InDesign. Several frustrating hours later (spread over a few days) and quite a bit of googling, I came up with this.

Now I had to work out how to print and then cut them out. I could just use scissors, but we’ve recently bought a Cricut Maker at school and I knew it had a print and cut feature. After quite a bit of trial and error, I worked out how to print out a PDF of my design and send it to cut on the Cricut.
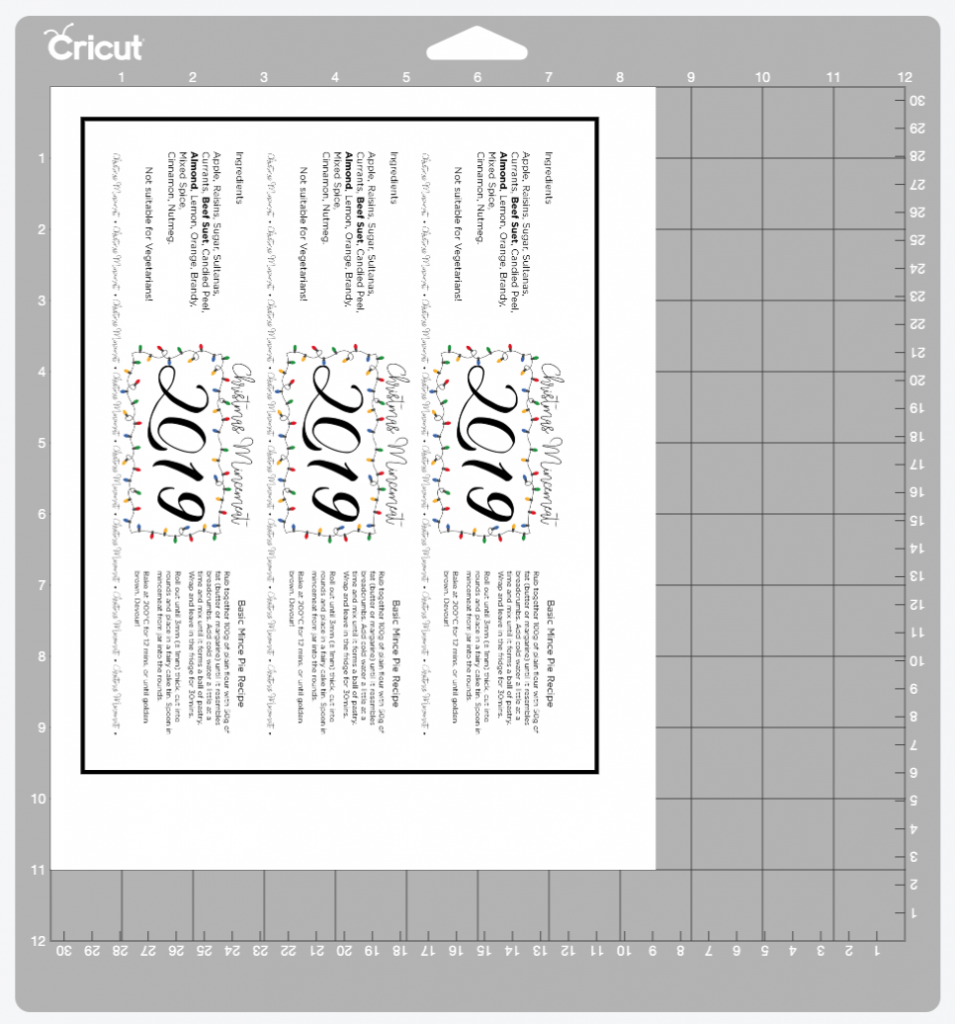
It worked very well, although I do need to work on the bleed at the edges of the design (the circular labels didn’t fair as well).
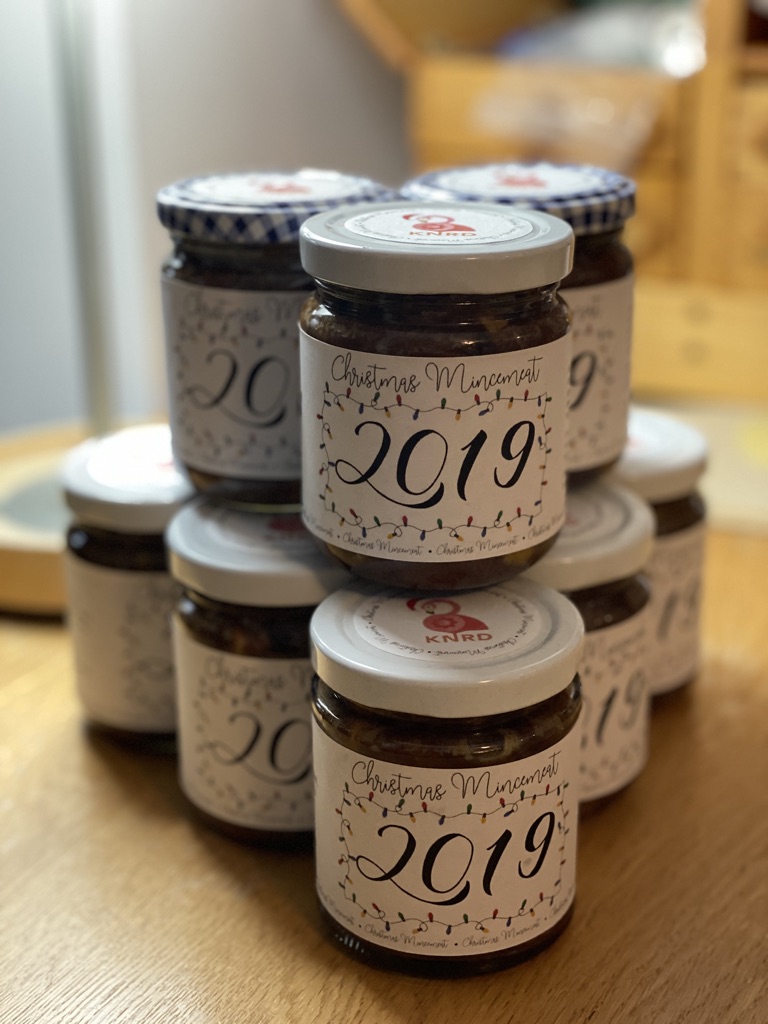
The finished jars look very professional and the jar tops, with my logo, look amazing! Now that I have the basic template it should be much faster to make labels again next year.
This Christmas I wanted to make some project bags for my family, as I am (perhaps unsurprisingly) surrounded by crafty people. One bag I particularly wanted to make was a round base Japanese knot bag. My boyfriend’s mum had been very impressed by my own knot bag when I went to visit, so I wanted to make one for her. But as the one I owned had been given to me in a swap, I didn’t know how to make one!
I naively thought ‘how hard can it be’, as I knew how to make a basic two sided knot bag. This one only had the addition of a round panel at the bottom. It turned out to be very difficult, and two failed bags later I decided to search for some instructions!
It transpired that there were very few places with instructions. In fact the only complete set of instructions I could find was on a French site called DIY District. The obvious problem was it was in French, a language I only have rudimentary knowledge of. So Google Translate to the rescue!
So I don’t forget how to make this bag in future, I am going to write my own set of instructions below. But I would like to thank DIY District for their very clear instructions!
Step 1
Draft a pattern. I used the measurements on DIY District. There is a minor maths equation error, but trust me – the circle does need to be 147mm diameter.
All seams are 10mm.
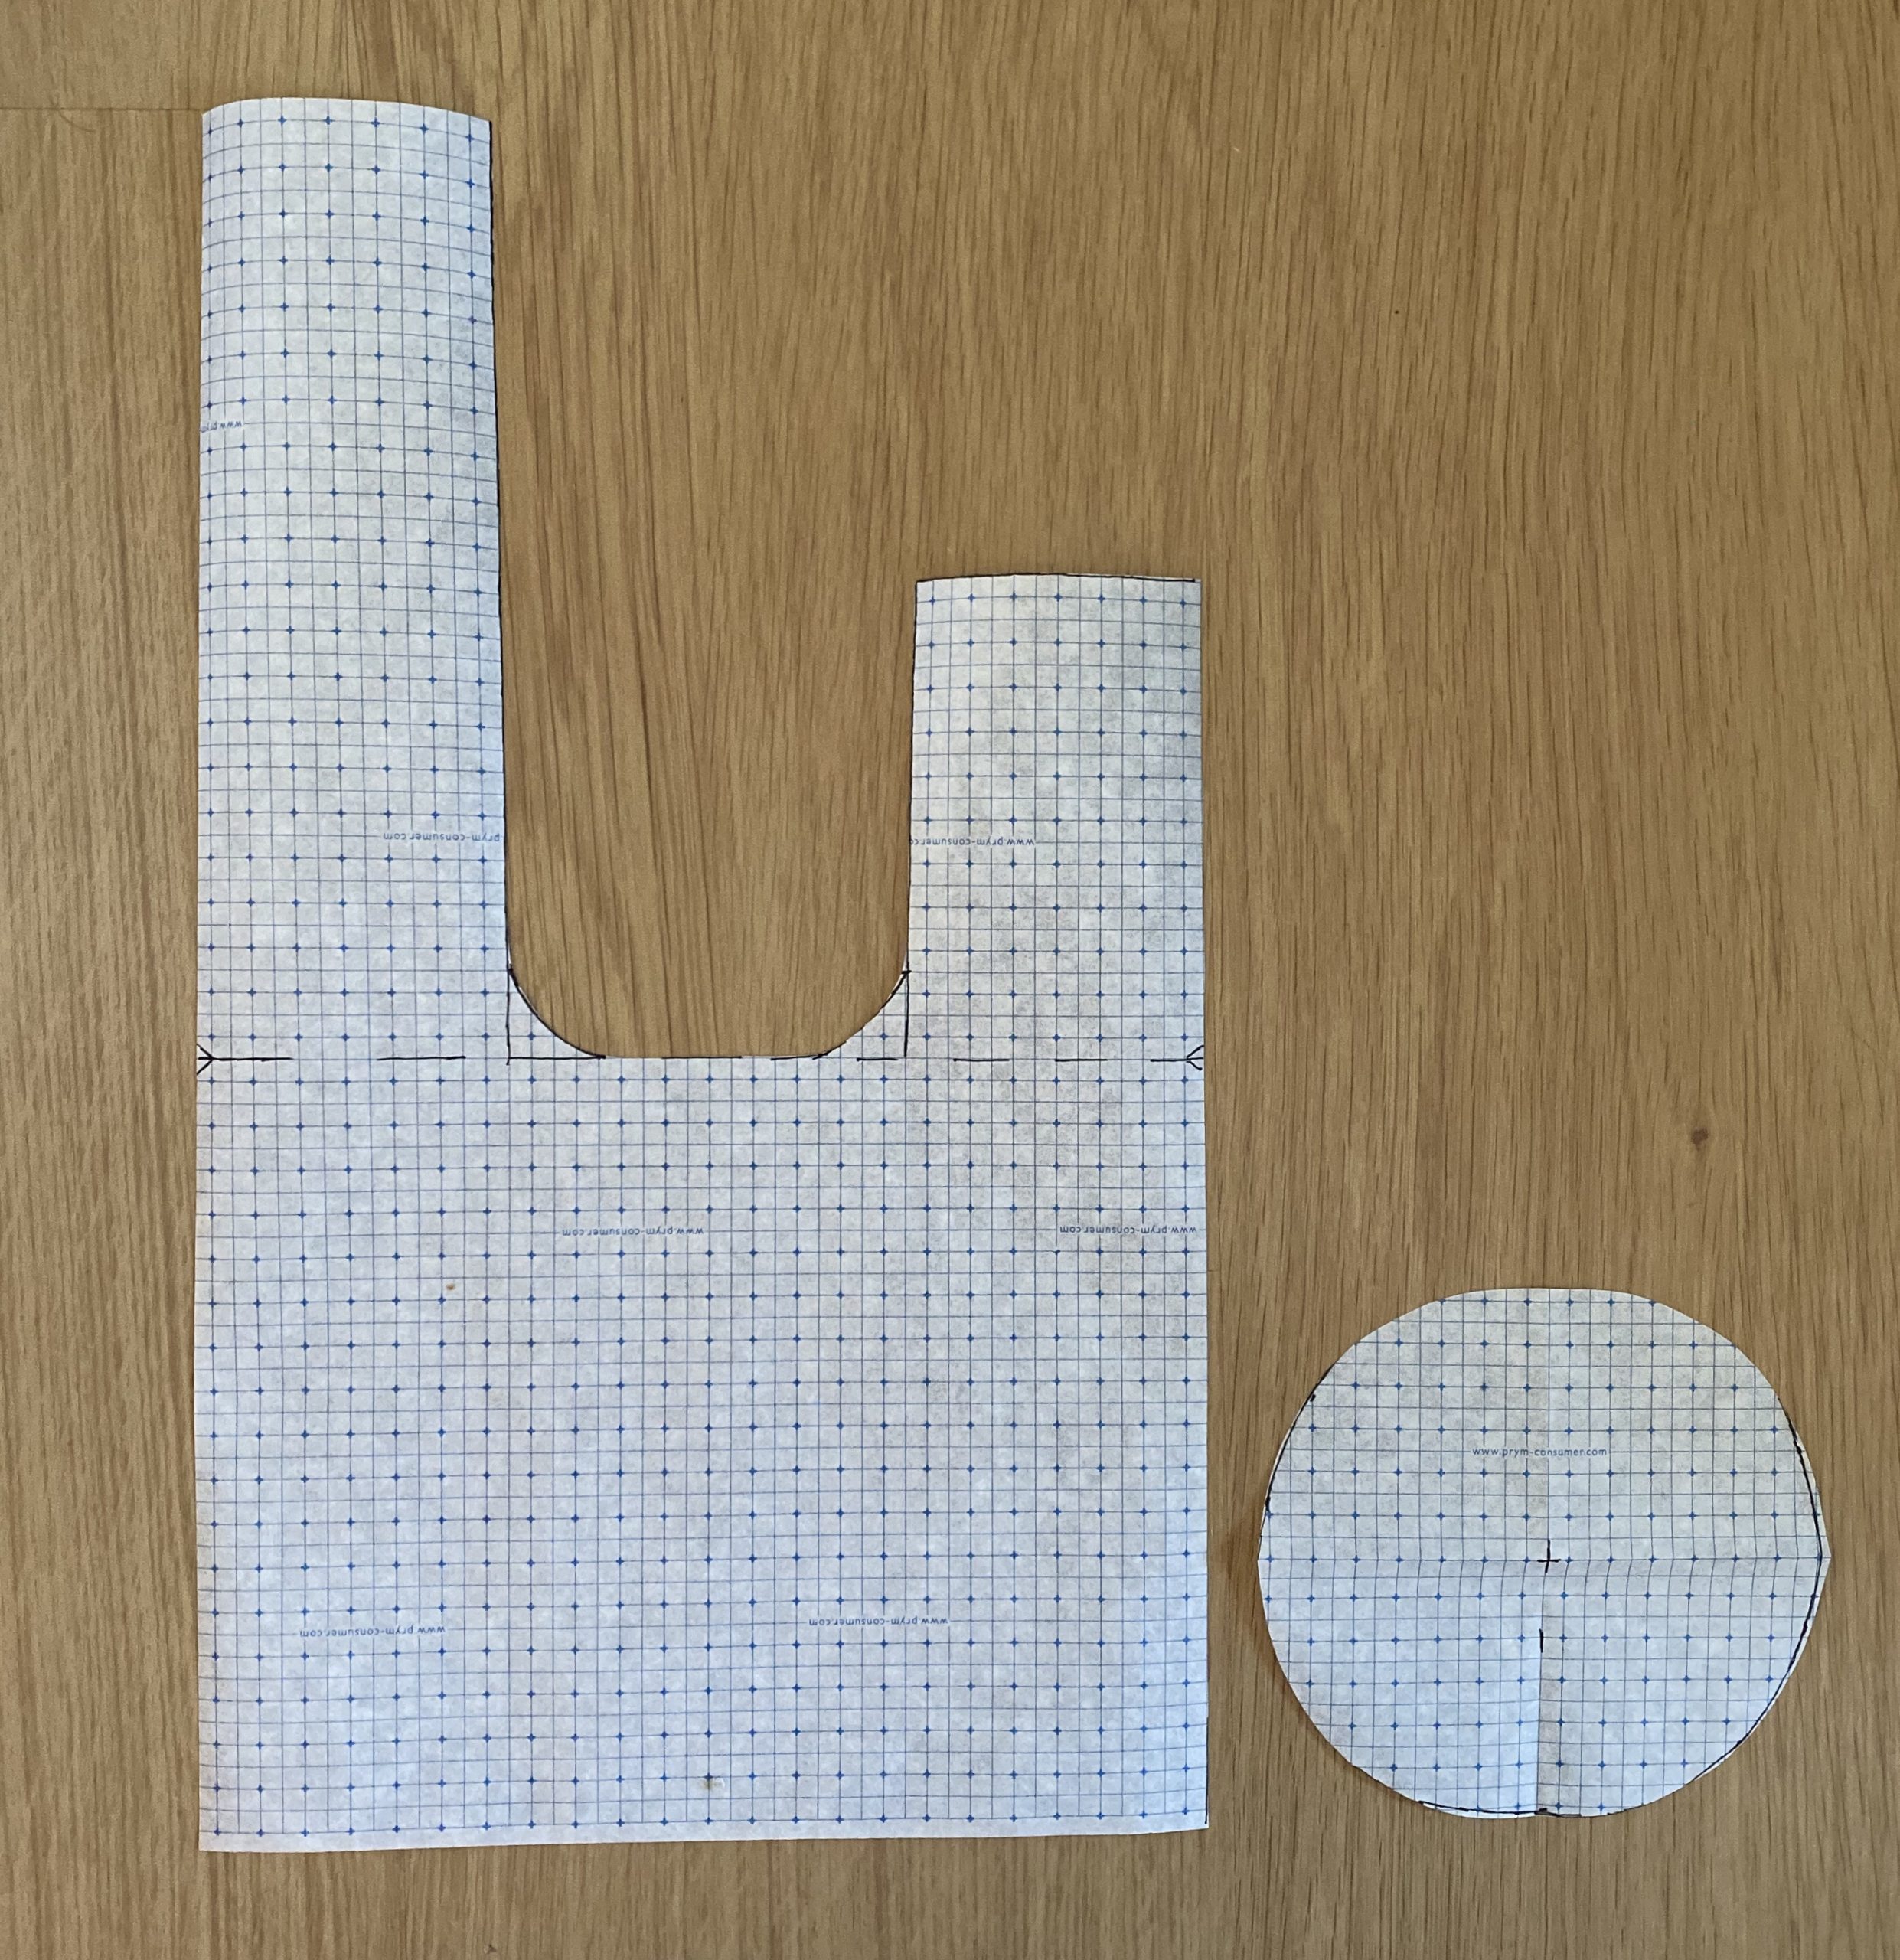
Step 2
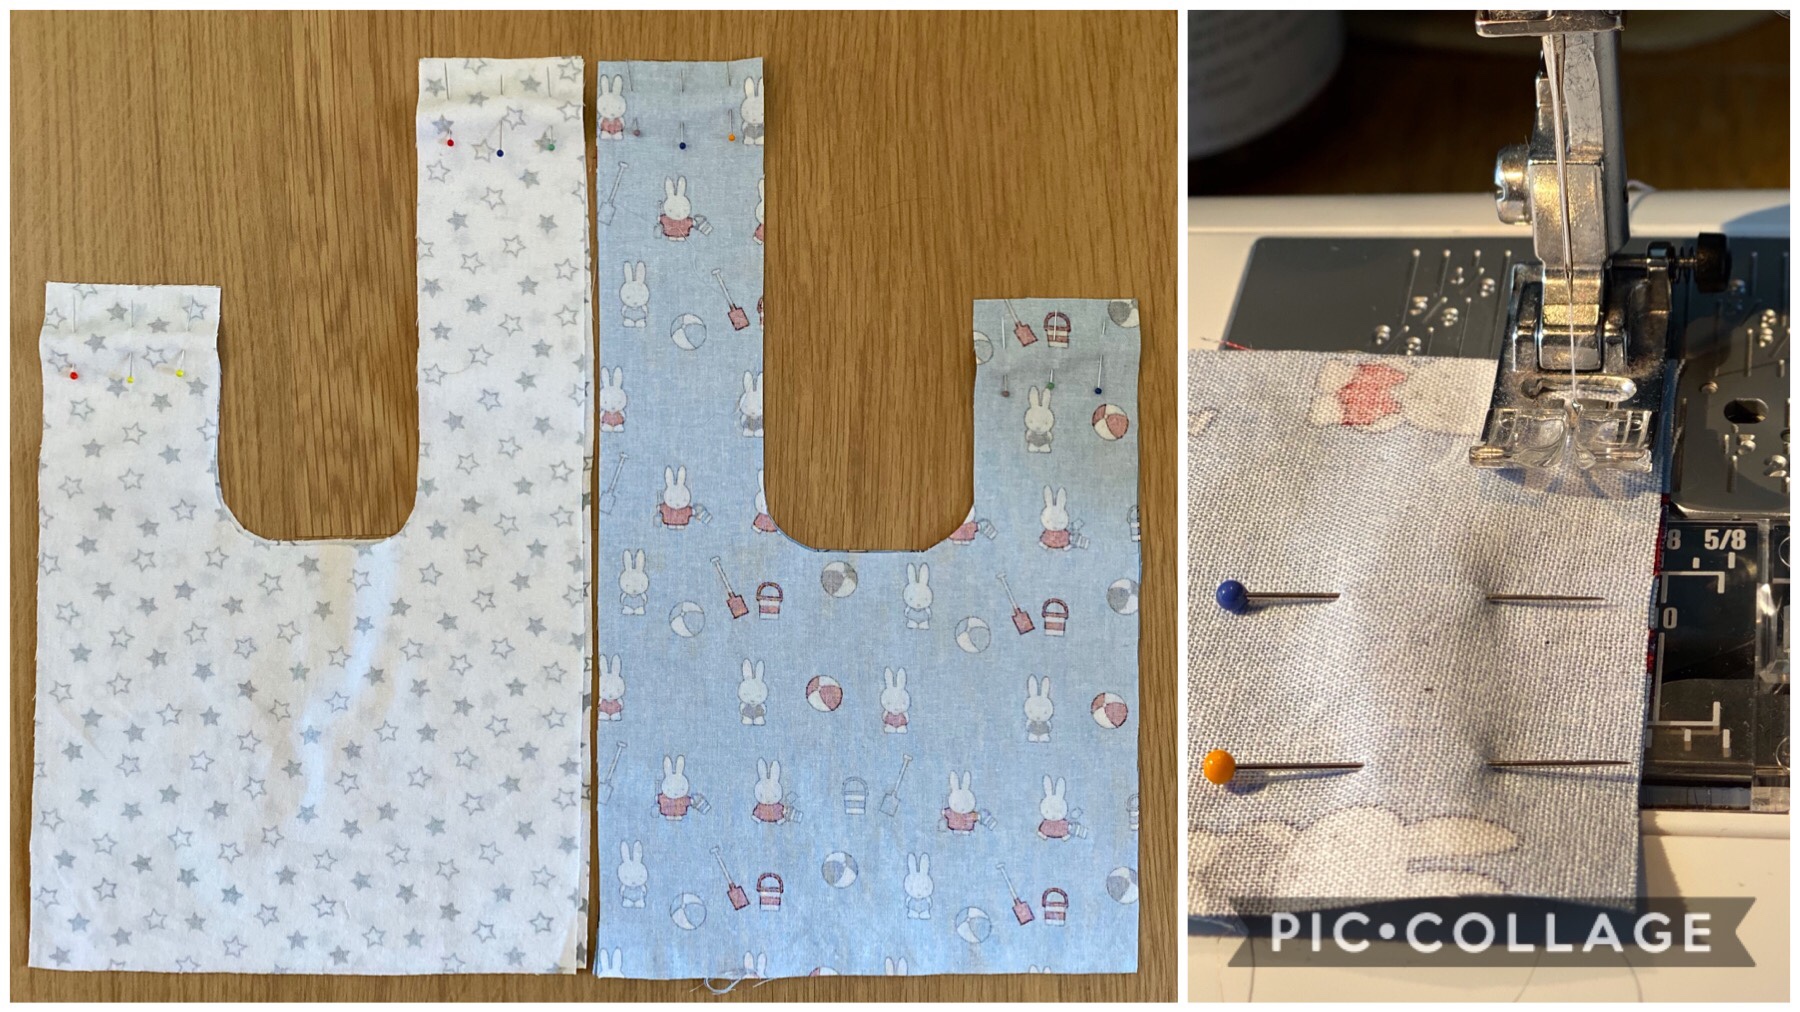
Cut 2 bag pieces out of your outer fabric, 2 from your lining fabric and 1 circle from each.
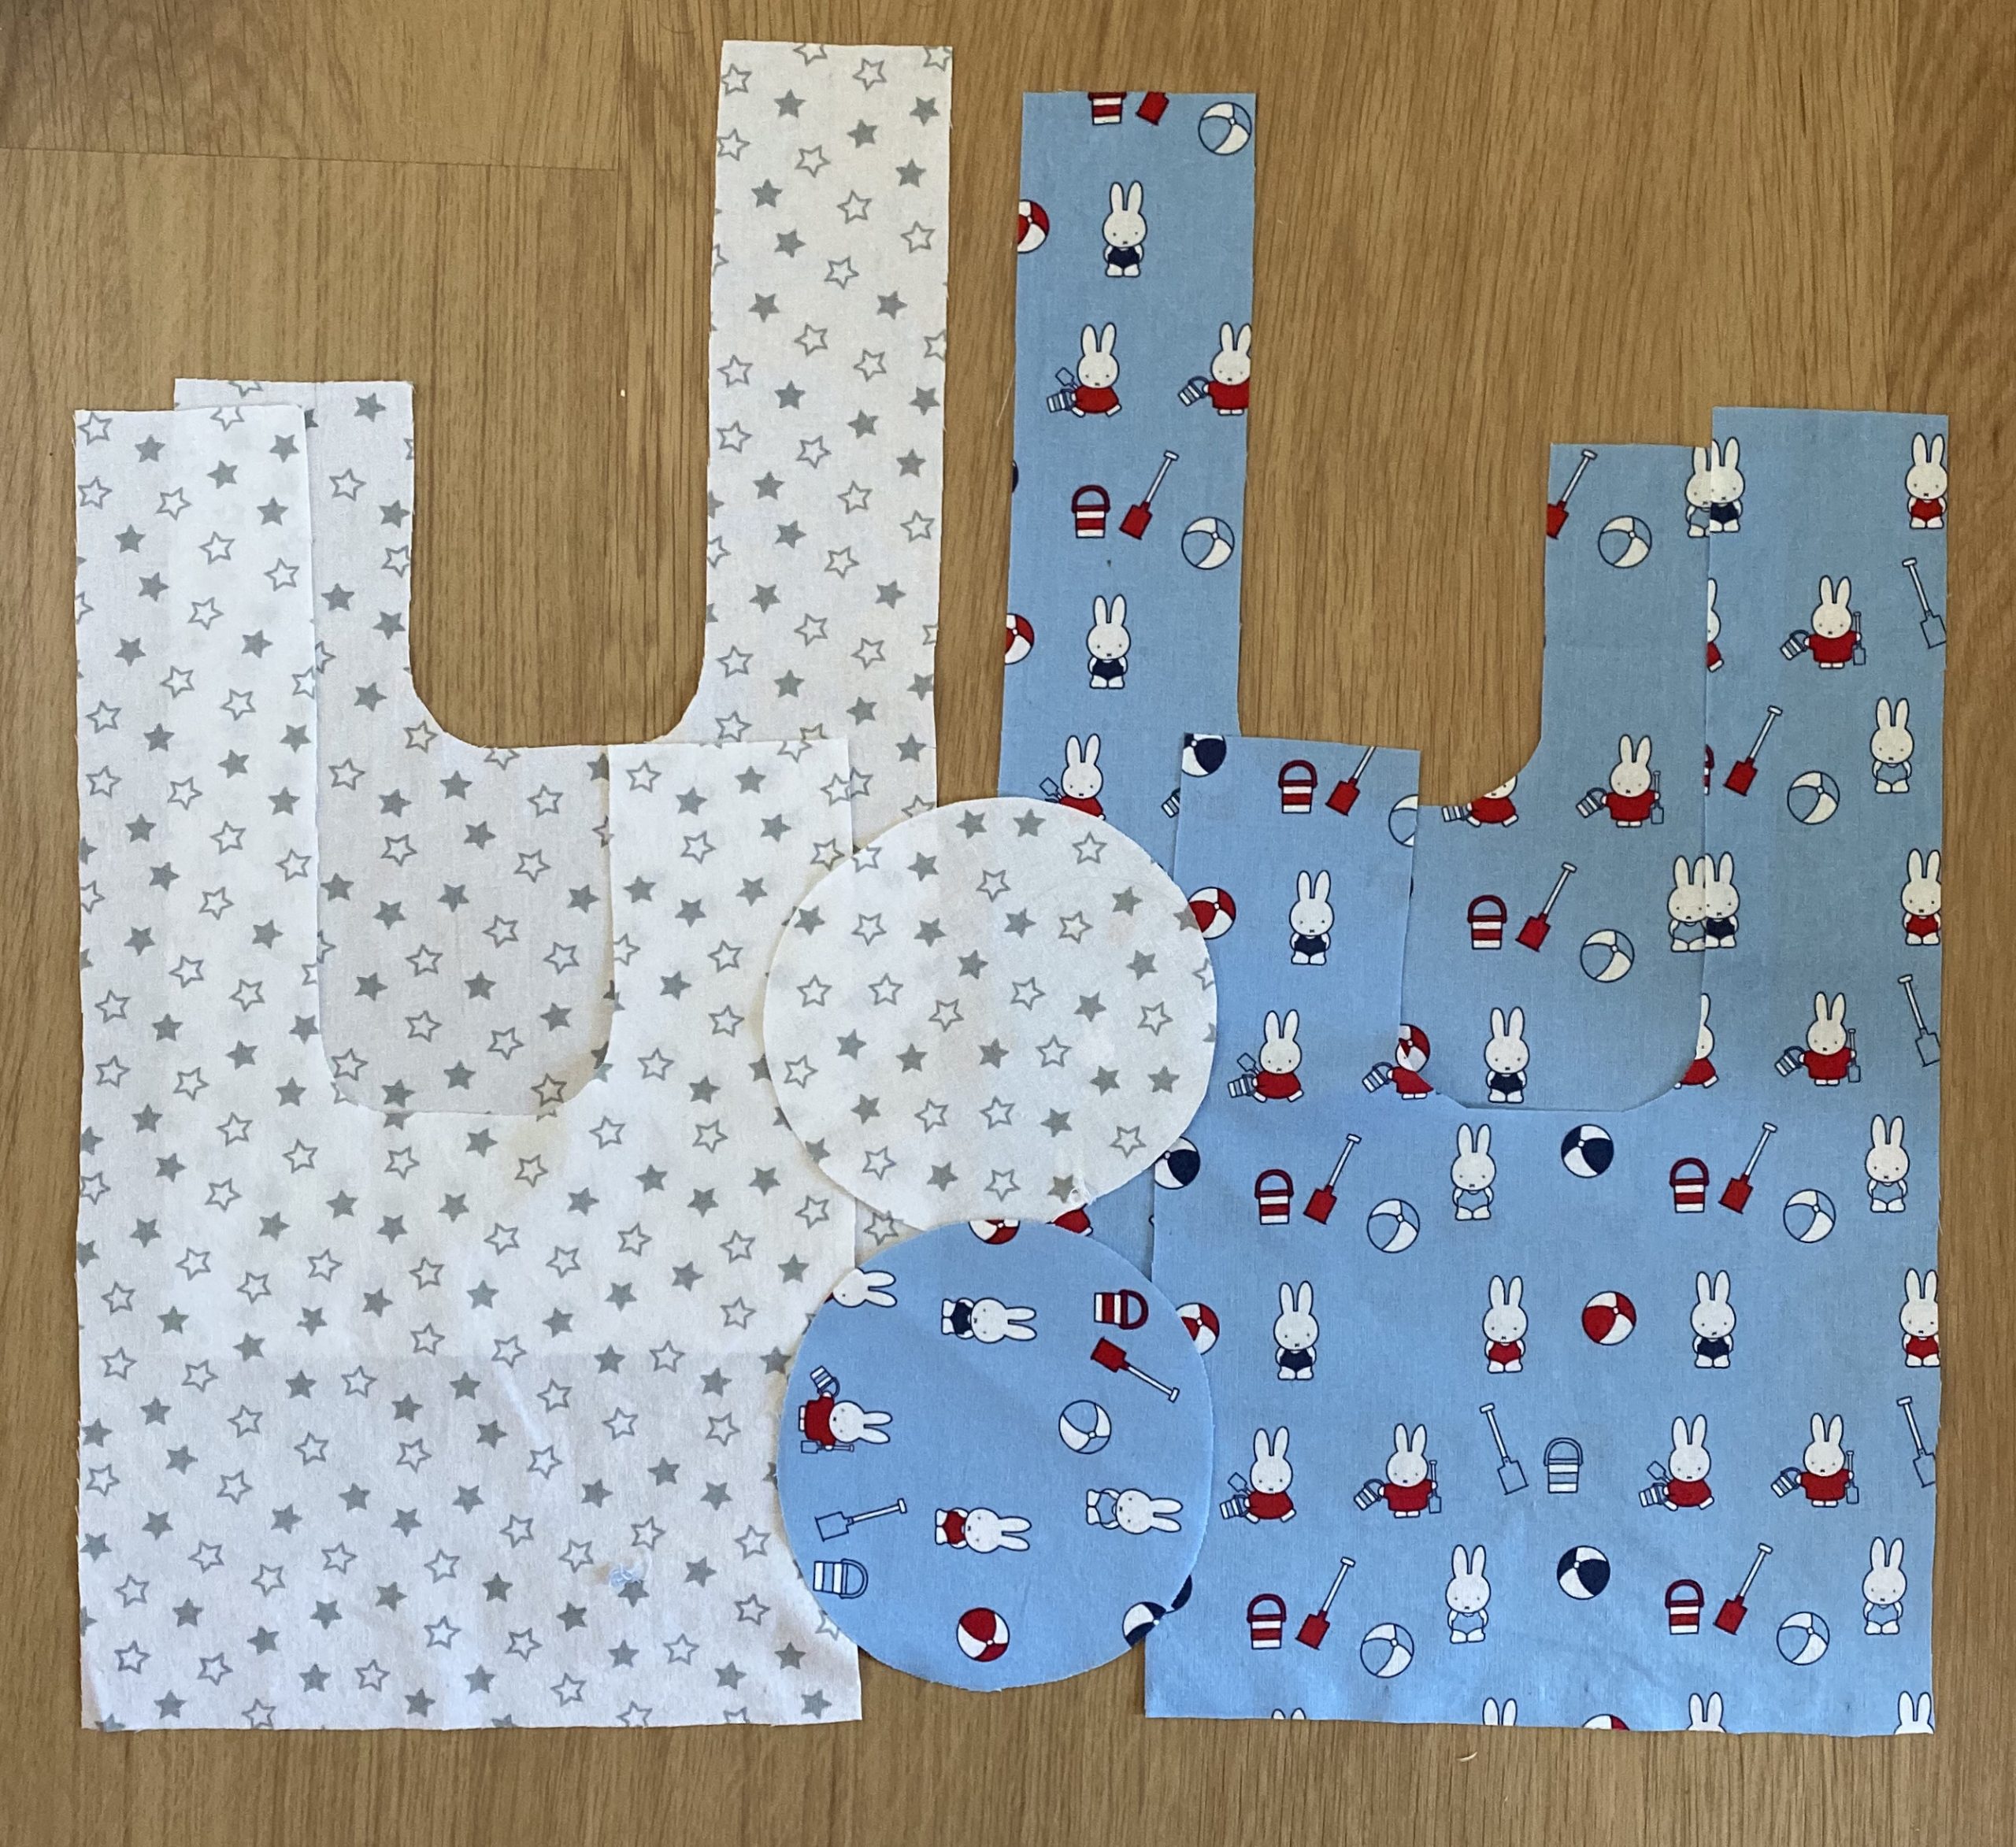
I interfaced my outer circle, but it works ok without.
Step 3
Pin and sew the shoulders of the bag straps (outer and lining). Press flat when done.
Step 4
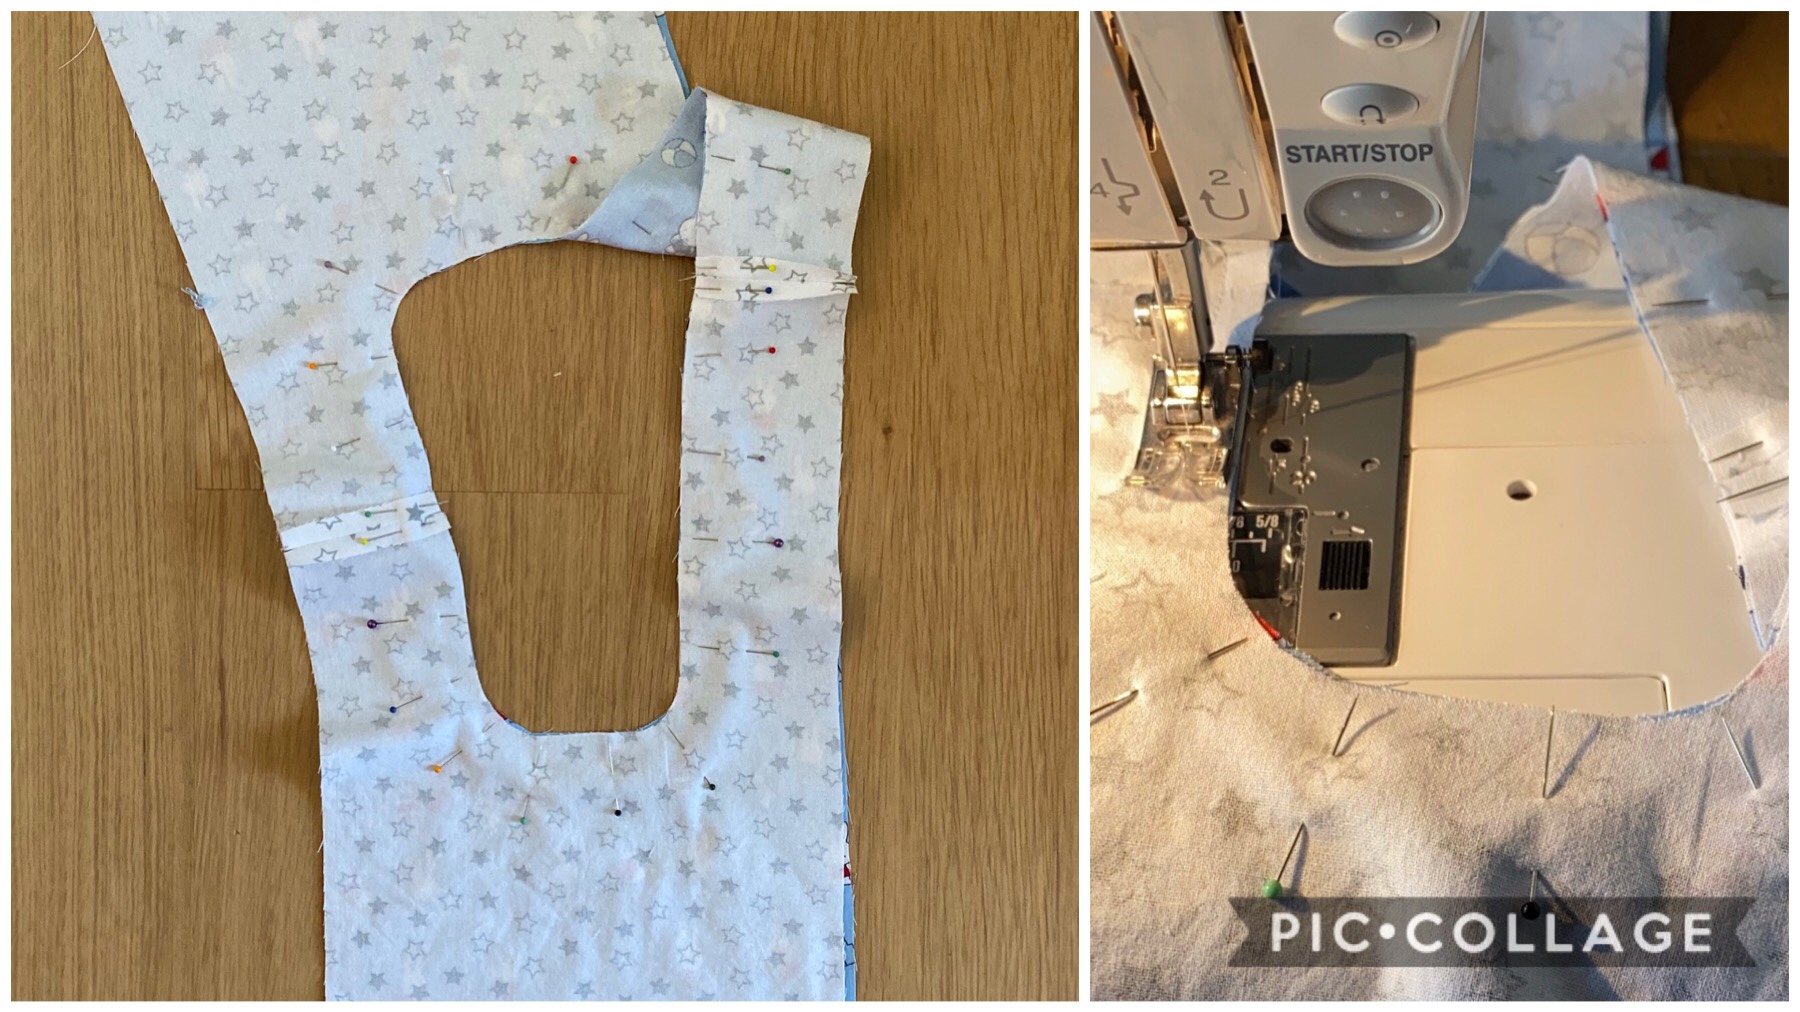
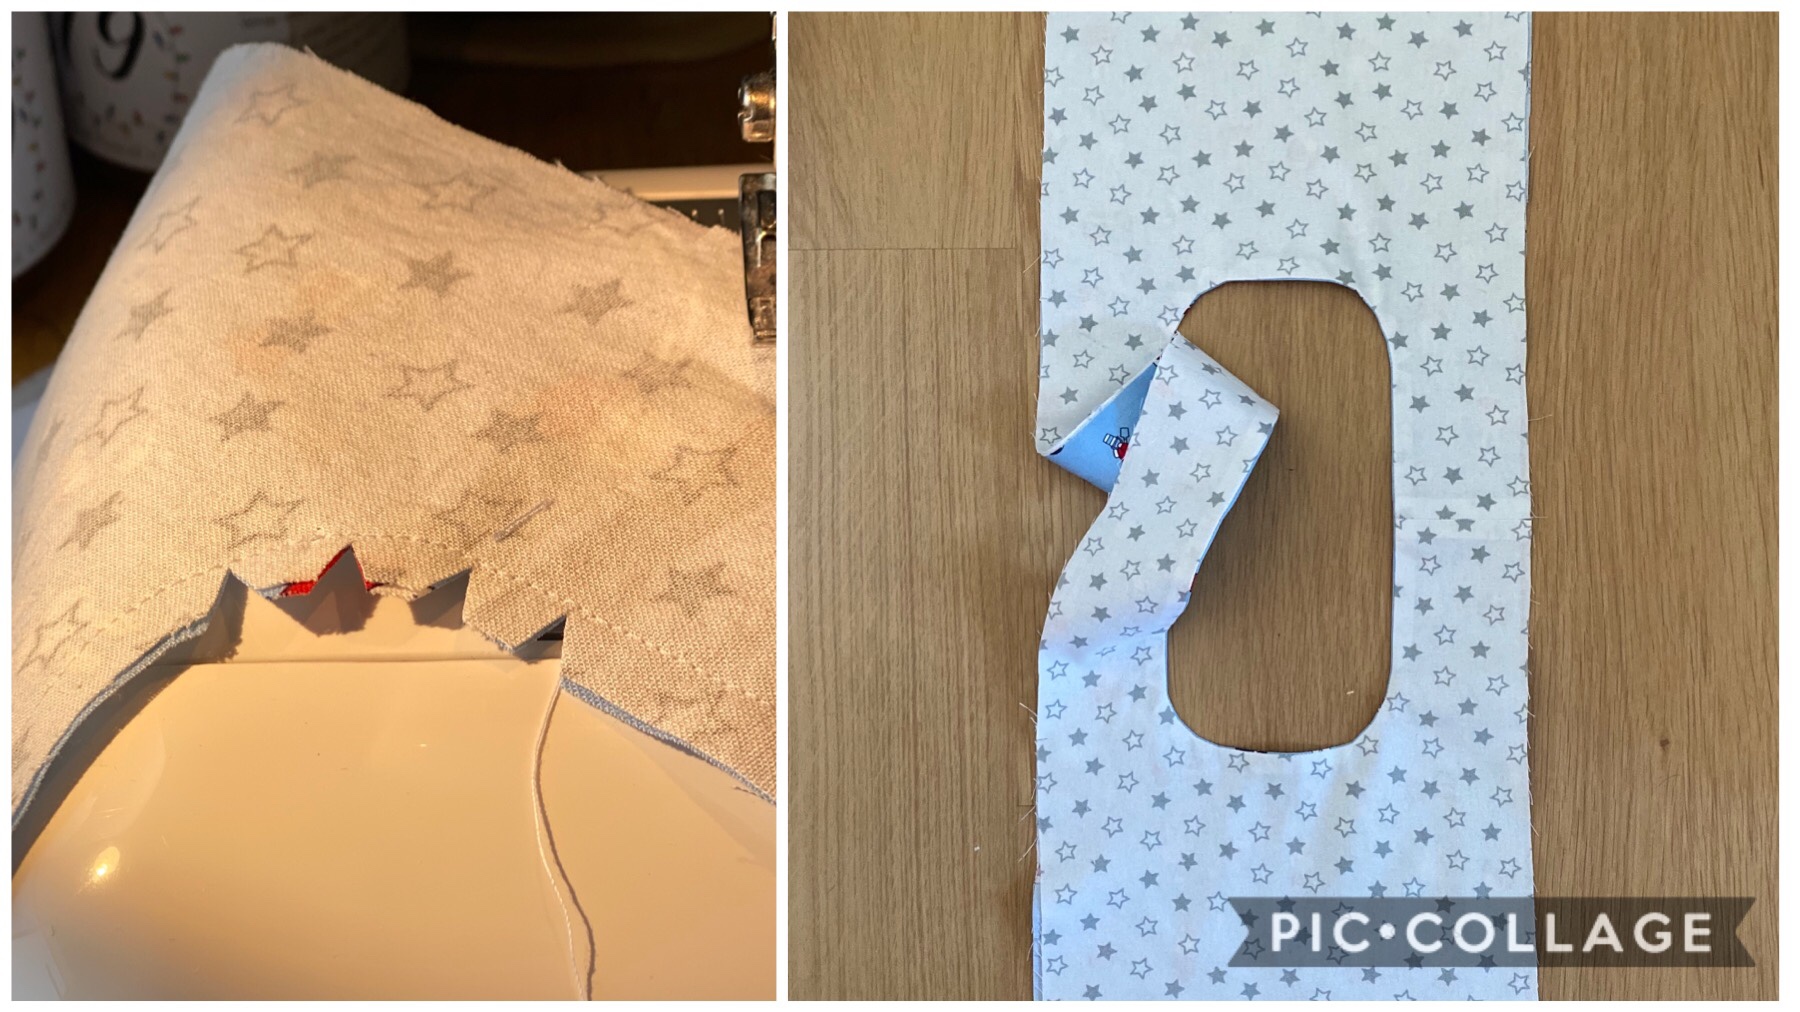
Place right sides together and pin the centre seams (around the oval) and sew together. Clip the curves, turn right way round and press flat.
Step 5
This bit is really tricky, so tricky in fact that DIY District made a video showing how it works. I would highly recommend going to their site to watch it!
Do make sure, before you begin this stage,that you have clearly marked where the notches are on the sides of your fabric. You want to start and stop sewing at this point on either side of the handle.
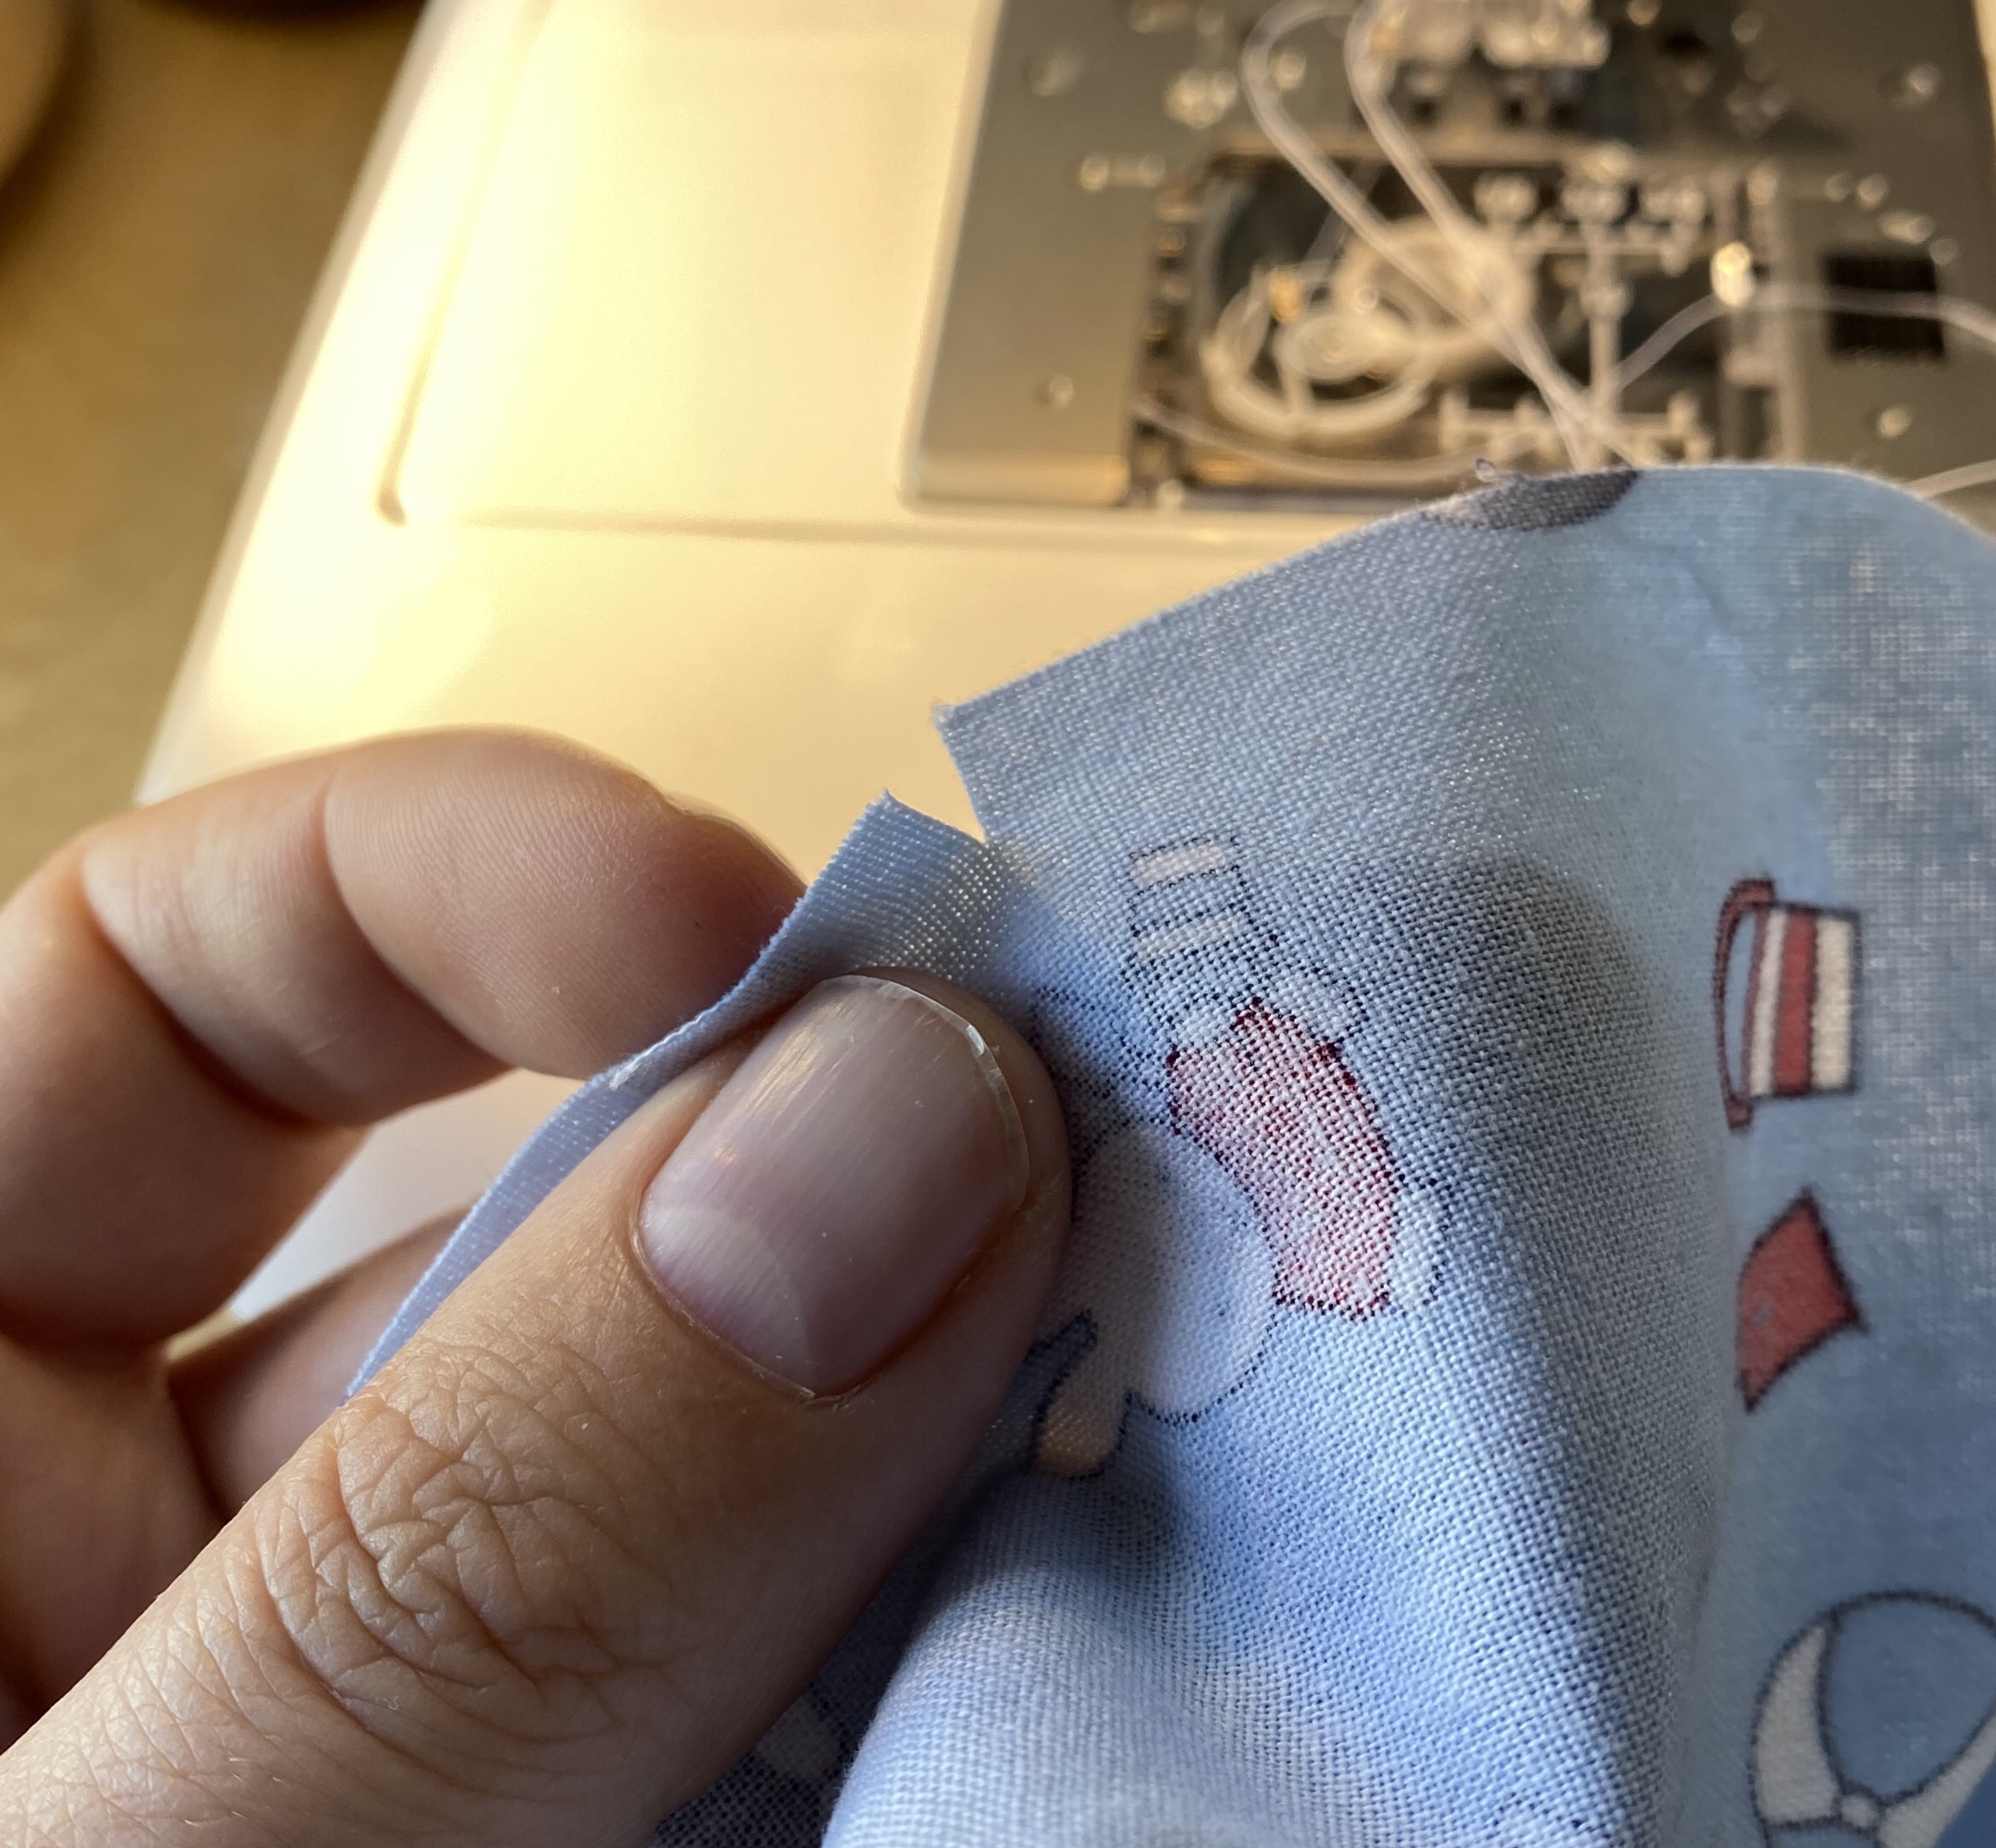
Then (and this is the tricky bit you need to watch the video for) you fold one half of the bag inside the handle, tucking it in quite well and carefully pin. Do this all the way down the handle until you have pinned between the two notches. Then sew from one notch to the other. Go slowly and make sure the rest of the bag is firmly away from the stitch line!
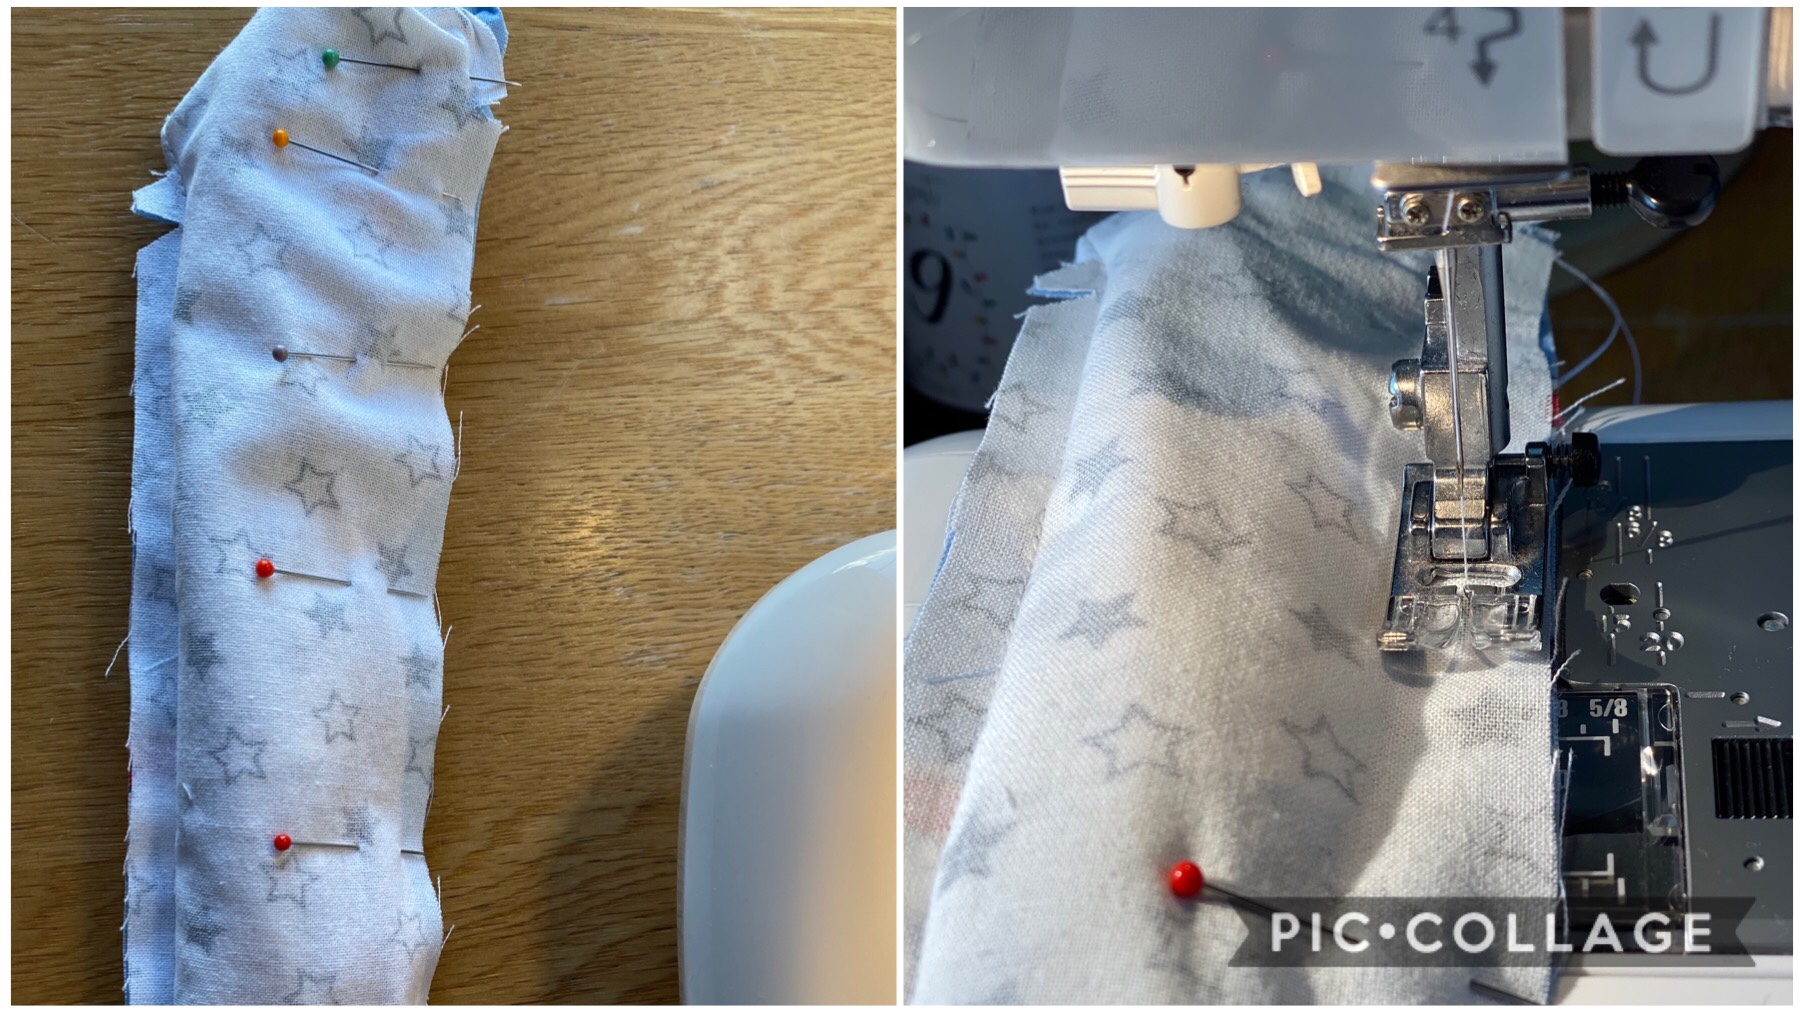
Now the satisfying bit, pull the bag through the handle, showing the final finished handle strap. Repeat for the other side and then press again.
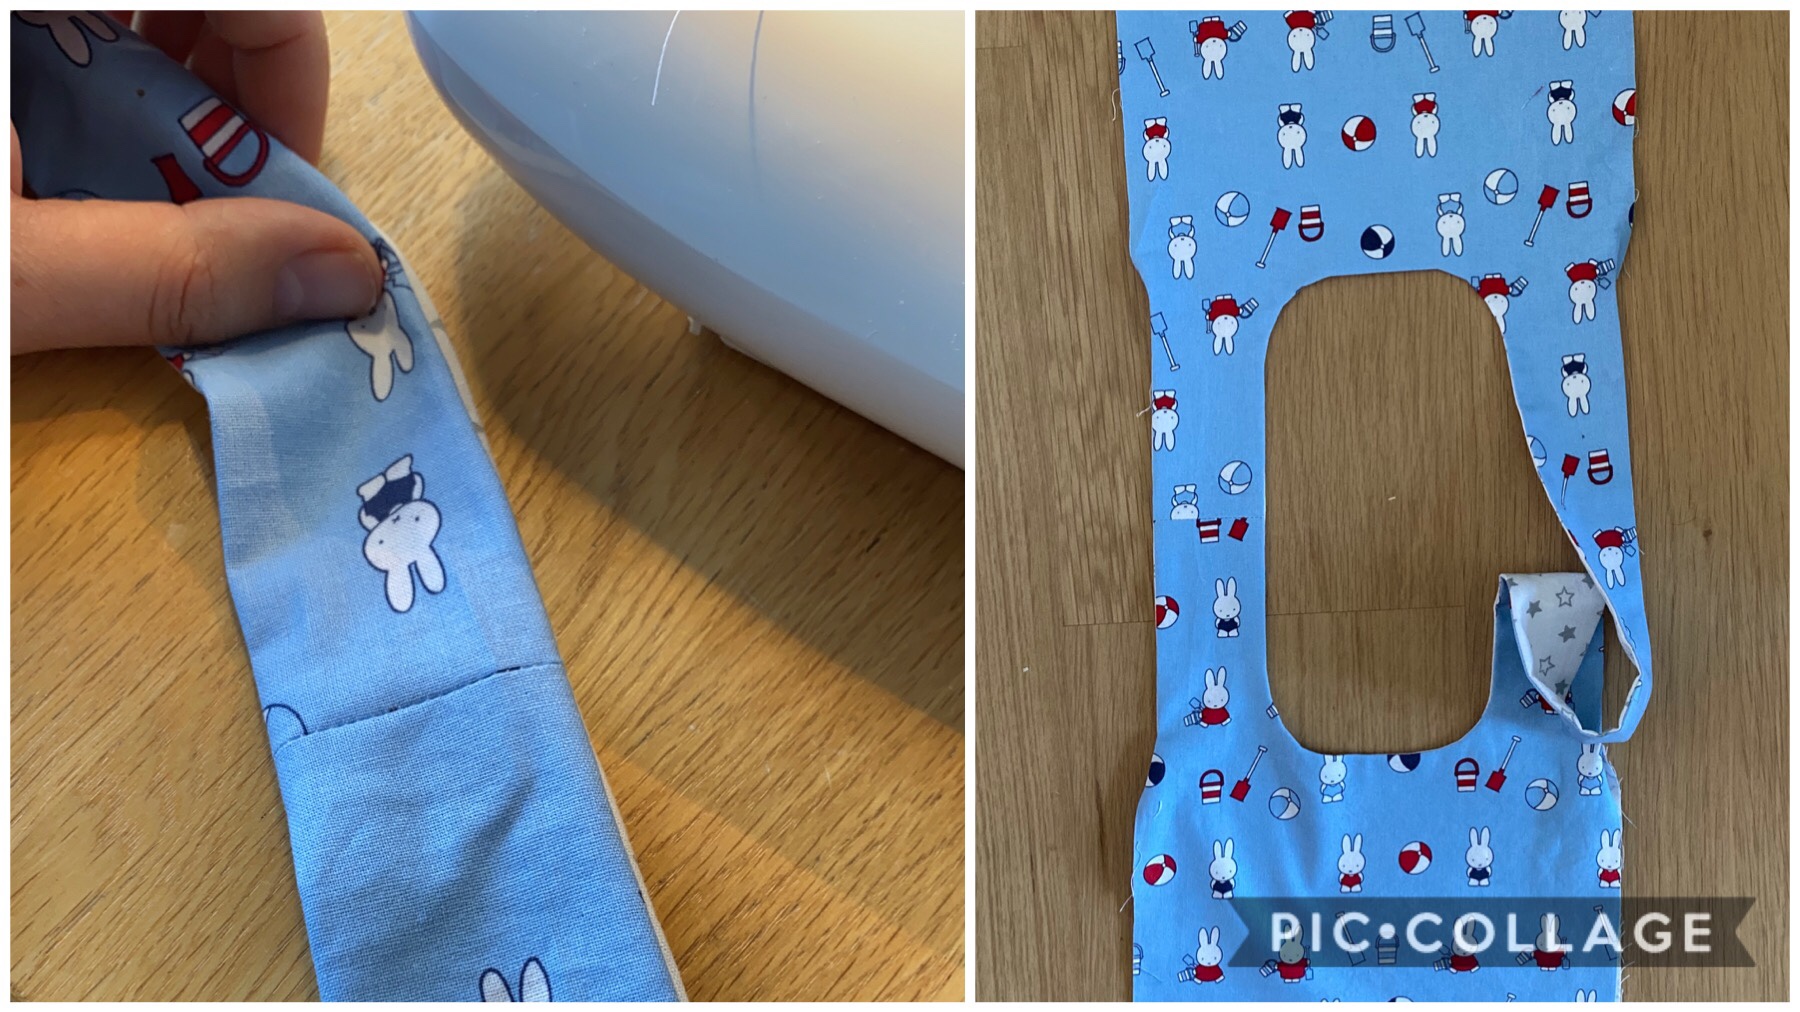
Step 6
Now the (relatively) easy bit. Turn the outside of the bag inside out and pin the side seams. Sew and press. Then do the same for the lining but remember to leave a small gap in one of the sides so you can turn it right way round later!
Step 7
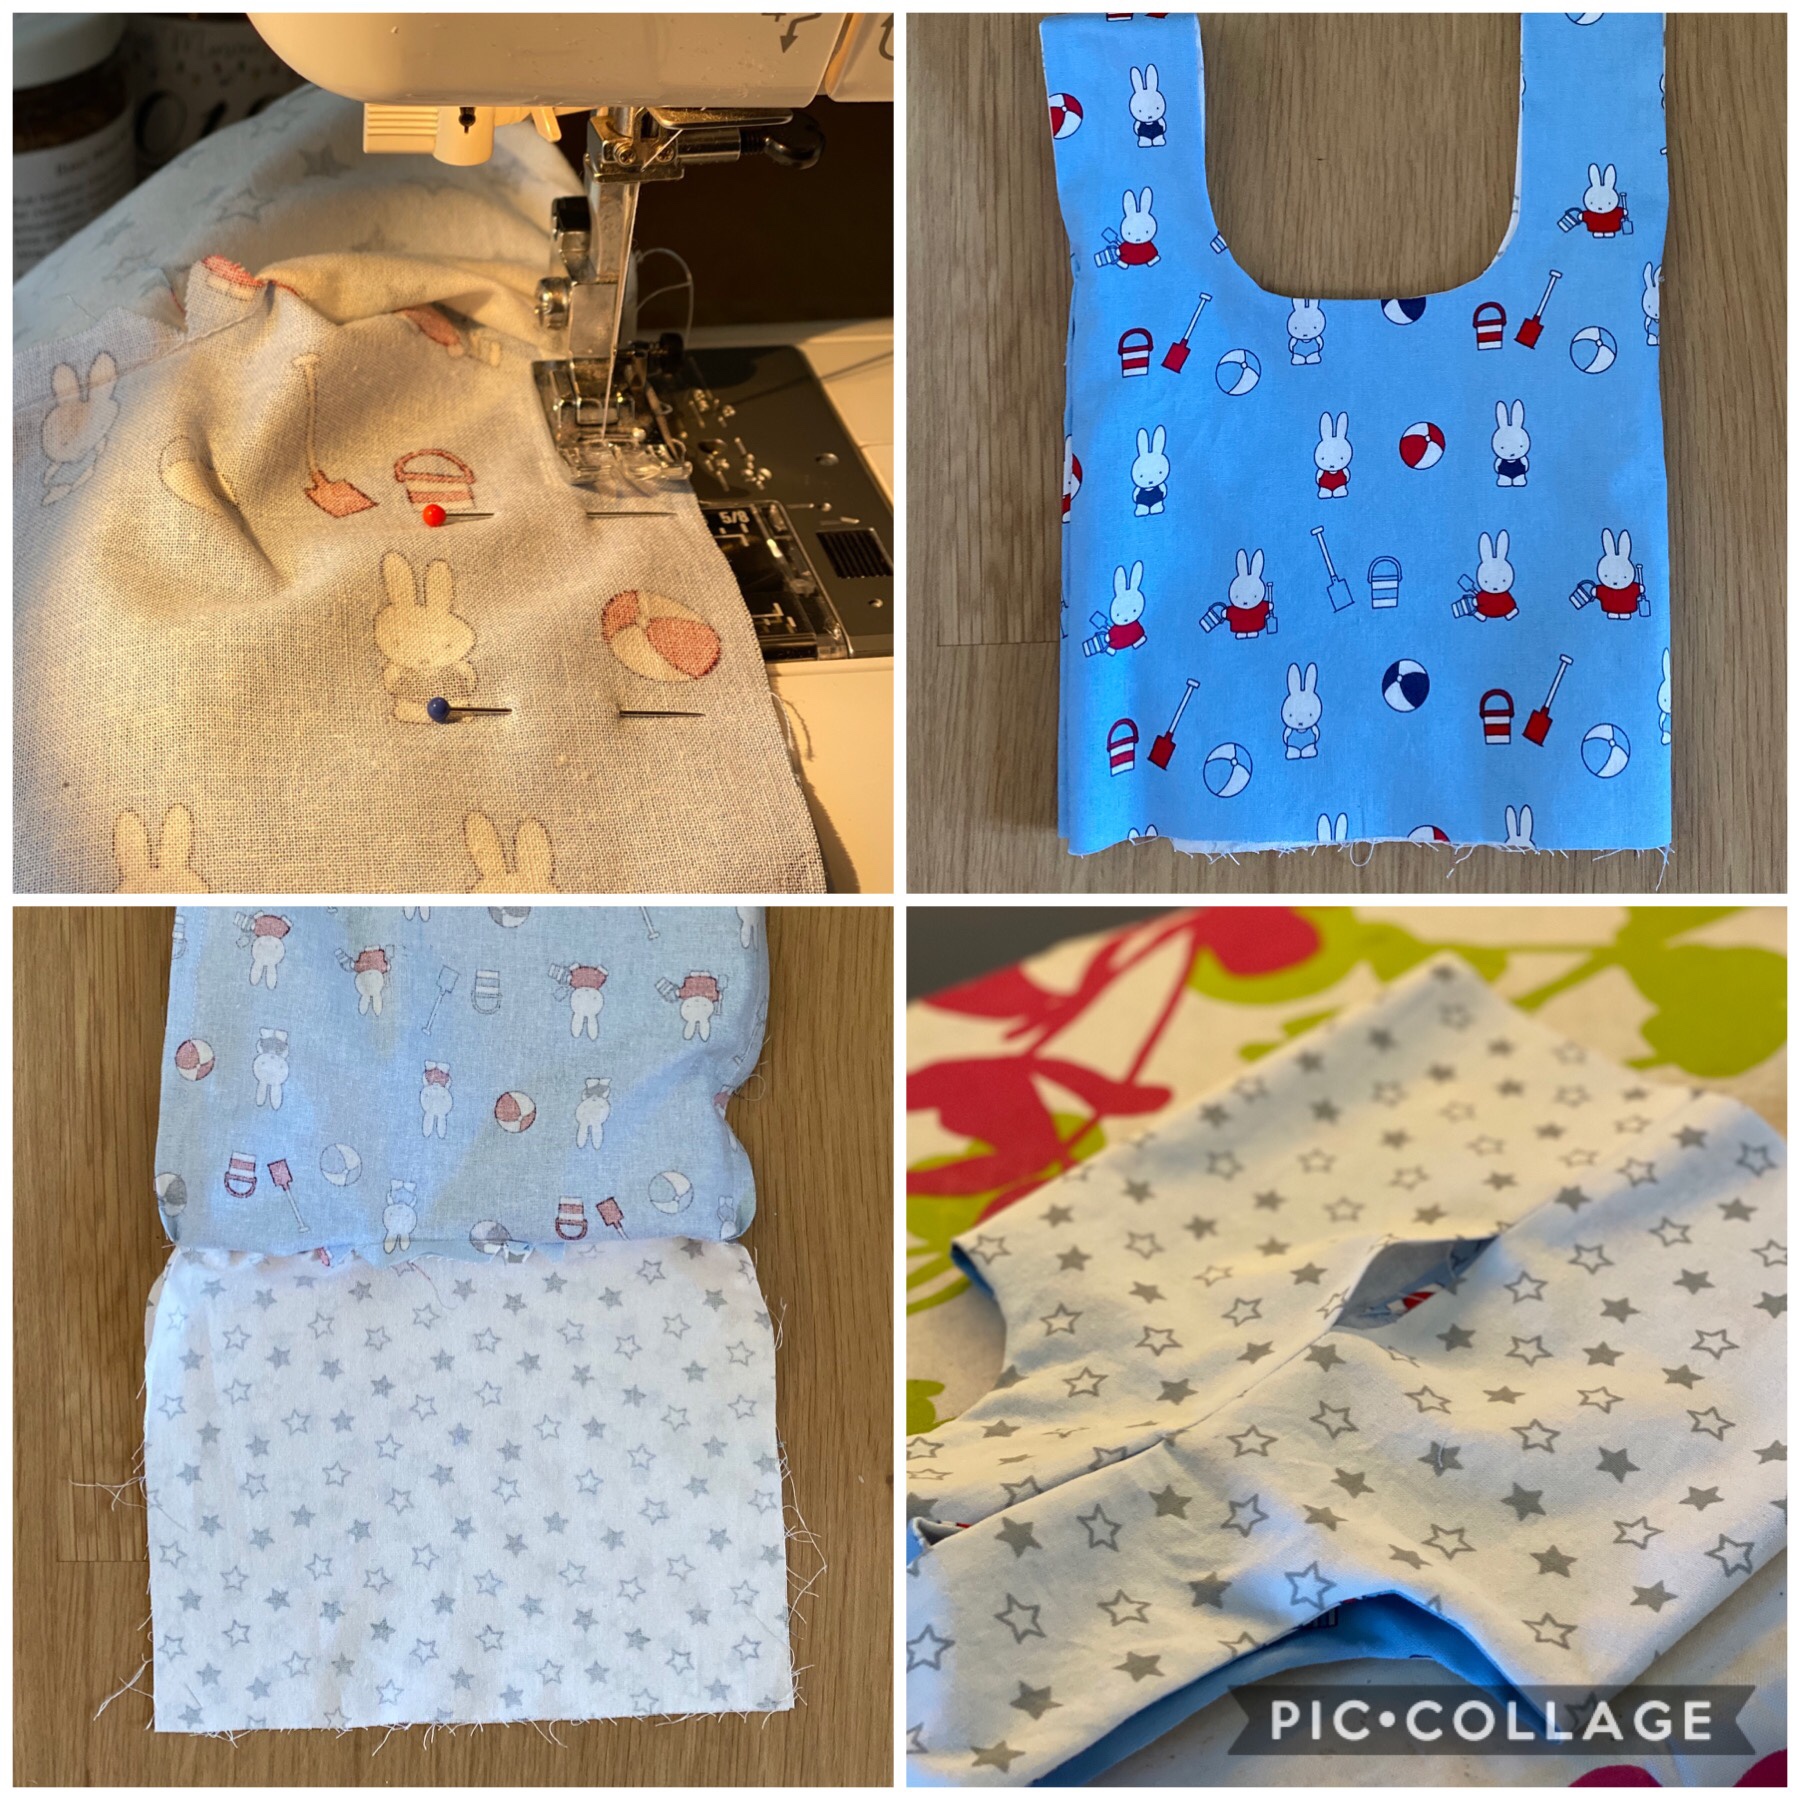
I ran some gathering stitches around the base of the outside before pinning the base in place. This was so I could adjust the gathers so it looked nicer when I was done sewing. Use lots of pins and spaces out the gathers as best you can. Then slowly stitch the base on.
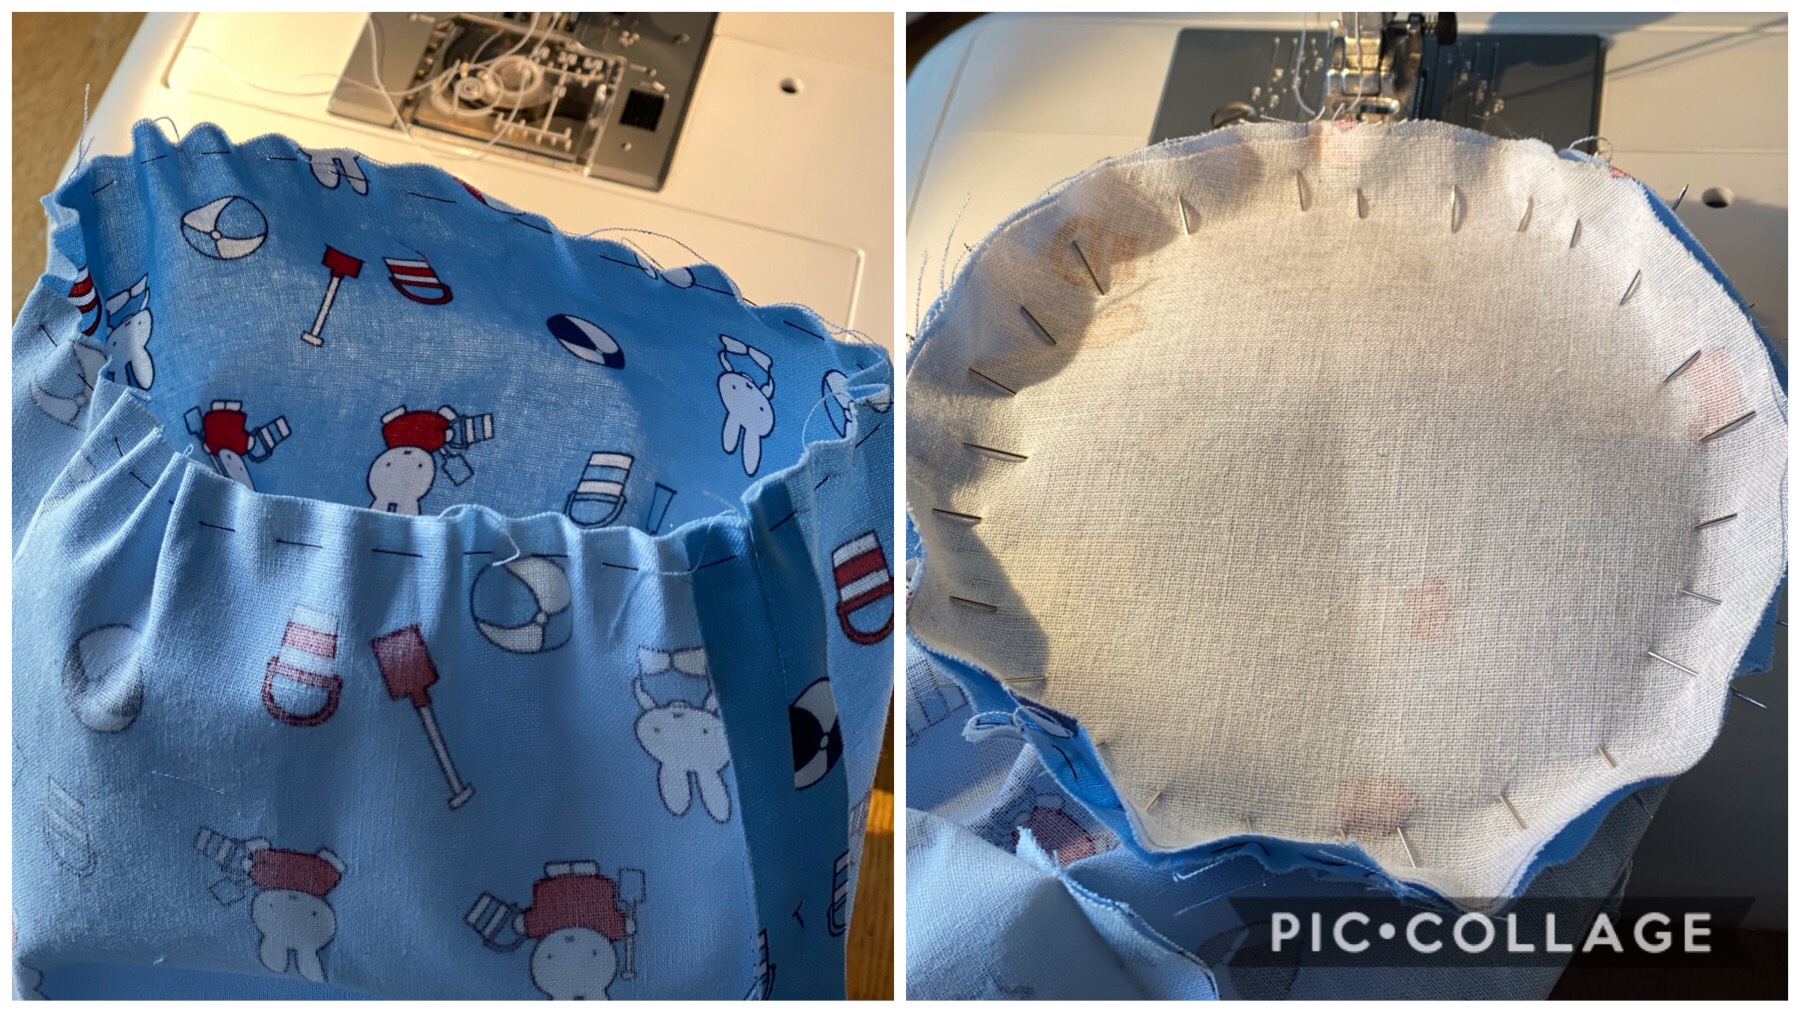
Then clip the curves and turn right side out.
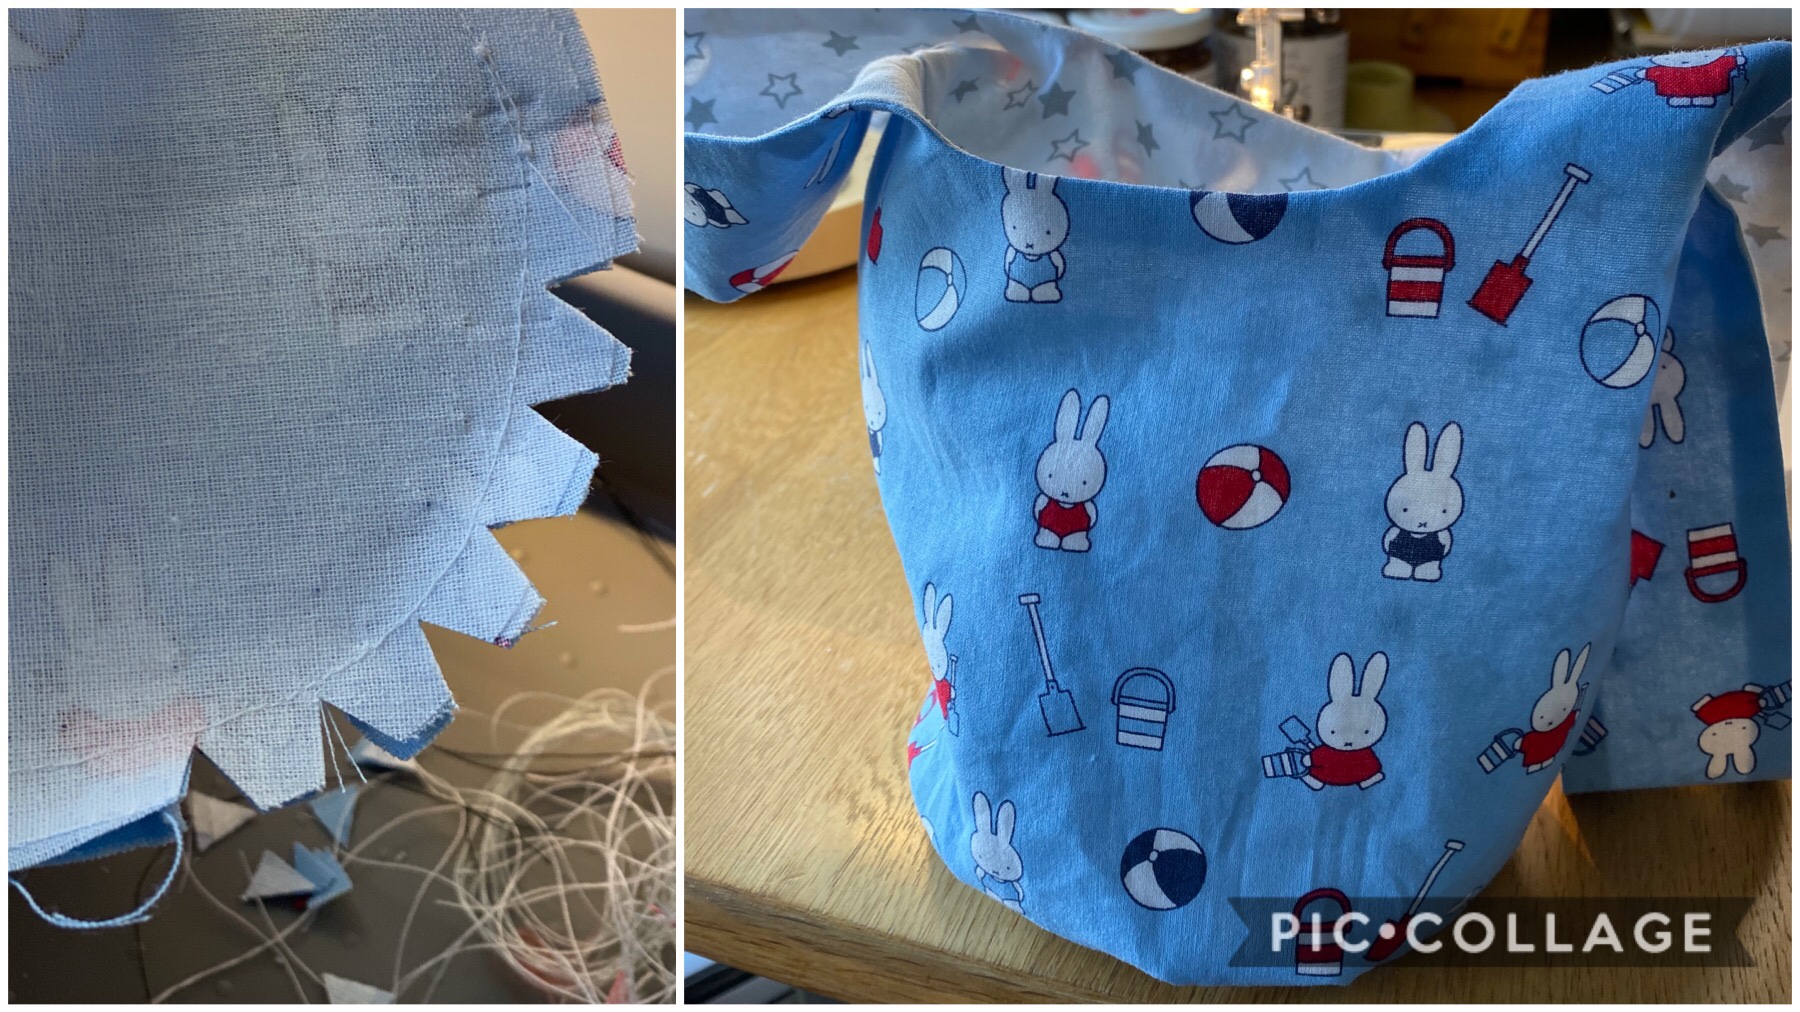
Step 8
Pull the lining bag out of the main bag. Remember that gap you left? Pull the inside of the bag through this gap and attach the base (as in step 7).
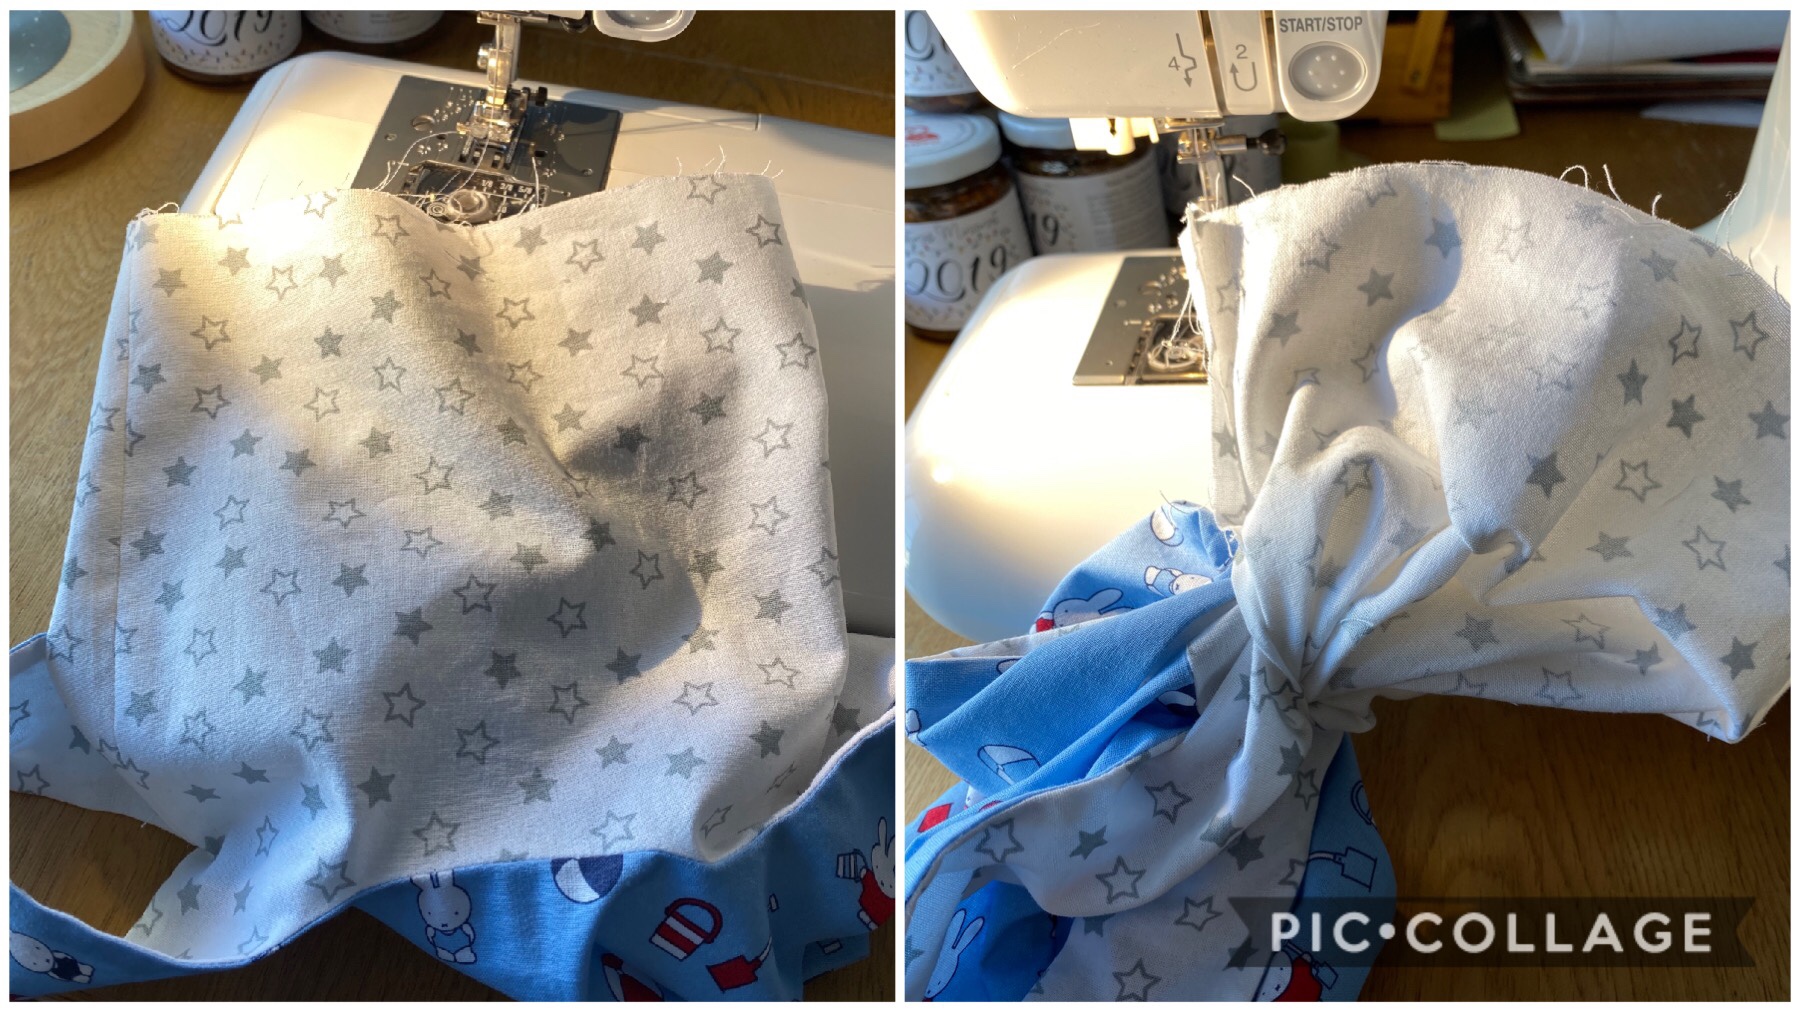
Pull the bag back through this gap once the base is attached and blind hem stitch the gap closed.
The finished result!
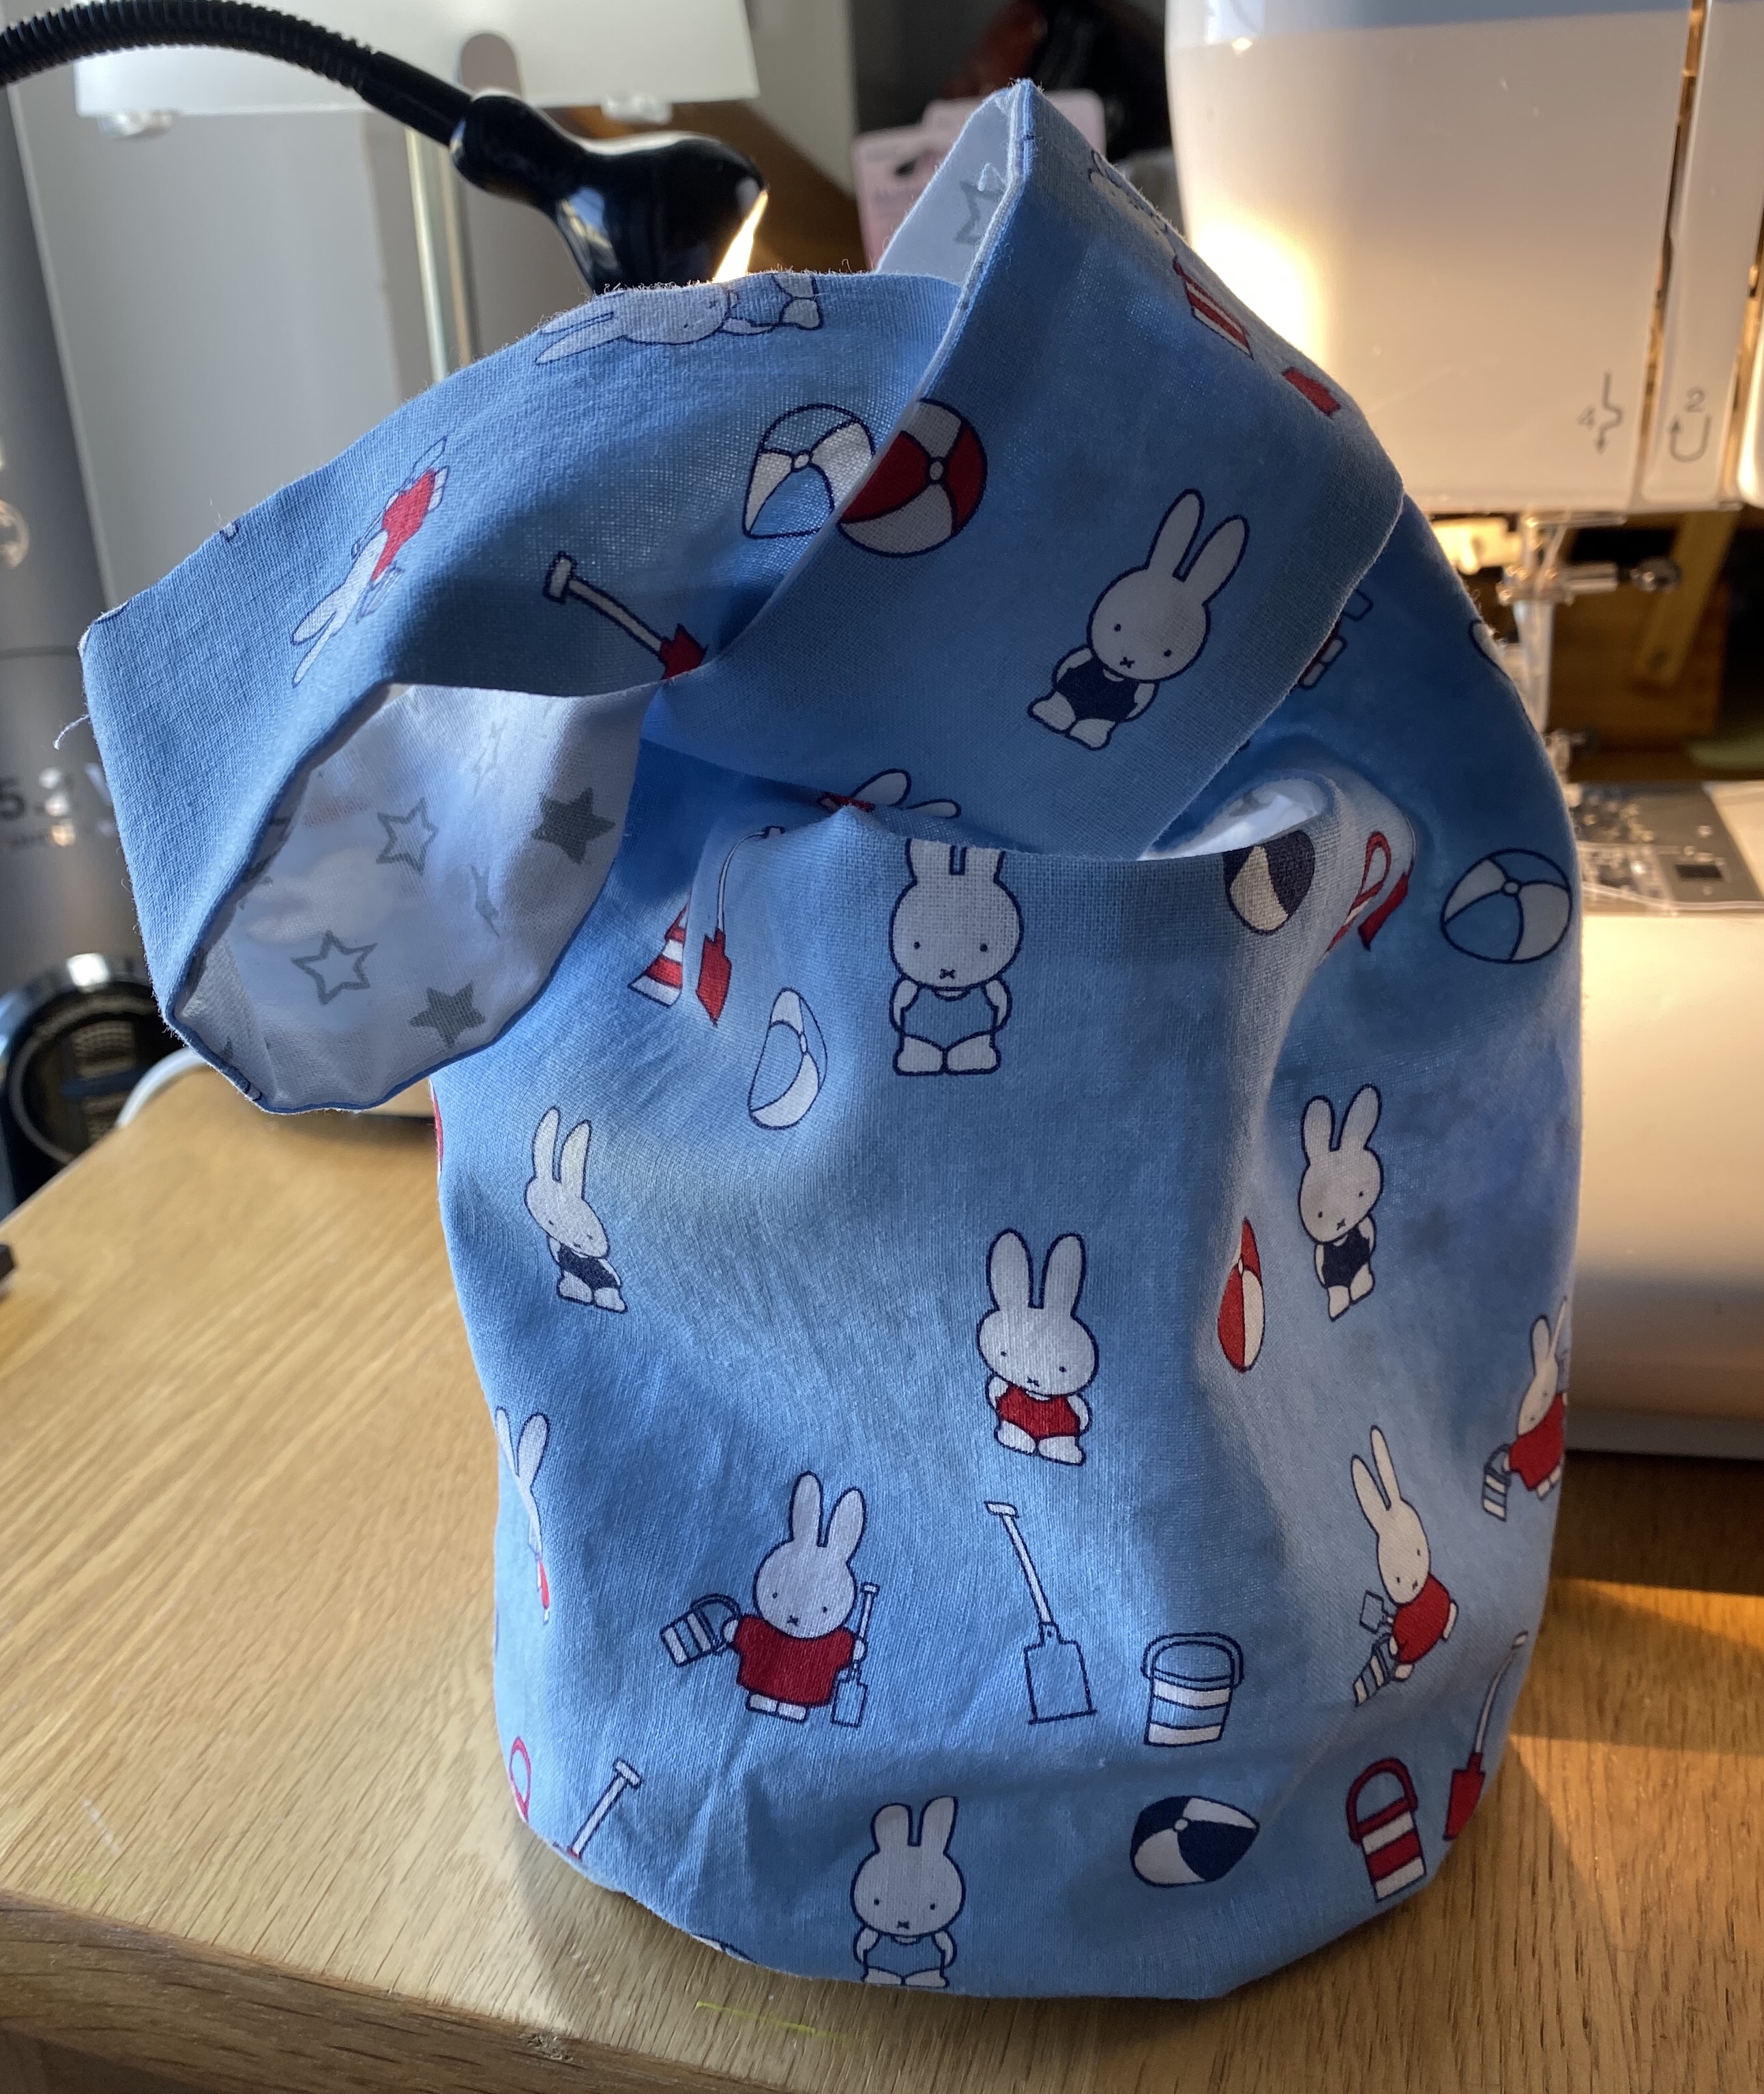
It is exactly what I wanted to make! And once I got my head around the handles, it was easy. So later that day I made the bag for my boyfriend’s mum (and as she doesn’t read this blog (- yet!) here is her finished Christmas present:
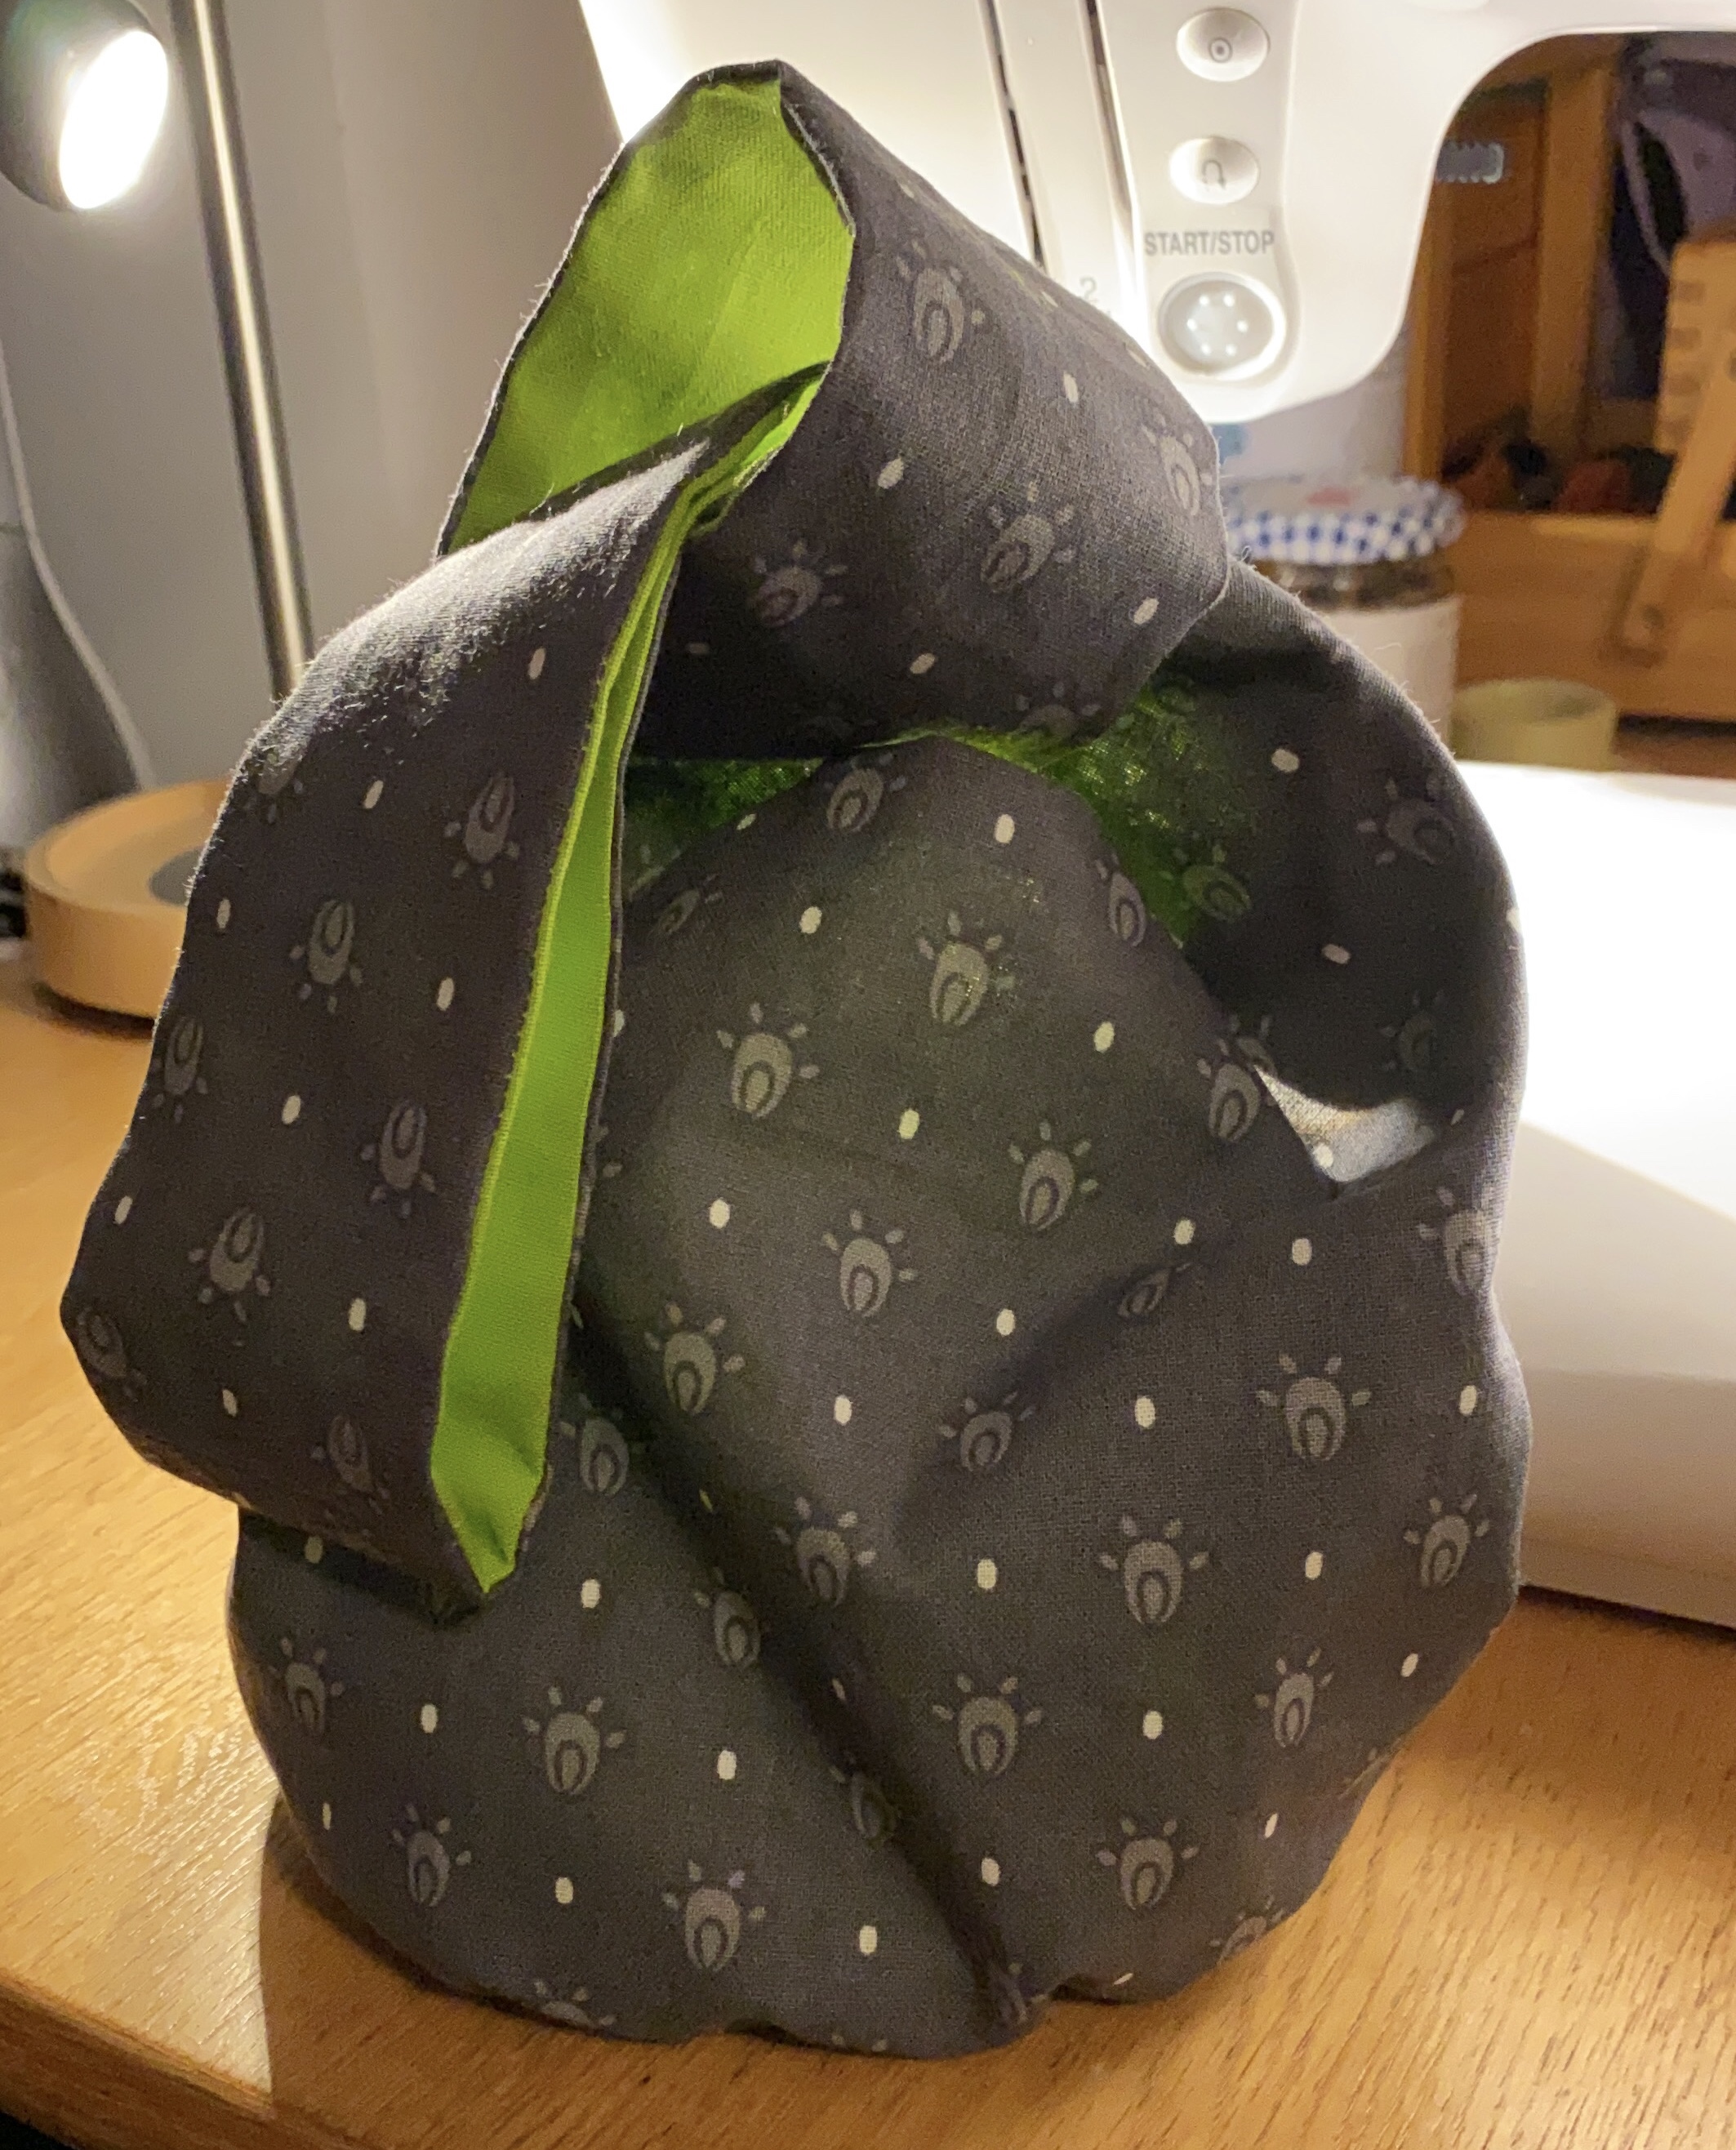
I hope she likes it!
-

A 2022 Embroidery Challenge
4 February 2023
I’ve been watching people making temperature quilts on social media for a few years and really liked the idea of making one. But I knew I would struggle to carry such a large project through to the end, plus the idea of knitting a blanket in the heat of summer wasn’t that appealing. Then I […]
-
Little Life Update
3 February 2023
I finally caught COVID, and while I am curled up on my sofa feeling sorry for myself, I thought I would check through things. I realised that I haven’t written anything on this blog for ages (gulp April 2021) and so much has happened! The problem is that Instagram is so much quicker and easier […]
-

Alison Glass Lumen Quilt
19 April 2021
In which I attempt to make a giant quilt, for the first time!
-
Cactus Embroidery – Slow Sewing
6 February 2021
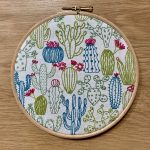
It’s taken just over a year, but this embroidery is finally finished!
-

Mushroom Ragu – Vegan and Delicious!
1 January 2021
It's new year's day and I'm making Mushroom Ragu.
-

A 2022 Embroidery Challenge
4 February 2023
I’ve been watching people making temperature quilts on social media for a few years and really liked the idea of making one. But I knew I would struggle to carry such a large project through to the end, plus the idea of knitting a blanket in the heat of summer wasn’t that appealing. Then I […]
-

Little Life Update
3 February 2023
I finally caught COVID, and while I am curled up on my sofa feeling sorry for myself, I thought I would check through things. I realised that I haven’t written anything on this blog for ages (gulp April 2021) and so much has happened! The problem is that Instagram is so much quicker and easier […]
-

Alison Glass Lumen Quilt
19 April 2021
In which I attempt to make a giant quilt, for the first time!
-

Cactus Embroidery – Slow Sewing
6 February 2021
It’s taken just over a year, but this embroidery is finally finished!
-

Mushroom Ragu – Vegan and Delicious!
1 January 2021
It's new year's day and I'm making Mushroom Ragu.
-

A 2022 Embroidery Challenge
4 February 2023
I’ve been watching people making temperature quilts on social media for a few years and really liked the idea of making one. But I knew I would struggle to carry such a large project through to the end, plus the idea of knitting a blanket in the heat of summer wasn’t that appealing. Then I […]
-

Little Life Update
3 February 2023
I finally caught COVID, and while I am curled up on my sofa feeling sorry for myself, I thought I would check through things. I realised that I haven’t written anything on this blog for ages (gulp April 2021) and so much has happened! The problem is that Instagram is so much quicker and easier […]
-

Alison Glass Lumen Quilt
19 April 2021
In which I attempt to make a giant quilt, for the first time!
-

Cactus Embroidery – Slow Sewing
6 February 2021
It’s taken just over a year, but this embroidery is finally finished!
-

Mushroom Ragu – Vegan and Delicious!
1 January 2021
It's new year's day and I'm making Mushroom Ragu.
-

A 2022 Embroidery Challenge
4 February 2023
I’ve been watching people making temperature quilts on social media for a few years and really liked the idea of making one. But I knew I would struggle to carry such a large project through to the end, plus the idea of knitting a blanket in the heat of summer wasn’t that appealing. Then I […]
-

Little Life Update
3 February 2023
I finally caught COVID, and while I am curled up on my sofa feeling sorry for myself, I thought I would check through things. I realised that I haven’t written anything on this blog for ages (gulp April 2021) and so much has happened! The problem is that Instagram is so much quicker and easier […]
-

Alison Glass Lumen Quilt
19 April 2021
In which I attempt to make a giant quilt, for the first time!
-

Cactus Embroidery – Slow Sewing
6 February 2021
It’s taken just over a year, but this embroidery is finally finished!
-

Mushroom Ragu – Vegan and Delicious!
1 January 2021
It's new year's day and I'm making Mushroom Ragu.
-

A 2022 Embroidery Challenge
4 February 2023
I’ve been watching people making temperature quilts on social media for a few years and really liked the idea of making one. But I knew I would struggle to carry such a large project through to the end, plus the idea of knitting a blanket in the heat of summer wasn’t that appealing. Then I […]
-

Little Life Update
3 February 2023
I finally caught COVID, and while I am curled up on my sofa feeling sorry for myself, I thought I would check through things. I realised that I haven’t written anything on this blog for ages (gulp April 2021) and so much has happened! The problem is that Instagram is so much quicker and easier […]
-

Alison Glass Lumen Quilt
19 April 2021
In which I attempt to make a giant quilt, for the first time!
-

Cactus Embroidery – Slow Sewing
6 February 2021
It’s taken just over a year, but this embroidery is finally finished!
-

Mushroom Ragu – Vegan and Delicious!
1 January 2021
It's new year's day and I'm making Mushroom Ragu.
-

A 2022 Embroidery Challenge
4 February 2023
I’ve been watching people making temperature quilts on social media for a few years and really liked the idea of making one. But I knew I would struggle to carry such a large project through to the end, plus the idea of knitting a blanket in the heat of summer wasn’t that appealing. Then I […]
-

Little Life Update
3 February 2023
I finally caught COVID, and while I am curled up on my sofa feeling sorry for myself, I thought I would check through things. I realised that I haven’t written anything on this blog for ages (gulp April 2021) and so much has happened! The problem is that Instagram is so much quicker and easier […]
-

Alison Glass Lumen Quilt
19 April 2021
In which I attempt to make a giant quilt, for the first time!
-

Cactus Embroidery – Slow Sewing
6 February 2021
It’s taken just over a year, but this embroidery is finally finished!
-

Mushroom Ragu – Vegan and Delicious!
1 January 2021
It's new year's day and I'm making Mushroom Ragu.
-

A 2022 Embroidery Challenge
4 February 2023
I’ve been watching people making temperature quilts on social media for a few years and really liked the idea of making one. But I knew I would struggle to carry such a large project through to the end, plus the idea of knitting a blanket in the heat of summer wasn’t that appealing. Then I […]
-

Little Life Update
3 February 2023
I finally caught COVID, and while I am curled up on my sofa feeling sorry for myself, I thought I would check through things. I realised that I haven’t written anything on this blog for ages (gulp April 2021) and so much has happened! The problem is that Instagram is so much quicker and easier […]
-

Alison Glass Lumen Quilt
19 April 2021
In which I attempt to make a giant quilt, for the first time!
-

Cactus Embroidery – Slow Sewing
6 February 2021
It’s taken just over a year, but this embroidery is finally finished!
-

Mushroom Ragu – Vegan and Delicious!
1 January 2021
It's new year's day and I'm making Mushroom Ragu.
