Baking Basics – Bread
Like everyone else in COVID-19 lockdown, getting basic food is challenging. My teenager is fragile (both emotionally and physically) and so to protect them we are trying not to leave the flat. As my teenager is also autistic, they also have a limited diet (due to sensory issues) and, as if life wasn’t fun already, is also lactose intolerant.
One of the things that is a staple part of my teenager’s diet is basic white bread with a soft, non-floury, crust. But getting bread is difficult. Especially when you can’t get weekly food deliveries and you are trying really hard not to leave the flat (17 days and counting).
So I’ve taken to trying to bake my own bread. The first one I made didn’t work, it “tasted weird”. But the second one got a thumbs up. So here is my recipe for the most basic of white bread. With a (hopefully) soft crust and absolutely no floury top!
It helps to have an (optional) boyfriend on hand, who really enjoys kneading!
The bread is simply strong flour, salt, sugar, yeast and water (specific quantities below) and a lot of patience and time – something I seem to have a lot of at the moment.
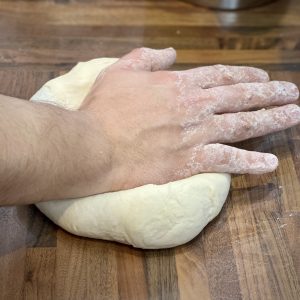
After your ingredients are mixed well and you have a dough, you need to knead it. This works the gluten in the bread making it soft, warm and stretchy. You are aiming for dough you can stretch until it is translucent without breaking (the windowpane test).
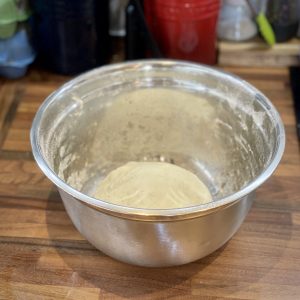
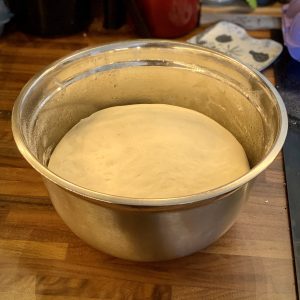
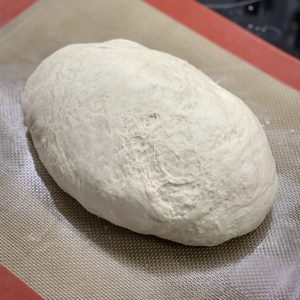
Once it is soft, warm and stretchy, scoop it into a ball and place in an oiled bowl. Cover with a tea towel and leave for 2 hours to double in size (this is called proving). Don’t do what I did and mix up your proving times and leave it only to prove for 1 hour before working it.
After the first proving, it will have doubled in size. Knock it back, something that is very satisfying, and knead again. For the uninitiated, knocking back is when you gently punch the air out of your dough before scooping the now floppy dough out of the bowl again.
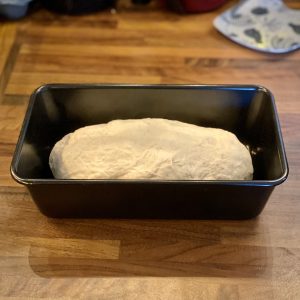
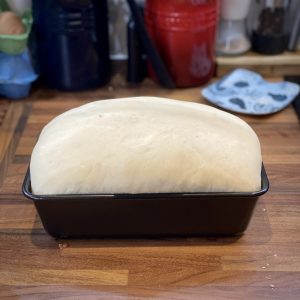
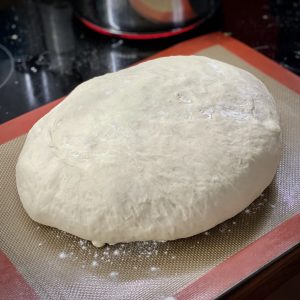
Then roll it into a sausage shape and pop into a loaf tin (you don’t have to use a loaf tin, but I am aiming for as uniform and simple a bread as possible – remember I have a teenager who needs to eat this!). Cover it with the tea towel again and leave for an hour (not 2 hours as I did – sigh!).
Once again it will have doubled in size. Now you just need to slash the top of the bread with a serrated knife and pop it in the oven.
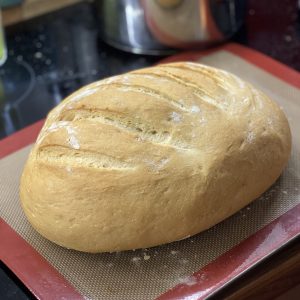
All being well, after 30mins in the oven you’ll have a lovely, incredibly simple-looking, loaf of bread. Due to my ahem tiny proving error, mine collapsed in the oven a bit. But it is still bread and still tastes good.
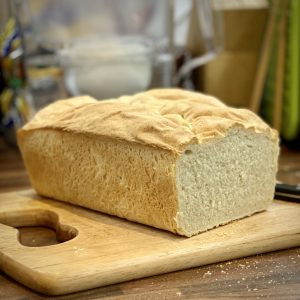
Most importantly, my teenager has just devoured 3 slices of marmite on toast – courtesy of my homemade bread! Success!
Basic White Bread
Ingredients
- 500 g Strong White Bread Flour
- 1 ½ tsp Salt
- 1 tsp Caster Sugar
- 1 sachet Fast Action Yeast 7g
- 300 ml Warm Water
Instructions
- Put the flour, sugar, salt and yeast in a bowl. Make sure the yeast and salt are on opposite sides of the bowl!
- Mix the dry ingredients together.
- Add the warm water (make sure this is not from the hot tap, but is a mix of water from your kettle and cold water, should be between 40°c and 50°c, or warm to the touch).
- Mix the water into the dry ingredients until you have a dough. It might be a bit sticky, but don't worry.
- Turn the dough onto a clean table and knead. Keep kneading until the dough feels warm, soft and not sticky. This might take about 10 mins.
- Lightly oil the bowl and place the dough back in. Cover with a tea towel and leave for 2 hours.
- When the dough has doubled in size, knock it back and turn out onto the table surface again.
- Knead again, but only for a couple of minutes this time. Shape into a sausage, trying to keep a smooth surface on the top. Place into a loaf tin.
- Cover and leave for 1 hour.
- Heat your oven to 190°c.
- When the dough has again doubled in size, slash the top with a serrated knife and put in the oven.
- Bake for 25-30 mins. You can take the bread out of the tin with a clean tea towel and tap the bottom. If it sounds hollow, then it's done.
- Take your bread out of the oven and out of the tin and leave to cool.
- The finished bread keeps well, I keep mine in an old loaf's plastic bag.
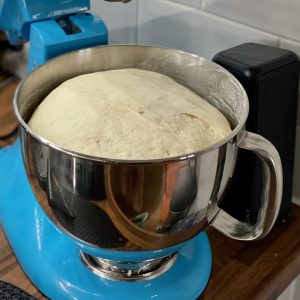
I love bread (to be fair, who doesn’t!), so this morning I thought I would bake a fresh loaf. I have a dough hook for my Kitchen Aid mixer, so I wouldn’t even need to knead it!
I’ve included the recipe below. Top tip for making bread in a Kitchen Aid is not to go above speed 2 on the side, otherwise, your bread starts climbing up and over the bread hook.
The actual making the bread doesn’t take too long, but you need to factor in the proving time.
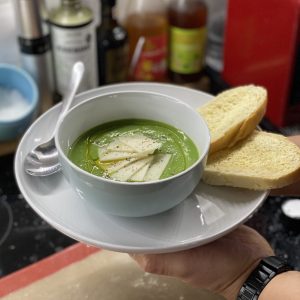
The bread was ready for lunch, just in time to have with some homemade broccoli soup (courtesy of my boyfriend).
Basic Bread (Dairy-Free)
Equipment
- Kitchen Aid Mixer (optional)
Ingredients
- 500 g Strong Bread Flour
- 2 packs Easy Bake Yeast approx 14g)
- 30 g Pure Margarine
- 1 pinch Salt
- 500 ml Tepid Water
Instructions
Making the Dough
- Attach the dough hook to the KitchenAid.
- Put the flour in the Kitchenaid mixing bowl. Put the yeast on one side of the bowl and the salt on the other side of the bowl (otherwise the salt can kill the yeast). Add the margarine.
- Lower the dough hook and set the mixer on speed 2. The ingredients will start mixing together. Don't worry if the margarine doesn't look to be mixing in, it will eventually.
- Add the tepid water a little at a time until the mixture forms a ball of dough. You probably won't need all the water.
- Once you have a ball of dough, let the KitchenAid knead the dough for approximately 4 mins.
- Stop the Kitchen Aid and check the dough. It should be soft and elastic (you can check this by pulling on a piece of dough). If it isn't then let it knead for a bit longer.
Proving the Dough
- Once the dough is soft and elastic, remove the dough hook and cover the bowl with a clean tea towel. Leave the dough for 2 hours to prove.
- After 2 hours the dough should have doubled in size.
- Knockback the dough and take it out of the bowl (you may need to gently scrape the sides). Gently knead the dough and shape it into the loaf shape you want.
- Place the dough on a baking tray lined with baking parchment, you might want to use a Silpat.
- Dust the top lightly with flour and cover with clingfilm. Leave the dough to prove a second time until it has doubled in size again.
Baking the Bread
- Preheat the oven to 200°c and boil a kettle of water
- Add a few slashes to the top of the bread. You need to do this very quickly with a very sharp knife.

- Place the bread in the oven and pour the boiling water into the grill tray at the bottom of the oven (if you don't have a grill tray then put a heatproof bowl of boiling water in the base of the oven.
- Wait 20 mins, then check the bread. It should be golden brown. Turn the loaf over and tap the bottom, if it sounds hollow then it's done. If not then bake for 5 more minutes and then check again.
- Leave to cool and then slice with a sharp serrated knife
-

A 2022 Embroidery Challenge
4 February 2023
I’ve been watching people making temperature quilts on social media for a few years and really liked the idea of making one. But I knew I would struggle to carry such a large project through to the end, plus the idea of knitting a blanket in the heat of summer wasn’t that appealing. Then I […]
-
Little Life Update
3 February 2023
I finally caught COVID, and while I am curled up on my sofa feeling sorry for myself, I thought I would check through things. I realised that I haven’t written anything on this blog for ages (gulp April 2021) and so much has happened! The problem is that Instagram is so much quicker and easier […]
-

Alison Glass Lumen Quilt
19 April 2021
In which I attempt to make a giant quilt, for the first time!
-

Cactus Embroidery – Slow Sewing
6 February 2021
It’s taken just over a year, but this embroidery is finally finished!
-

Mushroom Ragu – Vegan and Delicious!
1 January 2021
It's new year's day and I'm making Mushroom Ragu.
-
A 2022 Embroidery Challenge
4 February 2023
I’ve been watching people making temperature quilts on social media for a few years and really liked the idea of making one. But I knew I would struggle to carry such a large project through to the end, plus the idea of knitting a blanket in the heat of summer wasn’t that appealing. Then I […]
-
Little Life Update
3 February 2023
I finally caught COVID, and while I am curled up on my sofa feeling sorry for myself, I thought I would check through things. I realised that I haven’t written anything on this blog for ages (gulp April 2021) and so much has happened! The problem is that Instagram is so much quicker and easier […]
-
Alison Glass Lumen Quilt
19 April 2021
In which I attempt to make a giant quilt, for the first time!
-
Cactus Embroidery – Slow Sewing
6 February 2021
It’s taken just over a year, but this embroidery is finally finished!
-
Mushroom Ragu – Vegan and Delicious!
1 January 2021
It's new year's day and I'm making Mushroom Ragu.